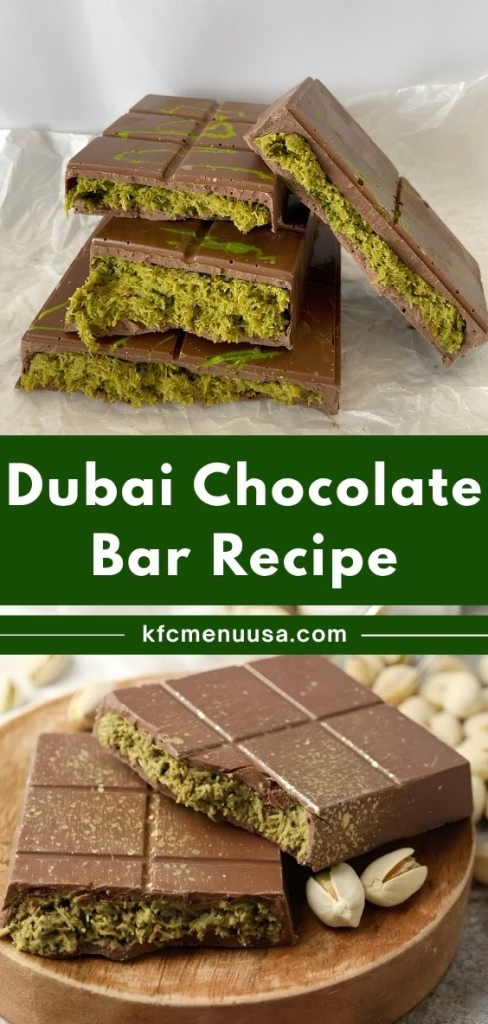
I still remember the first time I watched someone crack open a Dubai chocolate bar on my phone screen and hearing that crunch through the speaker. I knew right away I had to recreate it in my own kitchen.
After a few tries, I finally landed on a version that gives you that same crispy, nutty, chocolatey bite without needing a plane ticket to Dubai. I’m walking you through every step I used, along with the little details that made the biggest difference.
Cooking Time
- Prep Time: 15 minutes
- Cooking Time: 12 minutes
- Total Time: 45 minutes (includes chilling)
Ingredients
- 3 tablespoons unsalted butter, divided – this helps toast the pastry and thin out the chocolate for spreading
- 5 ounces kataifi pastry, coarsely chopped – gives the filling its signature crunch, so thaw it fully if frozen
- 1 jar (7 to 8 ounces) pistachio cream or pistachio butter – the heart of the filling, so pick a good-quality one
- 2 tablespoons tahini – balances the sweetness with a nutty, savory note
- 1/4 teaspoon salt – wakes up the flavor of the pistachio filling
- 3 tablespoons white chocolate chips – used for the decorative drizzle on top
- 1 to 4 drops green food coloring (optional) – just for tinting the drizzle if you want that classic look
- 12 ounces milk chocolate chips, divided – forms the shell, so choose a chocolate you genuinely enjoy eating
Note: this recipe makes 2 bars and serves about 6 to 8 people, depending on how thick you slice it.
Equipment You Need
- Silicone chocolate bar mold – shapes the bars and gives them that clean, glossy finish
- Nonstick skillet – for toasting the kataifi pastry without it sticking
- Heatproof bowl – used for melting chocolate over simmering water
- Small saucepan – holds the water for your double boiler
- Offset spatula – spreads the filling and chocolate into even layers
- Bench scraper – levels the top layer and removes excess chocolate
- Baking sheet – keeps the molds steady while you work and chill them
How to Make Dubai Chocolate Bar Recipe?
Making this at home is much simpler than it looks in those viral videos. Once you toast the pastry and melt your chocolate, the rest is just layering and chilling. I promise the process moves faster than you’d expect.
Toast the Kataifi Pastry
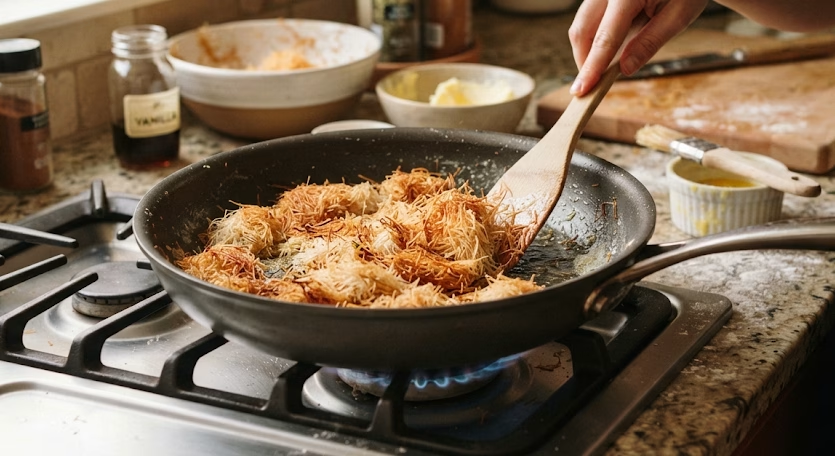
Melt 2 tablespoons of butter in a nonstick skillet over medium heat, then add the chopped kataifi. Stir it often so every strand toasts evenly and turns a deep golden color. This should take about 8 to 10 minutes, and your kitchen will smell incredible.
Mix the Pistachio Filling
Transfer the toasted pastry to a bowl right away while it’s still warm. Stir in the pistachio cream, tahini, and salt until everything is coated and combined. The filling should look glossy and hold together loosely when you press it with a spoon.

Melt and Drizzle the White Chocolate
Set up a double boiler and melt the white chocolate chips until smooth. Stir in a drop or two of green food coloring if you’re using it, then drizzle it across the bottom of your mold in loose, irregular lines. Pop the mold in the freezer for a few minutes to set.
Coat the Mold with Milk Chocolate
Melt most of your milk chocolate with the remaining butter, then spread a thin layer over the bottom and sides of the mold. Freeze this layer until it’s firm to the touch, which usually takes about 10 minutes. This shell is what gives the bar its clean snap.
Layer the Filling and Chocolate
Spoon the pistachio filling into the mold and press it into an even layer with your spatula. Pour the rest of the melted chocolate over the top, then scrape across the surface with your bench scraper to level everything out and remove excess.
Chill and Unmold
Refrigerate the bars for at least 40 minutes, or until they’re completely firm. Once set, pop them out of the mold gently and trim any uneven edges with a sharp knife before serving.
Additional Tips for Making This Recipe Better
- I always toast the kataifi a little longer than feels necessary, because a light golden color turns soggy once it’s mixed with the filling.
- I like to work with my chocolate mold cold from the fridge, since it helps the first thin layer set faster and cleaner.
- I keep my melted chocolate moving constantly with a spatula so it stays smooth and doesn’t seize up on me.
- I always taste my pistachio filling before assembling, since brands vary a lot in sweetness and I like to adjust the salt.
- I found that chilling between every layer, even briefly, gives the bars much cleaner edges once unmolded.
Common Mistakes to Avoid
- I once rushed the kataifi toasting step and ended up with a chewy filling instead of a crunchy one, so I never skip watching it closely now.
- I learned the hard way that skipping the thin chocolate shell layer makes the bars crack apart when you try to remove them from the mold.
- I used to overheat my chocolate directly over the flame, and it seized almost instantly, so I stick to a gentle double boiler now.
- I’ve made the mistake of filling the mold while the chocolate shell was still soft, which caused the layers to blend together messily.
- I sometimes forgot to level the top layer properly, and the bars ended up lopsided once they set.
How to Serve Dubai Chocolate Bar
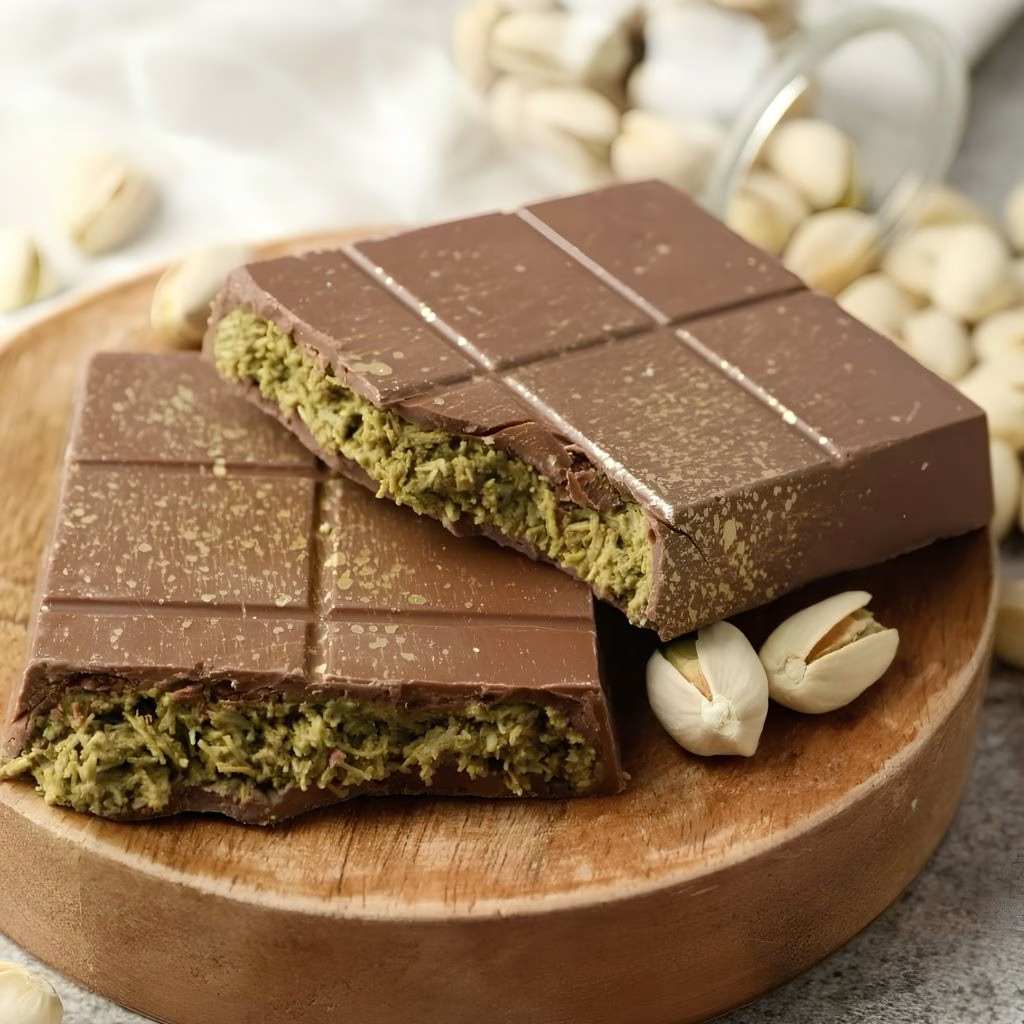
I like slicing these bars into smaller pieces so people can share without feeling like they’re committing to a whole bar at once. Arranging them on a dark plate really makes that green pistachio filling pop against the chocolate shell.
A light dusting of crushed pistachios or a few extra drops of colored white chocolate on top adds a nice finishing touch if you’re serving guests.
Variations
- Swap the milk chocolate shell for dark chocolate if you prefer a less sweet, more intense flavor.
- Use ruby chocolate instead of white chocolate for the drizzle to get a naturally pink pattern without any food coloring.
- Try a dairy-free chocolate and butter substitute if you want to make this recipe more plant-based friendly.
- Add a pinch of cardamom to the filling for a warmer, more fragrant twist.
- Mix in a few crushed pistachios directly into the filling for extra texture in every bite.
- If you’re enjoying easy homemade recipes beyond desserts, you can also try an Air Fryer Cornish Hen Recipe or an Air Fryer Spaghetti Squash Parm Recipe for something savory.
Nutritional Information
Here’s a rough idea of what one serving looks like, though exact numbers will vary based on your brands and portion size.
- Calories: about 300 per serving
- Protein: around 3 grams per serving
- Carbohydrates: roughly 28 grams per serving
- Fat: about 20 grams per serving
Make Ahead and Storage
You can prepare the pistachio filling up to a day in advance and keep it covered in the fridge until you’re ready to assemble the bars. This saves time on the day you plan to layer and set everything.
Once assembled, store the bars in an airtight container in the refrigerator, where they’ll stay fresh and crisp for up to three weeks. I don’t recommend freezing them, since the kataifi can lose some of its signature crunch after thawing.
Why You’ll Love This Recipe?
This bar earns its viral status honestly, and once you make it at home, you’ll understand exactly why.
- Impressive results with simple steps. Even though it looks like a bakery-level treat, the actual process only involves melting, mixing, and layering.
- A satisfying crunch in every bite. The toasted kataifi keeps its texture even under a layer of rich pistachio filling, giving you that addictive contrast.
- Easy to customize. You can swap chocolates, add spices, or change the drizzle color to make the bars your own.
- Great for gifting or sharing. Sliced into smaller pieces, these bars make a beautiful homemade gift or party treat.
- Make-ahead friendly. Since they store well in the fridge, you can prepare them a few days before you actually need them.
FAQs
Can I make a 3 ingredient Dubai chocolate bar?
Yes, a simplified version is possible using just chocolate, pistachio cream, and toasted kataifi, skipping the tahini and food coloring for an easier, quicker bar.
What’s the best Dubai chocolate filling recipe?
The classic filling combines toasted kataifi pastry with pistachio cream, a little tahini, and a pinch of salt for balance and crunch.
How to make Dubai chocolate without kataifi?
If you can’t find kataifi, crushed phyllo dough or even crispy rice cereal toasted in butter can mimic that same crunchy texture in the filling.
Where can I get ingredients for Dubai chocolate?
Middle Eastern grocery stores, specialty bakeries, and online retailers usually carry kataifi pastry and pistachio cream if your local supermarket doesn’t stock them.
Is there an easy Dubai chocolate bar recipe for beginners?
Yes, this recipe is fairly beginner-friendly since it only involves toasting, melting, and layering, with no baking or complicated techniques required.
Can I make this Dubai chocolate bar recipe with pistachio cream instead of pistachio butter?
Absolutely, pistachio cream works just as well and is actually what most Dubai-style bars use for that smooth, sweet filling.
Can I make a Dubai chocolate bar recipe without tahini?
Yes, you can leave out the tahini, though it does add a nice savory balance, so the filling may taste slightly sweeter without it.
Is there a Dubai dark chocolate recipe version?
Yes, simply substitute dark chocolate for the milk chocolate shell if you prefer a richer, less sweet finished bar.
Where can I find kataifi near me?
Check Middle Eastern or Mediterranean grocery stores first, since they usually stock fresh or frozen kataifi near the phyllo dough section.
What is pistachio butter, and can I use it here?
Pistachio butter is a smooth, nut-based spread, and while it works, it tends to be less sweet than pistachio cream, so you may want to adjust sugar levels slightly.

Dubai Chocolate Bar Recipe
Ingredients
Method
- Melt 2 tablespoons of butter in a nonstick skillet over medium heat, then add the chopped kataifi. Stir it often so every strand toasts evenly and turns a deep golden color. This should take about 8 to 10 minutes, and your kitchen will smell incredible.
- Transfer the toasted pastry to a bowl right away while it’s still warm. Stir in the pistachio cream, tahini, and salt until everything is coated and combined. The filling should look glossy and hold together loosely when you press it with a spoon.
- Set up a double boiler and melt the white chocolate chips until smooth. Stir in a drop or two of green food coloring if you’re using it, then drizzle it across the bottom of your mold in loose, irregular lines. Pop the mold in the freezer for a few minutes to set.
- Melt most of your milk chocolate with the remaining butter, then spread a thin layer over the bottom and sides of the mold. Freeze this layer until it’s firm to the touch, which usually takes about 10 minutes. This shell is what gives the bar its clean snap.
- Spoon the pistachio filling into the mold and press it into an even layer with your spatula. Pour the rest of the melted chocolate over the top, then scrape across the surface with your bench scraper to level everything out and remove excess.
- Refrigerate the bars for at least 40 minutes, or until they’re completely firm. Once set, pop them out of the mold gently and trim any uneven edges with a sharp knife before serving.
Notes
- I always toast the kataifi a little longer than feels necessary, because a light golden color turns soggy once it’s mixed with the filling.
- I like to work with my chocolate mold cold from the fridge, since it helps the first thin layer set faster and cleaner.
- I keep my melted chocolate moving constantly with a spatula so it stays smooth and doesn’t seize up on me.
- I always taste my pistachio filling before assembling, since brands vary a lot in sweetness and I like to adjust the salt.
- I found that chilling between every layer, even briefly, gives the bars much cleaner edges once unmolded.