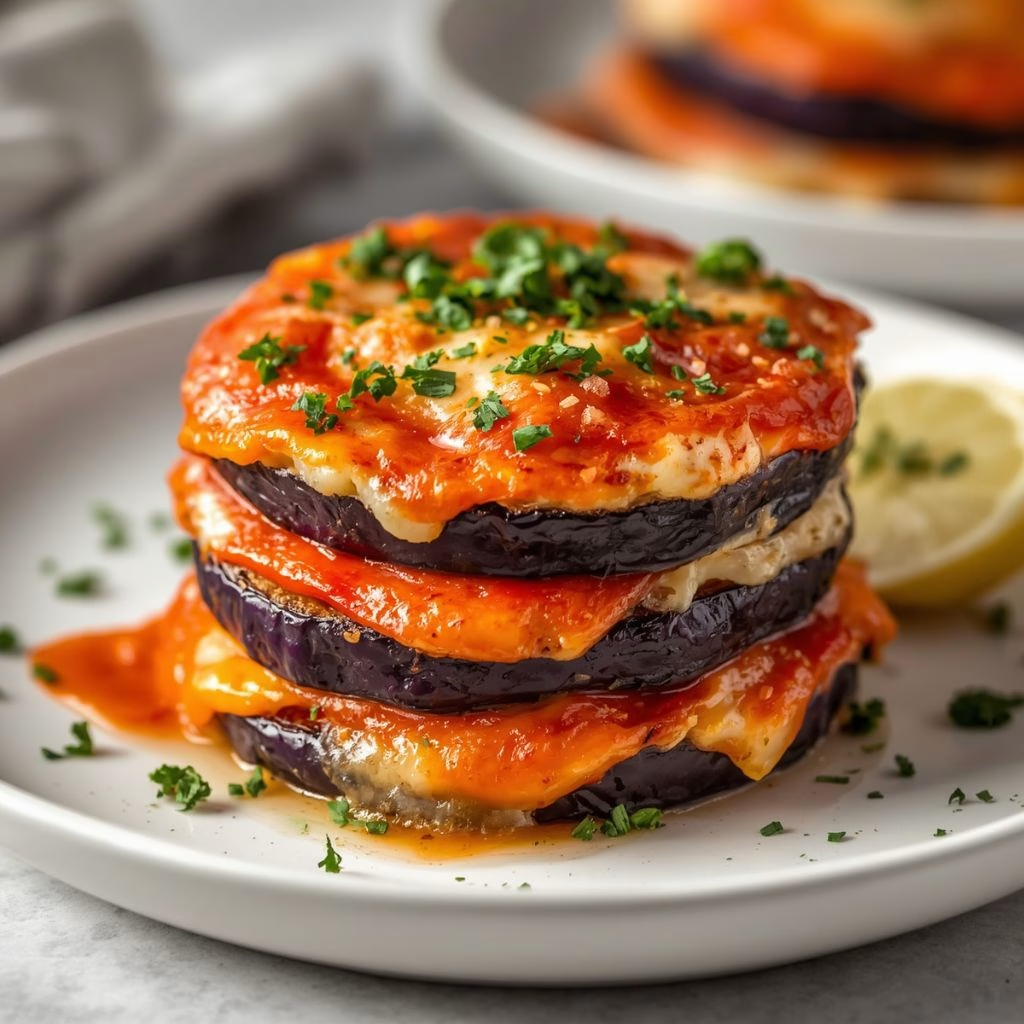
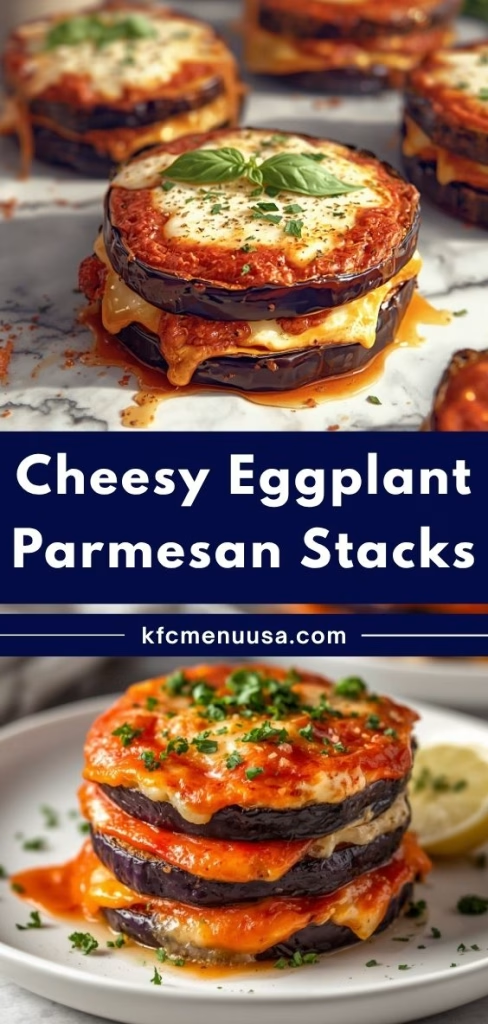
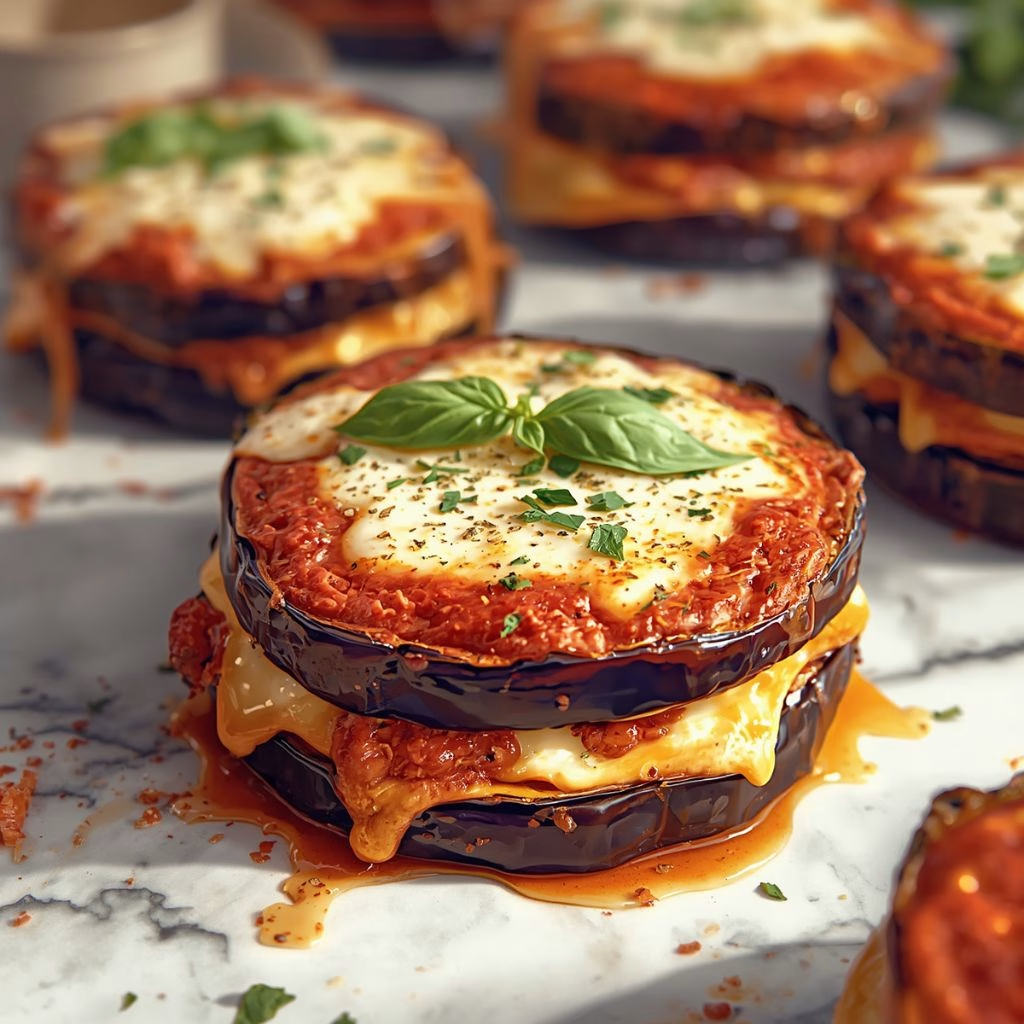
I made this Cheesy Eggplant Parmesan Stacks Recipe last weekend, and I’m still thinking about them. Instead of frying the eggplant and drowning it in cheese, I baked everything and layered it into neat little towers that look way fancier than the effort they take.
Every bite gives me that crispy-on-the-outside, melty-on-the-inside combo I crave. If you love classic eggplant parmesan but want something lighter and easier to plate, this recipe is for me and for you too. Trust me, once you try stacking instead of casserole-ing, you won’t go back.
Ingredients
- 2 eggplants, sliced into 1/3-inch rounds (about 8 slices per eggplant) — pick firm, glossy eggplants; soft or wrinkled ones tend to taste bitter
- 2 teaspoons kosher salt, for drawing out moisture — this step keeps my slices from turning soggy once baked
- 1/4 cup all-purpose flour — the first layer that helps the egg wash stick evenly
- 3 large eggs, beaten — go for room temperature eggs since they coat more smoothly
- 1/2 cup parmesan cheese, freshly grated — pre-shredded parmesan doesn’t melt or crisp the same way, so I always grate my own
- 1/2 cup panko breadcrumbs — panko gives that extra crunch regular breadcrumbs can’t match
- 1/2 cup seasoned Italian breadcrumbs — adds herby flavor right into the crust
- 8 slices fresh mozzarella, halved — skip the low-moisture block kind here; fresh mozzarella melts softer and creamier
- 3 1/2 cups Italian tomato sauce, homemade or your favorite jarred brand — a good chunky, garlicky sauce makes a real difference
- 15 ounces whole milk ricotta — whole milk ricotta stays rich and doesn’t turn watery like part-skim can
- 1 large egg, lightly beaten — binds the ricotta filling so it holds its shape
- 1/2 cup parmesan cheese, freshly grated — for the ricotta mixture
- 1 teaspoon lemon zest — brightens up the creamy ricotta beautifully
- 1 teaspoon kosher salt — for the ricotta filling
- 1/2 teaspoon black pepper — freshly cracked tastes noticeably better here
- 2 tablespoons fresh flat-leaf Italian parsley, chopped — fresh parsley is a must; dried just doesn’t give the same lift
- 1/2 cup mozzarella, grated, optional — for extra cheese pull on top
Note: This recipe yields 8 individual eggplant stacks, using the ingredient quantities listed above, so plan on roughly one stack per person as a side, or two stacks per person if serving as a main course.
Variations
- Swap ricotta for a dairy-free cashew ricotta and use plant-based mozzarella if you want a fully dairy-free version.
- Use gluten-free panko and a gluten-free flour blend to make this recipe celiac-friendly.
- Tuck a thin slice of prosciutto between the eggplant layers for a salty, savory twist.
- Stir cooked, crumbled Italian sausage or ground beef into your tomato sauce for a heartier, meat-lover’s version.
- Add a pinch of red pepper flakes to the ricotta filling if you like a little heat.
- Try goat cheese instead of ricotta for a tangier filling.
Cooking Time
- Prep Time: 1 hour 5 minutes
- Cook Time: 15 minutes (for baking the breaded eggplant)
- Final Bake: 20 minutes (for assembling and melting everything together)
- Total Time: 1 hour 40 minutes
Equipment You Need
- Baking sheets — for salting and baking the eggplant slices
- Paper towels — to draw out and blot moisture from the eggplant
- Shallow dishes or pie plates — for setting up your flour, egg, and breadcrumb stations
- 9×13-inch baking pan — for layering and baking the finished stacks
- Box grater or microplane — for freshly grating parmesan and zesting lemon
- Mixing bowl — for combining the ricotta filling
How to Make Cheesy Eggplant Parmesan Stacks?
Salt the Eggplant
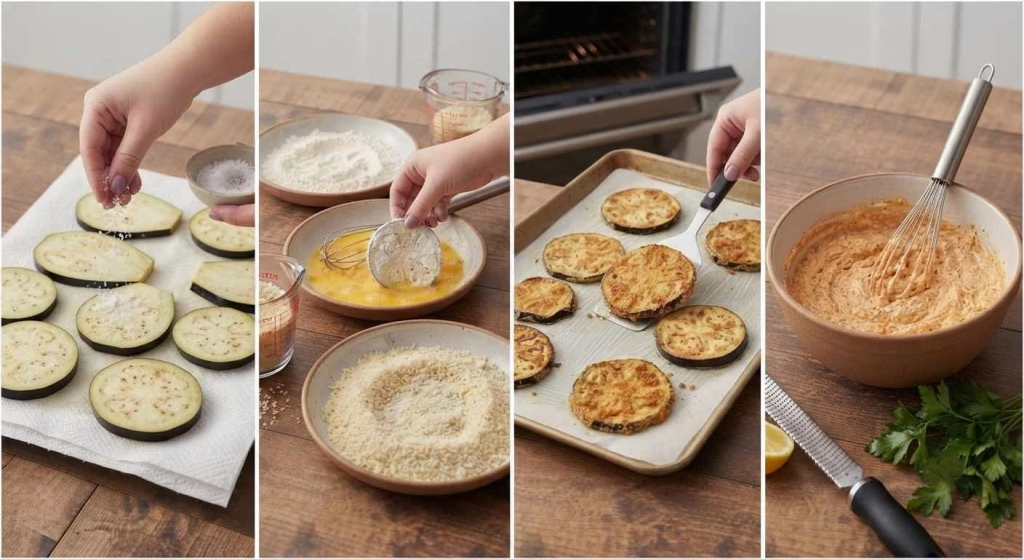
Salting pulls excess water out of the eggplant so it crisps up instead of turning mushy in the oven. I lay my slices on paper towels, sprinkle them with kosher salt, and let them rest for about an hour. Afterward, I rinse off the salt and pat each slice completely dry before moving on.
Set Up Your Breading Station
I like lining up three shallow dishes: one with flour, one with beaten eggs, and one with a mix of panko, breadcrumbs, and parmesan. This assembly-line approach makes breading each eggplant slice fast and mess-free. Preheating the oven to 400°F now saves time later.
Bread and Bake the Eggplant
Each slice gets dipped first in flour, then egg, then the breadcrumb mixture before landing on a greased baking sheet. I bake them for 15 to 18 minutes, flipping halfway, until they’re golden and crisp. Let them cool slightly before handling.
Mix the Ricotta Filling
While the eggplant bakes, I whisk together ricotta, egg, parmesan, lemon zest, parsley, salt, and pepper in one bowl. This filling can be made ahead and chilled, which is a huge time-saver on a busy night. It should be thick and spreadable, not runny.
Choose Your Tomato Sauce
Any good tomato sauce works here, whether homemade or a trusted jarred brand. I usually make a simple garlicky marinara because it lets the crispy eggplant shine. If you enjoy smoky Mediterranean-inspired appetizers alongside Italian classics, Smoky Baba Ghanoush with Charred Eggplant Recipe also pairs beautifully with this meal. A thicker sauce also helps prevent the stacks from getting soggy.
Assemble the Stacks
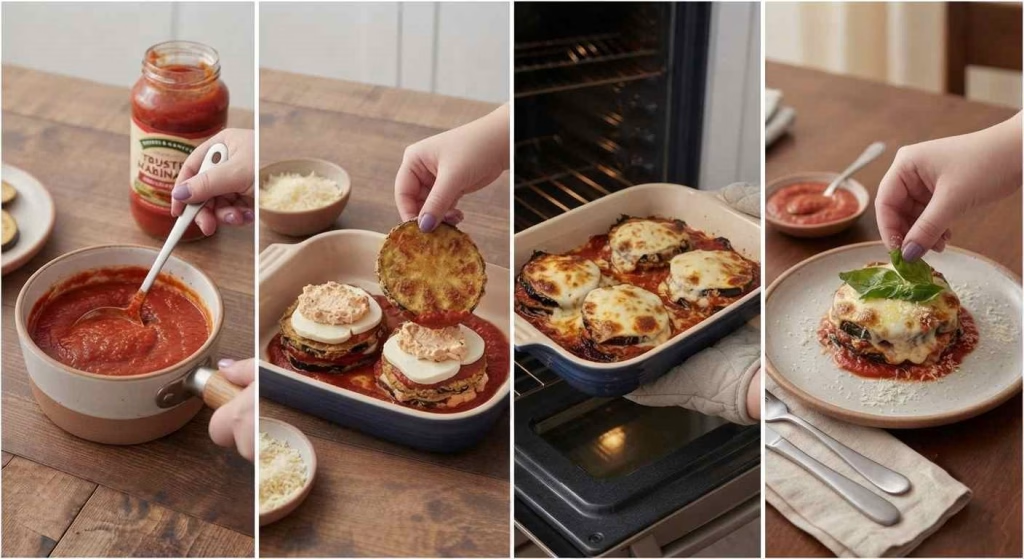
I spread a layer of sauce in my baking dish, then start stacking eggplant, mozzarella, and more sauce, repeating the layers. Each stack gets topped generously with the ricotta mixture and a sprinkle of extra mozzarella or parmesan. Building individual towers instead of a casserole keeps portions neat and pretty.
Bake Until Bubbly
The assembled stacks go back into the 400°F oven for about 20 minutes, just until the cheese is melted and golden. I watch closely near the end since ovens vary and cheese can brown quickly. Once it’s bubbling and fragrant, it’s ready to come out.
Garnish and Serve
I finish every stack with fresh basil leaves and an extra spoonful of warm sauce on the side. A light dusting of parmesan right before serving adds one more layer of flavor. This final touch makes the dish feel restaurant-worthy.
Additional Tips for Making This Recipe Better
- I never skip patting the eggplant fully dry after rinsing, since any leftover moisture makes the breading slide right off.
- I always grate my own parmesan because pre-shredded cheese has anti-caking additives that keep it from melting smoothly.
- I like using two baking sheets so the eggplant slices bake in a single layer instead of overlapping and steaming.
- I’ve found that letting the breaded eggplant cool for a few minutes before stacking keeps the layers from sliding apart.
- I make the ricotta filling a day ahead whenever I can, since chilling it actually helps the flavors deepen.
- I keep my sauce on the thicker side, because a watery sauce makes the crispy layers go soft fast.
How to Serve Cheesy Eggplant Parmesan Stacks?
I love plating these stacks individually on white plates so the layers are easy to see and admire. A few fresh basil leaves and a light drizzle of good olive oil make them look like something from a trattoria menu.
Pair them with a simple arugula salad or lemony roasted chicken for a complete Italian-style dinner. For a more diverse Mediterranean-inspired spread, Chicken Tagine with Preserved Lemon and Olives Recipe also complements these flavors surprisingly well, and I always keep extra warm sauce nearby for spooning over the top.
Nutritional Information
Here’s a general idea of what one eggplant parmesan stack offers, though exact values depend on your specific ingredients:
- Calories: approximately 280 to 320 per stack
- Protein: approximately 15 to 18 grams per stack
- Carbohydrates: approximately 18 to 22 grams per stack
- Fat: approximately 16 to 20 grams per stack
Make Ahead and Storage
Make Ahead
I often bread the eggplant slices earlier in the day and keep them chilled until I’m about an hour from serving. The ricotta filling can also be mixed up to two days in advance and stored in the fridge. This makes weeknight assembly quick since most of the work is already done.
Refrigerating
Leftover stacks keep well in an airtight container in the fridge for up to three days. I like storing them in a single layer so the breading doesn’t get squished or soggy. Just cover the dish tightly with foil or a lid before chilling.
Freezing
These stacks freeze nicely if you assemble them without the final bake, wrapped tightly in foil, for up to two months. I recommend freezing the breaded eggplant slices separately from the sauce and ricotta for the best texture later. Thaw everything in the fridge overnight before baking.
Reheating
I reheat leftover stacks in a 350°F oven for about 15 to 20 minutes until warmed through and the cheese is melty again. Using the oven instead of the microwave keeps that crispy breading intact. A quick broil at the end brings back a little extra crunch on top.
Why You’ll Love This Recipe?
Here’s why this dish has become one of my go-to dinners for both weeknights and company:
- It’s baked, not fried, so I get all the crispy texture I want without the extra oil and mess of deep frying.
- It’s endlessly customizable, since I can add sausage, prosciutto, or swap cheeses depending on what I’m craving that day.
- It works for any crowd size, because I can make one stack for a quick lunch or a dozen for a dinner party without changing the method.
- The make-ahead steps save me real time, letting me prep components early and assemble right before guests arrive.
- It’s naturally vegetarian and easy to adapt for gluten-free or dairy-free eaters, so I can serve it to almost anyone at my table.

Cheesy Eggplant Parmesan Stacks Recipe
Ingredients
Method
- Salting pulls excess water out of the eggplant so it crisps up instead of turning mushy in the oven. I lay my slices on paper towels, sprinkle them with kosher salt, and let them rest for about an hour. Afterward, I rinse off the salt and pat each slice completely dry before moving on.
- I like lining up three shallow dishes: one with flour, one with beaten eggs, and one with a mix of panko, breadcrumbs, and parmesan. This assembly-line approach makes breading each eggplant slice fast and mess-free. Preheating the oven to 400°F now saves time later.
- Each slice gets dipped first in flour, then egg, then the breadcrumb mixture before landing on a greased baking sheet. I bake them for 15 to 18 minutes, flipping halfway, until they’re golden and crisp. Let them cool slightly before handling.
- While the eggplant bakes, I whisk together ricotta, egg, parmesan, lemon zest, parsley, salt, and pepper in one bowl. This filling can be made ahead and chilled, which is a huge time-saver on a busy night. It should be thick and spreadable, not runny.
- Any good tomato sauce works here, whether homemade or a trusted jarred brand. I usually make a simple garlicky marinara because it lets the crispy eggplant shine. A thicker sauce also helps prevent the stacks from getting soggy.
- I spread a layer of sauce in my baking dish, then start stacking eggplant, mozzarella, and more sauce, repeating the layers. Each stack gets topped generously with the ricotta mixture and a sprinkle of extra mozzarella or parmesan. Building individual towers instead of a casserole keeps portions neat and pretty.
- The assembled stacks go back into the 400°F oven for about 20 minutes, just until the cheese is melted and golden. I watch closely near the end since ovens vary and cheese can brown quickly. Once it’s bubbling and fragrant, it’s ready to come out.
- I finish every stack with fresh basil leaves and an extra spoonful of warm sauce on the side. A light dusting of parmesan right before serving adds one more layer of flavor. This final touch makes the dish feel restaurant-worthy.
Notes
- I never skip patting the eggplant fully dry after rinsing, since any leftover moisture makes the breading slide right off.
- I always grate my own parmesan because pre-shredded cheese has anti-caking additives that keep it from melting smoothly.
- I like using two baking sheets so the eggplant slices bake in a single layer instead of overlapping and steaming.
- I’ve found that letting the breaded eggplant cool for a few minutes before stacking keeps the layers from sliding apart.
- I make the ricotta filling a day ahead whenever I can, since chilling it actually helps the flavors deepen.
- I keep my sauce on the thicker side, because a watery sauce makes the crispy layers go soft fast.