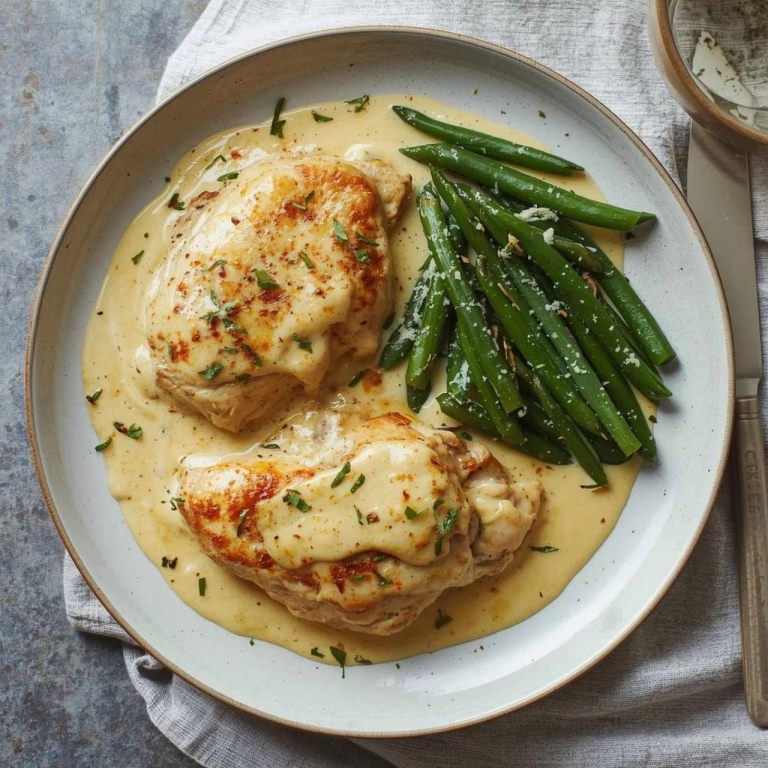
If you’ve ever had a cold day where all you wanted was something warm, comforting, and homemade without too much effort, then you’ll understand why I always come back to my chicken pot pie recipe bisquick.
There’s just something magical about that golden, biscuit-like topping paired with creamy chicken and veggies underneath. It feels like a hug in a casserole dish. Over the years, I’ve made this dish in a dozen ways, and every time I learn something new that makes it even better the next time around.
One thing I love about using Bisquick for pot pie is how it removes a lot of the fuss. I mean, don’t get me wrong — I admire those flaky homemade crusts too, but when I’m juggling a busy day or just don’t feel like turning my kitchen into a flour battlefield, Bisquick is my best friend. It still gives that fluffy, buttery topping that pairs perfectly with the hearty filling, but without needing to pull out a rolling pin.

Getting That Topping Just Right
One thing I’ve learned is that the Bisquick topping isn’t something you want to overmix. Trust me on this — a light hand makes all the difference. When I mix the Bisquick, milk, and sometimes a little melted butter together, I try to stir just until everything is combined.
If the dough looks a little lumpy, that’s totally okay. Overmixing can make the topping tough, and that’s the last thing anyone wants when they’re digging into pot pie comfort food.
Sometimes I even add a tiny pinch of garlic powder or a little shredded cheese into the Bisquick batter for extra flavor. It’s not traditional, but it adds a fun twist. And if I’m feeling fancy, brushing the top with a little butter before it bakes makes it extra golden and gives the kitchen that irresistible smell.
Customize the Filling Every Time
The beauty of a Bisquick chicken pot pie recipe is that it’s so forgiving and flexible. I’ve used rotisserie chicken, leftover grilled chicken, or even shredded turkey — whatever’s on hand. It’s honestly a great way to clean out the fridge.
Got some sad-looking carrots or half a bag of frozen peas? Into the pot they go. I’ve even thrown in diced potatoes or leftover green beans. As long as the filling stays thick and creamy, it always turns out delicious.
One trick I’ve learned: make sure the filling is thick enough before it goes in the oven. If it’s too runny, it’ll bubble up and get watery underneath the Bisquick crust. I usually let the filling simmer for a few minutes until it thickens, and that makes all the difference in the final texture. Nobody wants a soggy-bottom pot pie.

Can I Make It Ahead of Time?
Oh yes, and I do it all the time. There are a couple of options. You can make the filling ahead of time and keep it in the fridge for a day or two. Then when you’re ready to bake, just pour the filling into your baking dish, mix up your Bisquick topping fresh, and pop it in the oven. Easy.
If you want to go even further, you can bake the whole pie, let it cool, and then refrigerate it. I’ve done this for meal prepping, and it reheats beautifully. Just cover it with foil and warm it in the oven so the topping doesn’t dry out. Sometimes I’ll sprinkle a tiny bit of water on top before reheating to keep the crust from getting too hard.
Freezer-Friendly Tips
You bet it freezes well. I usually let the fully baked pot pie cool completely, then cover it tightly with foil and freeze it. It’s a lifesaver on those nights when cooking feels like a chore.
To reheat, I put it straight in the oven from frozen — again, covered with foil — and let it go low and slow until it’s warmed through. It might take a little longer, but the flavor and texture hold up surprisingly well.
Just one note: if I know I’m going to freeze it, I sometimes underbake the topping just slightly. That way, it doesn’t get too brown when I reheat it later. Small trick, big impact.
Common Mistakes I’ve Learned to Avoid
I’ve definitely had my share of trial-and-error moments with this dish. Here are a few things I’ve learned the hard way:
- Don’t skimp on seasoning. The filling should taste great on its own before it even goes in the oven. I’ve found that a little poultry seasoning, garlic powder, or even a splash of Worcestershire sauce makes a big difference.
- Let it rest after baking. I know it’s hard to wait when your kitchen smells amazing, but giving the pot pie 10-15 minutes to cool helps the filling set up. Otherwise, you might get that soupy mess on the first scoop (been there, not fun).
- Use a deep enough dish. That filling bubbles like crazy in the oven, and shallow dishes mean spills. I’ve ruined a few oven bottoms by not paying attention to this. These days, I play it safe with a deep pie dish or even a small casserole pan.
Some Fun Twists to Try
Over time, I’ve started playing around with different flavors. Like, have you ever tried a Tex-Mex version of this dish? Swap out some of the veggies for corn and black beans, add in cumin and chili powder, maybe even toss in some shredded pepper jack cheese. It’s like a whole new meal.
Or go with a creamy garlic mushroom version — use sautéed mushrooms and a little cream cheese in the filling for extra richness. I swear, it tastes like something you’d get at a cozy bistro.

Got Leftovers? Here’s What I Do
Leftovers never go to waste in my house. I just scoop them into a container and keep them in the fridge for up to 3 days. For reheating, the microwave works, but if I have the time, the oven gives the crust a better texture.
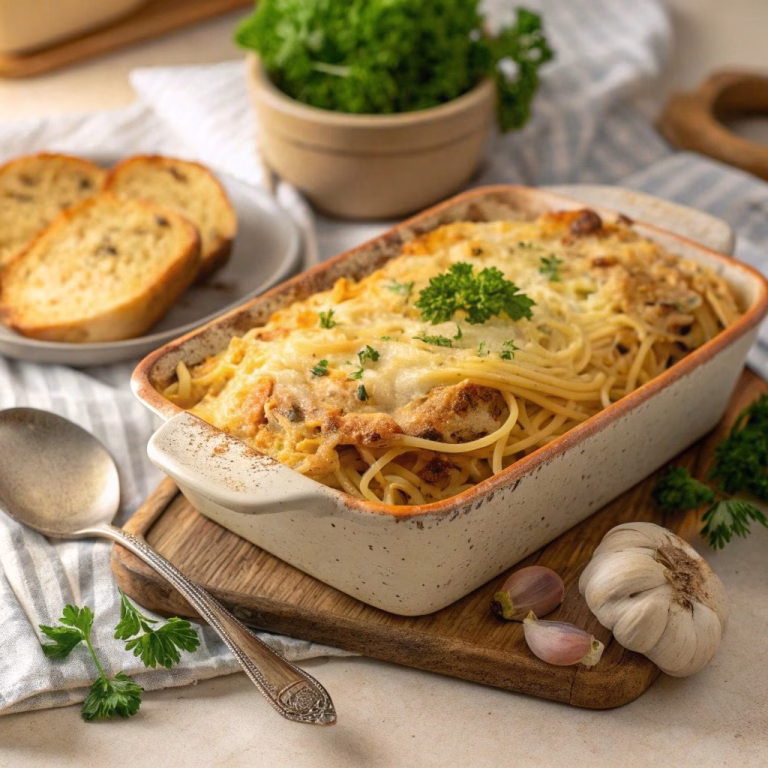
Sometimes, I even turn leftover filling into something new. Like, I’ve stirred it into pasta for a creamy chicken and veggie bake, or even added a little broth and turned it into a soup. The Bisquick topping doesn’t really carry over to new recipes, but the filling is like gold.
Chicken Pot Pie Recipe Bisquick
Ingredients
Method
- In a medium bowl, combine the cooked chicken, thawed mixed vegetables, chicken broth, and cream of chicken soup. Mix everything thoroughly until the chicken is well-coated and the vegetables are evenly distributed. The mixture should look creamy but not too watery.
- Make sure the filling is at room temperature before going into the oven. If it’s cold from the fridge, give it a quick warm-up in the microwave to avoid uneven baking. Pour this mixture into a greased 9-inch pie plate or a similar-sized baking dish and smooth out the top with a spoon or spatula.
- You want the filling to be evenly spread so that the Bisquick topping bakes properly over every bite.
- In a separate mixing bowl, combine the Bisquick baking mix, milk, and egg. Use a whisk or fork to stir the mixture until everything is just combined. The batter will be a little lumpy, and that’s perfectly fine—overmixing can make the crust tough instead of light and fluffy.
- If you’re adding any extras to your topping, like shredded cheese or seasonings, stir them in at this point. This batter should be pourable but thick enough to spoon over the filling.
- Pour the Bisquick mixture evenly over the chicken and veggie filling. You can use the back of a spoon to gently spread it to the edges, but don’t worry about it being perfect—it will spread and rise as it bakes.
- Place the dish in a preheated oven at 400°F (200°C). Bake for 30 minutes, or until the top is golden brown and cooked through. You’ll know it’s ready when the crust has a firm, biscuit-like texture and the edges start to bubble slightly.
- Avoid opening the oven too often during baking, as this can slow down the cooking process and keep the crust from setting properly. Let the pot pie cool for about 5 minutes after removing it from the oven to allow the filling to set slightly. This helps you cut clean slices without the filling spilling out too much.
- Once slightly cooled, scoop and serve hot. This dish pairs beautifully with a simple green salad or roasted veggies on the side. If you have leftovers, store them in an airtight container in the refrigerator for up to 3 days.
- To reheat, cover with foil and warm in a 350°F oven for 15-20 minutes or until heated through. The microwave works in a pinch, but I always prefer the oven to maintain the crust’s texture.