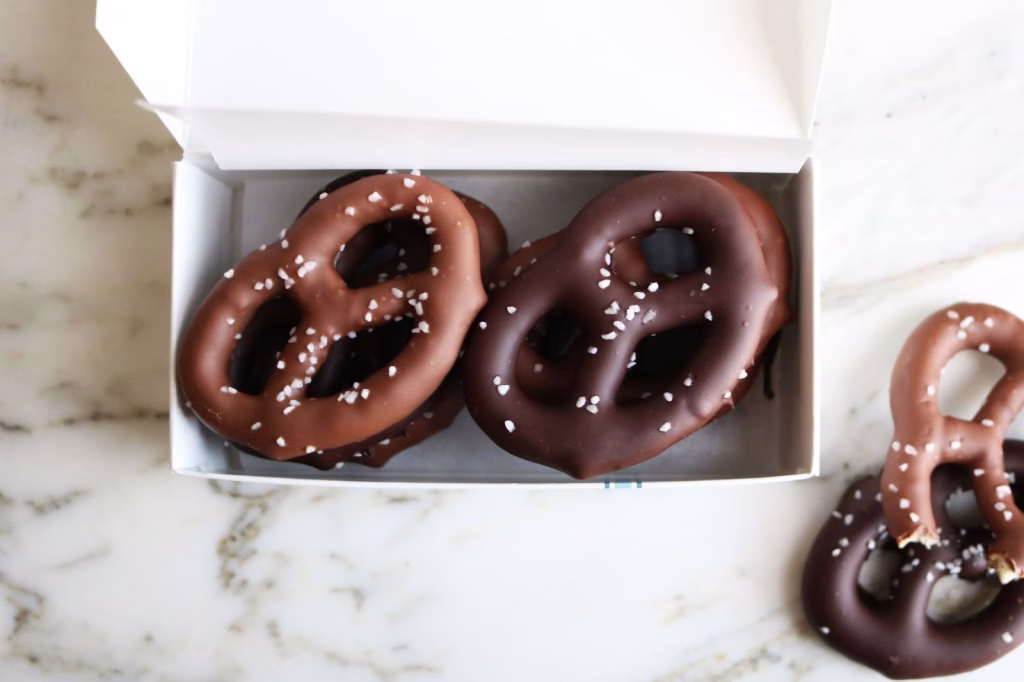
Chocolate Pretzels Recipe: Sweet, Salty & Crunchy Dish
I recently made a batch of these chocolate pretzels, and let me tell you—they didn’t last long in my kitchen! I love how simple they are to put together, yet they look like something straight out of a bakery.
The best part for me is that I can switch up the toppings depending on who I’m serving them to.
They’re the perfect blend of salty crunch and sweet chocolatey goodness. Honestly, I’ll be making these again for every holiday and snack night at home!

Ingredients
Here’s everything you’ll need to make the perfect chocolate pretzels at home.
- 2 cups pretzel twists or rods – I like twists because they hold chocolate better, but rods are great for gifting.
- 1 ½ cups chocolate chips (milk, dark, or white) – melt smoothly, and fresh chocolate tastes better than candy melts.
- 2 tbsp sprinkles, crushed nuts, or shredded coconut – toppings add both crunch and color.
- A pinch of sea salt – optional, but I recommend it for an extra pop of flavor.
Note: Serves about 6 people.
Variations
Want to change things up? Try these fun options:
- Use dairy-free chocolate chips for a vegan-friendly version.
- Swap in sugar-free chocolate if you’re cutting back on sugar.
- Drizzle with natural peanut butter for a nutty kick.
- Mix dark and white chocolate for a marbled effect.
Cooking Time
This recipe is quick and easy!
- Prep Time: 15 minutes
- Cooking Time: 10 minutes (for melting chocolate)
- Cooling Time: 25 minutes
- Total Time: 50 minutes
Equipment You Need
A few basic tools are all you need:
- Microwave-safe bowl or double boiler – for melting chocolate smoothly.
- Baking sheet lined with parchment – to prevent sticking.
- Forks or tongs – for dipping pretzels without mess.
- Spoon – to drizzle extra chocolate or toppings.
- Cooling rack (optional) – helps pretzels set evenly.
How to Make Chocolate Pretzels?
Making chocolate pretzels is simple, and the process is fun to do alone or with kids. I like to keep all my toppings ready before I melt the chocolate—that way, I can work quickly and avoid any mess. The key is not to rush the setting time, as that’s what gives the pretzels their glossy finish. Let’s break it down step by step.
Step 1: Prepare Your Workspace
Line a baking sheet with parchment paper and set out bowls of toppings. Having everything ready makes the process smoother, especially since chocolate sets quickly once dipped.
Step 2: Melt the Chocolate
Place chocolate chips in a microwave-safe bowl and heat in 30-second bursts, stirring each time, until smooth. If you prefer, use a double boiler for gentler melting. Avoid overheating, or the chocolate will seize.

Step 3: Dip the Pretzels
Use a fork or tongs to dip each pretzel into the melted chocolate. Shake gently to remove excess chocolate so it doesn’t clump. Place each coated pretzel onto the prepared baking sheet.

Step 4: Add Your Toppings
While the chocolate is still wet, sprinkle on your chosen toppings. This is where you can be creative—mix textures and colors for variety. Kids especially love decorating this part!
Step 5: Allow Chocolate to Set
Let the pretzels rest at room temperature for about 20 minutes. For faster results, pop the tray in the fridge. Don’t stack them until fully set, or they’ll stick together.
Step 6: Serve or Store
Once firm, your pretzels are ready to enjoy! Serve them fresh or pack them in an airtight container for later. They’ll stay crisp and delicious for several days.

Additional Tips for Making This Recipe Better
From my experience, here are some little tricks that make a big difference:
- I always use high-quality chocolate—it melts smoother and tastes richer.
- I like dipping pretzels only halfway sometimes, which looks beautiful and keeps the sweet-salty balance.
- Mixing two chocolates (dark base with white drizzle) makes them look fancy without much effort.
- Adding a tiny sprinkle of sea salt before the chocolate hardens gives them that irresistible gourmet finish.
How to Serve Chocolate Pretzels?
Chocolate pretzels are as fun to serve as they are to eat! You can pile them into a decorative bowl for parties, wrap them in colorful cellophane for gifting, or use them as edible toppers for cakes and ice cream. If I’m serving guests, I like arranging them in neat rows on a platter and adding some fresh fruit for color.
Nutritional Information
Here’s an approximate breakdown per serving (2 pretzels):
- Calories: ~150
- Protein: 2g
- Carbohydrates: 20g
- Fat: 7g
Make Ahead and Storage
- Storing: Keep your chocolate pretzels in an airtight container at room temperature for up to 5 days. Make sure they’re stored in a cool place so the chocolate doesn’t melt.
- Freezing: Yes, you can freeze them! Place them in a freezer-safe container with parchment between layers. They’ll last up to 2 months.
- Reheating/Restoring: No need to reheat—just let frozen pretzels sit at room temperature for about 15 minutes before serving. They’ll taste just as fresh as the day you made them.
Why You’ll Love This Recipe?
Here’s why I think you’ll keep coming back to this one:
- It’s super quick—less than an hour from start to finish.
- Totally customizable with endless toppings and chocolate varieties.
- Kid-friendly and fun to make as a family activity.
- Perfect for holidays, parties, or last-minute gifts.
- Gives you that sweet-and-salty combo everyone loves.

Chocolate Pretzels Recipe
Ingredients
Method
- Line a baking sheet with parchment paper and set out bowls of toppings. Having everything ready makes the process smoother, especially since chocolate sets quickly once dipped.
- Place chocolate chips in a microwave-safe bowl and heat in 30-second bursts, stirring each time, until smooth. If you prefer, use a double boiler for gentler melting. Avoid overheating, or the chocolate will seize.
- Use a fork or tongs to dip each pretzel into the melted chocolate. Shake gently to remove excess chocolate so it doesn’t clump. Place each coated pretzel onto the prepared baking sheet.
- While the chocolate is still wet, sprinkle on your chosen toppings. This is where you can be creative—mix textures and colors for variety. Kids especially love decorating this part!
- Let the pretzels rest at room temperature for about 20 minutes. For faster results, pop the tray in the fridge. Don’t stack them until fully set, or they’ll stick together.
- Once firm, your pretzels are ready to enjoy! Serve them fresh or pack them in an airtight container for later. They’ll stay crisp and delicious for several days.
Notes
- I always use high-quality chocolate—it melts smoother and tastes richer.
- I like dipping pretzels only halfway sometimes, which looks beautiful and keeps the sweet-salty balance.
- Mixing two chocolates (dark base with white drizzle) makes them look fancy without much effort.
- Adding a tiny sprinkle of sea salt before the chocolate hardens gives them that irresistible gourmet finish.