I still remember the first time I brought home one of those giant chicken pot pies from Costco and realized two people could barely make a dent in it. That’s what pushed me to figure out my own version at home, one I could bake in smaller batches or freeze for later.
After a few rounds of testing, I landed on a filling that’s rich, creamy, and packed with tender chicken and vegetables, tucked inside a flaky golden crust. This is my copycat take on that warehouse-size favorite, scaled down and made completely from scratch in my own kitchen. I promise this Costco Chicken Pot Pie Copycat Recipe tastes just as comforting, if not better, than the original.

Cooking Time
- Prep Time: 20 minutes
- Cook Time: 50 minutes
- Total Time: 1 hour 10 minutes
Ingredients
- 3 cups frozen mixed vegetables (peas, carrots, corn, and green beans) — I skip thawing them first since they cook right in the broth
- 1 cup potatoes, peeled and diced — russet or Yukon gold both hold their shape nicely
- 1 cup celery, sliced — adds a subtle crunch and a savory backbone to the filling
- ⅔ cup butter — I always use unsalted so I can control the seasoning myself
- ⅔ cup onion, chopped — cook it low and slow so it turns soft and sweet
- ⅓ cup leeks, thinly sliced (optional) — this is my favorite add-in for extra depth of flavor
- ⅔ cup all-purpose flour (or a 1-to-1 gluten free blend) — this is what thickens the filling into that classic creamy texture
- 1 teaspoon salt — adjust to taste depending on how salty your broth is
- 1 teaspoon black pepper — freshly ground makes a noticeable difference
- ½ teaspoon celery seed — a small amount goes a long way for flavor
- ½ teaspoon onion powder — layers in more savory depth alongside the fresh onion
- ½ teaspoon Italian seasoning — rounds out the herby, homey flavor
- 1 ¾ cups chicken broth — homemade or store-bought both work well here
- 1 ⅓ cups milk — whole milk gives the creamiest result
- 4 cups cooked chicken, shredded or cubed — rotisserie chicken saves a ton of time
- 4 unbaked 9-inch pie crusts (2 double-crust batches) — store-bought works, but a homemade all-butter crust is worth the extra effort
- Cream or milk, for brushing the crust (optional) — this is what gives the top that glossy, golden finish
Note: This recipe makes two full 9-inch pies, serving about 12 to 16 people, or 8 individual portions if made in ramekins.
Equipment You Need
- Large saucepan — for simmering the vegetables and building the creamy filling
- Whisk — keeps the flour and liquid smooth and lump-free
- Two 9-inch pie plates — for baking the full-size pies
- Rolling pin — to roll out the pie dough evenly
- Ramekins (optional) — for making individual portions
- Aluminum foil — to shield the crust edges from over-browning
- Sharp knife — for cutting steam vents into the top crust
How to Make This Chicken Pot Pie Recipe?
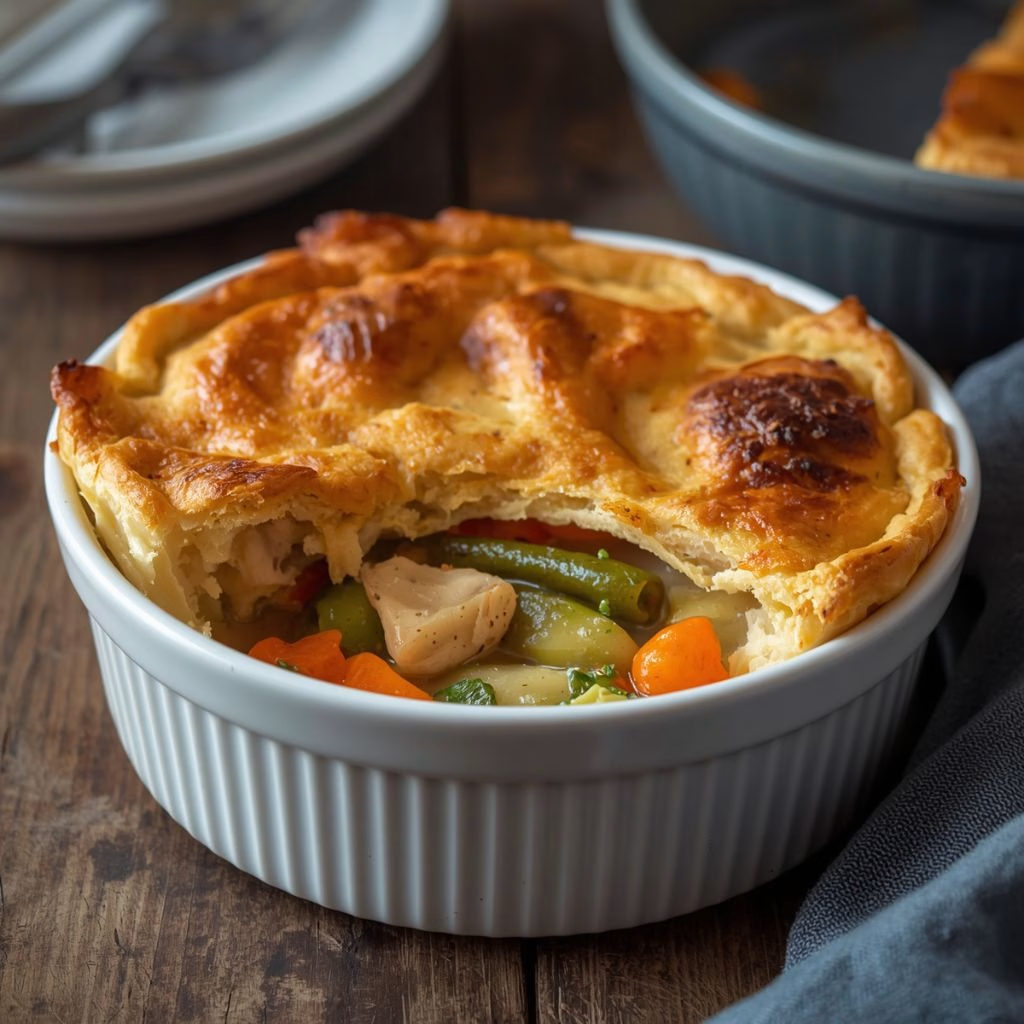
Making this dish comes down to two main stages: building the filling, then assembling and baking the pies. I like to prep everything ahead of time so the process feels quick and stress-free once the oven is hot. Here’s exactly how I put it all together, step by step.
Preheat and Prep
Start by preheating your oven to 425°F so it’s fully hot by the time your pies are ready to bake. While it heats, peel and dice your potatoes, slice your celery, and measure out the frozen vegetables. Having everything prepped ahead of time makes the cooking process move much faster.
Cook the Vegetables
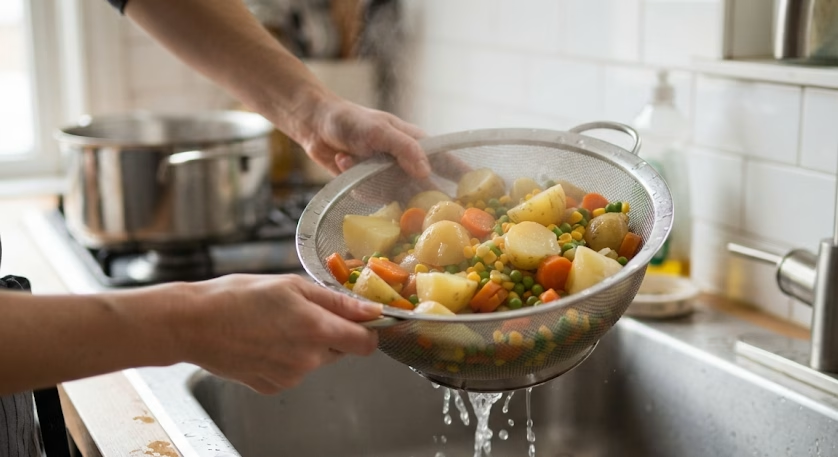
Place the potatoes, celery, and frozen mixed vegetables into a large saucepan and cover with water. Bring it to a boil, then reduce to a simmer until the potatoes are fork-tender, about 10 minutes. Drain everything well in a colander and set it aside for later.
Build the Creamy Base
In the same saucepan, melt the butter and cook the onion and leeks until soft and fragrant, about 5 minutes. Whisk in the flour, salt, pepper, celery seed, onion powder, and Italian seasoning until it forms a smooth paste. This step is what gives the filling its rich, velvety texture.

Thicken the Filling
Slowly whisk in the chicken broth and milk, pouring gradually so no lumps form. Keep whisking over medium heat until the mixture comes to a gentle simmer and thickens into a creamy gravy-like consistency. This usually takes about 5 to 7 minutes.
Combine Chicken and Vegetables
Remove the saucepan from the heat and stir in the cooked chicken along with the drained vegetables. Mix everything until it’s evenly coated in that creamy sauce. At this point, you can use the filling right away or let it cool and freeze it for later.
Assemble the Pies
Fit a rolled-out bottom crust into each pie plate, then divide the warm filling evenly between them. Top each pie with a second crust, pinch the edges together to seal, and cut a few small slits in the top to let steam escape. Brush lightly with cream or milk if you want a shiny, golden crust.
Bake Until Golden
Place foil rings around the crust edges to prevent them from browning too fast, then bake for 30 to 35 minutes, or until the top is golden brown and the filling is bubbling through the slits. Remove the foil during the last few minutes if you want extra color on top.
Cool and Serve
Let the pies rest for about 10 minutes before slicing. This gives the creamy filling time to set slightly so it holds together when served rather than running all over the plate.
Additional Tips for Making This Recipe Better
After making this more times than I can count, here are the tricks that make the biggest difference for me:
- I always whisk the broth and milk in slowly rather than dumping it in all at once, since that’s what keeps the filling silky instead of lumpy.
- I like to season the filling a little more boldly than feels necessary, because the pie crust mellows out the flavor once it bakes.
- I’ve found that letting the filling cool slightly before filling the crust keeps the bottom from getting soggy.
- I always cut generous steam vents in the top crust, since a sealed pie tends to bubble over messily in the oven.
- I like to brush the crust with cream instead of plain milk for a deeper golden color.
Common Mistakes to Avoid
- I’ve overfilled my pies before, and it always leads to a mess in the oven. I now stop just below the rim.
- I used to skip draining the boiled vegetables well enough, which made my filling watery instead of creamy.
- I’ve learned not to skip preheating the oven fully, since a cooler oven leads to a pale, undercooked bottom crust.
- I once forgot to cut vent slits, and steam pressure cracked the top crust open unevenly.
- I’ve rushed the cooling time before slicing, and the filling ran everywhere instead of holding its shape.
How to Serve This Chicken Pot Pie
I love serving this pie straight out of the oven with a simple green salad or steamed vegetables on the side to balance out the richness. A light drizzle of extra cream or a sprinkle of fresh chopped parsley over the top adds a nice pop of color right before serving.
For individual ramekins, I set each one on a small plate with a spoon resting beside it, which always feels a little more special for guests. If I’m serving a crowd, I slice the full pie into wedges and plate it with the golden crust facing up so the layers show. You can also enjoy similar chicken dishes like Hawaiian Chicken Sheet Pan Recipe when you’re looking for another comforting chicken meal.
Variations
- Swap the chicken for leftover Thanksgiving turkey for a holiday-friendly twist.
- Use a gluten free 1-to-1 flour blend and gluten free pie crust for a fully gluten free version.
- Add a splash of white wine to the filling for a slightly deeper, more savory flavor.
- Mix in fresh herbs like thyme or rosemary for a more aromatic filling.
- Try a dairy-free milk alternative and plant-based butter for a lighter version.
- Top with a biscuit crust instead of pie dough for a cobbler-style pot pie.
Nutritional Information
Here’s a general breakdown per slice, based on a pie cut into 8 servings:
- Calories: approximately 420 per slice
- Protein: approximately 18 grams per slice
- Carbohydrates: approximately 32 grams per slice
- Fat: approximately 24 grams per slice
Make Ahead and Storage
You can prep the filling up to two days ahead and store it in the refrigerator until you’re ready to assemble and bake the pies.
For leftovers, store baked slices in an airtight container in the refrigerator for up to 3 days, then reheat in the oven at 350°F until warmed through.
To freeze, you can freeze the raw filling in a sealed freezer bag for up to 3 months, or freeze a fully assembled unbaked pie wrapped tightly in foil for the same length of time.
Why You’ll Love This Recipe
This chicken pot pie has become a regular in my kitchen for a few reasons:
- It’s incredibly comforting. The creamy filling and flaky crust make it feel like a warm hug on a plate, especially during colder months.
- It’s flexible for leftovers. I can use rotisserie chicken, leftover turkey, or even a store-bought crust depending on how much time I have.
- It freezes beautifully. I love having a batch of filling tucked away in the freezer for busy weeknights.
- It works for any size gathering. I can make full pies for a crowd or individual ramekins for a smaller meal.
- It’s easy to customize. Between the gluten free option and the herb variations, I can easily adjust it to fit different diets or cravings. A similar option with chicken, vegetables, and a hearty side is Grainy Mustard Chicken Bowl with Veggies & Mashed Potatoes Recipe.
FAQs
What are the ingredients in the Costco chicken pot pie?
Costco’s version typically includes a creamy chicken and vegetable filling with peas, carrots, celery, and potatoes inside a butter pie crust. My homemade version follows a very similar base.
Is the Costco chicken pot pie discontinued?
Availability can vary by location and season, since Costco often rotates its bakery and prepared food items. Checking with your local warehouse is the best way to confirm current stock.
What do people say in their Costco chicken pot pie reviews?
Most reviews describe it as hearty, filling, and great for feeding a crowd, though some find the portion size too large for smaller households, which is exactly why I make my own smaller batches.
Are there instructions for the Costco chicken pot pie on Reddit?
Some home cooks share their own reheating and baking tips online, but there’s no official recipe published, which is part of why copycat versions like this one are so popular.
Is there a Sam’s Club chicken pot pie copycat recipe similar to this one?
Yes, warehouse-style pot pies from different retailers tend to use a similar creamy filling and flaky crust, so this recipe works well as a copycat base for either version.
Can I make this hearty chicken pot pie recipe ahead of time?
Absolutely. I often make the filling a day or two in advance and refrigerate it, then assemble and bake the pies closer to serving time.
Can I use evaporated milk in this chicken pot pie recipe?
Yes, evaporated milk can replace regular milk for an even richer, creamier filling with a slightly more concentrated flavor.
Can I make this recipe gluten free?
Yes, simply swap in a 1-to-1 gluten free flour blend for the filling and use a gluten free pie crust for the same comforting result.

Costco Chicken Pot Pie Copycat Recipe
Ingredients
Method
- Start by preheating your oven to 425°F so it’s fully hot by the time your pies are ready to bake. While it heats, peel and dice your potatoes, slice your celery, and measure out the frozen vegetables. Having everything prepped ahead of time makes the cooking process move much faster.
- Place the potatoes, celery, and frozen mixed vegetables into a large saucepan and cover with water. Bring it to a boil, then reduce to a simmer until the potatoes are fork-tender, about 10 minutes. Drain everything well in a colander and set it aside for later.
- In the same saucepan, melt the butter and cook the onion and leeks until soft and fragrant, about 5 minutes. Whisk in the flour, salt, pepper, celery seed, onion powder, and Italian seasoning until it forms a smooth paste. This step is what gives the filling its rich, velvety texture.
- Slowly whisk in the chicken broth and milk, pouring gradually so no lumps form. Keep whisking over medium heat until the mixture comes to a gentle simmer and thickens into a creamy gravy-like consistency. This usually takes about 5 to 7 minutes.
- Remove the saucepan from the heat and stir in the cooked chicken along with the drained vegetables. Mix everything until it’s evenly coated in that creamy sauce. At this point, you can use the filling right away or let it cool and freeze it for later.
- Fit a rolled-out bottom crust into each pie plate, then divide the warm filling evenly between them. Top each pie with a second crust, pinch the edges together to seal, and cut a few small slits in the top to let steam escape. Brush lightly with cream or milk if you want a shiny, golden crust.
- Place foil rings around the crust edges to prevent them from browning too fast, then bake for 30 to 35 minutes, or until the top is golden brown and the filling is bubbling through the slits. Remove the foil during the last few minutes if you want extra color on top.
- Let the pies rest for about 10 minutes before slicing. This gives the creamy filling time to set slightly so it holds together when served rather than running all over the plate.
Notes
- I always whisk the broth and milk in slowly rather than dumping it in all at once, since that’s what keeps the filling silky instead of lumpy.
- I like to season the filling a little more boldly than feels necessary, because the pie crust mellows out the flavor once it bakes.
- I’ve found that letting the filling cool slightly before filling the crust keeps the bottom from getting soggy.
- I always cut generous steam vents in the top crust, since a sealed pie tends to bubble over messily in the oven.
- I like to brush the crust with cream instead of plain milk for a deeper golden color.