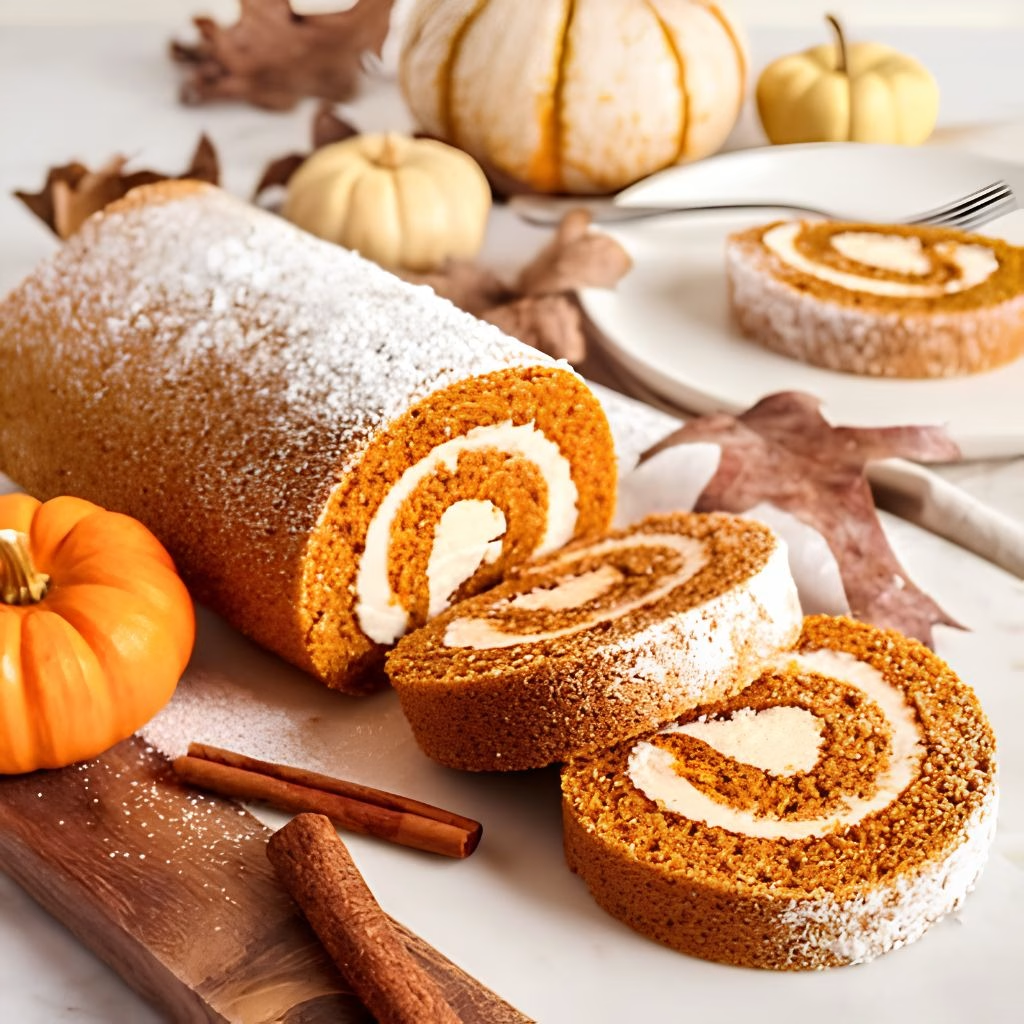
I still remember the first time I attempted a Easy Pumpkin Roll Recipe I was terrified it would crack right down the middle the second I tried to roll it up. It didn’t, and honestly, I’ve never looked back since. Once I figured out the two little tricks that make this cake behave every single time, I started making it for every fall gathering I could find an excuse for.
It’s soft, it’s spiced just right, and that tangy cream cheese filling in the center makes it impossible to eat just one slice. If you’ve been nervous to try one of these classic pumpkin roll recipes yourself, let me walk you through exactly how I do it.
Cooking Time
- Prep Time: 10 minutes
- Cook Time: 15 minutes
- Total Time: 35 minutes (plus at least 4-6 hours chilling before serving)
Equipment You’ll Need
- Half-sheet cookie pan – gives the cake the thin, even shape needed for rolling
- Wax paper – lines the pan and helps the cake release and roll cleanly
- Mixing bowls – one for wet ingredients, one for dry
- Hand mixer or stand mixer – makes quick work of the cream cheese filling
- Silicone spatula – spreads the batter and filling evenly without tearing
- Cooling rack – lets the cake cool flat before it’s rolled
Ingredients
For the pumpkin cake:
- 3/4 cup all-purpose flour – the base of the cake, keep it light for the fluffiest texture
- 1/4 teaspoon salt – wakes up all the other flavors, don’t skip it
- 1 teaspoon baking soda – helps the cake rise thin and even
- 1 tablespoon pumpkin pie spice – the cozy fall flavor that makes this cake taste like autumn
- 1 cup granulated sugar – gives the cake its structure, so stick with real sugar here
- 2/3 cup pumpkin puree (not pumpkin pie filling) – the star ingredient, make sure the can says “pure pumpkin”
- 3 large eggs – bind everything together and add moisture
- 1 teaspoon vanilla extract – rounds out the spice with a warm, sweet note
For the cream cheese filling:
- 8 oz cream cheese, softened – the creamy, tangy heart of the filling
- 1 cup powdered sugar – sweetens the filling without adding grit
- 2 tablespoons butter, softened – loosens the filling so it spreads like a dream
- 1 teaspoon vanilla extract – adds depth to the sweet filling
Note: This recipe serves about 12 slices, so it’s perfect for a holiday dessert table or a smaller family gathering with leftovers.
How to Make Easy Pumpkin Roll Recipe?
Making this cake really only takes a handful of steps, and once you’ve done it once, it becomes second nature. Below I’m breaking every stage down so nothing catches you off guard. Read through the whole thing once before you start so you know what’s coming next.
Preheat and Mix the Wet Ingredients
Start by preheating your oven to 350°F so it’s ready the moment your batter is done. In a large bowl, stir together the pumpkin puree, sugar, eggs, and vanilla until the mixture is smooth and well combined. This forms the moist, flavorful base of your cake.
Combine the Dry Ingredients
In a separate bowl, whisk together the flour, baking soda, salt, and pumpkin pie spice. Mixing these dry ingredients on their own first keeps the baking soda evenly distributed so you don’t end up with any odd-tasting bites later on.
Bring the Batter Together
Slowly fold the dry mixture into the pumpkin mixture, stirring just until no streaks of flour remain. The batter will be quite thin and pourable, which is exactly what you want for a thin, rollable cake layer.
Prep the Pan and Bake
Lightly grease your half-sheet pan with non-stick spray, then line it with wax paper, letting a little hang over the edges. Pour in the batter and spread it evenly with a spatula, then bake for exactly 15 minutes, until the top springs back when lightly touched.
Cool and Roll It Up
Let the cake cool in the pan for about 10 minutes, then lift it out using the overhanging wax paper and set it on a cooling rack for another 10 minutes. While it’s still slightly warm, roll the cake up together with the wax paper, starting from one short end, and let it cool completely in that rolled shape.
Make the Cream Cheese Filling
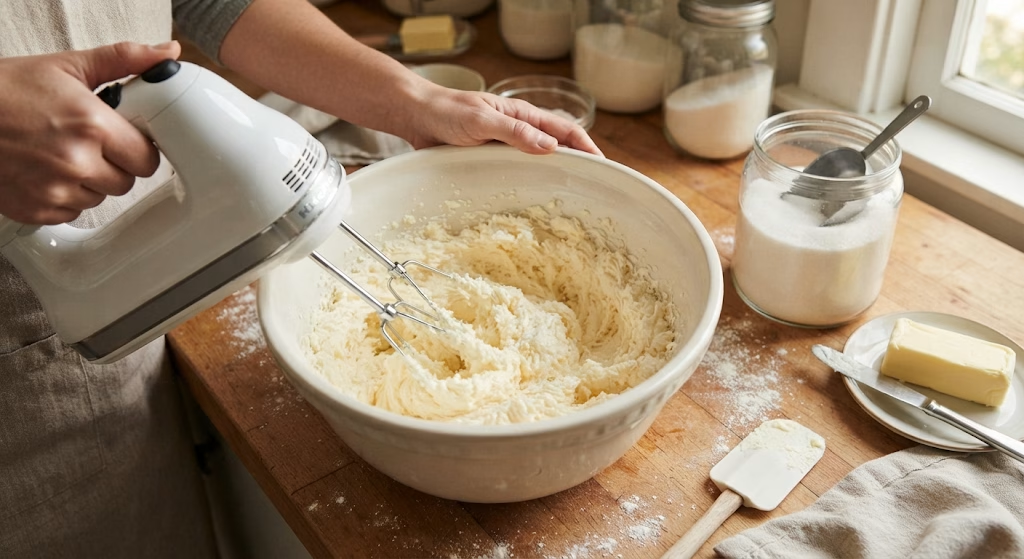
While the cake cools, beat the softened cream cheese, powdered sugar, butter, and vanilla together until smooth and fluffy. Try to resist tasting too much of it — it’s dangerously good on its own, straight from the bowl.
Fill and Re-Roll the Cake
Once the cake is completely cool, gently unroll it and spread the cream cheese filling in an even layer across the whole surface. Carefully roll the cake back up, this time slowly peeling away the wax paper as you go instead of rolling it in.
Chill Before Slicing
Wrap the finished roll in a fresh piece of wax paper and refrigerate it for at least 4-6 hours, though overnight is even better. Chilling firms up the filling and makes slicing so much cleaner when you’re ready to serve.
Additional Tips for Making This Recipe Better
After making this more times than I can count, here’s what I’ve learned actually makes a difference:
- I always use wax paper instead of parchment for the baking step — it releases the cake so much more easily once it’s rolled.
- I make sure my pumpkin puree and eggs are at room temperature, since it helps the batter mix together more evenly.
- I never skip rolling the cake while it’s still warm, because a cooled cake is far more likely to crack.
- I like to dust a clean towel or my counter with a little powdered sugar as a backup surface if my wax paper ever tears.
- I always let the filled roll chill overnight when I can, since the flavor and texture both improve with time.
Common Mistakes to Avoid
- I’ve grabbed pumpkin pie filling by mistake before, and it completely changes the texture always double-check the can says “pumpkin puree.”
- I used to skip greasing the pan under the wax paper, and the paper would slide around while I was spreading the batter.
- I learned the hard way that rolling a fully cooled cake almost always leads to cracks, so roll it warm every time.
- I once rushed the chilling step, and the filling was too soft to slice cleanly — give it the full resting time.
- I overbaked mine once by a couple of minutes, and the drier edges cracked when I rolled it, so watch the clock closely.
How to Serve an Easy Pumpkin Roll Recipe?
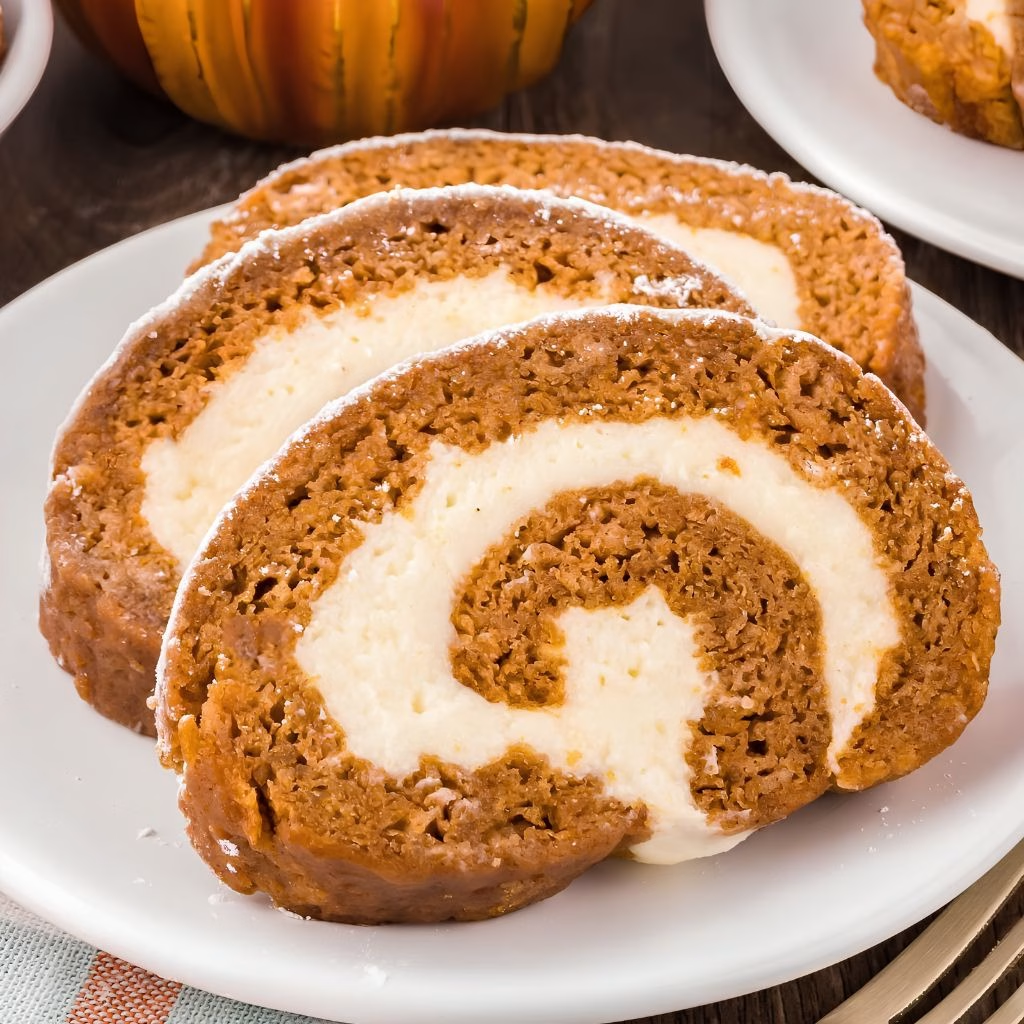
Once your pumpkin roll has fully chilled, place it on a long serving platter and slice it into inch-thick rounds so each piece shows off that pretty spiral of filling. I like to dust the top with a little extra powdered sugar right before serving for a snowy, festive look.
A few toasted pecans or a light drizzle of caramel sauce over each slice also makes it feel extra special for a holiday table. If you’re hosting a bigger crowd, this cake pairs beautifully alongside a warm slice of pumpkin pie for guests who can’t decide between the two.
Variations
- Swap the cream cheese for a dairy-free or vegan cream cheese alternative for a lactose-free version.
- Use a 1:1 low-calorie sweetener in place of the sugar in the cake or filling if you’re watching your sugar intake.
- Try maple syrup in place of the powdered sugar in the filling for a slightly different, richer sweetness.
- Add a handful of finely chopped pecans or walnuts into the filling for extra crunch.
- Start with a spice cake mix as a shortcut base if you want an even faster easy pumpkin roll recipe using cake mix.
- Fold a swirl of Philadelphia cream cheese pumpkin roll recipe-style spiced filling in for a slightly different flavor twist.
Nutritional Information
Here’s a general breakdown per slice, based on 12 servings from this recipe:
- Calories: about 238 kcal
- Protein: about 4g
- Carbohydrates: about 35g
- Fat: about 10g
Make Ahead and Storage
You can make this pumpkin roll a day or two in advance, since it actually needs several hours of chilling before serving anyway. Once sliced, store leftovers in a sealed container in the refrigerator for up to a week, though in my house it rarely lasts that long.
To freeze, wrap the rolled (unsliced) cake tightly in wax paper and then foil, or place it in a freezer-safe bag, and freeze for up to 3 months. Thaw it slowly in the refrigerator overnight before slicing and serving.
Why You’ll Love This Recipe?
This easy pumpkin roll recipe with cream cheese has earned its spot as one of my most-requested fall desserts, and here’s why I think you’ll feel the same way:
- It comes together with simple pantry ingredients — no fancy equipment or hard-to-find items required, just a mixing bowl and a sheet pan.
- The wax paper trick makes it genuinely foolproof, even if you’ve never rolled a cake before in your life.
- It’s easy to customize, whether you want it dairy-free, lower in sugar, or made with a shortcut cake mix base.
- It looks impressive enough for a holiday table but takes only about 35 minutes of actual hands-on cooking time.
- It stores and freezes well, so you can make it ahead and take one less thing off your holiday to-do list.
FAQs
Can I use parchment paper instead of wax paper?
Some readers have had success with parchment, but I’ve always found wax paper releases the cake more easily and helps prevent sticking during the roll.
Why did my pumpkin roll crack?
Cracking usually happens when the cake cools completely before rolling, so be sure to roll it while it’s still slightly warm.
Can I freeze a pumpkin roll?
Yes, wrap the rolled cake tightly in wax paper and foil, then freeze it for up to 3 months, and thaw it in the fridge overnight before serving.
What size pan should I use?
A standard half-sheet pan, about 18 by 13 inches, is the ideal jelly roll pan size for this recipe, giving the cake a thin, even layer that’s easy to roll.
Can I make this into a loaf instead of a roll?
This recipe is designed specifically for rolling, so baking it as a loaf would need a different pan size and a longer, adjusted baking time to work properly.
If you love this one, you might also want to check out more cozy fall bakes over on our recipes collection for even more ideas to round out your holiday dessert table.

Easy Pumpkin Roll Recipe
Ingredients
Method
- Start by preheating your oven to 350°F so it’s ready the moment your batter is done. In a large bowl, stir together the pumpkin puree, sugar, eggs, and vanilla until the mixture is smooth and well combined. This forms the moist, flavorful base of your cake.
- In a separate bowl, whisk together the flour, baking soda, salt, and pumpkin pie spice. Mixing these dry ingredients on their own first keeps the baking soda evenly distributed so you don’t end up with any odd-tasting bites later on.
- Slowly fold the dry mixture into the pumpkin mixture, stirring just until no streaks of flour remain. The batter will be quite thin and pourable, which is exactly what you want for a thin, rollable cake layer.
- Lightly grease your half-sheet pan with non-stick spray, then line it with wax paper, letting a little hang over the edges. Pour in the batter and spread it evenly with a spatula, then bake for exactly 15 minutes, until the top springs back when lightly touched.
- Let the cake cool in the pan for about 10 minutes, then lift it out using the overhanging wax paper and set it on a cooling rack for another 10 minutes. While it’s still slightly warm, roll the cake up together with the wax paper, starting from one short end, and let it cool completely in that rolled shape.
- While the cake cools, beat the softened cream cheese, powdered sugar, butter, and vanilla together until smooth and fluffy. Try to resist tasting too much of it it’s dangerously good on its own, straight from the bowl.
- Once the cake is completely cool, gently unroll it and spread the cream cheese filling in an even layer across the whole surface. Carefully roll the cake back up, this time slowly peeling away the wax paper as you go instead of rolling it in.
- Wrap the finished roll in a fresh piece of wax paper and refrigerate it for at least 4-6 hours, though overnight is even better. Chilling firms up the filling and makes slicing so much cleaner when you’re ready to serve.
Notes
- I always use wax paper instead of parchment for the baking step it releases the cake so much more easily once it’s rolled.
- I make sure my pumpkin puree and eggs are at room temperature, since it helps the batter mix together more evenly.
- I never skip rolling the cake while it’s still warm, because a cooled cake is far more likely to crack.
- I like to dust a clean towel or my counter with a little powdered sugar as a backup surface if my wax paper ever tears.
- I always let the filled roll chill overnight when I can, since the flavor and texture both improve with time.