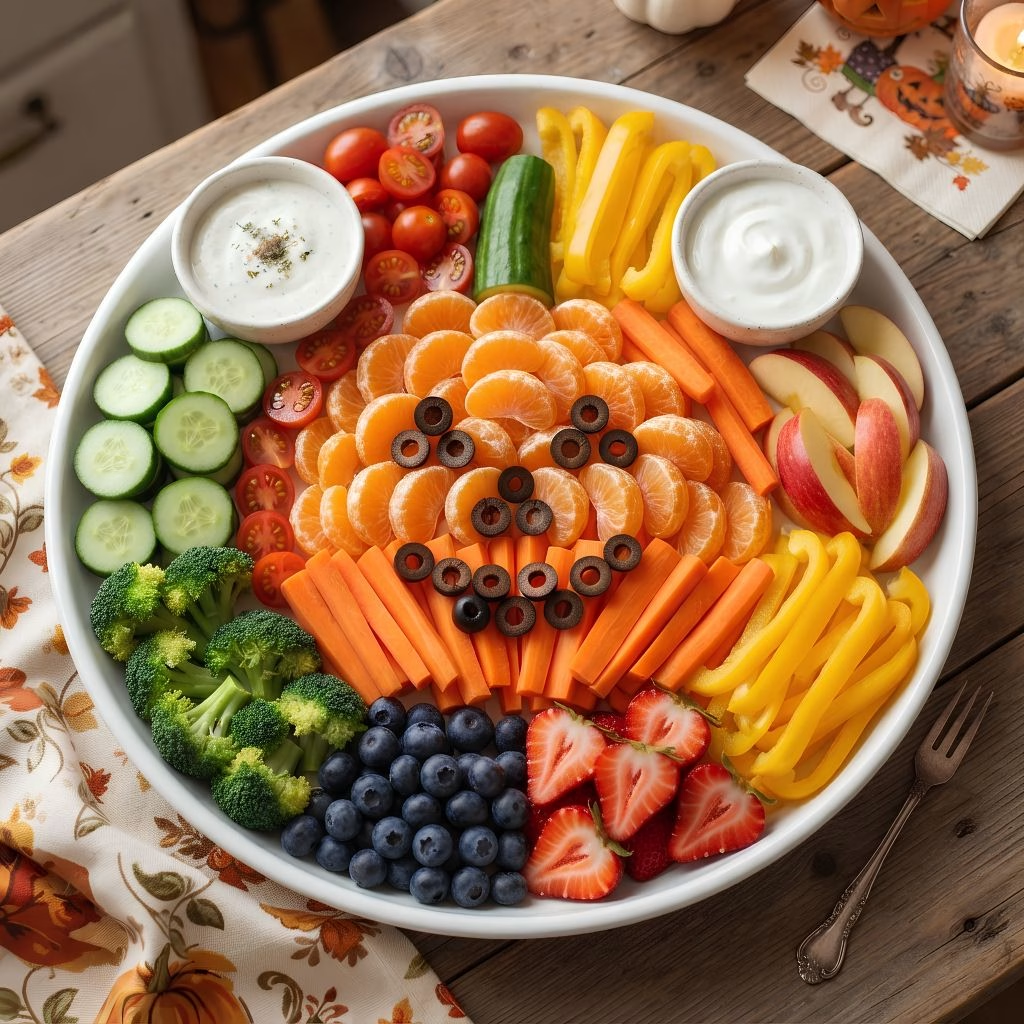
I made this Halloween Fruit and Veggie Platter Recipe for our neighborhood party last year, and it disappeared faster than any candy bowl on the table. I love that it’s colorful, it’s genuinely healthy, and it takes almost no cooking skill to pull off.
My kids helped me arrange the pieces into a pumpkin shape, and honestly, that’s half the fun. If you want a halloween fruit tray that looks festive but doesn’t take all day, this one’s for you.
Prep Time, Cook Time, and Total Time
- Prep Time: 25 minutes
- Cook Time: 0 minutes (no cooking required)
- Total Time: 25 minutes
Ingredients for This Halloween Fruit and Veggie Tray
- 2 cups cherry tomatoes – these work as little “pumpkins” on the veggie side, so pick the roundest ones you can find
- 1 cucumber, sliced into rounds – a mild, crunchy base that layers nicely into any pattern
- 1 bell pepper, cut into strips – orange or yellow peppers echo the Halloween color scheme perfectly
- 1 cup baby carrots – naturally orange, so they do a lot of the decorating work for you
- 1 cup broccoli florets – use fresh florets, not frozen, or they’ll turn mushy and watery on the tray
- 1 cup cauliflower florets – these take on dye or dip color well if you want to get creative
- 2 cups green and red grapes – rinse and pat them fully dry so the platter doesn’t get soggy
- 2 apples, sliced – toss the slices in a little lemon juice so they don’t brown before serving
- 1 cup strawberries, halved – pick ones with a deep red color for the best “bloody” Halloween effect
- 2 clementines or mandarins, peeled – leave them whole or split into segments shaped like tiny pumpkins
- 1 cup blueberries – great for filling in small gaps and adding a pop of deep color
- 1 cup ranch or veggie dip – homemade or store-bought both work fine here
- 1 cup fruit yogurt dip – a lighter, sweeter option to pair with the fruit side
- 2 black olives, sliced – these become eyes, spiders, or any spooky detail you want to add
Note: Serves 8 to 10 as a party appetizer or snack tray.
Equipment You’ll Need
- Large round or oval platter – gives you enough room to shape the fruit and veggies into Halloween designs
- Sharp paring knife – makes clean cuts for fruit shapes and veggie sticks
- Cutting board – keep one for fruit and one for veggies to avoid flavor transfer
- Small bowls or ramekins – for holding the dips in the center of the tray
- Paper towels – useful for drying washed produce before arranging
How to Make This Halloween Fruit and Veggie Platter?
This recipe really comes together in the arranging, not the cooking, so don’t overthink it. I like to wash and dry everything first, then lay out my shapes before committing to a final design. Once you’ve got your plan, the whole tray goes together in under half an hour.
Wash and Dry Every Ingredient
Start by rinsing all your fruits and vegetables under cool water, then pat them completely dry with paper towels. I skip this step at my own risk every single time, and the platter always ends up watery and dull-looking by the time guests arrive. Dry produce holds its shape and color much longer on display.
Slice and Prep Your Shapes
Cut your cucumbers into rounds, peppers into strips, and apples into thin wedges, keeping pieces roughly the same size for a tidy look. I toss my apple slices in lemon juice right away so they stay bright instead of turning brown. This is also when I halve strawberries and peel the clementines.
Build the Base Layer
Place your largest, flattest pieces first, like cucumber rounds or lettuce leaves, to create a sturdy base across the platter. I usually work from the outer edge inward so the whole tray fills in evenly. This base also helps smaller pieces, like blueberries, stay put instead of rolling around.
Arrange the Shapes and Theme
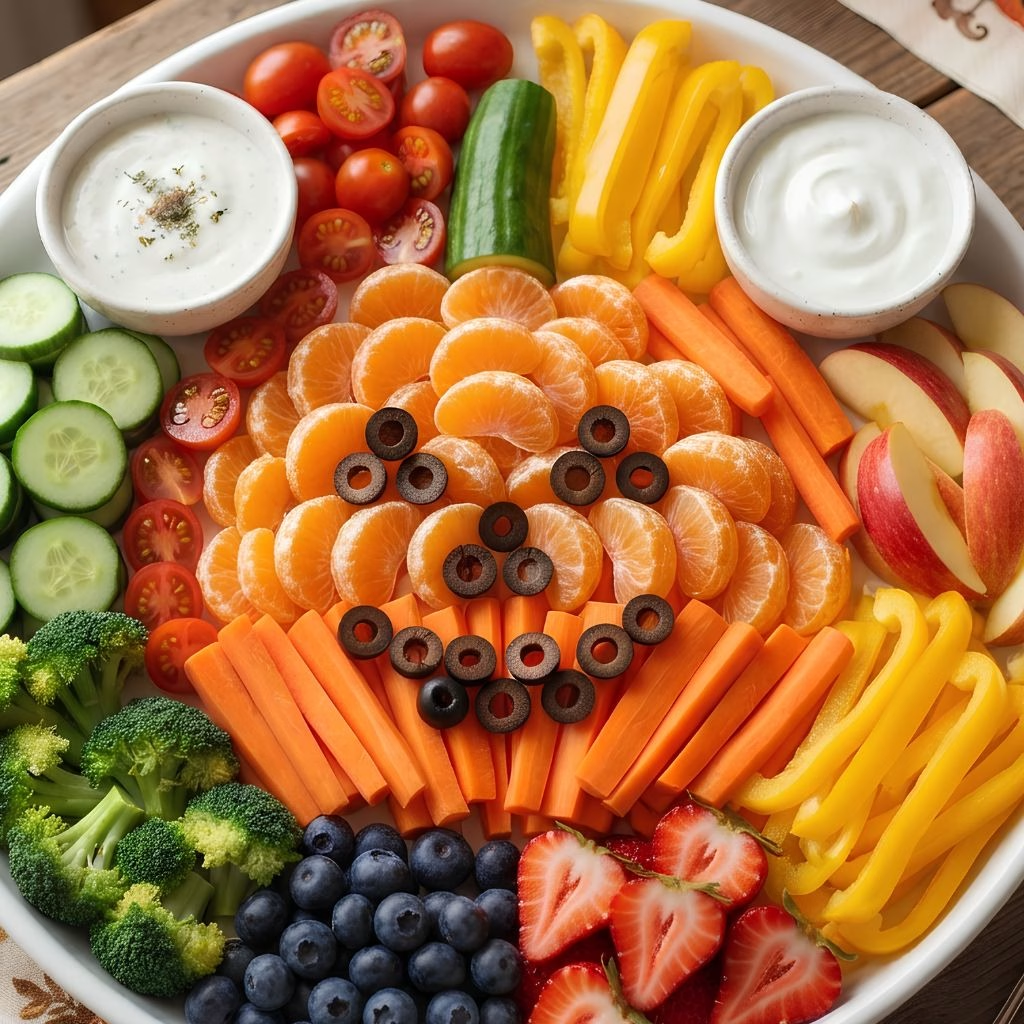
Use your orange produce, like carrots, cherry tomatoes, and clementines, to build a pumpkin or jack-o’-lantern shape in one section of the tray. I like adding sliced olives as eyes or spider legs for a bit of spooky detail. Group your veggies and fruits separately so flavors don’t bleed into each other.
Add the Dips Last
Place your small bowls of ranch and yogurt dip directly onto the platter, nestled into open spaces so they don’t slide around. I always add these last so I can see exactly how much room is left after arranging everything else. This is the moment the whole halloween fruit and veggie tray really comes together visually.
Chill Before Serving
Cover the platter loosely with plastic wrap and refrigerate it for at least 15 minutes before your guests arrive. I’ve found this short chill keeps everything crisp and makes the colors look even more vibrant under party lighting. Pull it out right before serving so nothing wilts.
Additional Tips for Making This Recipe Better
- I always cut my fruit and veggies within a few hours of serving, not the night before, since fresher cuts hold their texture and color so much better.
- I like using a melon baller for cantaloupe or honeydew when I want round “eyeball” shapes scattered across the tray.
- I’ve learned to keep my dips in small, separate bowls instead of one large bowl, since it keeps the tray looking neater for longer.
- I always pat my berries completely dry, because any leftover moisture makes the whole platter look sloppy within an hour.
- I like adding a few edible candy eyes to the dip bowls for an extra spooky touch that kids especially love.
Common Mistakes to Avoid
- I used frozen broccoli once by mistake, and it turned limp and watery almost immediately, always using fresh florets instead.
- I didn’t dry my grapes well one year, and they left a wet ring on the platter that soaked into the other produce nearby.
- I cut my apples too far in advance without lemon juice, and they browned before guests even arrived.
- I crowded the tray with too many ingredients at once, which made the Halloween shapes hard to recognize. Less is often more here.
- I forgot to taste my dip ahead of time once, and it turned out far too salty for the fresh veggies it was meant to complement.
How to Serve Your Halloween Fruit and Veggie Platter?
I like setting this tray out as the centerpiece of the snack table, right next to the heavier Halloween treats, so guests have a lighter option too. A few edible candy eyes pressed into the dip bowls or scattered across the fruit instantly boosts the spooky factor without any extra effort.
For parties with kids, I’ll sometimes add small Halloween-themed skewers so little hands can grab pieces without touching everything else on the platter. This also pairs nicely alongside other spooky party bites if you’re putting together a full Halloween spread.
Variations on This Halloween Fruit and Veggie Tray
- Dairy-free option: swap the ranch dip for a cashew-based or dairy-free veggie dip.
- Sugar-free fruit side: stick to berries and citrus, which have less natural sugar than grapes or apples.
- Extra protein: add cubed cheese or hard-boiled egg halves shaped like little ghosts.
- Spicier veggie dip: mix a pinch of cayenne or smoked paprika into your ranch for a kick.
- Tropical twist: swap in pineapple chunks and mango for a lighter, sweeter fruit tray.
Nutritional Information
Here’s a rough breakdown per serving when the tray is split among 8 to 10 people:
- Calories: approximately 90 to 120 per serving
- Protein: approximately 2 to 3 grams per serving
- Carbohydrates: approximately 18 to 22 grams per serving
- Fat: approximately 1 to 3 grams per serving (more if served with a creamy dip)
Make Ahead and Storage
You can wash and chop most of the vegetables up to a day ahead and store them in airtight containers in the fridge. I’d hold off on cutting apples or other fruit that browns until just a few hours before serving for the best color and texture.
Leftovers keep well in the refrigerator for about 2 to 3 days if stored in a sealed container away from the dip. I always store the dip separately so the vegetables don’t get soggy while sitting in the fridge.
This platter isn’t freezer-friendly, since fresh fruits and vegetables lose their crunch and texture once thawed. I’d recommend only prepping what you’ll realistically eat within a few days.
Why You’ll Love This Recipe
This halloween fruit and veggie tray checks every box for a stress-free party spread — it’s simple, healthy, and genuinely fun to put together with family.
- Quick to assemble: there’s no cooking involved, so you can have the whole tray ready in about 25 minutes, even with kids helping.
- Naturally healthy: it’s one of the easiest ways to balance out a table full of candy and sweets with something nutritious.
- Easy to customize: you can swap in whatever fruits and veggies and halloween veggies and dip combinations you already have on hand.
- Kid-friendly and interactive: little ones love helping arrange the shapes, which makes it a great halloween fruit tray for kids project.
- Great for any setting: it works just as well as halloween fruit ideas for school parties as it does for a full house gathering.
FAQs About Halloween Fruit and Veggie Platters
Can I make this platter the night before?
You can prep most of the vegetables the night before, but I’d wait to cut fruits like apples until closer to serving time so they don’t brown.
What’s the best dip for a veggie halloween snacks tray?
A classic ranch dip works great for vegetables, while a light yogurt or honey dip pairs better with the fruit side of the tray.
How do I keep the fruit from turning brown?
Toss any apples or pears in a bit of lemon juice right after cutting, and keep the tray chilled until you’re ready to serve.
Can I turn this into a halloween fruit tray for kids’ school party?
Absolutely just skip any choking-hazard-sized pieces and keep shapes simple, like clementine pumpkins or grape ghosts on skewers.
How long can this platter sit out at a party?
I wouldn’t leave it out longer than about 2 hours at room temperature, especially if the dip contains dairy.
For more Halloween party ideas, check out this gluten free halloween puppy chow recipe for a sweet, crunchy snack mix, or try this halloween pretzel bats recipe if you want another easy, no-fuss treat to round out your spread.

Halloween Fruit and Veggie Platter Recipe
Ingredients
Method
- Start by rinsing all your fruits and vegetables under cool water, then pat them completely dry with paper towels. I skip this step at my own risk every single time, and the platter always ends up watery and dull-looking by the time guests arrive. Dry produce holds its shape and color much longer on display.
- Cut your cucumbers into rounds, peppers into strips, and apples into thin wedges, keeping pieces roughly the same size for a tidy look. I toss my apple slices in lemon juice right away so they stay bright instead of turning brown. This is also when I halve strawberries and peel the clementines.
- Place your largest, flattest pieces first, like cucumber rounds or lettuce leaves, to create a sturdy base across the platter. I usually work from the outer edge inward so the whole tray fills in evenly. This base also helps smaller pieces, like blueberries, stay put instead of rolling around.
- Use your orange produce, like carrots, cherry tomatoes, and clementines, to build a pumpkin or jack-o’-lantern shape in one section of the tray. I like adding sliced olives as eyes or spider legs for a bit of spooky detail. Group your veggies and fruits separately so flavors don’t bleed into each other.
- Place your small bowls of ranch and yogurt dip directly onto the platter, nestled into open spaces so they don’t slide around. I always add these last so I can see exactly how much room is left after arranging everything else. This is the moment the whole halloween fruit and veggie tray really comes together visually.
- Cover the platter loosely with plastic wrap and refrigerate it for at least 15 minutes before your guests arrive. I’ve found this short chill keeps everything crisp and makes the colors look even more vibrant under party lighting. Pull it out right before serving so nothing wilts.
Notes
- I always cut my fruit and veggies within a few hours of serving, not the night before, since fresher cuts hold their texture and color so much better.
- I like using a melon baller for cantaloupe or honeydew when I want round “eyeball” shapes scattered across the tray.
- I’ve learned to keep my dips in small, separate bowls instead of one large bowl, since it keeps the tray looking neater for longer.
- I always pat my berries completely dry, because any leftover moisture makes the whole platter look sloppy within an hour.
- I like adding a few edible candy eyes to the dip bowls for an extra spooky touch that kids especially love.