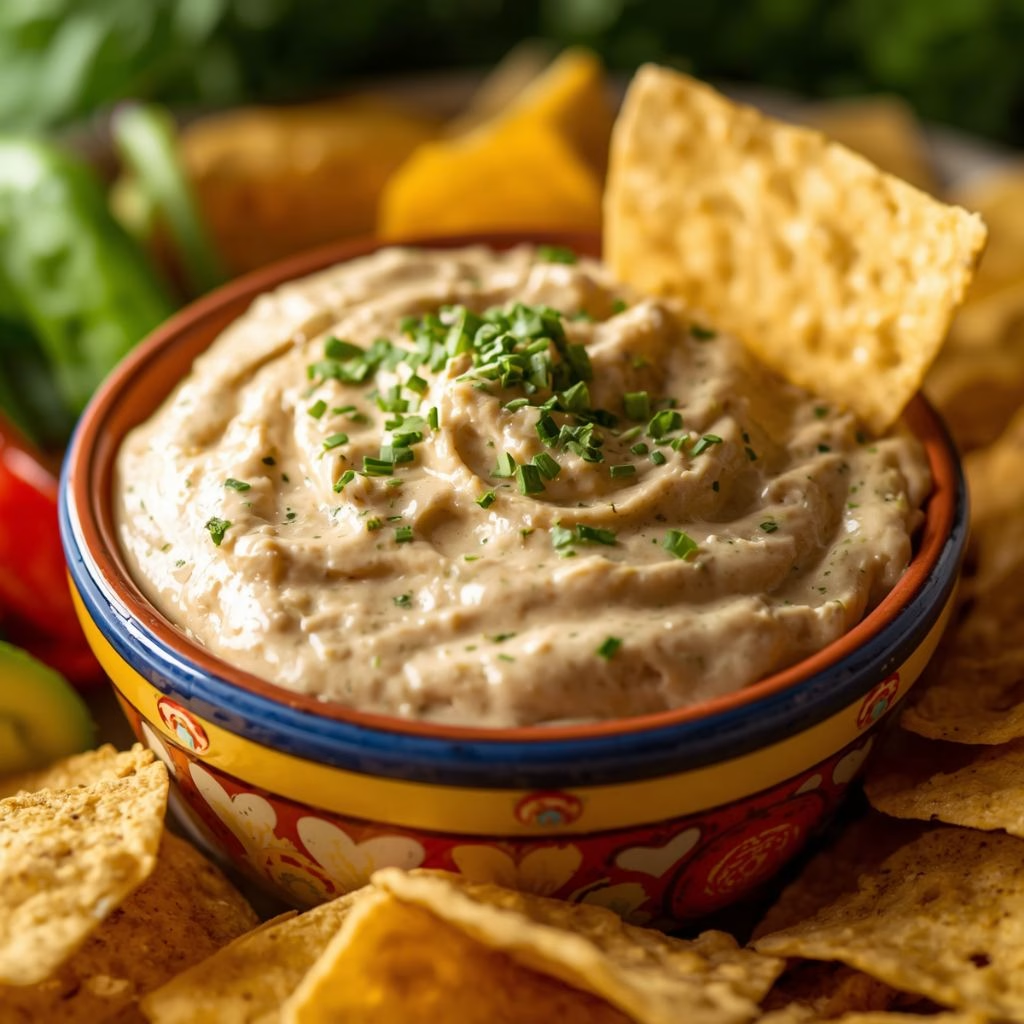
I still remember the first time I made this Hatch Chile Frozen Dip Recipe for a backyard get-together. It disappeared before I even got a chip in my own hand. I’ve made it dozens of times since, tweaking the heat level and cheese blend until I landed on the version I’m sharing with you today.
It’s warm, gooey, a little smoky, and comes together with barely any effort on my part. If you love a good hatch green chile dip, this one is about to become your new go-to. Whether you’re feeding a crowd on game day or just want something cozy to snack on, I promise this dip pulls its weight.

Cooking Time
- Prep Time: 10 minutes
- Cook Time: 15-20 minutes
- Total Time: 25-30 minutes
Equipment You Need
- Mixing bowl – for combining the cream cheese, sour cream, and seasonings smoothly
- Small baking dish – holds the dip while it bakes into a bubbly, melty layer
- Measuring cups and spoons – keeps your ratios accurate so the dip doesn’t turn watery
- Spatula or wooden spoon – for folding in the chiles and cheese without overmixing
- Oven mitts – because that baking dish comes out seriously hot
Ingredients
- 8 ounces cream cheese, softened — softening it first is the secret to a lump-free base
- 4 ounces diced hatch green chiles (fresh, canned, or frozen) — the star of the show; frozen roasted hatch chiles work beautifully when fresh ones are out of season
- 1 cup shredded Monterey Jack cheese — melts smooth and mild, balancing the chile heat
- 1/3 cup shredded cheddar cheese — adds a little sharpness and color to the mix
- 1/2 cup sour cream (or plain Greek yogurt) — keeps the dip creamy without making it heavy
- 1/4 teaspoon garlic powder — a small amount goes a long way for savory depth
- 1/8 teaspoon salt — taste as you go, since canned chiles can already be salty
- 3 dashes hot sauce — adjust up or down depending on how much heat you want
- 3/4 cup shredded Monterey Jack cheese, for topping — this is what gives you that golden, bubbly top layer
Note: This recipe serves about 6-8 people as an appetizer (roughly 2 cups of dip total).
How to Make Hatch Chile Frozen Dip Recipe?
I know it looks like a lot of steps below, but honestly this whole dip comes together in one bowl and one baking dish. There’s no complicated technique here, just good mixing and a short trip to the oven. Here’s exactly how I do it every time.
Preheat and Prep
I always start by preheating my oven to 350°F so it’s fully ready by the time my mixture is assembled. While it heats, I pull my cream cheese out early so it has time to soften cold cream cheese is the main reason dips turn lumpy. I also drain my diced chiles if there’s excess liquid.
Mix the Base
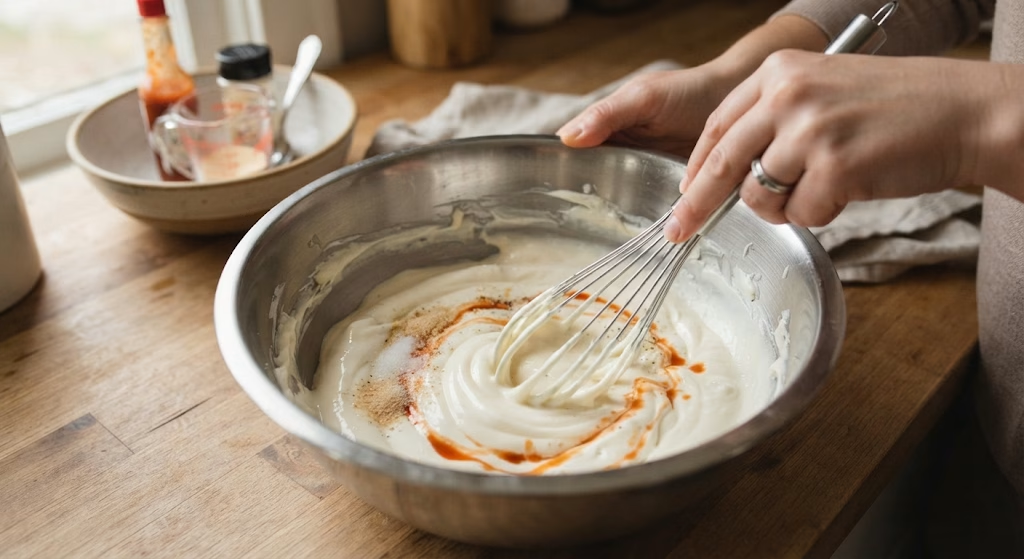
In a mixing bowl, I combine the softened cream cheese, sour cream, garlic powder, salt, and hot sauce first. I like to stir this base until it’s completely smooth before adding anything else, since it’s much harder to work out lumps once the cheese and chiles go in.
Fold in the Chiles and Cheese
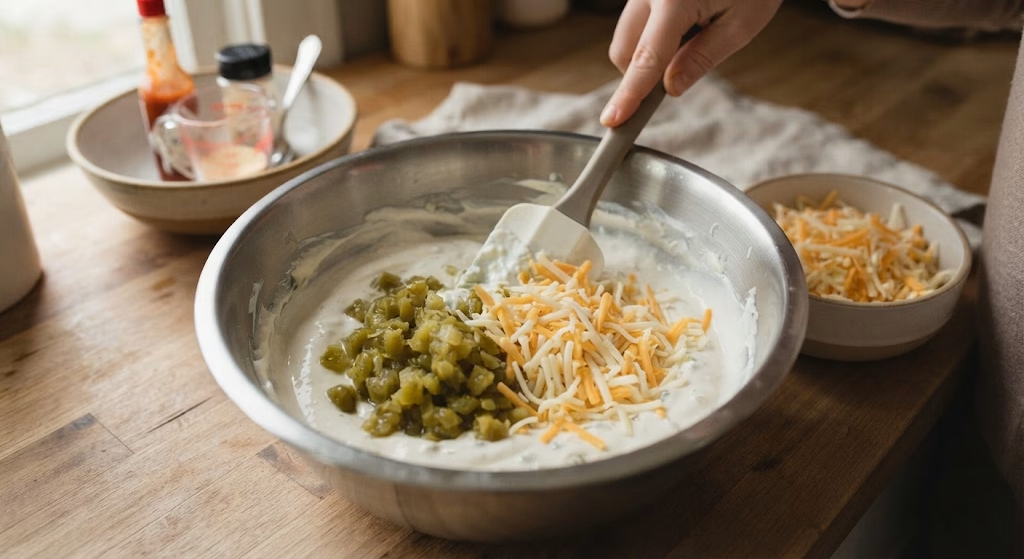
Next, I fold in the diced hatch chiles along with the Monterey Jack and cheddar cheese. I keep the topping cheese separate at this point that gets sprinkled on right before baking so it forms a nice melty crust instead of disappearing into the mix.
Transfer to the Baking Dish
I spread the mixture evenly into my small baking dish, smoothing the top with a spatula. This step matters more than people think an even layer bakes more consistently and you won’t end up with a scorched edge and a cold center.
Bake Until Bubbly
I slide the dish into the oven and bake for 15-20 minutes, until the cheese on top is fully melted and just starting to bubble around the edges. If I want a deeper golden top, I’ll switch to broil for the last minute or two, watching it closely so it doesn’t burn.
Cool Slightly and Serve
I let the dip rest for about 5 minutes after pulling it out; it’s molten right out of the oven, and this short rest helps it set up just enough to scoop without running everywhere. Then it’s straight to the table with chips.
Additional Tips for Making This Recipe Better
I’ve made this dip more times than I can count, and these are the little things I’ve learned along the way:
- I always let my cream cheese sit out for at least 30 minutes before mixing. It blends so much smoother than cold cream cheese straight from the fridge.
- I shred my own cheese instead of buying pre-shredded bags, since the anti-caking coating on packaged cheese keeps it from melting as smoothly.
- When I want this dip closer to a green chile sour cream dip recipe, I bump up the sour cream slightly and skip the baking step entirely for a cold version.
- I taste my chiles before adding hot sauce, since heat levels can vary a lot from batch to batch, especially with fresh hatch peppers.
- If my dip ever turns out a bit thin, I stir in a little extra shredded cheese rather than more liquid ingredients to thicken it back up.
Common Mistakes to Avoid
- I skipped softening the cream cheese once and ended up with a lumpy dip. Give yourself the extra 20-30 minutes, it’s worth it.
- I overbaked it early on trying to get more color, and the cheese turned rubbery instead of gooey pull it the moment it’s bubbling.
- I didn’t drain my canned chiles once and the dip turned watery. I always drain excess liquid before mixing.
- I used pre-shredded cheese thinking it’d save time, but it didn’t melt evenly, freshly shredded cheese really does make a difference here.
- I added all the hot sauce at once without tasting first, and it came out spicier than my guests expected. Add it gradually.
How to Serve Hatch Chile Frozen Dip?
I love serving this dip straight out of the baking dish while it’s still warm and glossy on top, with a few extra pieces of diced hatch chile scattered over the surface for color and a hint at the heat inside. Sturdy tortilla chips, blue corn chips, or warm crusty bread all work great as dippers, and I’ll often set out some sliced bell peppers on the side for anyone avoiding gluten.
For the presentation, I like to place the baking dish on a wooden board surrounded by chips and a small bowl of extra hot sauce, so people can spice it up individually. If you’re setting up a full spread, this dip pairs really nicely alongside something like this spinach artichoke dip for guests who want a milder option next to the spicy one.

Variations
- Swap the sour cream for plain Greek yogurt if you want a lighter, higher-protein version
- Make it dairy-free by using a plant-based cream cheese and dairy-free shredded cheese blend
- Stir in cooked, crumbled chorizo or shredded chicken for a heartier, meat-lovers version
- Skip the oven completely and serve it as a green chile cheese dip cold, similar to a classic hatch green chile dip you’d find at a potluck
- Add a can of black beans for extra texture and a boost of fiber
- Mix in a spoonful of taco seasoning for a flavor closer to a creamland green chile dip recipe
Nutritional Information
Here’s a general breakdown per serving of this dip, based on an 8-serving batch:
- Calories: about 240 kcal
- Protein: about 9g
- Carbohydrates: about 3g
- Fat: about 22g
Make Ahead and Storage
You can mix this dip together up to a day ahead of time. Just cover it tightly and store it in the fridge unbaked, then pop it in the oven when you’re ready to serve, adding a few extra minutes to the bake time since it’ll be starting cold.
Leftovers keep well in an airtight container in the refrigerator for up to 4 days. To reheat, I microwave individual portions in 30-second bursts, stirring between each, until it’s warm and creamy again.
If you want to freeze it, portion the cooled, baked dip into a freezer-safe container and store for up to 2 months. Thaw it overnight in the fridge before reheating gently, since the texture can separate slightly if reheated straight from frozen.
Why You’ll Love This Recipe
This dip has earned a permanent spot in my appetizer rotation, and here’s why I think you’ll feel the same way:
- It’s incredibly fast to put together. Between the prep and the bake time, I’m usually done in under 30 minutes, which makes it one of my go-to last-minute party dishes.
- It’s easy to customize the heat. Whether you prefer it mild or want something closer to a hatch chile cheese dip trader joe’s shoppers rave about, you control the spice level completely.
- It works for a variety of diets. Since it’s naturally gluten free and keto-friendly, I can serve it to guests with different dietary needs without extra substitutions.
- The flavor tastes gourmet without gourmet effort. It reminds me of the flavor you’d get from a blue moose hatch green chile cheddar dip, but made fresh in my own kitchen.
- It reheats beautifully. I can make it ahead, and it tastes just as good the next day, which takes a lot of pressure off party prep.
If you’re a fan of loaded cheesy appetizers, I’d also point you toward a good nacho cheese sauce recipe on my site. The two make a fantastic combo on any snack table.
FAQs
Can I use frozen hatch chiles instead of fresh?
Yes, frozen roasted and diced hatch chiles work great in this recipe and are often easier to find outside of hatch chile season.
Is this similar to the hatch chile dip Costco sells?
It’s in the same family, creamy, cheesy, and chili-forward though this homemade version lets you control the heat and cheese blend yourself.
Can I make this dip without baking it?
Absolutely. Simply skip the oven step and mix everything cold for a quick green chile cheese dip cold that’s ready to serve immediately.
What’s the best cheese for melting in this dip?
Monterey Jack, pepperjack, mozzarella, and cheddar all melt smoothly and work well in this recipe, either as the main cheese or the topping.
How spicy is this dip?
It depends entirely on the heat level of your hatch chiles and how much hot sauce you add, so it can range from mild to fairly spicy based on your preference.

Hatch Chile Frozen Dip Recipe
Ingredients
Method
- I always start by preheating my oven to 350°F so it’s fully ready by the time my mixture is assembled. While it heats, I pull my cream cheese out early so it has time to soften cold cream cheese is the main reason dips turn lumpy. I also drain my diced chiles if there’s excess liquid.
- In a mixing bowl, I combine the softened cream cheese, sour cream, garlic powder, salt, and hot sauce first. I like to stir this base until it’s completely smooth before adding anything else, since it’s much harder to work out lumps once the cheese and chiles go in.
- Next, I fold in the diced hatch chiles along with the Monterey Jack and cheddar cheese. I keep the topping cheese separate at this point that gets sprinkled on right before baking so it forms a nice melty crust instead of disappearing into the mix.
- I spread the mixture evenly into my small baking dish, smoothing the top with a spatula. This step matters more than people think an even layer bakes more consistently and you won’t end up with a scorched edge and a cold center.
- I slide the dish into the oven and bake for 15-20 minutes, until the cheese on top is fully melted and just starting to bubble around the edges. If I want a deeper golden top, I’ll switch to broil for the last minute or two, watching it closely so it doesn’t burn.
- I let the dip rest for about 5 minutes after pulling it out; it’s molten right out of the oven, and this short rest helps it set up just enough to scoop without running everywhere. Then it’s straight to the table with chips.
Notes
- I always let my cream cheese sit out for at least 30 minutes before mixing. It blends so much smoother than cold cream cheese straight from the fridge.
- I shred my own cheese instead of buying pre-shredded bags, since the anti-caking coating on packaged cheese keeps it from melting as smoothly.
- When I want this dip closer to a green chile sour cream dip recipe, I bump up the sour cream slightly and skip the baking step entirely for a cold version.
- I taste my chiles before adding hot sauce, since heat levels can vary a lot from batch to batch, especially with fresh hatch peppers.
- If my dip ever turns out a bit thin, I stir in a little extra shredded cheese rather than more liquid ingredients to thicken it back up.