I still remember the first time I melted a scoop of ice cream into waffle batter just to see what would happen, and honestly, it changed my whole outlook on breakfast. The waffles came out golden, slightly sweet, and impossibly tender in the middle.
I ended up shaping a few pieces into a cone and piling on whipped cream and sprinkles just for fun. Ever since that morning, this Ice Cream Waffle Recipe has been my go-to recipe whenever I want dessert to feel socially acceptable before noon. It is quick, it is playful, and it never fails to make people smile at the table.
Ingredients
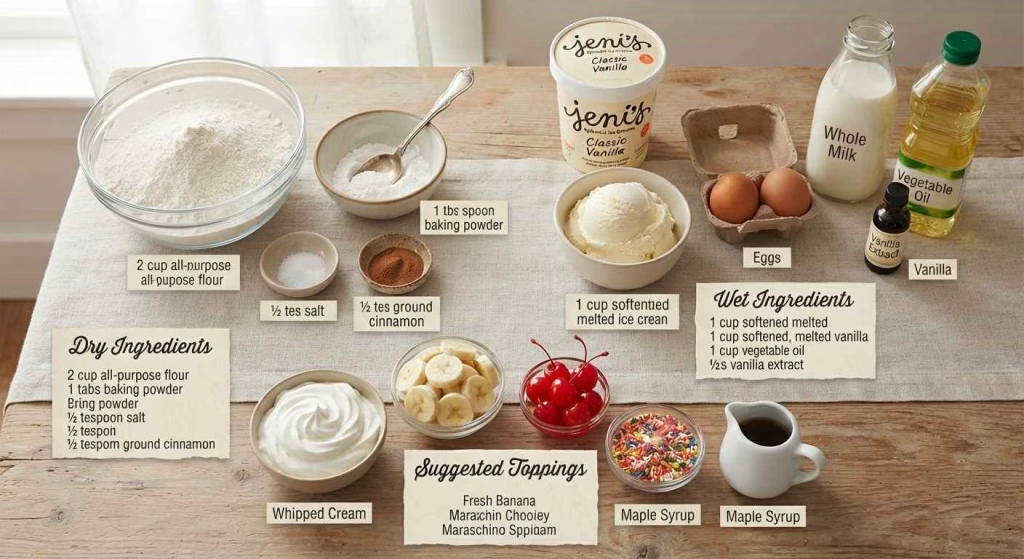
- 2 cups all-purpose flour: this is what gives the waffles their structure, so don’t swap it for a lighter flour or the batter may turn out too loose
- 1 tablespoon baking powder: this is the ingredient that makes the waffles puff up and stay light instead of dense
- ½ teaspoon salt: a small amount, but it sharpens every other flavor in the batter
- ½ teaspoon ground cinnamon: adds warmth and a cozy aroma while the waffles cook
- 1 cup melted ice cream (your favorite flavor): use a flavor with mix-ins like cookie pieces or caramel swirls for extra texture, and let it soften naturally or in short microwave bursts rather than fully liquifying it
- 2 large eggs: these bind everything together and help the waffles hold their shape
- ½ cup milk: adds moisture so the batter isn’t too thick
- ½ cup vegetable oil: keeps the finished waffles crisp on the outside
- ½ teaspoon vanilla extract: rounds out the sweetness from the ice cream
- Whipped cream, banana slices, maraschino cherries, sprinkles, and syrup for topping
Note: These amounts are enough for 4 Belgian-style waffles, which is usually enough to build 2 to 3 finished ice cream cone waffles once everything is arranged.
Variations
- Swap dairy milk and vegetable-based ice cream for a dairy-free version using oat milk and a coconut milk-based ice cream
- Use a sugar-free or reduced-sugar ice cream if you’re watching sugar intake
- Stir mini chocolate chips or crushed cookies into the batter for extra crunch
- Try a fruity ice cream flavor like strawberry or mango for a lighter, brighter twist
- Add a pinch of nutmeg along with the cinnamon for a spicier flavor profile

Cooking Time
- Prep Time: 10 minutes
- Cooking Time: 12 minutes
- Total Time: 22 minutes
Equipment You Need
- Waffle iron: cooks the batter into crisp, golden waffles
- Large mixing bowl: holds the wet ingredients while you whisk them together
- Medium mixing bowl: keeps the dry ingredients separate before combining
- Microwave-safe bowl: used to soften the ice cream before mixing it into the batter
- Whisk or spatula: blends the batter smoothly without overworking it
- Sharp knife: shapes the cooked waffles into cones and circles for serving
How to Make Ice Cream Waffles?
This section walks through the whole process from mixing to cooking. Each step is simple enough for kids to help with. Follow along and you’ll have warm waffles ready in well under half an hour.
Prepare the Dry Ingredients
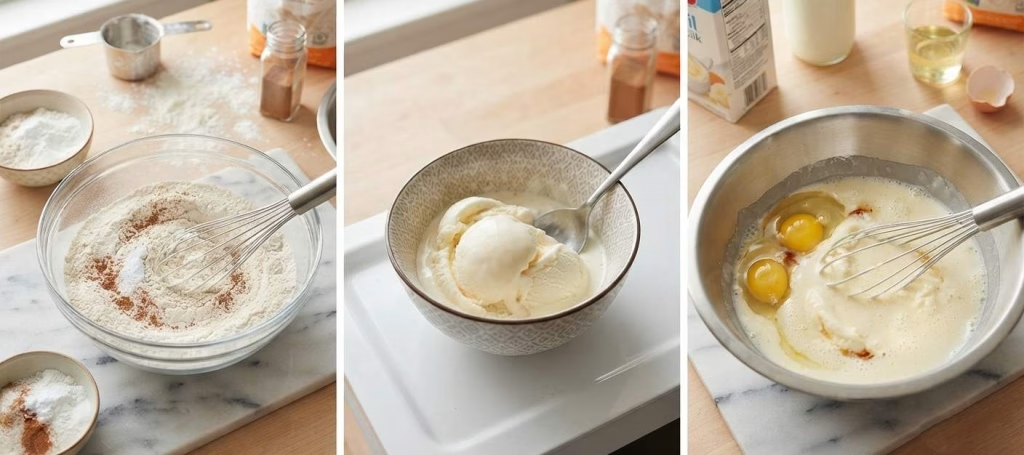
In a mixing bowl, stir together the flour, baking powder, salt, and cinnamon until fully combined. Set this bowl aside while you work on the wet ingredients. Keeping the dry mix separate at first helps everything blend evenly later.
Soften the Ice Cream
Scoop about a cup of ice cream into a microwave-safe bowl. Heat it in short bursts of 15 to 20 seconds until it turns soft and pourable but not completely melted into liquid. This gentle approach protects any mix-ins so they stay intact in the batter.
Combine the Wet Ingredients
In a larger bowl, whisk together the softened ice cream, eggs, milk, oil, and vanilla extract until smooth. The mixture should look creamy and slightly thick. This forms the flavorful base that gives the waffles their signature sweetness.
Fold in the Dry Mixture
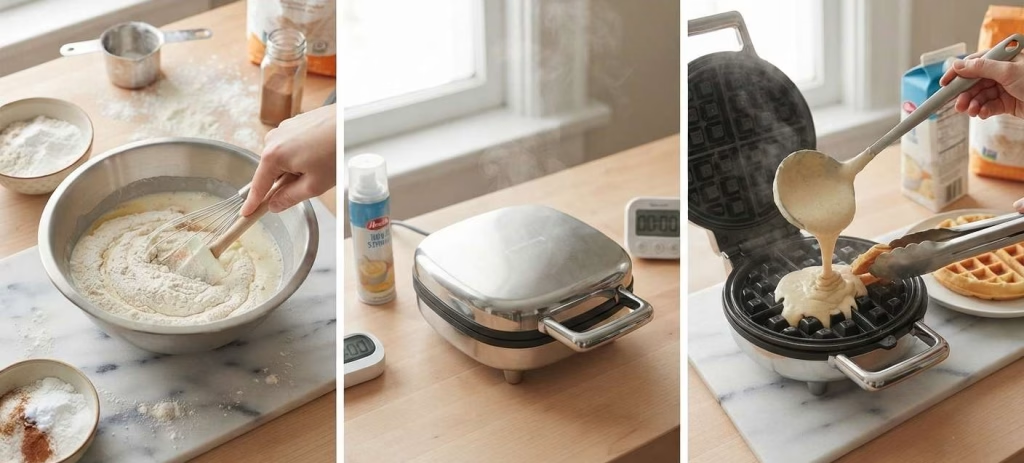
Gradually add the dry ingredients into the wet mixture, folding gently with a spatula. Stop as soon as the flour disappears into the batter. A few small lumps are completely normal and won’t affect the final texture.
Heat the Waffle Iron
Preheat your waffle iron according to its instructions, then lightly coat it with non-stick spray. A properly heated iron is what gives waffles that golden crust instead of a pale, soft exterior. Give it a few extra minutes if you’re not sure it’s fully warmed up.
Cook the Waffles
Pour about ¾ cup of batter onto the hot iron, close the lid, and cook for 3 to 4 minutes. Check for a deep golden color before removing each waffle. Repeat with the remaining batter until it’s all used up.
Shape and Assemble
Once the waffles have cooled slightly, use a knife to cut one into a cone shape and slice circles from another. Arrange the pieces on a plate to resemble an ice cream cone.
Top with whipped cream, banana slices, sprinkles, a scoop of ice cream, and a cherry. If you’re planning a complete Mediterranean-inspired meal later in the day, Grilled Lamb Kofta with Cucumber Mint Yogurt Recipe makes a flavorful savory option to balance out this sweet treat.
Additional Tips for Making This Recipe Better
- I always leave any softened mix-in chunks right in the batter instead of scooping them out, since they melt in beautifully while cooking
- I found that overmixing the batter makes the waffles tougher, so I stop stirring the moment the flour is incorporated
- I like to test my waffle iron’s timing with one waffle first, since every model runs a little differently
- I always spray the iron again between waffles if I notice any sticking, especially with a sweeter batter like this one
- I keep finished waffles warm in a low oven while I cook the rest of the batch, so nothing gets cold before serving
How to Serve Ice Cream Waffles?
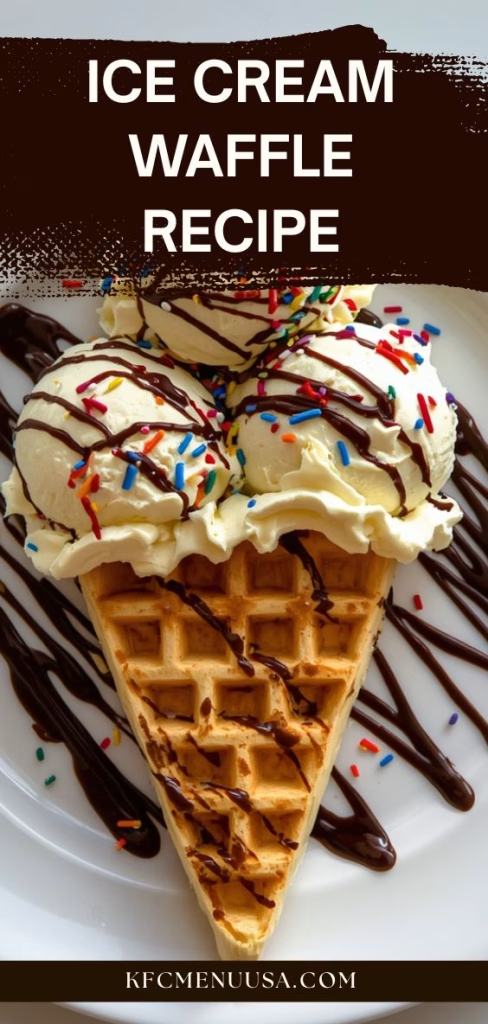
Serving these waffles is where the fun really happens. I like arranging the pieces so the plate looks like an actual ice cream cone, with the triangular piece as the base and the circular pieces stacked to look like scoops.
A drizzle of syrup or chocolate sauce right before serving adds shine and makes the plate look bakery-worthy. Finish with a few extra sprinkles scattered around the plate for a festive, colorful presentation that photographs well too. For a hearty family dinner before dessert, Classic Eggplant Moussaka with Bechamel Recipe fits naturally into the same homemade menu.
Nutritional Information
Here’s a general look at what one serving of these waffles provides, though exact numbers will shift depending on the ice cream flavor and toppings you choose.
- Calories: approximately 380 per serving
- Protein: approximately 12g per serving
- Carbohydrates: approximately 65g per serving
- Fat: approximately 8g per serving
Make Ahead and Storage
You can make the batter up to a day ahead and store it covered in the fridge, though it’s best whisked again briefly before cooking since it may thicken slightly overnight.
Cooked waffles keep well in an airtight container in the refrigerator for up to 3 days, making them a convenient make-ahead breakfast or snack option.
For longer storage, freeze cooled waffles in a single layer before transferring them to a freezer bag, where they’ll keep for up to 2 months without losing quality.
To reheat, pop frozen or refrigerated waffles into a toaster or a 350°F oven for a few minutes until warmed through and crisp again on the edges.
Why You’ll Love This Recipe
This recipe brings something a little different to the table, and here’s why it’s worth adding to your regular rotation.
- It’s incredibly easy to put together, since the batter comes together in one bowl with basic pantry staples
- It’s endlessly customizable, letting you swap in whatever ice cream flavor or topping combination sounds good that day
- It works for both breakfast and dessert, so you get more mileage out of one simple recipe
- It’s a fun, hands-on activity for kids, who love helping shape the waffles into cones
- It turns an everyday breakfast into something that feels like a celebration, without requiring much extra effort

Ice Cream Waffle Recipe
Ingredients
Method
- In a mixing bowl, stir together the flour, baking powder, salt, and cinnamon until fully combined. Set this bowl aside while you work on the wet ingredients. Keeping the dry mix separate at first helps everything blend evenly later.
- Scoop about a cup of ice cream into a microwave-safe bowl. Heat it in short bursts of 15 to 20 seconds until it turns soft and pourable but not completely melted into liquid. This gentle approach protects any mix-ins so they stay intact in the batter.
- In a larger bowl, whisk together the softened ice cream, eggs, milk, oil, and vanilla extract until smooth. The mixture should look creamy and slightly thick. This forms the flavorful base that gives the waffles their signature sweetness.
- Gradually add the dry ingredients into the wet mixture, folding gently with a spatula. Stop as soon as the flour disappears into the batter. A few small lumps are completely normal and won’t affect the final texture.
- Preheat your waffle iron according to its instructions, then lightly coat it with non-stick spray. A properly heated iron is what gives waffles that golden crust instead of a pale, soft exterior. Give it a few extra minutes if you’re not sure it’s fully warmed up.
- Pour about ¾ cup of batter onto the hot iron, close the lid, and cook for 3 to 4 minutes. Check for a deep golden color before removing each waffle. Repeat with the remaining batter until it’s all used up.
- Once the waffles have cooled slightly, use a knife to cut one into a cone shape and slice circles from another. Arrange the pieces on a plate to resemble an ice cream cone. Top with whipped cream, banana slices, sprinkles, a scoop of ice cream, and a cherry.
Notes
- I always leave any softened mix-in chunks right in the batter instead of scooping them out, since they melt in beautifully while cooking
- I found that overmixing the batter makes the waffles tougher, so I stop stirring the moment the flour is incorporated
- I like to test my waffle iron’s timing with one waffle first, since every model runs a little differently
- I always spray the iron again between waffles if I notice any sticking, especially with a sweeter batter like this one
- I keep finished waffles warm in a low oven while I cook the rest of the batch, so nothing gets cold before serving