Meltaway Brownie Cookies Recipe: A Deliciously Simple Treat
I can’t even begin to explain how much I love these meltaway brownie cookies. The first time I made them, I honestly couldn’t stop at just one — they were so soft, chocolaty, and rich, almost like biting into a fudgy brownie but in cookie form.
I love how easy they are to make, and the fact that they use simple pantry staples makes them even better. When they come out of the oven, rolled in that pretty powdered sugar, they look so festive and irresistible.
Trust me, once you bake these, you’ll understand why they’ve become one of my go-to desserts for cozy evenings and special gatherings.

Ingredients
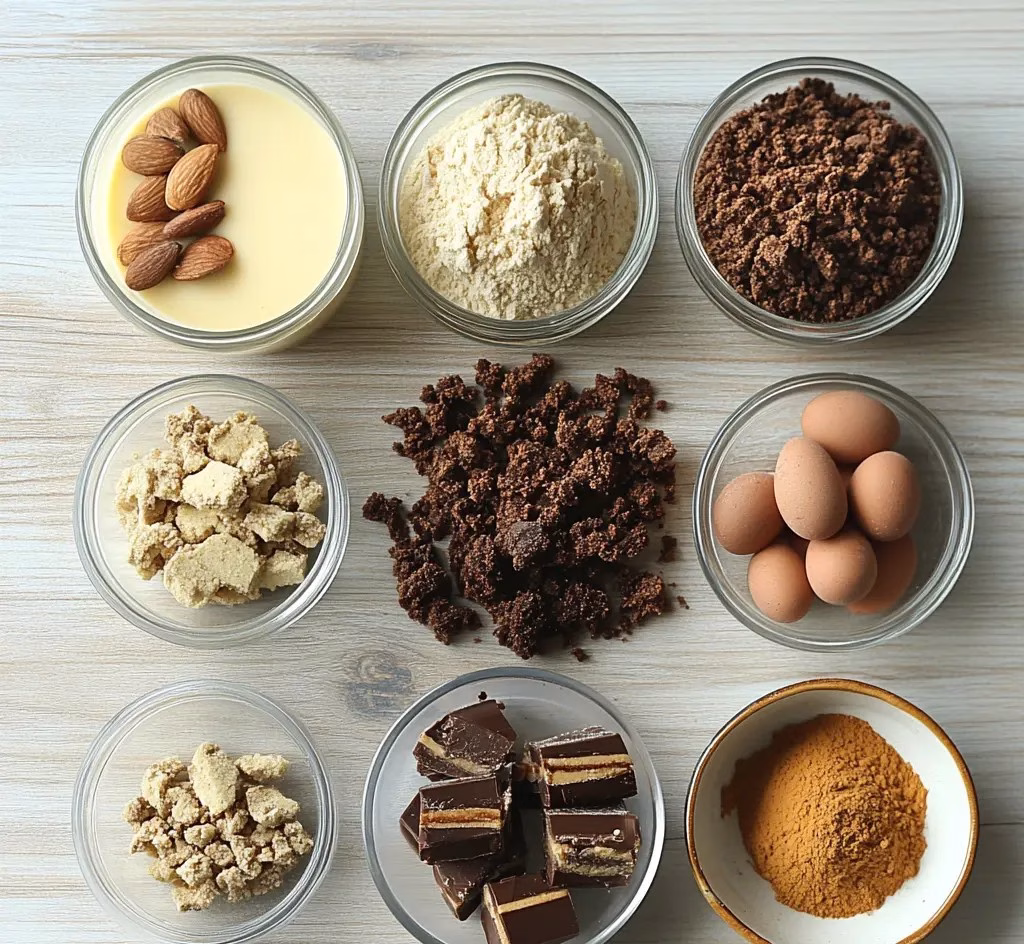
Here’s everything you’ll need to whip up these gooey, chocolate-packed cookies. I’ve added little notes to help you get the best results.
- 1 cup all-purpose flour – regular flour works best, but a 1:1 gluten-free flour also does the job well.
- 1/3 cup unsweetened cocoa powder – go for a high-quality cocoa to get a deep, rich flavor.
- 1 teaspoon baking powder – gives the cookies their little lift.
- 1/2 teaspoon salt – balances the sweetness and enhances chocolate flavor.
- 1/2 cup unsalted butter, softened – room-temperature butter blends smoothly with sugar for the right texture.
- 3/4 cup granulated sugar – gives sweetness and structure.
- 1/4 cup light brown sugar – adds moisture and a subtle caramel depth.
- 1 large egg – binds the dough and adds richness.
- 1 teaspoon vanilla extract – pure vanilla adds the best aroma.
- 1/2 cup powdered sugar – for rolling the dough balls, giving the cookies their signature “meltaway” look.
- Optional add-ins:
1/2 cup chocolate chips or chunks – for extra gooey bites.
1/2 cup chopped walnuts or pecans – adds a crunchy surprise if you like nuts in cookies.
Note: This recipe makes about 24 cookies, perfect for several servings to share.
Variations
I love how flexible this recipe is — you can tweak it based on your preferences.
- Dairy-free version: Use plant-based butter and dairy-free chocolate chips.
- Sugar-free version: Replace sugar with a baking-friendly sweetener like stevia or monk fruit.
- Flavor twist: Add espresso powder for a mocha kick or a pinch of cinnamon for warmth.
- Healthier option: Swap half the butter for unsweetened applesauce.
Cooking Time
Here’s exactly how long you’ll need:
- Prep Time: 15 minutes
- Chill Time: 30 minutes
- Cook Time: 10–12 minutes
- Total Time: About 1 hour
Equipment You Need
Gathering the right tools makes baking stress-free. Here’s what I use:
- Mixing bowls – one large for wet ingredients, one medium for dry.
- Hand mixer or stand mixer – for creaming butter and sugar to perfection.
- Measuring cups and spoons – accuracy is key for good cookies.
- Sifter – makes flour and cocoa silky smooth.
- Cookie scoop or tablespoon – keeps cookies even-sized.
- Parchment paper or silicone baking mat – no sticking, no mess.
- Baking tray – sturdy enough for even baking.
- Wire rack – cools cookies without making them soggy.
How to Make Meltaway Brownie Cookies Recipe?
Baking these cookies is straightforward, but a little patience with the chilling step makes them perfect. Here’s how I make them:
Step 1: Prepare the Dry Mix
I start by preheating the oven to 350°F (175°C) and lining my baking tray with parchment paper. Then I sift together the flour, cocoa powder, baking powder, and salt into a medium bowl. This step ensures the mixture is lump-free and smooth, which really helps with the final texture.
Step 2: Cream the Butter and Sugars
In a larger bowl, I cream together the softened butter, granulated sugar, and brown sugar with my mixer until the mixture is light and fluffy. This usually takes about 2–3 minutes. Once it’s airy, I add the egg and vanilla extract and beat again until everything is well combined.
Step 3: Combine the Dough
Next, I slowly add the dry mix into the wet mix. I keep my mixer on low and stop just as the dough comes together — overmixing can make cookies tough. At this point, I sometimes fold in chocolate chips or nuts for extra texture.
Step 4: Chill the Dough
This step is important! I cover the bowl with plastic wrap and let it chill in the fridge for 30 minutes. If I’m in a rush, I pop it into the freezer for about 15 minutes. Chilling keeps the cookies from spreading too much while baking.
Step 5: Shape and Bake
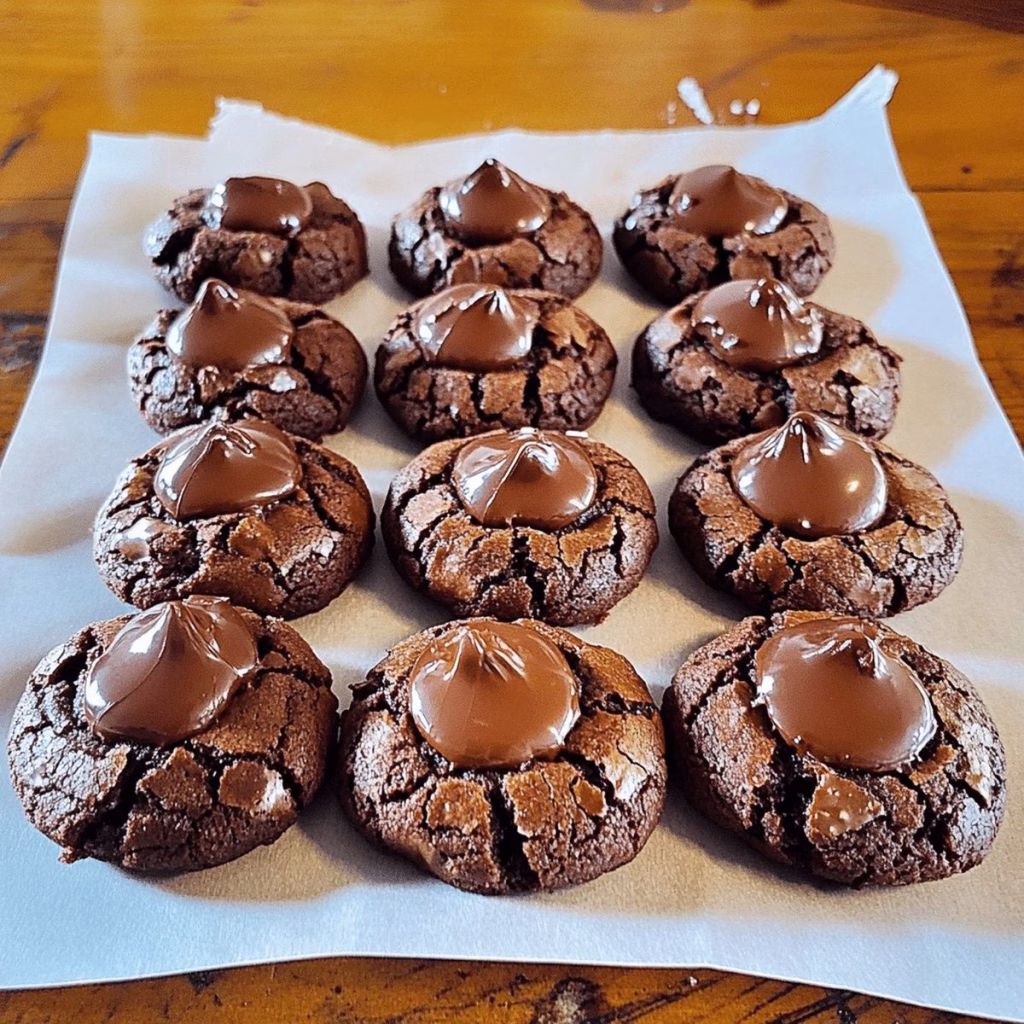
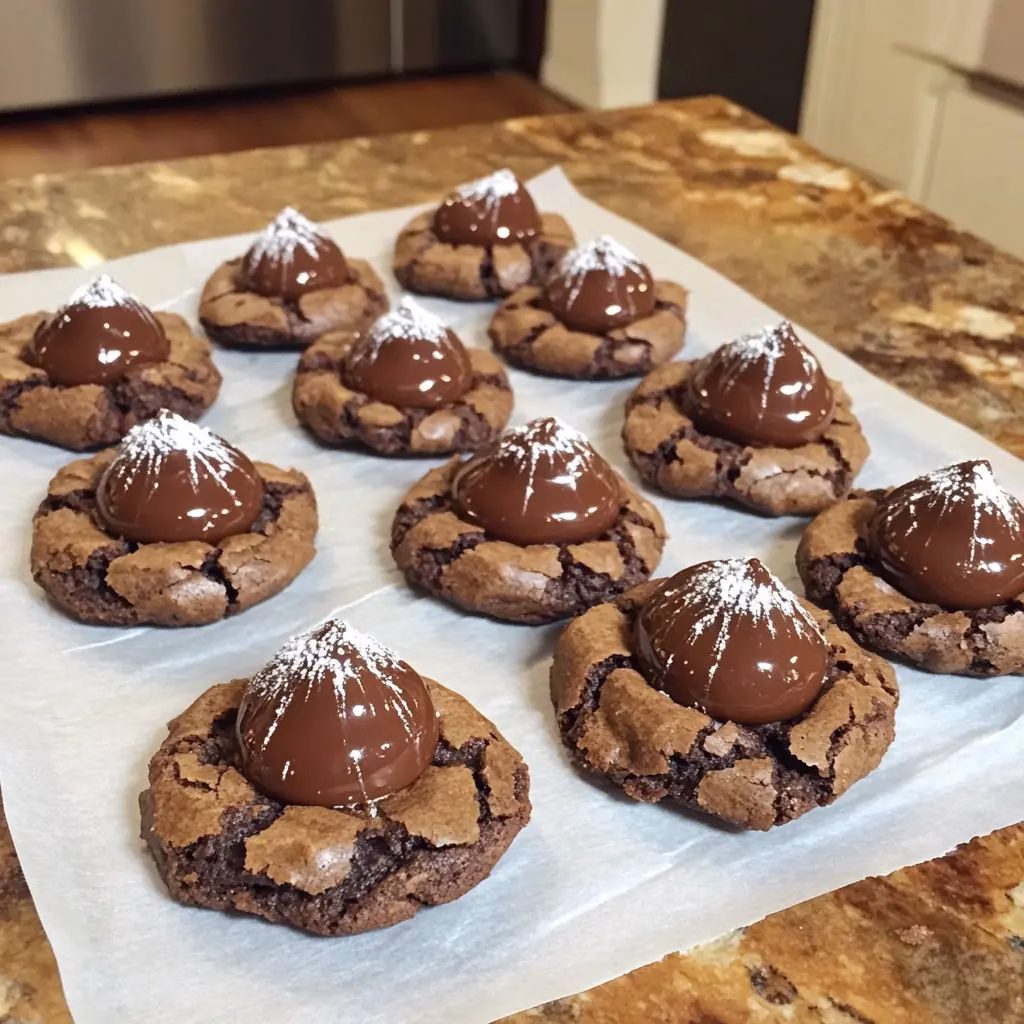
Once the dough is firm, I scoop out small portions (about a tablespoon each) and roll them into balls. Then I coat each one generously in powdered sugar before placing them on the prepared tray, spaced about 2 inches apart. They bake for 10–12 minutes, just until the edges are set and the centers look soft.
Step 6: Cool and Enjoy
I let the cookies rest on the tray for about 5 minutes before moving them to a wire rack to cool completely. Honestly, I usually can’t resist trying one while it’s still warm — the gooey center is irresistible!
Additional Tips for Making this Recipe Better
Every time I bake these cookies, I pick up a few tricks. Here are my best ones:
- I always chill the dough — it keeps the cookies thick and soft.
- I take them out of the oven even if they look slightly underdone; they set as they cool.
- I like to double-coat the dough balls in powdered sugar for extra snowy cookies.
- If I’m gifting them, I place them in a clear bag with a ribbon — they look so pretty!
How to Serve Meltaway Brownie Cookies Recipe?
Presentation can make these cookies even more special. I love serving them on a rustic wooden board with a dusting of cocoa powder for a café-style feel. For parties, I add them to a dessert platter alongside fresh berries and other cookies. If I’m serving them at home, I pair them with a big mug of coffee or hot chocolate. And for an indulgent twist, I sandwich a scoop of vanilla ice cream between two cookies — it’s heavenly!
Nutritional Information
Here’s the estimated nutrition per cookie (based on 24 cookies):
- Calories: 110
- Protein: 1.5 g
- Carbohydrates: 14 g
- Fat: 5 g
Make Ahead and Storage
Room Temperature: I store them in an airtight container for up to 5 days — they stay soft and fudgy.
Freezing the Dough: I roll the dough into balls, coat them in powdered sugar, and freeze on a tray. Once solid, I transfer them to a freezer bag. They bake beautifully straight from frozen.
Freezing Baked Cookies: If I bake them ahead, I store them in the freezer in an airtight container for up to 3 months. A quick 10-second microwave reheat brings back that gooey center.
Why You’ll Love This Recipe?
There are so many reasons I keep coming back to these cookies. Here are my top ones:
- They’re incredibly easy to make, even if you’re new to baking.
- The texture is soft, chewy, and fudgy — just like brownies in cookie form.
- You can customize them with nuts, extra chocolate, or flavor twists.
- They’re perfect for holidays, gifting, or just cozy nights at home.
- They look beautiful with their powdered sugar coating, no fancy decorating needed.