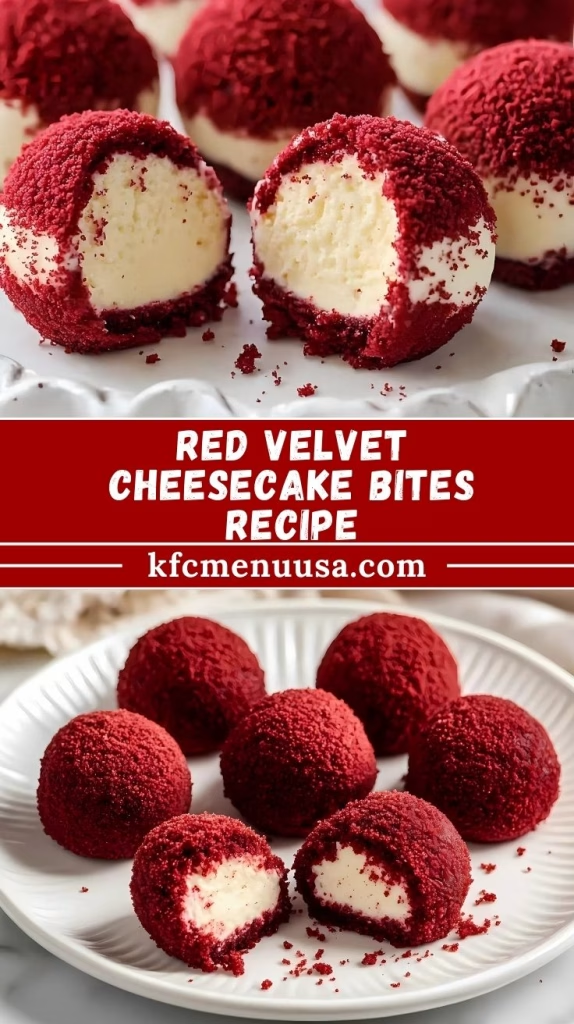
Red Velvet Cheesecake Bites Recipe: Sweet & Decadent Dish
I made these Red Velvet Cheesecake Bites the other day, and honestly, they were a huge hit! I love how the velvety cake pairs perfectly with the smooth cheesecake swirl—it feels fancy but doesn’t take forever to make.
These little bites are just the right size for parties, holidays, or even when I just want a small indulgence.
I was surprised at how easy the steps were once I got started. If you’re looking for something impressive yet simple, this is definitely the recipe to try!
Ingredients
Here’s what I used and why it works best:
For the Red Velvet Layer
- 1 cup all-purpose flour (use almond flour if you want it gluten-free—it changes the texture slightly but still works!)
- 1/4 cup cocoa powder (unsweetened is best for that deep, real chocolate flavor)
- 1/2 cup granulated sugar (keeps the batter balanced in sweetness)
- 1/2 cup buttermilk (skip the store-bought if needed—just mix milk with vinegar or lemon juice)
- 1/4 cup unsalted butter, melted (adds richness without overpowering)
- 1 large egg (gives structure and moisture)
- 1 teaspoon red food coloring (I like using natural beetroot-based dye when I can)
- 1 teaspoon vanilla extract (rounds out the flavor)
- 1/2 teaspoon baking powder (helps the bites rise slightly)
- 1/4 teaspoon salt (balances sweetness and enhances flavor)
For the Cheesecake Filling
- 8 oz cream cheese, softened (room temp makes it super creamy)
- 1/4 cup granulated sugar (keeps the cheesecake filling sweet but not overwhelming)
- 1 large egg yolk (adds smooth texture)
- 1 teaspoon vanilla extract (brings out that classic cheesecake taste)
Optional Toppings
- Whipped cream or frosting (for an extra touch of indulgence)
- Sprinkles or crushed cookies (perfect for presentation)
Note: Makes about 24 bite-sized servings.
Variations
You can easily switch things up depending on your preferences:
- Dairy-Free: Use vegan cream cheese and plant-based milk in place of dairy.
- Gluten-Free: Almond or coconut flour works instead of all-purpose flour.
- Sugar-Free: Sweeten with monk fruit, stevia, or another sugar substitute.
- Extra Flavor: Add mini chocolate chips, chopped nuts, or even a raspberry swirl for something fun.
Cooking Time
Here’s how long it takes me to get these ready:
- Prep Time: 25 minutes
- Cooking Time: 20–25 minutes
- Cooling/Chilling Time: 1–2 hours
- Total Time: About 2.5 to 3 hours
Equipment You Need
- Mixing bowls – For combining the batter and cheesecake filling.
- Hand mixer or stand mixer – Makes the cheesecake filling super smooth.
- Measuring cups and spoons – Accuracy is key in baking!
- Rubber spatula – Great for folding and scraping every last bit of batter.
- Muffin tin or mini-cupcake pan – Shapes the bites into perfect portions.
- Cupcake liners – Prevents sticking and makes cleanup easy.
- Cooling rack – Helps cool them evenly after baking.
- Piping bag (optional) – If you want a fancy swirl or frosting touch.
How to Make Red Velvet Cheesecake Bites?
Preheat the Oven
I start by heating the oven to 350°F (175°C). Then, I line my muffin tin with cupcake liners to keep things neat and easy to remove later.
Prepare the Red Velvet Layer
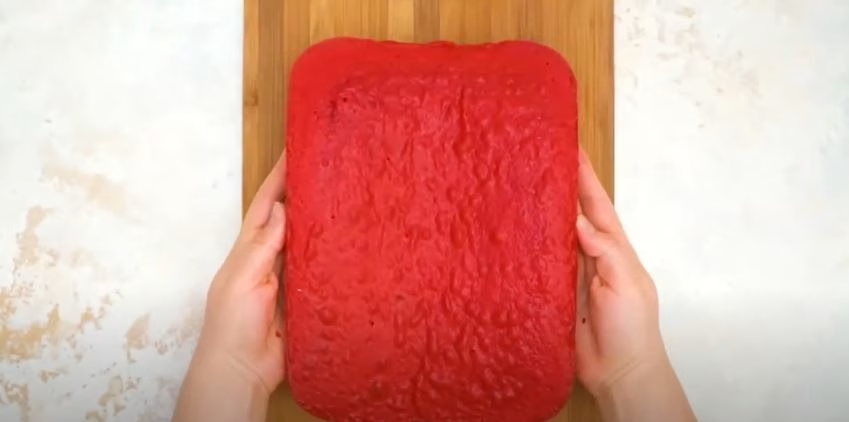
In one bowl, I whisk together the flour, cocoa powder, baking powder, and salt. In another, I mix melted butter, sugar, and vanilla until smooth, then add in the egg. Slowly, I combine the wet and dry ingredients, alternating with the buttermilk, until I have a lump-free batter.
Make the Cheesecake Filling
With my mixer, I beat the softened cream cheese until silky. Then, I add sugar, vanilla, and the egg yolk, mixing until creamy. This filling should look smooth and shiny before using.

Layer the Batter
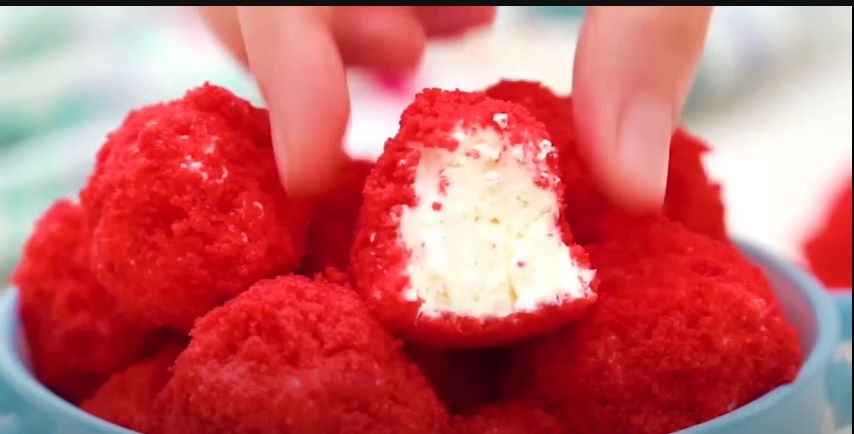
I spoon just enough red velvet batter to fill about one-third of each cupcake liner. Then, I add a small scoop of cheesecake filling on top and swirl gently with a toothpick if I want a marbled effect.
Bake
I place the muffin tin into the oven and bake for about 20–25 minutes. The cheesecake should still have a slight wobble in the center when done—that’s the secret to a creamy bite.
Cool and Chill
After baking, I let them cool on a rack for 20 minutes. Then, I transfer them to the fridge to chill for at least 1–2 hours before serving. Trust me, the chilling makes all the difference in texture!
Additional Tips for Making this Recipe Better
From my experience, these small tweaks really help:
- Don’t overbake—I pull them out as soon as the cheesecake layer jiggles slightly.
- I prefer natural red food dye—it’s healthier and still gives a lovely color.
- A little swirl with a toothpick makes them look bakery-worthy without effort.
- I like to add mini chocolate chips to the red velvet batter for extra richness.
How to Serve Red Velvet Cheesecake Bites?
These bites look amazing on a platter! I sometimes pipe whipped cream on top and sprinkle crushed cookies or colorful sprinkles for a festive vibe.
Fresh berries like strawberries or raspberries also pair beautifully with the richness. And honestly, they go so well with coffee or tea—it makes them feel like a café-style treat at home.

Nutritional Information
Each bite is small but satisfying. Here’s the approximate breakdown per piece (based on 24 bites):
- Calories: 120
- Protein: 2g
- Carbohydrates: 10g
- Fat: 8g
Make Ahead and Storage
Refrigeration
I store mine in an airtight container in the fridge, and they stay fresh for up to 5 days.
Freezing
I wrap each bite individually, then place them in a freezer-safe bag. They keep well for about 2 months. I just thaw them overnight in the fridge before serving.
Restoring
If they feel too firm after refrigeration, I leave them at room temp for 10 minutes before serving so they’re perfectly soft.
Why You’ll Love This Recipe?
These cheesecake bites are such a win, and here’s why:
- They’re easy to make but look super impressive.
- Perfect for parties, holidays, or just a little indulgence.
- Easily customizable with gluten-free, sugar-free, or dairy-free swaps.
- The red velvet and cheesecake combo is simply irresistible.
- They store well, so you can make them ahead without stress.
Red Velvet Cheesecake Bites Recipe
Ingredients
Method
- I start by heating the oven to 350°F (175°C). Then, I line my muffin tin with cupcake liners to keep things neat and easy to remove later.
- In one bowl, I whisk together the flour, cocoa powder, baking powder, and salt. In another, I mix melted butter, sugar, and vanilla until smooth, then add in the egg. Slowly, I combine the wet and dry ingredients, alternating with the buttermilk, until I have a lump-free batter.
- With my mixer, I beat the softened cream cheese until silky. Then, I add sugar, vanilla, and the egg yolk, mixing until creamy. This filling should look smooth and shiny before using.
- I spoon just enough red velvet batter to fill about one-third of each cupcake liner. Then, I add a small scoop of cheesecake filling on top and swirl gently with a toothpick if I want a marbled effect.
- I place the muffin tin into the oven and bake for about 20–25 minutes. The cheesecake should still have a slight wobble in the center when done—that’s the secret to a creamy bite.
- After baking, I let them cool on a rack for 20 minutes. Then, I transfer them to the fridge to chill for at least 1–2 hours before serving. Trust me, the chilling makes all the difference in texture!
Notes
- Don’t overbake—I pull them out as soon as the cheesecake layer jiggles slightly.
- I prefer natural red food dye—it’s healthier and still gives a lovely color.
- A little swirl with a toothpick makes them look bakery-worthy without effort.