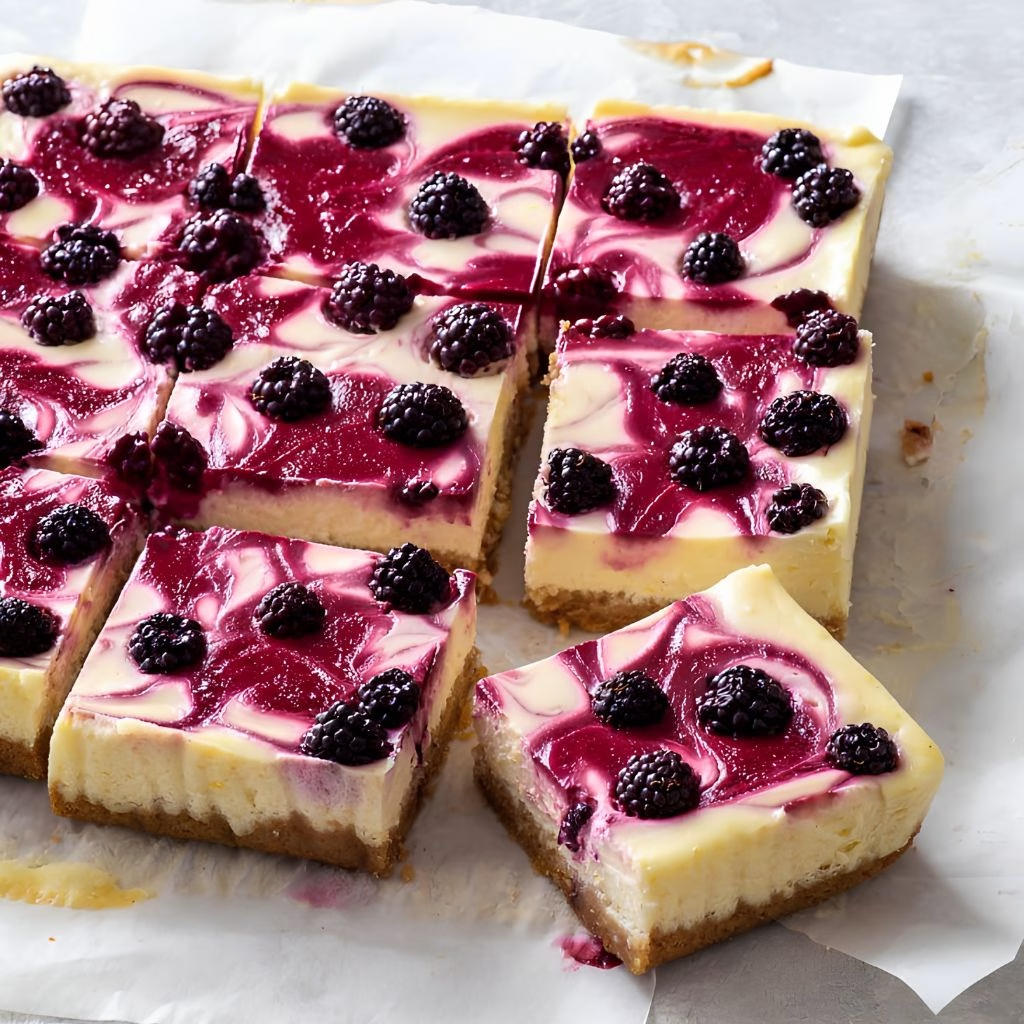
I still remember the first time I pulled this Blackberry Cheesecake Bars Recipe out of the oven the swirls looked almost too pretty to cut into. I made them on a whim one lazy weekend when I had a bowl of blackberries staring at me from the counter, and honestly, they turned out better than I expected.
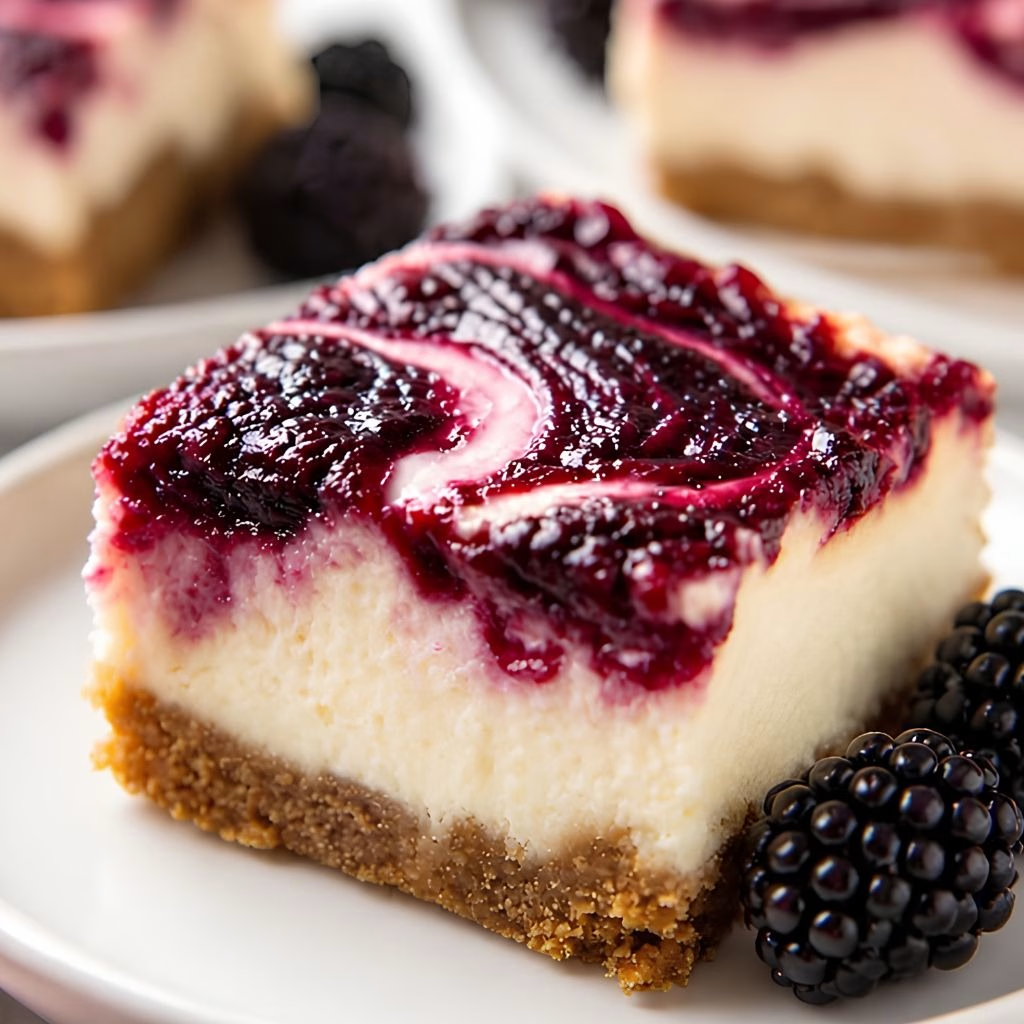
The filling is silky and light, not heavy like plain cream cheese, and the tangy blackberry ribbon running through it makes every bite feel fancy. If you’ve ever been nervous about cheesecake cracking on you, stick with me.
I’m sharing exactly how I keep mine smooth every single time, no water bath required. If you enjoy comforting recipes that bring together rich flavors and a homemade feel, you might also enjoy Gospel Shank with Smoked Gouda Grits.
Cooking Time
- Prep Time: 30 minutes
- Cook/Bake Time: 40 minutes
- Total Time: 1 hour 10 minutes (plus at least 1 hour chilling, overnight is best)
Ingredients
For the blackberry swirl:
- 1 1/2 cups fresh or frozen blackberries — this gets cooked down into a thick reduction for the swirl.
For the crust:
- 1 1/2 cups crushed digestive biscuits or graham crackers — the buttery base that holds everything together.
- 1/3 cup unsalted butter, melted — binds the crumbs; add it slowly so the mixture doesn’t turn greasy.
For the cheesecake filling:
- 1 3/4 cups full-fat cream cheese, room temperature — cold cream cheese leaves lumps, so let it soften first.
- 1/3 cup full-fat plain or Greek yogurt, room temperature — adds tang and keeps the filling light instead of dense.
- 1/2 cup caster or superfine sugar — dissolves smoothly for a silky texture.
- 1 1/2 tablespoons cornstarch — helps the filling set without needing a water bath.
- 2 large eggs, room temperature — cold eggs can seize the batter, so don’t skip bringing them to temperature.
- 1/2 tablespoon lemon juice — brightens the flavor and balances the sweetness.
- 1/2 teaspoon vanilla bean paste or 1 teaspoon vanilla extract — gives the filling that warm, aromatic base note.
- Zest of 1 lemon — the real flavor booster here, don’t be shy with it.
For topping:
- 1/2 cup fresh blackberries — dot these on top before baking for pops of color and juicy bursts.
Note: This recipe makes 9 generous bars, perfect for a small gathering or a week of treating yourself.
Equipment You Need
- 8-inch square baking pan — holds the crust and filling in an even, sliceable layer.
- Parchment paper — lines the pan so the bars lift out cleanly.
- Small saucepan — for cooking down the blackberries into a reduction.
- Fine mesh sieve — strains out the seeds and skins from the reduction.
- Large mixing bowl and whisk — for mixing the cheesecake filling by hand.
- Toothpick or skewer — swirls the blackberry mixture into the filling.
- Measuring cups and spoons — keeps your ratios accurate for a smooth bake.
How to Make Blackberry Cheesecake Bars Recipe?
Making these bars isn’t complicated, it just takes a little patience through a few short stages. I promise none of the steps are tricky, even if you’ve never baked a cheesecake before. Here’s exactly how I put mine together from start to finish.
Cook the Blackberry Reduction
Add the blackberries to a small saucepan and cook on medium-high heat until they release their juice and start breaking down. Push the mixture through a sieve to remove seeds and skin, then return the juice to the pan and simmer until it thickens into a syrupy consistency. Let it cool completely before using, since a warm reduction will melt into the filling instead of swirling on top.
Press and Bake the Crust
Preheat your oven to 355ºF (180ºC) and line your pan with parchment paper. Mix the crushed biscuits with melted butter until it looks like wet sand, then press it firmly into an even layer using the bottom of a glass. Bake for 10 minutes, then set it aside to cool slightly while you make the filling.
Mix the Cheesecake Filling
Lower the oven to 285ºF (140ºC). In a large bowl, mix the softened cream cheese and yogurt together using a whisk, stirring gently rather than beating air into it. Add the sugar and cornstarch, then the eggs one at a time, mixing just until each is incorporated and smooth.
Flavor and Combine
Stir in the lemon juice, vanilla, and lemon zest until the filling is silky and well combined. Take out about 1 1/2 tablespoons of this filling and mix it into the cooled blackberry reduction — this keeps the swirl sitting on top instead of sinking. Pour the rest of the filling over the cooled crust and smooth it into an even layer.
Swirl and Assemble
Spoon the blackberry mixture over the cheesecake filling in small dollops, then drag a toothpick through it to create swirls. Go easy here, since over-swirling blends the colors together instead of keeping those pretty ribbons distinct. Scatter the fresh blackberries evenly across the top before it goes into the oven.
Bake Low and Slow
Bake at 285ºF (140ºC) for 30-35 minutes, until the edges look set and lightly golden but the center still has a gentle wobble. Turn the oven off and leave the door slightly open, letting the bars cool gradually inside for about an hour to prevent cracking.
Chill Before Serving
Once the bars reach room temperature, transfer them to the fridge for at least an hour, though overnight gives you the best flavor and texture. Chilling firms everything up so you get clean, neat slices when it’s time to cut and serve.
Additional Tips for Making This Recipe Better
I’ve made these bars enough times now to know exactly what makes them turn out right. Here’s what I always keep in mind:
- I always set out my cream cheese, yogurt, and eggs a good hour before I start, since cold ingredients are the main reason batters turn lumpy.
- I never use a hand mixer for this filling it whips in too much air, and that’s usually what causes cracks.
- I like using a metal pan over glass, since I find it bakes more evenly and cools faster too.
- I let my crust cool for a few minutes before pouring in the filling, otherwise the butter can make the base soggy.
- I trust the wobble test over the clock if the middle still jiggles slightly when I nudge the pan, I know it’s ready to come out.
Common Mistakes to Avoid
- I once rushed the chilling step and my bars fell apart when I sliced them, so now I always give them at least an hour, ideally overnight.
- I used to over-swirl the blackberry mixture thinking more was better, but a few gentle strokes give you those clean, defined ribbons.
- I learned the hard way that skipping the sieve leaves gritty seeds in every bite, so I never skip straining the reduction.
- I overbaked mine early on trying to get a fully set center, and it turned dry — pulling it out while slightly wobbly is exactly right.
- I tried using cold cream cheese straight from the fridge once, and my filling stayed lumpy no matter how long I mixed it.
How to Serve Blackberry Cheesecake Bars?
I like cutting these into neat squares with a warm, clean knife, wiping the blade between each slice for sharp edges. A few extra fresh blackberries and a light dusting of powdered sugar on top makes them look bakery-worthy in seconds.
For an extra touch, I sometimes add a small mint leaf beside each bar or a light drizzle of the leftover blackberry reduction across the plate. They’re lovely served slightly chilled alongside coffee or a glass of dessert wine for a relaxed evening treat, especially after a savory meal such as Mediterranean Lemon Chicken with Artichokes & Olives.
Variations
- Swap the blackberries for raspberries or blueberries if that’s what you have on hand or prefer.
- Use a gluten-free biscuit or cookie for the crust to make the whole recipe gluten-free.
- Try a ginger biscuit or shortbread crust for a slightly spiced or buttery twist on the base.
- Replace the yogurt with sour cream for an even richer, tangier filling.
- Reduce the sugar slightly and use a sugar substitute if you’re watching your sugar intake.
- Use dairy-free cream cheese and yogurt alternatives to make the bars dairy-free.
Nutritional Information
Here’s a rough estimate per bar, based on 9 servings from the recipe:
- Calories: approximately 220-250 kcal
- Protein: approximately 4-5 g
- Carbohydrates: approximately 20-22 g
- Fat: approximately 14-16 g
Make Ahead and Storage
You can make the crust and blackberry reduction a day in advance and store them separately in the fridge until you’re ready to assemble and bake. This helps break up the work if you’re short on time the day you plan to serve them.
These bars keep well in an airtight container in the fridge for 3-4 days, and honestly, they taste even better on day two once the flavors have settled. I don’t recommend microwaving them, since that ruins the texture; just let them sit at room temperature for 10-15 minutes before serving if you prefer them less cold.
For longer storage, wrap individual bars tightly in plastic wrap and freeze for up to a month. Thaw them overnight in the fridge for the best texture when you’re ready to enjoy one.
Why You’ll Love This Recipe?
There are so many reasons these bars have become a regular in my kitchen. Here’s what makes them worth making again and again:
- No water bath needed: I skip the messy water bath entirely and still get a smooth, crack-free filling every time.
- Easy to make ahead: Since they need to chill anyway, they’re perfect for prepping a day before a get-together.
- Naturally adaptable: I’ve swapped the fruit and crust more times than I can count, and they always turn out great.
- Stunning presentation: The swirled top looks impressive with barely any extra effort on my part.
- Balanced flavor: The tangy lemon and juicy blackberries keep them from ever feeling too sweet or heavy.
FAQs
Are these similar to blackberry cheesecake bars pioneer woman style?
They’re similar in spirit but this version leans lighter, with more lemon zest and a low-bake method that skips the water bath entirely.
Can I make a no-bake blackberry cheesecake bars version instead?
Yes, you can set the filling with gelatin and skip the oven, though the texture will be softer and less firm than the baked version.
What makes this the best blackberry cheesecake recipe to try?
The combination of a crack-free baking method, bright lemon flavor, and a real blackberry reduction sets it apart from most versions.
Can I use Philadelphia cream cheese for this blackberry cheesecake?
Absolutely, Philadelphia works perfectly here and is actually what I use most often for the smoothest filling.
Can I turn this into blueberry cheesecake bars instead?
Yes, simply swap the blackberries for blueberries in both the reduction and the topping, using the same quantities.

Blackberry Cheesecake Bars Recipe
Ingredients
Method
- Add the blackberries to a small saucepan and cook on medium-high heat until they release their juice and start breaking down. Push the mixture through a sieve to remove seeds and skin, then return the juice to the pan and simmer until it thickens into a syrupy consistency. Let it cool completely before using, since a warm reduction will melt into the filling instead of swirling on top.
- Preheat your oven to 355ºF (180ºC) and line your pan with parchment paper. Mix the crushed biscuits with melted butter until it looks like wet sand, then press it firmly into an even layer using the bottom of a glass. Bake for 10 minutes, then set it aside to cool slightly while you make the filling.
- Lower the oven to 285ºF (140ºC). In a large bowl, mix the softened cream cheese and yogurt together using a whisk, stirring gently rather than beating air into it. Add the sugar and cornstarch, then the eggs one at a time, mixing just until each is incorporated and smooth.
- Stir in the lemon juice, vanilla, and lemon zest until the filling is silky and well combined. Take out about 1 1/2 tablespoons of this filling and mix it into the cooled blackberry reduction this keeps the swirl sitting on top instead of sinking. Pour the rest of the filling over the cooled crust and smooth it into an even layer.
- Spoon the blackberry mixture over the cheesecake filling in small dollops, then drag a toothpick through it to create swirls. Go easy here, since over-swirling blends the colors together instead of keeping those pretty ribbons distinct. Scatter the fresh blackberries evenly across the top before it goes into the oven.
- Bake at 285ºF (140ºC) for 30-35 minutes, until the edges look set and lightly golden but the center still has a gentle wobble. Turn the oven off and leave the door slightly open, letting the bars cool gradually inside for about an hour to prevent cracking.
- Once the bars reach room temperature, transfer them to the fridge for at least an hour, though overnight gives you the best flavor and texture. Chilling firms everything up so you get clean, neat slices when it’s time to cut and serve.
Notes
- I always set out my cream cheese, yogurt, and eggs a good hour before I start, since cold ingredients are the main reason batters turn lumpy.
- I never use a hand mixer for this filling it whips in too much air, and that’s usually what causes cracks.
- I like using a metal pan over glass, since I find it bakes more evenly and cools faster too.
- I let my crust cool for a few minutes before pouring in the filling, otherwise the butter can make the base soggy.
- I trust the wobble test over the clock if the middle still jiggles slightly when I nudge the pan, I know it’s ready to come out.