I still remember the first time I made a batch of this Soft Baked Sugar Cookie Bars Recipe I was tired of rolling out dough, cutting shapes, and babysitting a dozen trays of individual cookies.
So I pressed the whole batch into one pan instead, and honestly, it changed everything for me. The edges turned just barely golden while the middle stayed soft and a little sunken, exactly how I like it.

Once I piled on a thick swoop of vanilla buttercream and a handful of sprinkles, I knew this was going to be my go-to dessert for every birthday and holiday from then on. If you love that classic frosted sugar cookie flavor but hate the fuss, I promise this recipe is going to become your favorite too.
Cooking Time
- Prep Time: 25 minutes
- Cook Time: 25 minutes
- Total Time: 1 hour 30 minutes (includes cooling)
Ingredients
- 1 ½ cups all-purpose flour, spooned and leveled — too much flour is the #1 reason these bars turn out dry
- 1 teaspoon baking powder — gives the bars a little lift without making them cakey
- ¼ teaspoon baking soda — helps the bars spread evenly in the pan
- 1 ½ teaspoons cornstarch — my secret for a soft, tender crumb instead of a cakey one
- ¼ teaspoon salt — balances out all that sweetness
- ½ cup unsalted butter, softened — use true room-temperature butter, not melted or cold
- ¾ cup granulated sugar — creamed with the butter for that classic sugar cookie flavor
- 1 large egg + 1 egg yolk, room temperature — the extra yolk is what keeps these bars soft for days
- 2 teaspoons pure vanilla extract — for warm, bakery-style flavor
- ¼ teaspoon almond extract, optional — adds that nostalgic bakery sugar cookie taste
- 6 tablespoons rainbow sprinkles (jimmies, not nonpareils) — jimmies hold their color better inside the dough
For the vanilla buttercream:
- ¾ cup unsalted butter, softened — the base of a rich, fluffy frosting
- 2 ¼ cups confectioners’ sugar — sweetens and thickens the buttercream
- 3 tablespoons heavy cream or half-and-half — adjust slightly to control thickness
- 1 teaspoon pure vanilla extract — rounds out the frosting flavor
- Pinch of salt — cuts through the sweetness if needed
- Optional: gel food coloring and extra sprinkles for decorating
Note: This recipe serves 16 bars from a 9-inch square pan.
Equipment You Need
- 9-inch square baking pan — bakes the bars to the perfect thickness
- Parchment paper — makes lifting and slicing the bars mess-free
- Handheld or stand mixer — creams the butter and sugar smoothly
- Mixing bowls — one for dry ingredients, one for wet
- Whisk — combines the dry ingredients evenly
- Silicone spatula — scrapes the sticky dough into the pan
- Offset spatula — spreads the frosting in an even layer
- Cooling rack — lets the bars cool fully before frosting
- Sharp knife — for clean, neat squares when slicing

How to Make Soft Baked Sugar Cookie Bars Recipe?
This recipe comes together in two easy stages: mixing and baking the cookie base, then whipping up the frosting once the bars have cooled. There’s no dough chilling involved, so you can go from mixing bowl to oven in minutes. Here’s exactly how I do it every time.
Preheat and Prep the Pan
Start by preheating your oven to 350°F. Line your 9-inch square pan with parchment paper, leaving some overhang on the sides so you can lift the bars out easily later. This little step saves a lot of hassle when it’s time to slice.
Whisk the Dry Ingredients
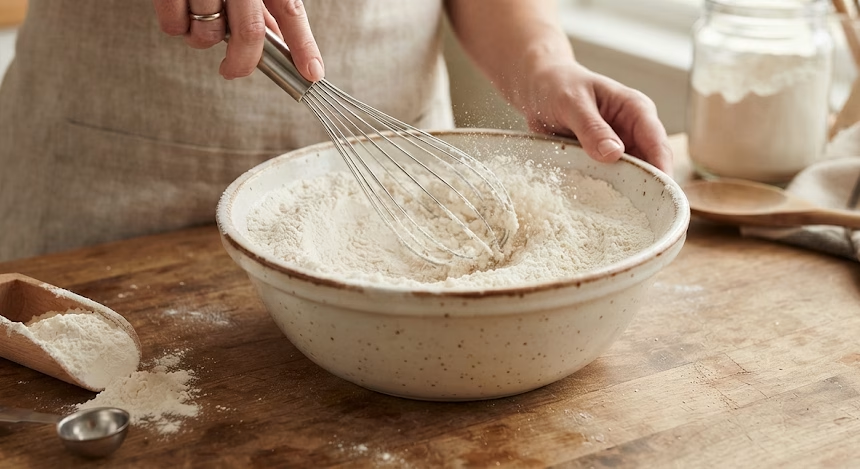
In a medium bowl, whisk together the flour, baking powder, baking soda, cornstarch, and salt. Whisking first makes sure the leaveners are distributed evenly, so you don’t end up with bars that rise unevenly or taste bitter in spots.
Cream the Butter and Sugar
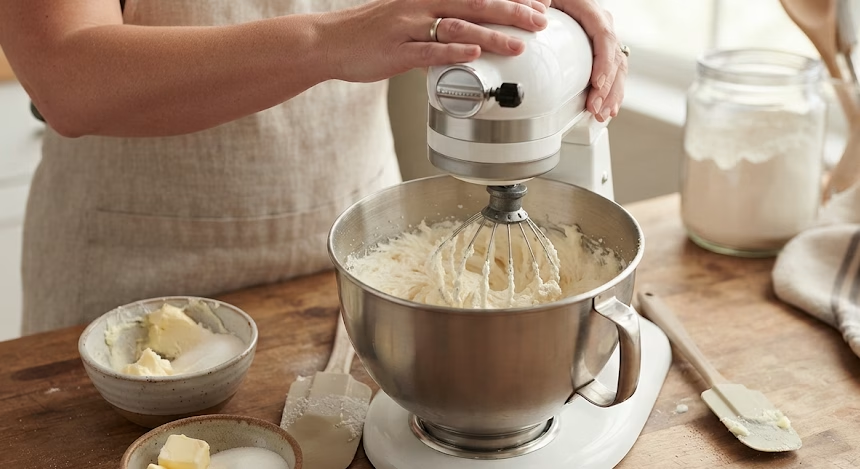
In a separate large bowl, beat the softened butter and sugar together until the mixture turns pale and fluffy, about 3 minutes. This step builds air into the dough, which is part of what keeps these bars from turning dense.
Add the Wet Ingredients
Beat in the egg, egg yolk, vanilla, and almond extract if you’re using it. Scrape down the bowl as you go so everything blends evenly. The mixture should look smooth, glossy, and slightly thickened at this point.
Combine Wet and Dry
Add the dry ingredients into the wet mixture and beat on low speed until just combined, then bump up to medium-high for a few seconds. The dough will be noticeably thick and sticky that’s exactly what you want here.
Fold in the Sprinkles
Gently mix in the rainbow sprinkles until they’re evenly scattered through the dough. I like to save a few extra sprinkles to press on top before baking for a prettier finish.
Press the Dough into the Pan
Since the dough is sticky, lightly flour your hands or use a spatula to press it evenly into the prepared pan. It will look like a thin layer, but it puffs up nicely in the oven.
Bake Until Just Set
Bake for about 25 minutes, until the edges turn lightly golden but the center still looks a touch underdone. That soft center is the key to a chewy bar instead of a dry one, so resist the urge to leave it in longer.
Cool Completely Before Frosting
Let the bars cool fully in the pan on a wire rack. The middle will sink slightly as it cools, which is completely normal and actually helps create that soft, brownie-like texture.
Make the Buttercream Frosting
While the bars cool, beat the butter until creamy, then add the confectioners’ sugar, cream, and vanilla. Beat on low first, then medium-high for a few minutes until light and fluffy. Add a pinch of salt if it tastes too sweet.
Frost and Slice
Lift the cooled bars out using the parchment overhang, spread on a generous layer of frosting, and top with extra sprinkles. Use a sharp knife, wiping it clean between cuts, for neat, bakery-style squares.
Additional Tips for Making This Recipe Better
I’ve made these more times than I can count, and here’s what actually makes a difference for me:
- I always weigh my flour instead of scooping straight from the bag it stops the bars from turning out dry.
- I press the edges down gently with a spoon right after baking so the bars sit level once cooled.
- I let the bars cool completely before frosting, or the buttercream slides right off.
- I go heavy-handed with the frosting because that thick layer is genuinely the best part.
- I use jimmies in the dough and save the tiny nonpareils for decorating on top, since nonpareils bleed color into the batter.
Common Mistakes to Avoid
- I overbaked mine the first time and ended up with a dry, cakey bar — now I always pull them out while the center still looks slightly underdone.
- I used to pack my flour into the measuring cup, which made the dough too stiff — spooning and leveling fixed that instantly.
- I tried frosting the bars while they were still warm once, and the buttercream melted right into the cookie patience really matters here.
- I skipped the extra egg yolk one time to save an egg, and the bars turned out noticeably less chewy I never skip it now.
- I put the frosted bars straight in the fridge to speed up cooling, and the buttercream turned stiff and crumbly I let them cool at room temperature instead.
How to Serve Soft Baked Sugar Cookie Bars?
I like slicing these into neat squares and arranging them on a flat platter so the frosting and sprinkles are the star of the show. For birthdays, I’ll match the sprinkle color to the theme, and for holidays, colored sugar or themed sprinkles work beautifully on top.
A cold glass of milk on the side never hurts either, and if I’m serving a crowd, I cut the bars a little smaller so people can grab two without feeling guilty. For a larger spread with both sweet and savory dishes, Orecchiette With Broccoli Peas Recipe can also fit nicely into the menu.
Variations
- Swap the almond extract for lemon or orange extract for a brighter, citrusy twist.
- Use a dairy-free butter substitute and a plant-based cream in the frosting for a dairy-free version.
- Mix in mini chocolate chips or crushed candy for extra texture and flavor.
- Try a cream cheese frosting instead of buttercream for a slightly tangier topping.
- Add a swirl of cinnamon sugar on top before baking for a snickerdoodle-inspired version.
- Use a reduced-sugar sweetener blend in both the bars and frosting for a lighter dessert.
Nutritional Information
Here’s a rough estimate per bar, based on 16 servings from this recipe:
- Calories: approximately 250-280 kcal
- Protein: approximately 2-3 g
- Carbohydrates: approximately 34-38 g
- Fat: approximately 12-14 g
Make Ahead and Storage
You can bake the cookie base up to a day ahead and keep it covered at room temperature, then frost it just before serving. The frosting can also be made a day in advance and stored in the fridge just bring it back to room temperature and give it a quick mix before spreading.
Frosted bars stay fresh in an airtight container at room temperature for about 2 days, or in the fridge for up to 5 days if you want them to last longer.
For longer storage, freeze the unfrosted bars for up to 3 months, wrapped tightly. You can also freeze individual frosted bars and thaw them overnight in the fridge whenever a craving hits. If you’re preparing several dishes ahead for a gathering, Pesto Couscous Salad Recipe is another make-ahead option that works well for serving a group.
Why You’ll Love This Recipe?
This recipe has earned a permanent spot in my baking rotation, and here’s why I think you’ll feel the same way:
- No chilling required: The dough goes straight from mixing bowl to oven, so you get a finished dessert in about 90 minutes total.
- One-pan convenience: Instead of scooping and baking multiple trays, everything bakes together in a single square pan.
- Soft, chewy texture: The extra egg yolk and cornstarch team up to keep every bar tender for days.
- Endlessly customizable: You can switch up the extract, frosting, or sprinkle colors to match any occasion.
- Great for a crowd: One pan slices into 16 generous bars, making it perfect for parties, potlucks, or bake sales.
FAQs
Old fashioned sugar cookie bars — are they the same as this recipe?
Yes, this is essentially a classic old-fashioned style base, just baked as bars instead of individual cookies for less fuss.
Can I make sugar cookie bars with no frosting?
Absolutely, they’re delicious plain or with a dusting of sugar on top if you’d rather skip the buttercream.
Can I make sugar cookie bars in a 9×13 pan?
Yes, double the ingredients and bake in a 9×13 pan for about 35-40 minutes total.
Do sugar cookie bars work well on a sheet pan?
Yes, a rimmed sheet pan works for a thinner, larger batch just to reduce the bake time slightly.
Is this an easy recipe for beginners?
Yes, it’s one of the simplest bar cookie recipes out there since there’s no dough chilling or shaping needed.

Soft Baked Sugar Cookie Bars Recipe
Ingredients
Method
- Start by preheating your oven to 350°F. Line your 9-inch square pan with parchment paper, leaving some overhang on the sides so you can lift the bars out easily later. This little step saves a lot of hassle when it’s time to slice.
- In a medium bowl, whisk together the flour, baking powder, baking soda, cornstarch, and salt. Whisking first makes sure the leaveners are distributed evenly, so you don’t end up with bars that rise unevenly or taste bitter in spots.
- In a separate large bowl, beat the softened butter and sugar together until the mixture turns pale and fluffy, about 3 minutes. This step builds air into the dough, which is part of what keeps these bars from turning dense.
- Beat in the egg, egg yolk, vanilla, and almond extract if you’re using it. Scrape down the bowl as you go so everything blends evenly. The mixture should look smooth, glossy, and slightly thickened at this point.
- Add the dry ingredients into the wet mixture and beat on low speed until just combined, then bump up to medium-high for a few seconds. The dough will be noticeably thick and sticky that’s exactly what you want here.
- Gently mix in the rainbow sprinkles until they’re evenly scattered through the dough. I like to save a few extra sprinkles to press on top before baking for a prettier finish.
- Since the dough is sticky, lightly flour your hands or use a spatula to press it evenly into the prepared pan. It will look like a thin layer, but it puffs up nicely in the oven.
- Bake for about 25 minutes, until the edges turn lightly golden but the center still looks a touch underdone. That soft center is the key to a chewy bar instead of a dry one, so resist the urge to leave it in longer.
- Let the bars cool fully in the pan on a wire rack. The middle will sink slightly as it cools, which is completely normal and actually helps create that soft, brownie-like texture.
- While the bars cool, beat the butter until creamy, then add the confectioners’ sugar, cream, and vanilla. Beat on low first, then medium-high for a few minutes until light and fluffy. Add a pinch of salt if it tastes too sweet.
- Lift the cooled bars out using the parchment overhang, spread on a generous layer of frosting, and top with extra sprinkles. Use a sharp knife, wiping it clean between cuts, for neat, bakery-style squares.
Notes
- I always weigh my flour instead of scooping straight from the bag it stops the bars from turning out dry.
- I press the edges down gently with a spoon right after baking so the bars sit level once cooled.
- I let the bars cool completely before frosting, or the buttercream slides right off.
- I go heavy-handed with the frosting because that thick layer is genuinely the best part.
- I use jimmies in the dough and save the tiny nonpareils for decorating on top, since nonpareils bleed color into the batter.