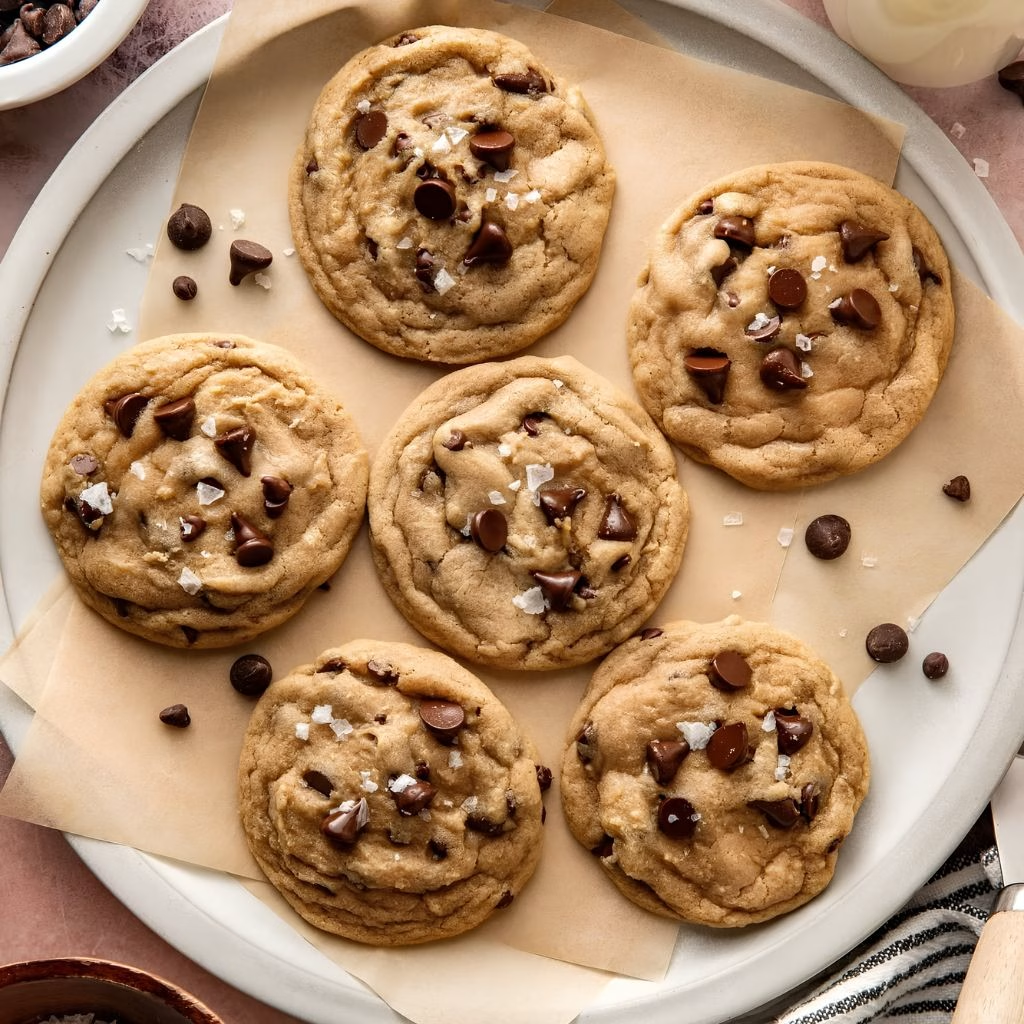
I made a batch of this Brown Butter Chocolate Chip Cookies Recipe on a lazy Sunday, mostly because I was bored of my regular cookie routine, and honestly, I haven’t gone back since. The second the butter turns that deep amber color and the kitchen fills with a nutty, toasty smell, I know I’m onto something special.
These aren’t your average cookies; they’re thick, chewy in the middle, slightly crisp on the edges, and packed with caramel-like depth that plain butter just can’t give you. Yes, there’s some chilling time involved, but I promise it’s worth every minute. Once you try this best brown butter chocolate chip cookie recipe, it’ll probably become your go-to too.
Cooking Time
- Prep Time: 45 minutes
- Cooking Time: 13 minutes
- Total Time: 5 hours (includes chilling time)
Ingredients
- 1 cup unsalted butter — this gets browned first, so it’s the flavor backbone of the whole recipe
- 1/2 cup granulated sugar — helps the edges crisp up slightly while balancing sweetness
- 1 cup packed brown sugar — the extra moisture and molasses notes keep these cookies soft and chewy
- 1 large egg + 1 egg yolk — the extra yolk adds richness and a chewier bite, so don’t skip it
- 2 teaspoons pure vanilla extract — rounds out the nutty brown butter flavor nicely
- 2½ cups all-purpose flour — spoon and level it, don’t scoop straight from the bag or you’ll add too much
- 1 teaspoon cornstarch — my little secret for that extra soft, tender crumb
- 1 teaspoon baking soda — gives the cookies lift without making them cakey
- ½ teaspoon salt — balances all that sweetness and deepens the flavor
- 2 tablespoons milk, room temperature — replaces the moisture that evaporates while browning the butter
- 1½ cups semi-sweet chocolate chips — I like a mix of chip brands for different melt textures
- Flaky sea salt (optional) — sprinkle on top for a salty-sweet finish that makes these taste bakery-made
Note: This recipe makes about 26-28 cookies, perfect for sharing with family or freezing half for later.
Equipment You Need
- Light-colored skillet — makes it easier to watch the butter change color as it browns
- Stand mixer or hand mixer — needed to cream the chilled brown butter until smooth
- Mixing bowls — one for wet ingredients, one for dry
- Whisk — for combining the dry ingredients evenly
- Cookie scoop — keeps every dough ball the same size for even baking
- Baking sheets — for arranging and baking the dough balls
- Parchment paper or silicone baking mat — prevents sticking and helps with even browning
- Wire cooling rack — lets air circulate so the cookies don’t turn soggy on the bottom

How to Make Brown Butter Chocolate Chip Cookies Recipe?
I know the steps look long, but honestly, once you brown the butter once, the rest comes together fast. Here’s exactly how I make this recipe from start to finish, broken down so nothing feels confusing.
Step 1: Brown the Butter
Cut the butter into even pieces and melt it in a light-colored skillet over medium heat. Keep stirring as it foams and the milk solids start browning on the bottom. Once it turns golden amber and smells nutty, pull it off the heat immediately.

Step 2: Chill the Butter Until Solid
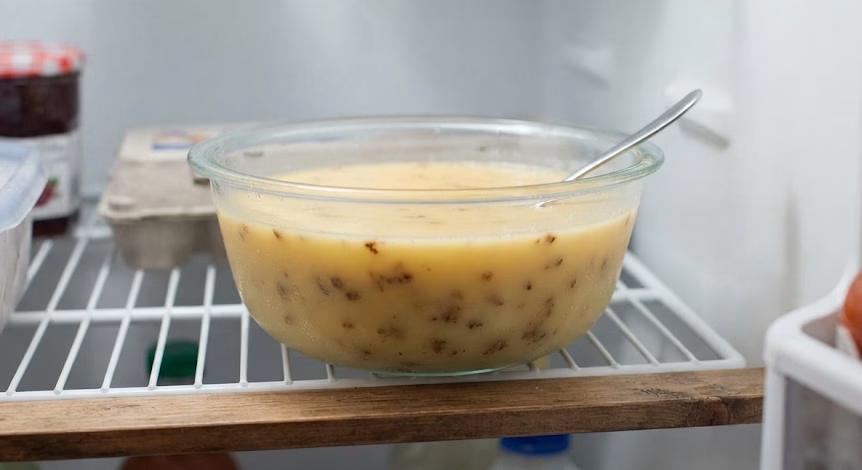
Pour the browned butter, including all those browned bits, into a heatproof bowl. Let it cool for about 10 minutes, then refrigerate until solid, roughly 90 minutes. This step is essential for structure.
Step 3: Cream the Butter and Sugars
Once solid, beat the brown butter on high speed until smooth and creamy, even if it looks grainy at first. Add both sugars and beat until light and fluffy, about 2 minutes total.
Step 4: Add the Eggs and Vanilla
Mix in the egg, egg yolk, and vanilla extract until fully combined. Scrape down the sides of the bowl so everything blends evenly without any streaks.
Step 5: Combine the Dry Ingredients
In a separate bowl, whisk together the flour, cornstarch, baking soda, and salt. This keeps the leavening evenly distributed before it hits the wet mixture.
Step 6: Bring the Dough Together
Add the dry mix to the wet ingredients on low speed until just combined. Drizzle in the milk while mixing, then fold in the chocolate chips until they’re evenly spread through the dough.
Step 7: Shape and Chill the Dough Balls
Scoop the dough into 2-tablespoon portions and shape them tall rather than wide. Refrigerate for at least 2 hours; this keeps the cookies thick instead of letting them spread thin.
Step 8: Bake to Golden Perfection
Bake at 375°F for 12-14 minutes until the edges turn golden but the centers still look soft. Let them cool on the sheet for 5 minutes before moving to a wire rack.
Additional Tips for Making This Recipe Better
I’ve made these enough times to know exactly what makes a difference, so here’s what I always keep in mind:
- I never skip chilling the dough, even when I’m impatient, because it really does stop the cookies from spreading into thin puddles.
- I like using a mix of chocolate chips and chunks so every bite has a slightly different texture.
- I press a few extra chocolate chips on top right after baking so the cookies look bakery-style and photograph well.
- I always weigh my flour instead of scooping it, since too much flour is the number one reason cookies turn out dry.
- I bake one test cookie first if I’m using a new oven, just to check spread and timing before committing the whole batch.
Common Mistakes to Avoid
- I’ve learned that skipping the milk after browning the butter leaves the dough dry and crumbly, so I never leave it out.
- I used to melt the butter and use it right away, but skipping the chilling step made my cookies spread flat every single time.
- I once used cold eggs straight from the fridge, and the batter looked curdled and uneven, so now I always bring them to room temperature.
- I overbaked a batch once thinking they weren’t done because the centers looked soft, but that softness is exactly what you want.
- I’ve overcrowded baking sheets before, and the cookies ended up merging together, so I always leave about 3 inches between each one.
How to Serve Brown Butter Chocolate Chip Cookies?
I love serving these slightly warm, so the chocolate chips are still a little gooey in the center. A glass of cold milk alongside is classic, but I also enjoy sandwiching a scoop of vanilla ice cream between two cookies for an easy dessert.
For presentation, stack them slightly askew on a wooden board or plate, and sprinkle a little extra flaky sea salt on top right before serving for that eye-catching, bakery-style finish. If you’re putting together a larger spread, an olive oil bread dip recipe can also sit nicely alongside other appetizers and desserts.
Variations
- Swap in dark chocolate chunks instead of semi-sweet chips for a richer, more intense chocolate flavor.
- Use a dairy-free butter alternative and plant-based milk to make these dairy-free without losing the brown butter effect.
- Fold in toasted pecans or walnuts for extra crunch alongside the chewy texture.
- Add a pinch of cinnamon or espresso powder to the dry mix to deepen the flavor even further.
- Mix in toffee bits along with the chocolate chips for a caramel-forward twist on the classic. For a savory option on the same spread, oven baked feta rolls with chili honey recipe can add a contrasting flavor.
Nutritional Information
Here’s a general idea of what one cookie contains, though this can vary based on exact ingredients used:
- Calories: around 180-200 per cookie
- Protein: about 2g per cookie
- Carbohydrates: roughly 24g per cookie
- Fat: approximately 9g per cookie
Make Ahead and Storage
You can make the cookie dough up to 3 days ahead and keep it chilled in the refrigerator until you’re ready to bake. This actually deepens the flavor even more as the brown butter settles into the dough.
Baked cookies stay fresh in an airtight container at room temperature for up to 5 days. For longer storage, freeze the baked cookies for up to 3 months and thaw them at room temperature.
Unbaked dough balls also freeze well for up to 3 months. Bake them straight from frozen, just adding an extra minute to the baking time, no thawing needed.
Why You’ll Love This Recipe?
Once I started making these, I realized why so many people call this the best brown butter chocolate chip cookies recipe out there. Here’s why I think you’ll love it too:
- Rich, nutty flavor: The browned butter gives these cookies a caramel-like depth that regular butter simply cannot replicate.
- Thick and chewy texture: The chilling steps and cornstarch work together to give you that perfect bakery-style thickness every time.
- Freezer-friendly: Whether it’s the dough or the baked cookies, both freeze beautifully, so you can bake fresh whenever you want.
- Customizable: From nuts to different chocolate types, this dough is a great base for experimenting with variations.
- Crowd-pleaser: These disappear fast at gatherings, and I’ve never had anyone say no to a second one.
FAQs
How to brown butter for this recipe?
Melt butter in a light-colored pan over medium heat, stirring constantly until it turns golden amber and smells nutty, then remove immediately from heat.
Can I make crispy brown butter chocolate chip cookies instead of chewy?
Baking a minute or two longer and flattening the dough balls slightly before baking will give you crispier edges throughout.
Why are my brown butter chocolate chip cookies not thick?
Skipping the chill time is usually the reason; both the butter and dough need to be properly chilled for thick cookies.
Can I substitute salted butter for these salted brown butter chocolate chip cookies?
Yes, just skip or reduce the added salt slightly since salted butter already brings extra seasoning to the dough.
How long do brown butter chocolate chip cookies stay fresh?
They stay fresh for about 5 days at room temperature in an airtight container, or up to 3 months in the freezer.

Brown Butter Chocolate Chip Cookies Recipe
Ingredients
Method
- Cut the butter into even pieces and melt it in a light-colored skillet over medium heat. Keep stirring as it foams and the milk solids start browning on the bottom. Once it turns golden amber and smells nutty, pull it off the heat immediately.
- Pour the browned butter, including all those browned bits, into a heatproof bowl. Let it cool for about 10 minutes, then refrigerate until solid, roughly 90 minutes. This step is essential for structure.
- Once solid, beat the brown butter on high speed until smooth and creamy, even if it looks grainy at first. Add both sugars and beat until light and fluffy, about 2 minutes total.
- Mix in the egg, egg yolk, and vanilla extract until fully combined. Scrape down the sides of the bowl so everything blends evenly without any streaks.
- In a separate bowl, whisk together the flour, cornstarch, baking soda, and salt. This keeps the leavening evenly distributed before it hits the wet mixture.
- Add the dry mix to the wet ingredients on low speed until just combined. Drizzle in the milk while mixing, then fold in the chocolate chips until they’re evenly spread through the dough.
- Scoop the dough into 2-tablespoon portions and shape them tall rather than wide. Refrigerate for at least 2 hours; this keeps the cookies thick instead of letting them spread thin.
- Bake at 375°F for 12-14 minutes until the edges turn golden but the centers still look soft. Let them cool on the sheet for 5 minutes before moving to a wire rack.
Notes
- I never skip chilling the dough, even when I’m impatient, because it really does stop the cookies from spreading into thin puddles.
- I like using a mix of chocolate chips and chunks so every bite has a slightly different texture.
- I press a few extra chocolate chips on top right after baking so the cookies look bakery-style and photograph well.
- I always weigh my flour instead of scooping it, since too much flour is the number one reason cookies turn out dry.
- I bake one test cookie first if I’m using a new oven, just to check spread and timing before committing the whole batch.