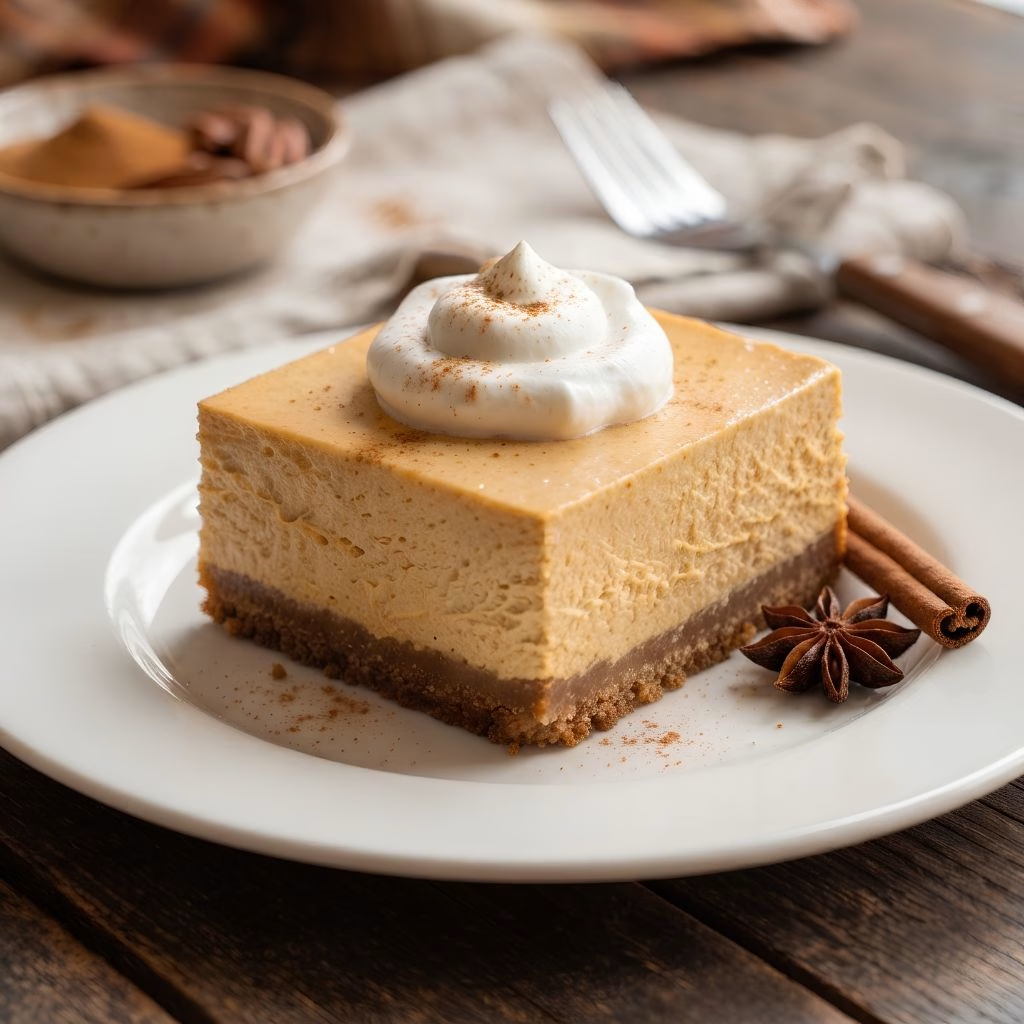
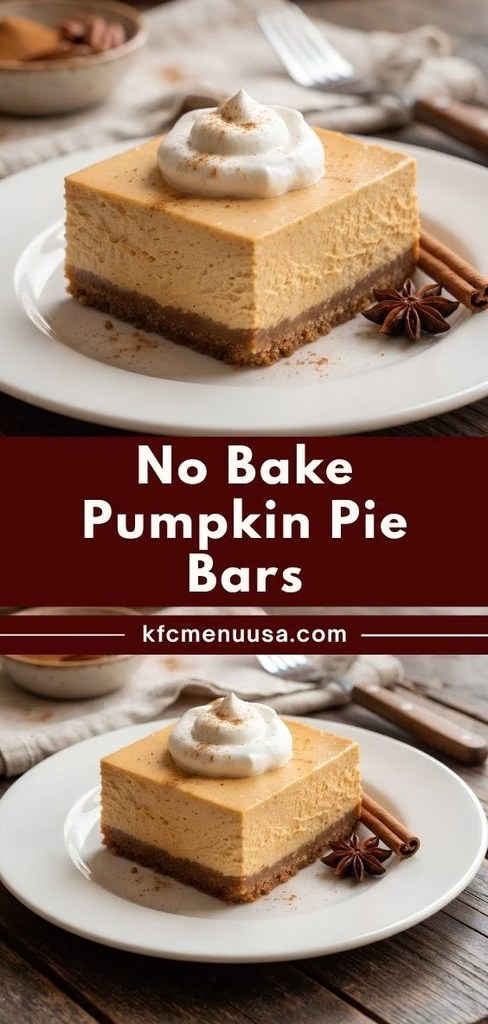
I started making this No Bake Pumpkin Pie Bars Recipe the year my oven was completely maxed out on Thanksgiving Day, and now I make them every single fall no matter how much oven space I actually have. There’s something so satisfying about a creamy, spiced pumpkin filling set over a crunchy brown butter crust without ever touching the oven.
I hand this recipe off to anyone who wants to help but doesn’t trust themselves with baking, and it always turns out perfectly. If you love pumpkin pie but not the fuss of rolling out a crust, I think you’re going to be just as obsessed with these bars as I am.
Cooking Time
- Prep Time: 30 minutes
- Cooking Time: 25 minutes (for the stovetop pumpkin butter)
- Total Time: 9 hours (includes overnight chilling)
Ingredients
- 1 can (15 ounces) pumpkin puree — grab plain pumpkin puree, not pumpkin pie filling, so you control the sweetness yourself
- ¼ cup brown sugar — helps thicken the pumpkin as it simmers down into a jammy butter
- 1 ½ teaspoons pumpkin pie spice, divided — this is your flavor backbone, so use a fresh jar if yours has been sitting a while
- 1 tablespoon apple cider vinegar — adds a little brightness that keeps the filling from tasting flat
- ¾ teaspoon salt, divided — balances the sweetness across both the crust and the filling
- 1 stick unsalted butter — browning it here is what gives the crust its deep, nutty flavor
- 2 cups graham cracker crumbs — the classic no-bake base, and you can pulse whole crackers in a food processor if needed
- 4 ounces cream cheese, softened — let it sit out for real, cold cream cheese leaves lumps in your filling
- 2 tablespoons powdered sugar — sweetens the cream cheese layer without adding graininess
- 1 teaspoon vanilla extract — rounds out the pumpkin spice with warmth
- 4 ounces heavy whipping cream — whipped to stiff peaks, this is what gives the filling its light, mousse-like texture
Note: this recipe serves 9, cut into generous squares from an 8×8 pan.
Equipment You Need
- Medium saucepan — for simmering the pumpkin butter and browning the butter
- Whisk — keeps the pumpkin butter smooth while it reduces
- 8×8 baking pan — the mold that shapes your bars
- Parchment paper — makes lifting the finished bars out so much easier
- Stand or hand mixer — whips the cream cheese and heavy cream to the right texture
- Rubber spatula — for gently folding the whipped cream into the filling
- Flat-bottomed glass — perfect for pressing the crust down into an even layer
How to Make No-Bake Pumpkin Pie Bars Recipe?
This recipe really comes together in stages, and each one builds on the last. None of the steps are difficult, they just take a little patience while things simmer, chill, and set. Here’s exactly how I put mine together every fall.
Make the Pumpkin Butter
Add the pumpkin puree, brown sugar, 1 teaspoon of pumpkin pie spice, apple cider vinegar, and ¼ teaspoon salt to a saucepan and stir well. Simmer on low for about 25 minutes, stirring often, until it’s reduced by half and thickened. Let it cool completely before using it in the filling.

Brown the Butter for the Crust
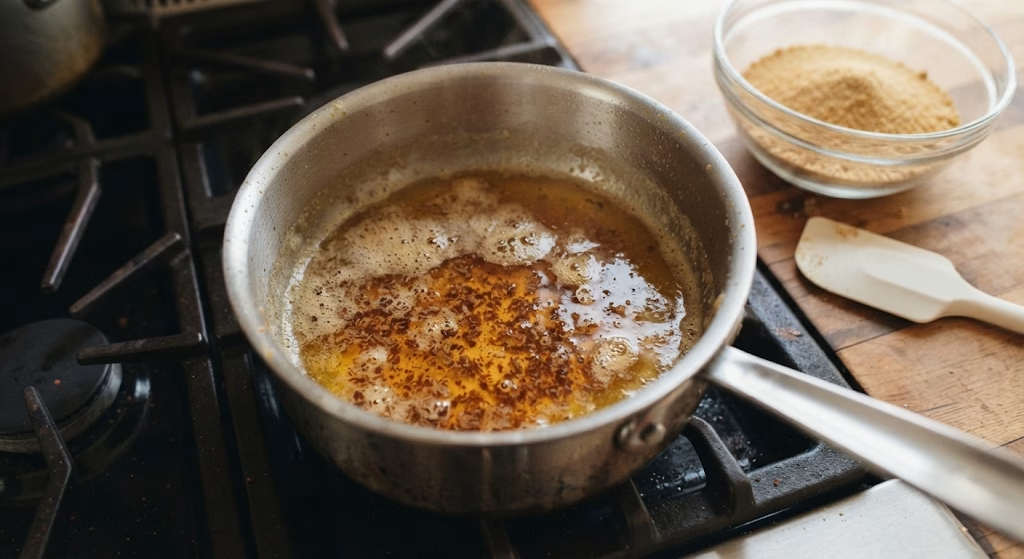
Melt your stick of butter in a saucepan over medium heat, swirling occasionally as it foams. Watch closely for small brown flecks to form at the bottom, which means it’s ready. Pull it off the heat right away and let it cool before combining with your crumbs.
Build and Chill the Crust
Stir the graham cracker crumbs with the remaining salt and pumpkin pie spice, then pour in the cooled browned butter. Mix until the texture resembles wet sand, then press it firmly into a parchment-lined 8×8 pan. Chill the crust in the fridge while you prepare the filling.
Whip the Filling Layers
Beat the softened cream cheese with powdered sugar, vanilla, and a pinch of salt until completely smooth. In a separate bowl, whip the heavy cream to stiff peaks. Fold the cooled pumpkin butter into the cream cheese first, then gently fold in the whipped cream in two batches.
Assemble, Chill, and Serve
Pour the finished filling over your chilled crust and smooth it into an even layer with a spatula. Refrigerate overnight so it sets completely, and for the cleanest slices, pop the pan in the freezer for about an hour right before cutting and serving.
Additional Tips for Making This Recipe Better
I’ve made this recipe more times than I can count, and here’s what actually makes a difference for me.
- I always let my cream cheese come fully to room temperature, or I end up with little lumps no amount of mixing can fix.
- I brown my butter in a light-colored pan so I can actually watch the color change instead of guessing and burning it.
- I fold the whipped cream in gently and in two additions, since dumping it all in at once deflates the texture I worked for.
- I make my pumpkin butter a day ahead when I can, which saves me time and lets the flavor deepen overnight.
- I always freeze the bars for the last hour before serving, because it makes slicing so much cleaner.
Common Mistakes to Avoid
- I once rushed the pumpkin butter and pulled it off the heat too early, and my filling ended up too loose to hold its shape.
- I tried using cold cream cheese straight from the fridge, and it left visible lumps throughout my filling.
- I didn’t press my crust down firmly enough one time, and it crumbled apart the second I tried to slice a bar.
- I skipped the overnight chill because I was impatient, and my bars were far too soft to hold together on a plate.
- I forgot to line my pan with parchment once, and getting the bars out cleanly turned into a complete disaster.
How to Serve No-Bake Pumpkin Pie Bars?
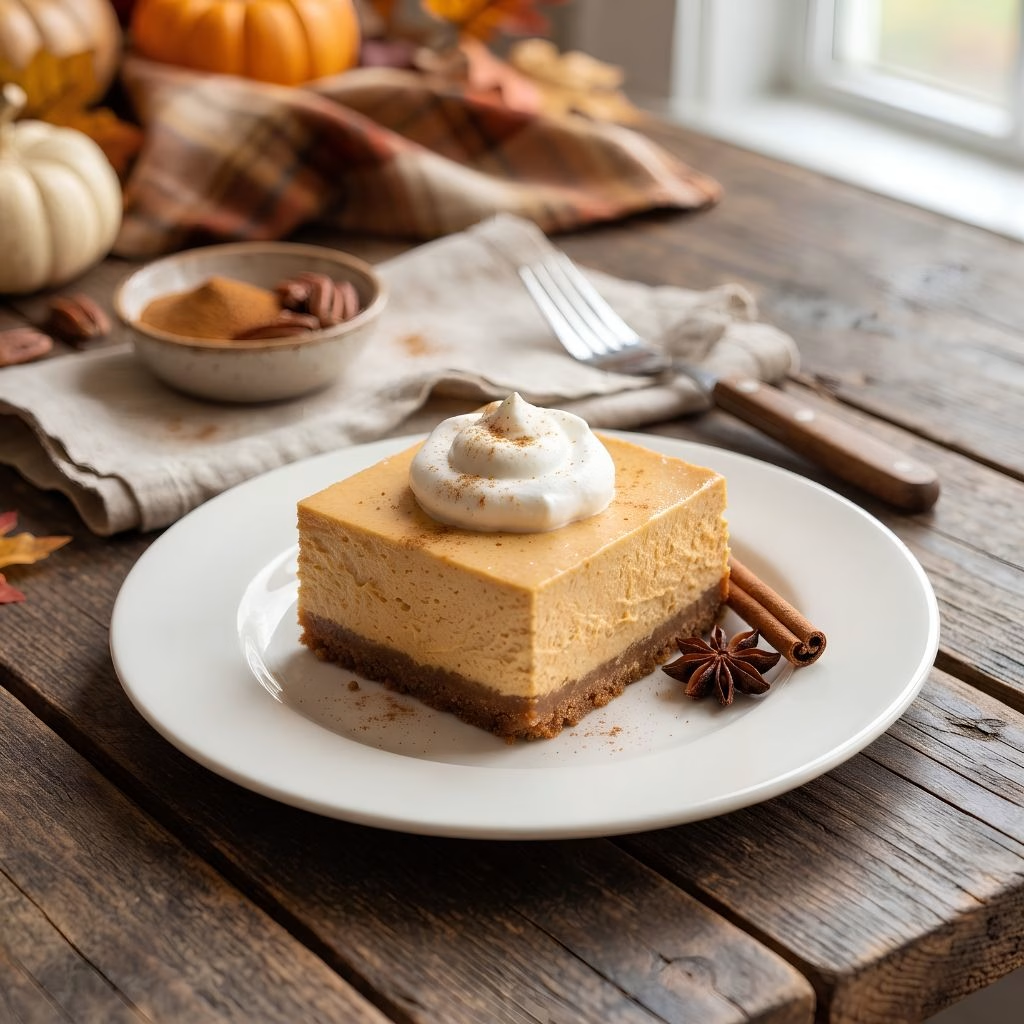
I like arranging these on a wooden board or a simple white platter so the layers really stand out against the crust. A dollop of freshly whipped cream on top, along with a light dusting of pumpkin pie spice or cinnamon, makes them look like they came straight from a bakery case.
They’re perfect for a Thanksgiving dessert table alongside a classic pie, or served on their own with a warm drink on a chilly afternoon. If you’re already leaning into cozy fall flavors, these bars pair beautifully next to something like a slice of pumpkin streusel muffins for a full seasonal spread.
Variations
- Swap the graham cracker crust for crushed gingersnaps if you want a spicier, more warming base
- Use light cream cheese and a sugar substitute for a lighter, lower-sugar version of these bars
- Stir a tablespoon of karo syrup into your pumpkin butter for an even glossier, more classic karo syrup pumpkin pie recipe flavor
- Make it dairy-free by using a plant-based cream cheese and coconut whipped cream in place of the dairy versions
- Simplify things into more of a 3 ingredient no bake pumpkin bars situation using store-bought pumpkin butter, graham crumbs, and whipped topping
- Add a swirl of caramel sauce over the top layer for extra richness and a prettier presentation
Nutritional Information
Here’s a rough breakdown per bar, which will vary a bit depending on the exact brands you use.
- Calories: 240 kcal
- Protein: 3 g
- Carbohydrates: 22 g
- Fat: 16 g
Make Ahead and Storage
You can make the entire pan up to two days ahead of time and keep it covered tightly in the fridge until you’re ready to serve.
Store leftover bars in an airtight container in the refrigerator, where they’ll stay fresh and set for up to four days.
To freeze, wrap individual bars tightly in plastic wrap and store them in a freezer bag for up to two months, then thaw overnight in the fridge before serving.
Why You’ll Love This Recipe?
This recipe has become one of my most requested fall desserts, and here’s why I think you’ll feel the same.
- It frees up your oven: Since nothing here needs to bake, you can make this while your turkey and sides take over every rack you have.
- It’s make-ahead friendly: These bars practically need to chill overnight, which means one less thing to worry about on the actual day.
- It’s endlessly adaptable: Between crust swaps, sugar-free options, and dairy-free versions, this recipe bends to fit whatever your table needs.
- It has that pie flavor without the fuss: You get all the cozy pumpkin spice flavor of a classic pie without rolling out a single bit of dough.
- It’s a crowd-pleaser: Even people who typically skip pumpkin dessert seem to come back for seconds on these.
FAQs
Can I use a homemade version instead of a Libby’s pumpkin bars recipe base?
Yes, this recipe already uses homemade pumpkin butter instead of a canned pie filling, which gives you more control over the sweetness and spice level.
Why is my filling too soft to slice cleanly?
This usually means the pumpkin butter wasn’t reduced enough or the bars didn’t chill long enough, so give both extra time next round.
Can I make this into no bake pumpkin oat bars instead?
Yes, swapping in a pressed oat and honey crust instead of graham crackers works well if you want a heartier, slightly chewier base.
How long do these bars actually stay fresh in the fridge?
They stay fresh for about four days when stored in an airtight container, and up to two months if you freeze them individually.
Is this one of those healthy no bake pumpkin recipes I can lighten up?
It can be, since swapping in light cream cheese, less sugar, or a sugar substitute all work well without ruining the texture.
If you’re rounding out a full fall dessert table, these bars sit really nicely next to something equally low-effort, like this no-bake pumpkin eclair cake for anyone who wants two no-oven pumpkin desserts side by side.

No Bake Pumpkin Pie Bars Recipe
Ingredients
Method
- Add the pumpkin puree, brown sugar, 1 teaspoon of pumpkin pie spice, apple cider vinegar, and ¼ teaspoon salt to a saucepan and stir well. Simmer on low for about 25 minutes, stirring often, until it's reduced by half and thickened. Let it cool completely before using it in the filling.
- Melt your stick of butter in a saucepan over medium heat, swirling occasionally as it foams. Watch closely for small brown flecks to form at the bottom, which means it’s ready. Pull it off the heat right away and let it cool before combining with your crumbs.
- Stir the graham cracker crumbs with the remaining salt and pumpkin pie spice, then pour in the cooled browned butter. Mix until the texture resembles wet sand, then press it firmly into a parchment-lined 8×8 pan. Chill the crust in the fridge while you prepare the filling.
- Beat the softened cream cheese with powdered sugar, vanilla, and a pinch of salt until completely smooth. In a separate bowl, whip the heavy cream to stiff peaks. Fold the cooled pumpkin butter into the cream cheese first, then gently fold in the whipped cream in two batches.
- Pour the finished filling over your chilled crust and smooth it into an even layer with a spatula. Refrigerate overnight so it sets completely, and for the cleanest slices, pop the pan in the freezer for about an hour right before cutting and serving.
Notes
- I always let my cream cheese come fully to room temperature, or I end up with little lumps no amount of mixing can fix.
- I brown my butter in a light-colored pan so I can actually watch the color change instead of guessing and burning it.
- I fold the whipped cream in gently and in two additions, since dumping it all in at once deflates the texture I worked for.
- I make my pumpkin butter a day ahead when I can, which saves me time and lets the flavor deepen overnight.
- I always freeze the bars for the last hour before serving, because it makes slicing so much cleaner.