I have to admit, the first time I made this No Bake Pumpkin Pie Recipe, I wasn’t sure it could compete with the classic baked version. But after one slice, I was completely hooked. It’s creamy, perfectly spiced, and unbelievably easy to make.
I love how I don’t even have to turn on my oven, especially during busy holidays. If you’re looking for a stress-free dessert that still tastes like fall in every bite, this is the one I keep coming back to.

Ingredients
- 1 graham cracker pie crust (9-inch, pre-made) – A ready-made crust saves time and keeps this recipe truly no-bake, while the graham flavor adds the perfect sweet crunch.
- 1 cup canned pumpkin puree – Be sure to use pure pumpkin puree, not pumpkin pie filling, so you can control the sweetness and spice levels.
- 1 package (3.4 oz) instant vanilla pudding mix – This helps thicken the filling quickly and gives it a smooth, stable texture without baking.
- 1 cup cold milk – Whole milk makes the filling richer, but 2% works well too; the milk activates the pudding mix so it sets properly.
- 1 teaspoon pumpkin pie spice – A warm blend of fall spices that gives the pie its classic seasonal flavor.
- 1 teaspoon ground cinnamon – Adds extra depth and enhances the pumpkin spice flavor beautifully.
- 8 ounces cream cheese, softened – Softened cream cheese blends smoothly and creates a creamy, lump-free filling.
- 1 cup powdered sugar – Powdered sugar dissolves easily into the cream cheese, giving sweetness without any grainy texture.
- 8 ounces whipped topping, thawed – Makes the pie light and fluffy; make sure it’s fully thawed for easy folding.
Note: This recipe makes one 9-inch pie and serves about 8 slices.
Variations
One of my favorite things about this recipe is how easy it is to customize.
If you want a dairy-free version, use dairy-free cream cheese, plant-based milk, and coconut whipped topping. For a lower-sugar option, choose sugar-free pudding mix and sugar-free whipped topping.
You can also swap the graham cracker crust for a chocolate cookie crust for a richer twist. If you enjoy creamy comfort-style dishes, you might also like this flavorful recipe cheesy-buffalo-chicken-stuffed-peppers-recipe.
To boost flavor, try adding a splash of vanilla extract, a drizzle of maple syrup, or even a pinch of sea salt to enhance the sweetness. For a crunchier texture, mix chopped pecans into the filling or sprinkle them on top before serving.
For more rich and satisfying meal inspiration, you can also explore this recipe best-easy-chicken-marsala-recipe.
Cooking Time
This recipe is quick to assemble and requires no baking at all.
- Prep Time: 15 minutes
- Chilling Time: 4 hours
- Total Time: 4 hours 15 minutes
Equipment You Need
- Mixing bowls – For preparing the cream cheese mixture and pudding mixture separately.
- Electric hand mixer – Helps achieve a smooth, lump-free filling quickly.
- Spatula – Perfect for folding in whipped topping gently.
- Measuring cups and spoons – Ensures accurate ingredient amounts.
- Refrigerator space – Essential for chilling and setting the pie properly.
How to Make No Bake Pumpkin Pie Recipe?
This recipe comes together in simple steps. Just mix, assemble, and chill.
Step 1: Prepare the Pudding Mixture
In a medium bowl, I whisk together the instant vanilla pudding mix, cold milk, pumpkin puree, pumpkin pie spice, and cinnamon. I mix until everything is smooth and slightly thickened. Then I set it aside to firm up while preparing the cream cheese layer.
Step 2: Make the Cream Cheese Base
In a separate large bowl, I beat the softened cream cheese and powdered sugar together using an electric mixer. I keep mixing until it’s creamy and completely smooth with no lumps. This step is important for creating a silky filling.
Step 3: Combine and Fold
Next, I gently fold the pudding mixture into the cream cheese mixture until fully combined. Once blended, I carefully fold in the whipped topping using a spatula. I make sure not to overmix so the filling stays light and airy.
Step 4: Fill the Crust
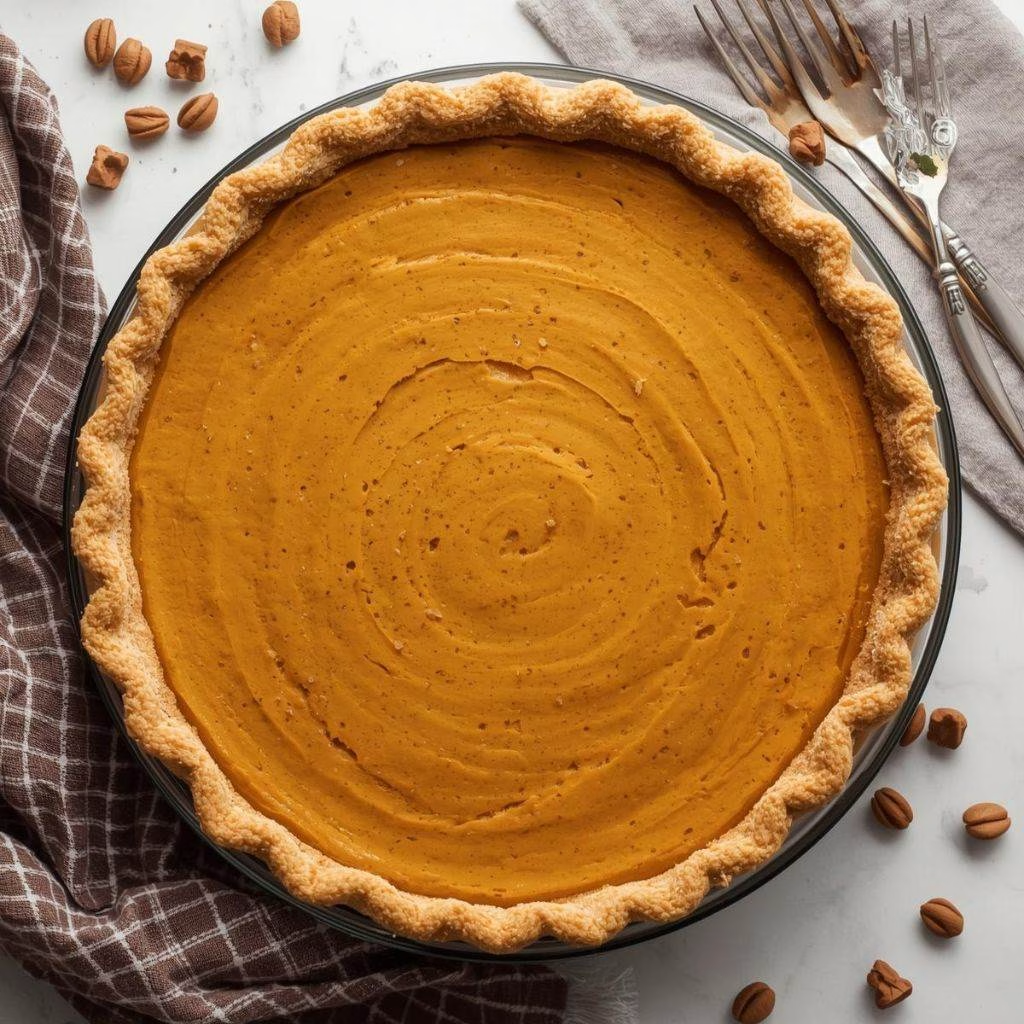
I spoon the pumpkin filling into the prepared graham cracker crust and spread it evenly with a spatula. I smooth out the top to make it look neat and inviting. At this point, it already smells amazing.
Step 5: Chill and Set
I place the pie in the refrigerator and let it chill for at least four hours. This allows the filling to firm up properly. When fully set, it slices beautifully and holds its shape.
Additional Tips for Making This Recipe Better
After making this pie several times, I’ve picked up a few tricks that really improve the results:
- I always use full-fat cream cheese because it gives a richer and more stable texture.
- I make sure the cream cheese is fully softened before mixing to avoid lumps.
- I chill the pie overnight when possible — I find the flavor gets even better the next day.
- I sometimes add a thin layer of whipped topping on top before serving for a prettier presentation.
- I refrigerate the crust for 10 minutes before filling if it feels crumbly, which helps it stay firm.
How to Serve No Bake Pumpkin Pie Recipe?
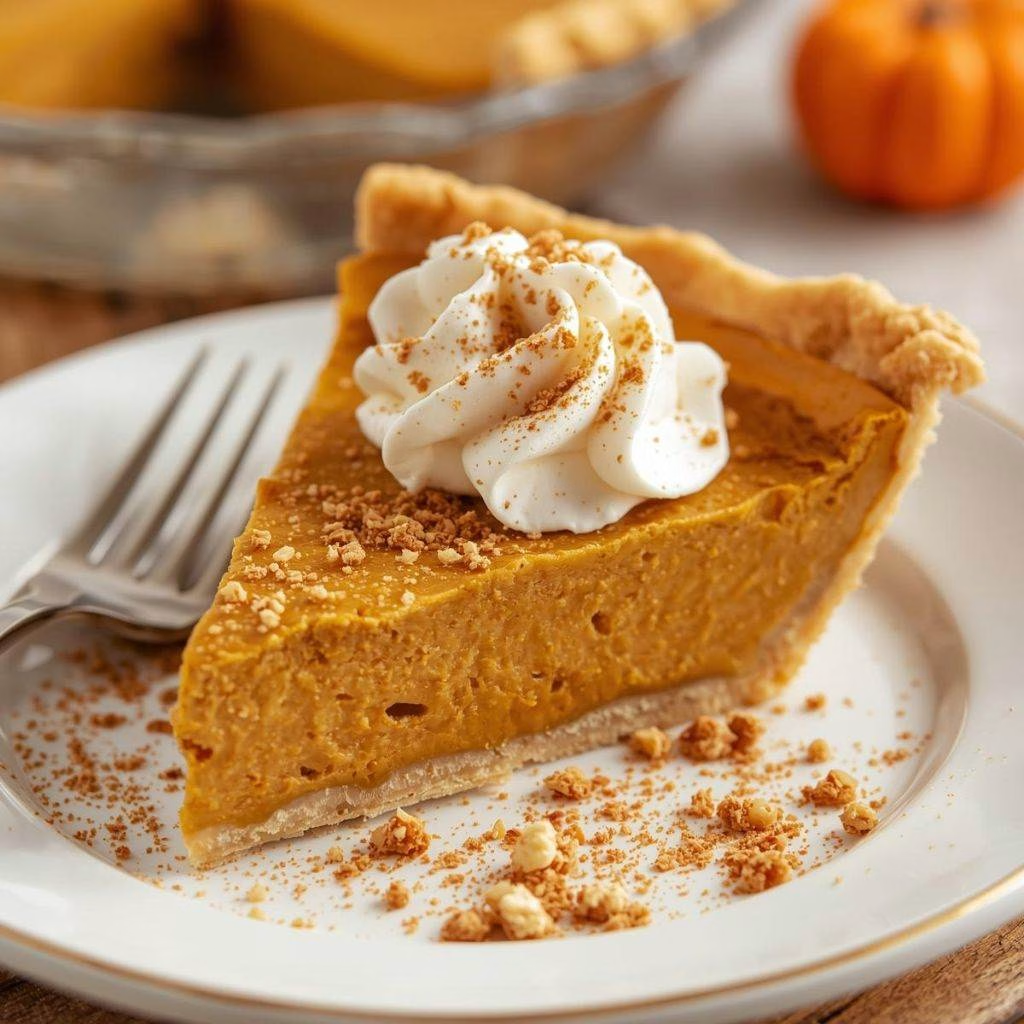
This pie is best served chilled straight from the refrigerator. I like to top each slice with a dollop of whipped cream and a sprinkle of cinnamon or pumpkin pie spice. For a festive touch, I sometimes drizzle caramel sauce over the top or add crushed pecans.
If I’m serving guests, I garnish the whole pie with piped whipped topping around the edges for a bakery-style look. A small cinnamon stick placed in the center can also make it look extra special for holiday gatherings.
Nutritional Information
Here’s a quick look at the approximate nutrition per slice:
- Calories: About 320 per serving
- Protein: Approximately 4g
- Carbohydrates: Around 40g
- Fat: Roughly 16g
(Values may vary depending on specific brands used.)
Make Ahead and Storage
Storing
Store the pie covered in the refrigerator for up to 3 days. I keep it tightly wrapped with plastic wrap or in an airtight container to prevent it from drying out.
Freezing
You can freeze this pie for up to 1 month. I wrap it well in plastic wrap and then foil to prevent freezer burn. Thaw overnight in the refrigerator before serving.
Reheating
Since this is a no-bake pie, reheating isn’t necessary. If frozen, simply let it thaw in the fridge until soft enough to slice comfortably.
Why You’ll Love This Recipe?
This no bake pumpkin pie is truly a crowd-pleaser. Here’s why I think you’ll love it too:
- It’s incredibly easy to make
There’s no baking involved, which makes it perfect for beginners or busy holiday schedules. - The texture is light and creamy
The combination of cream cheese and whipped topping creates a fluffy, mousse-like filling. - It’s perfect for holidays
This pie delivers classic fall flavor without taking up oven space during Thanksgiving or gatherings. - It’s easy to customize
You can adjust sweetness, spice levels, or even make it dairy-free or sugar-free. - It tastes even better the next day
I always notice the flavors deepen after chilling overnight, making leftovers just as delicious.
If you’re craving a simple yet impressive dessert, this no bake pumpkin pie recipe is one I genuinely love making again and again. It’s smooth, warmly spiced, and effortlessly elegant — perfect for fall celebrations or whenever you want a comforting slice of pumpkin goodness without the hassle.
No Bake Pumpkin Pie Recipe
Ingredients
Method
- In a medium bowl, I whisk together the instant vanilla pudding mix, cold milk, pumpkin puree, pumpkin pie spice, and cinnamon. I mix until everything is smooth and slightly thickened. Then I set it aside to firm up while preparing the cream cheese layer.
- In a separate large bowl, I beat the softened cream cheese and powdered sugar together using an electric mixer. I keep mixing until it’s creamy and completely smooth with no lumps. This step is important for creating a silky filling.
- Next, I gently fold the pudding mixture into the cream cheese mixture until fully combined. Once blended, I carefully fold in the whipped topping using a spatula. I make sure not to overmix so the filling stays light and airy.
- I spoon the pumpkin filling into the prepared graham cracker crust and spread it evenly with a spatula. I smooth out the top to make it look neat and inviting. At this point, it already smells amazing.
- I place the pie in the refrigerator and let it chill for at least four hours. This allows the filling to firm up properly. When fully set, it slices beautifully and holds its shape.
Notes
- I always use full-fat cream cheese because it gives a richer and more stable texture.
- I make sure the cream cheese is fully softened before mixing to avoid lumps.
- I chill the pie overnight when possible — I find the flavor gets even better the next day.
- I sometimes add a thin layer of whipped topping on top before serving for a prettier presentation.
- I refrigerate the crust for 10 minutes before filling if it feels crumbly, which helps it stay firm.