I still remember the first time I turned leftover risotto into something magical. I had extra rice sitting in my fridge and didn’t want to waste it, so I rolled it into balls, coated them in breadcrumbs, and fried them until golden.
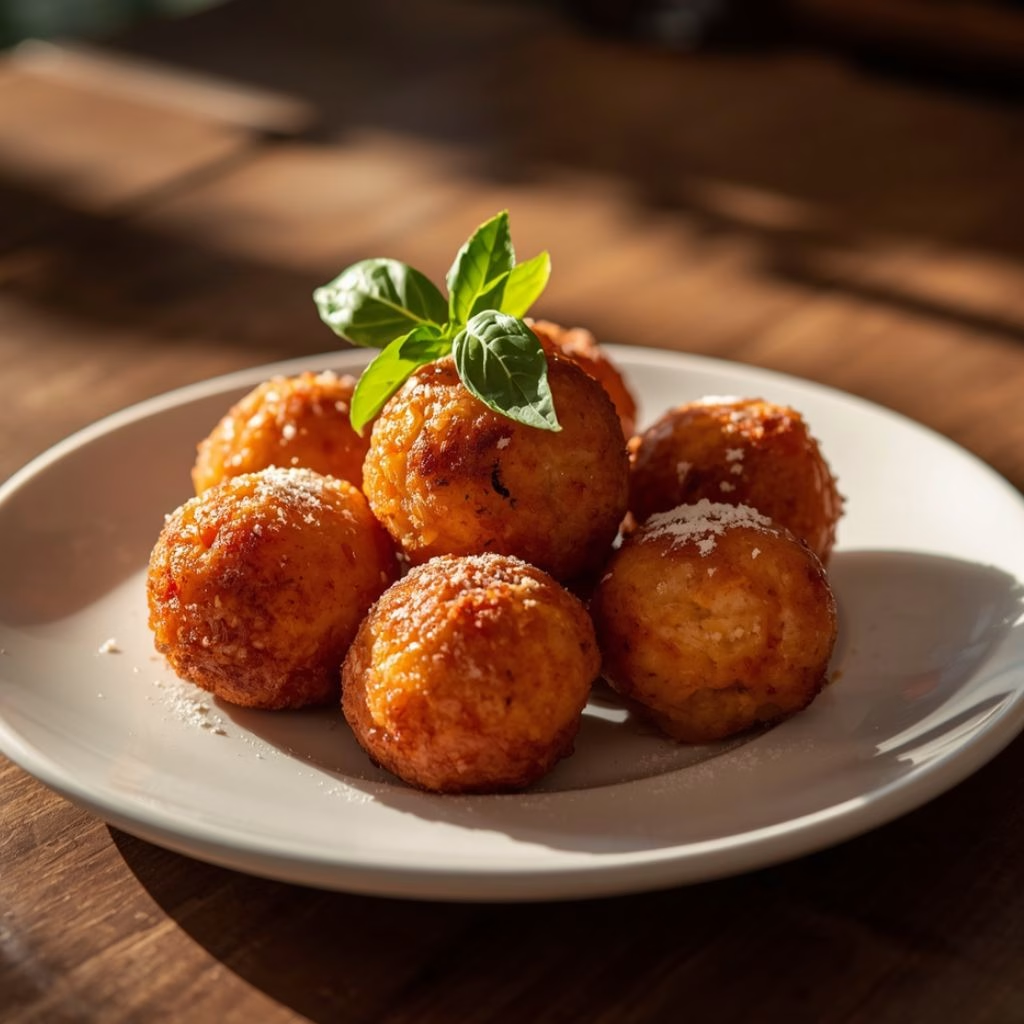
The result was a crispy, cheesy bite that disappeared from the plate in minutes. Ever since then, Parmesan Arancini Balls Recipe has been my go-to trick whenever I have risotto leftovers, and I promise it will become yours too.

Ingredients You’ll Need
Here’s everything that goes into making these golden, cheesy bites at home.
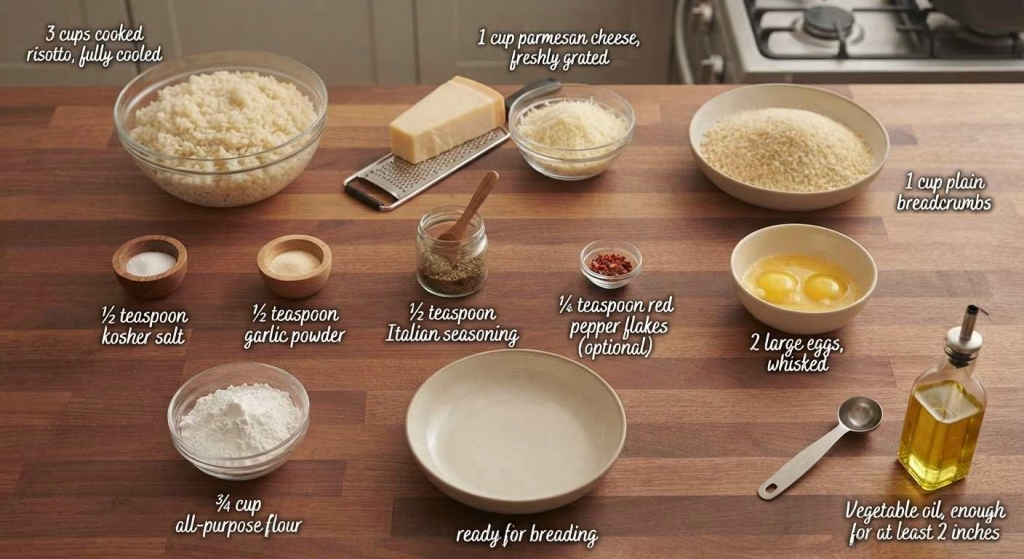
- 3 cups cooked risotto, fully cooled – using rice that’s chilled helps it hold its shape when you roll it into balls, so avoid using warm rice straight off the stove.
- 1 cup parmesan cheese, freshly grated – pre-shredded cheese from a bag often contains anti-caking agents that keep it from melting smoothly, so grating your own gives a much better texture.
- ½ teaspoon kosher salt – balances the richness of the cheese and rice.
- ½ teaspoon garlic powder – adds a subtle savory depth without overpowering the dish.
- ½ teaspoon Italian seasoning – brings in that classic herby, Italian flavor.
- ¼ teaspoon red pepper flakes, optional – skip this if your risotto is already well seasoned or if you prefer a milder bite.
- 1 cup plain breadcrumbs – panko works too if you want an extra crunchy shell.
- 2 large eggs, whisked – this is what helps the breadcrumbs cling to the rice balls.
- ¾ cup all-purpose flour – a light dusting here helps the egg stick evenly before breading.
- Vegetable oil, enough for at least 2 inches in your pot – a neutral oil works best since it won’t compete with the flavor of the cheese.
Note: These quantities make about 15 arancini balls, which is enough to serve as an appetizer for 4 to 6 people at a gathering.
Variations to Try
Want to switch things up? Here are a few easy swaps.
- Use a dairy-free parmesan alternative and a plant-based egg wash if you want a fully dairy-free version.
- Stuff each ball with a small cube of mozzarella before rolling for a gooey, melty center.
- Swap the red pepper flakes for smoked paprika if you want a milder, smokier flavor instead of heat.
- Mix finely chopped sun-dried tomatoes or olives into the risotto mixture for extra bursts of flavor.
- Try seasoned panko instead of plain breadcrumbs for an even more flavorful crust.
Cooking Time
- Prep Time: 15 minutes
- Cook Time: 15 minutes
- Total Time: 30 minutes
Equipment You’ll Need
- Large mixing bowl – for combining the risotto with cheese and seasonings.
- Cookie scoop – helps portion the rice evenly so every ball fries at the same rate.
- Three shallow bowls – for setting up your flour, egg, and breadcrumb station.
- Heavy-bottomed pot or Dutch oven – holds the oil at a steady temperature while frying.
- Kitchen thermometer – keeps your oil at the right temperature so the balls cook evenly.
- Slotted spoon – for safely lowering and removing the arancini from the hot oil.
- Paper towel-lined plate – catches excess oil after frying.
How to Make Parmesan Arancini Balls?
Making arancini is simpler than it looks once you have your ingredients prepped and ready. It comes together in a few easy stages: mixing, rolling, breading, and frying. Follow these steps and you’ll have a golden batch ready in half an hour.
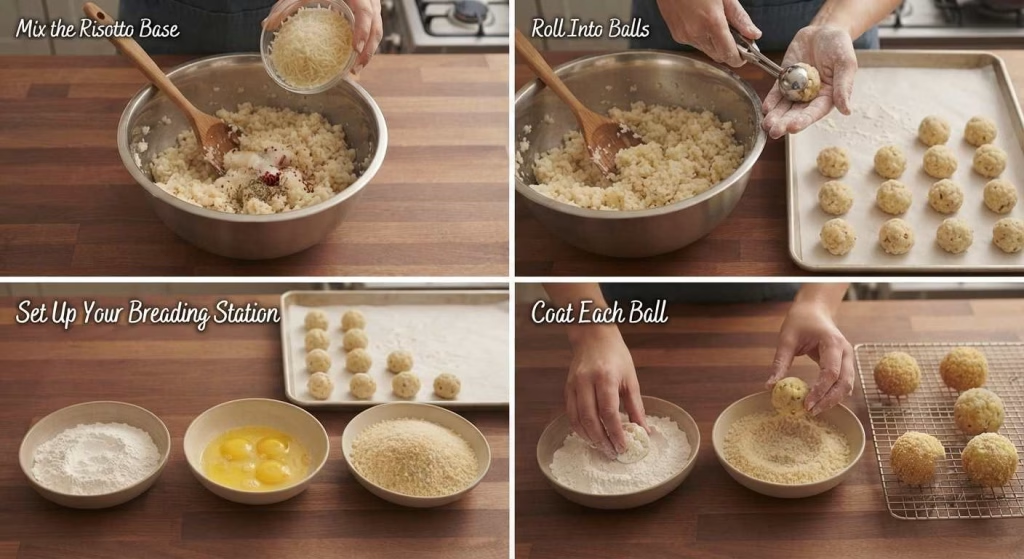
Mix the Risotto Base
Combine the cooled risotto with three-quarters of the parmesan, salt, garlic powder, Italian seasoning, and red pepper flakes in a large bowl. Stir everything together until it’s evenly distributed throughout the rice. This forms the flavorful base for every bite.
Roll Into Balls
Using a small cookie scoop, portion out the rice mixture and roll each scoop between your palms into a tight one-inch ball. Press firmly as you roll so the rice compacts and doesn’t fall apart later. Repeat until all the rice is used.
Set Up Your Breading Station
Place the flour, whisked eggs, and breadcrumbs into three separate shallow bowls. Keeping them separate makes the coating process quick and mess-free. This setup is key to getting an even, crispy shell on every ball.
Coat Each Ball
Dip each risotto ball first into the flour, then the egg, and finally the breadcrumbs, making sure it’s fully covered at each stage. The flour helps the egg adhere, and the egg helps the breadcrumbs stick. Set the coated balls aside on a tray until you’re ready to fry.
Heat the Oil
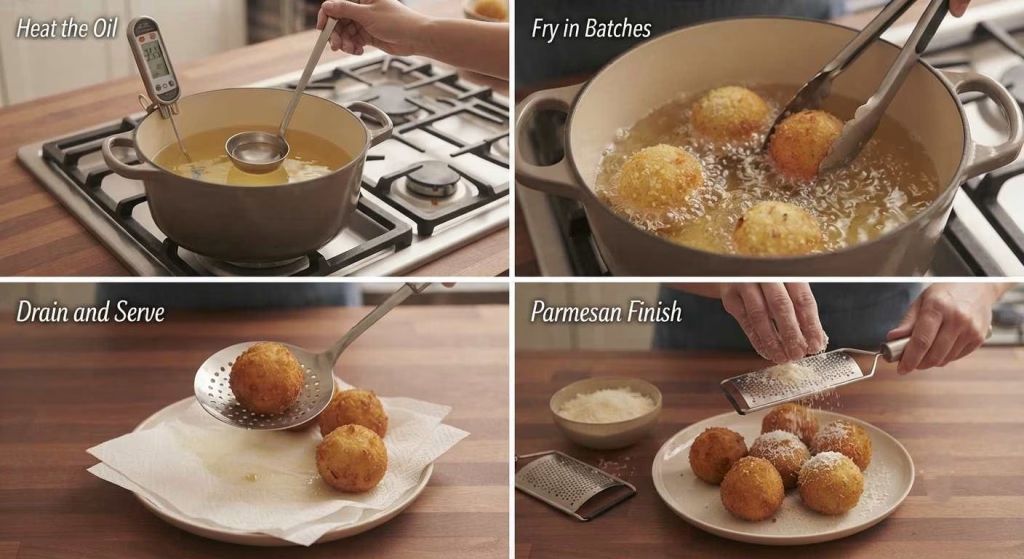
Pour vegetable oil into a heavy-bottomed pot until it reaches about two inches deep. Heat it over medium heat until it hits 365 degrees Fahrenheit. Getting the temperature right is essential for a crisp exterior without a greasy result.
Fry in Batches
Carefully lower three to four arancini balls into the hot oil at a time. Fry for one to two minutes, turning gently, until they’re deep golden brown all over. Frying in small batches keeps the oil temperature steady. If you enjoy crispy comfort food made with simple ingredients, Egg Roll in a Bowl Recipe is another delicious option to add to your meal rotation.
Drain and Serve
Remove the fried balls with a slotted spoon and place them on a paper towel-lined plate to drain excess oil. Sprinkle the remaining parmesan while they’re still warm. Serve them right away for the best texture.
Additional Tips for Making This Recipe Better
After making this recipe more times than I can count, here’s what I’ve learned along the way.
- I always make sure my risotto is completely cold before rolling it, since warm rice falls apart and won’t hold its shape in the oil.
- I like to pack the rice balls tightly as I roll them, because loose balls tend to crumble apart during frying.
- I check my oil temperature with a thermometer every single time, since guessing often leads to soggy or burnt arancini.
- I fry in small batches so the oil doesn’t cool down too fast, which keeps every ball evenly crisp.
- I set out all three breading bowls before I start rolling, because having everything ready saves me from a sticky mess halfway through.
How to Serve Parmesan Arancini Balls?
These rice balls are best enjoyed warm, right out of the fryer. Arrange them on a platter with a small bowl of dipping sauce in the center, like a spicy ranch or a simple marinara.
A sprinkle of fresh parsley and extra grated parmesan on top makes them look even more inviting. For a party spread, serve them alongside other finger foods, and Stuffed Pepper Casserole Recipe pairs especially well as another hearty comfort-food favorite.
Nutritional Information
Here’s a general idea of what one serving of these arancini balls provides.
- Calories: around 268 per serving
- Protein: about 5 grams
- Carbohydrates: around 22 grams
- Fat: approximately 18 grams
Make Ahead and Storage
Make Ahead: You can roll and bread the arancini balls a day in advance, then keep them covered in the fridge until you’re ready to fry. This makes party prep much easier since the messiest part is done ahead of time.
Storage: Once cooled, store any leftover fried arancini in an airtight container in the fridge for 3 to 5 days. Keeping them airtight prevents them from drying out or absorbing other fridge smells.
Freezing: You can freeze the uncooked, breaded balls on a tray until solid, then transfer them to a freezer bag for up to 2 months. Fry them straight from frozen, adding an extra minute or two to the cooking time.
Reheating: Warm leftovers in the microwave for 60 to 90 seconds, or for a crispier result, reheat them in a lightly oiled pan over medium heat for a few minutes on each side.
Why You’ll Love This Recipe?
This recipe earns a permanent spot in my rotation for so many reasons.
- It’s a fantastic way to use up leftover risotto instead of letting it go to waste in the fridge.
- It comes together with simple pantry staples like breadcrumbs, eggs, and flour that you probably already have.
- It’s endlessly customizable, since you can stuff it with cheese, swap the seasonings, or change up the dip.
- It’s a guaranteed crowd-pleaser, whether you’re serving it at a holiday party or a casual weekend get-together.
- It reheats well, so you can make a batch ahead of time and still enjoy that crispy texture later.

Crispy Parmesan Arancini Balls Recipe
Ingredients
Method
- Combine the cooled risotto with three-quarters of the parmesan, salt, garlic powder, Italian seasoning, and red pepper flakes in a large bowl. Stir everything together until it’s evenly distributed throughout the rice. This forms the flavorful base for every bite.
- Using a small cookie scoop, portion out the rice mixture and roll each scoop between your palms into a tight one-inch ball. Press firmly as you roll so the rice compacts and doesn’t fall apart later. Repeat until all the rice is used.
- Place the flour, whisked eggs, and breadcrumbs into three separate shallow bowls. Keeping them separate makes the coating process quick and mess-free. This setup is key to getting an even, crispy shell on every ball.
- Dip each risotto ball first into the flour, then the egg, and finally the breadcrumbs, making sure it’s fully covered at each stage. The flour helps the egg adhere, and the egg helps the breadcrumbs stick. Set the coated balls aside on a tray until you’re ready to fry.
- Pour vegetable oil into a heavy-bottomed pot until it reaches about two inches deep. Heat it over medium heat until it hits 365 degrees Fahrenheit. Getting the temperature right is essential for a crisp exterior without a greasy result.
- Carefully lower three to four arancini balls into the hot oil at a time. Fry for one to two minutes, turning gently, until they’re deep golden brown all over. Frying in small batches keeps the oil temperature steady.
- Remove the fried balls with a slotted spoon and place them on a paper towel-lined plate to drain excess oil. Sprinkle the remaining parmesan while they’re still warm. Serve them right away for the best texture.
Notes
- I always make sure my risotto is completely cold before rolling it, since warm rice falls apart and won’t hold its shape in the oil.
- I like to pack the rice balls tightly as I roll them, because loose balls tend to crumble apart during frying.
- I check my oil temperature with a thermometer every single time, since guessing often leads to soggy or burnt arancini.
- I fry in small batches so the oil doesn’t cool down too fast, which keeps every ball evenly crisp.
- I set out all three breading bowls before I start rolling, because having everything ready saves me from a sticky mess halfway through.