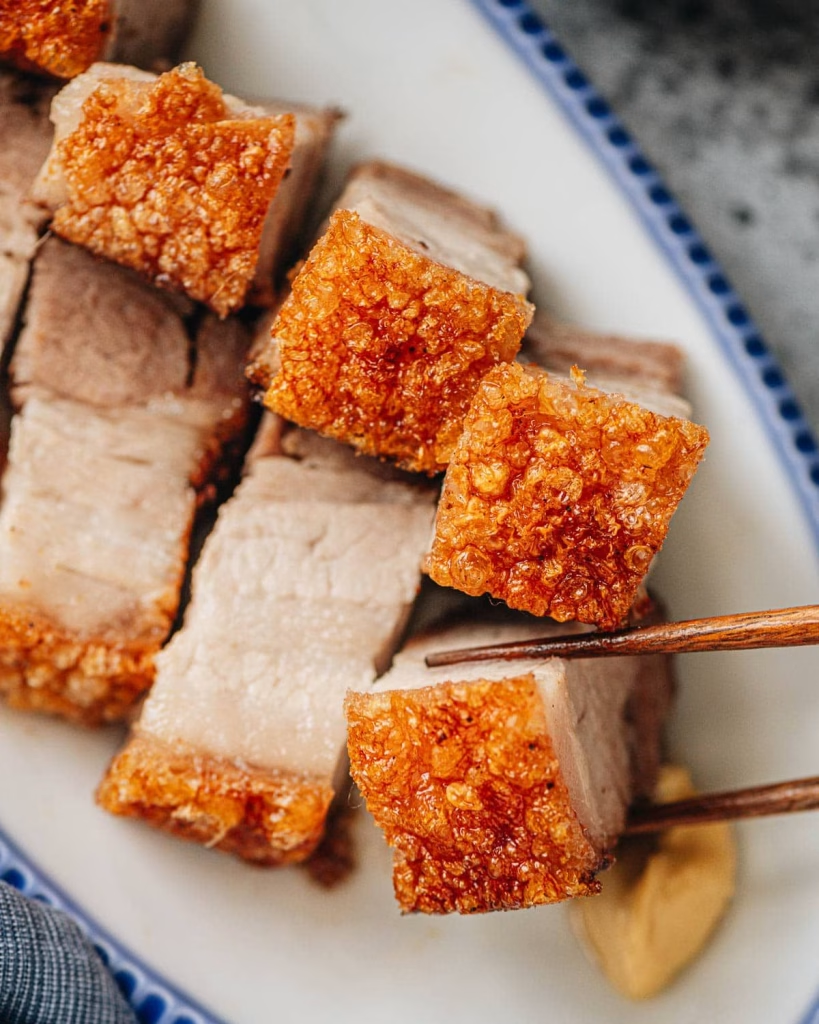
If there’s one thing I’ve learned from experimenting in the kitchen, it’s that pork belly and the air fryer are a match made in crispy heaven.
That irresistible crunch on the outside with tender, melt-in-your-mouth layers underneath—it’s enough to turn any regular dinner into a flavor-packed treat. And the best part? It’s all done in the air fryer, with way less oil, way less mess, and way more ease.
Whether you’re a pork belly pro or trying it for the first time, the air fryer simplifies everything. Still, there are a few key things I wish someone had told me before I started making it.
So, if you’re planning your next dinner around a pork belly air fryer recipe, let me help you get the absolute best results, with less trial and error.

How Do I Get That Ultra-Crispy Skin?
Getting that golden, blistered, crackling skin is every pork belly lover’s dream—and yes, the air fryer can do it beautifully. But, and this is a big but, it won’t happen unless you prep the skin properly. One of the most helpful things I learned is to dry out the skin as much as possible before cooking.
I usually pat it down with paper towels, then leave it uncovered in the fridge overnight if I have time. The dry air helps dehydrate the skin, which crisps up much better later.
Scoring the skin (making shallow cuts) also helps the fat render out properly. Just be careful not to cut into the meat. And don’t skip the salt—it’s your best friend for getting that skin crispy and flavorful.
Should I Marinate or Just Use Dry Rub?
This really comes down to your flavor preference. Personally, I like to do a dry rub for the meat side and leave the skin plain except for some salt. That way, the skin has the best shot at crisping up without any moisture-heavy sauces messing it up.
That said, if you’re after a sweet-spicy flavor or something more Asian-inspired, go for a marinade—but only on the meat side. Soy sauce, garlic, ginger, a touch of honey—those flavors are incredible. Just remember to pat the skin dry again before it hits the air fryer. I often pair this with sides like an air fryer carrots recipe to round out the meal with something simple yet flavorful.
How Long Do I Cook Pork Belly in the Air Fryer?
The general sweet spot seems to be around 30–40 minutes, depending on the size and thickness of your pork belly slices or slab. I usually start at a lower temperature (around 320°F or 160°C) for the first 20 minutes to render out the fat slowly, then crank it up to 400°F (200°C) to blister the skin during the last 10–15 minutes.
You’ll want to flip halfway through if your pieces aren’t thick or if you’re cooking small chunks. For thick slabs, just keep an eye on it and rotate if needed. And of course, every air fryer is a little different—so peek inside once or twice. You’ll know it’s done when that skin bubbles and the meat is tender with a slight caramelized edge.
Can I Make It Ahead of Time?
Absolutely, and I often do—especially if I’m planning for guests. Pork belly actually stores and reheats beautifully. Once it’s cooked and cooled, just slice it up and keep it in an airtight container in the fridge for up to 4 days.
To reheat, I toss the slices back into the air fryer for a few minutes at 375°F until they’re hot and crispy again. It’s honestly like having restaurant-style leftovers that taste just as good (sometimes even better!) than fresh. Leftovers also pair nicely with quick bites like an air fryer wings recipe, especially for game nights or casual gatherings.
Is Pork Belly Greasy in the Air Fryer?
You’d think so, right? But surprisingly, no. One of the biggest perks of using the air fryer is how much fat actually drains off during cooking. I always place the pork belly skin side up, so the fat renders down and drips away from the meat.
If I’m cooking pieces, I’ll even line the bottom with a bit of parchment or foil to catch the drippings and make cleanup easier. The result? Pork belly that’s rich and juicy, but not overly oily. The air fryer somehow strikes the perfect balance between indulgent and manageable.
How Do I Serve It?
This part is totally up to you. Sometimes I’ll slice the pork belly thin and serve it over jasmine rice with pickled veggies and a drizzle of hoisin sauce. Other days, I’ll cube it up and toss it on top of ramen or noodle stir-fry for added richness.

It’s also amazing tucked into bao buns with a bit of fresh cucumber and scallion—so good. And if you’re keeping things simple? Just pile the crispy pieces on a platter with some dipping sauce (think soy-vinegar or chili garlic) and call it a night. It’s even better when paired with sides like an Fried Pickles Recipe Air Fryer.
Can I Freeze Cooked Pork Belly?
Yes, and it’s a great way to keep leftovers from going to waste. I usually wrap individual pieces tightly in foil and then store them in a freezer bag. They’ll keep for about 2 months without losing too much texture.
When you’re ready to enjoy again, thaw them in the fridge overnight and re-crisp in the air fryer at 375°F. It’s honestly one of the best freezer-friendly meats I’ve worked with. And it’s always nice to have some stashed away when you’re too busy to cook from scratch.
Is Pork Belly Hard to Digest?
That’s a question I get asked a lot, especially from friends who are newer to fattier cuts of meat. Pork belly is rich—there’s no getting around that. It has a higher fat content than most meats, so I usually pair it with something acidic or fresh to balance it out.
Think pickled vegetables, a crunchy slaw, or even a squeeze of lime. That way, it doesn’t feel so heavy. And portion size helps too—I keep servings small and savor each bite instead of overloading the plate.
My Favorite Tip? Let It Rest!
This might sound simple, but letting pork belly rest after cooking makes a huge difference. I used to slice into it the moment it came out of the air fryer, and while it was still tasty, the juices would run out, and the texture wasn’t as perfect.
Now, I let it rest for about 10 minutes before cutting. It helps everything settle—so the meat stays moist, and the skin stays crunchy. Trust me, it’s worth the wait

Pork Belly Air Fryer Recipe
Ingredients
Method
- First, make sure the pork belly is completely dry—pat it down with paper towels to remove any moisture. Dry skin is key to achieving that blistering, crackly top. Then use a sharp knife to score the skin in a crosshatch pattern—shallow cuts that don’t reach the meat. Rub the skin generously with sea salt, pressing it gently into the crevices to enhance crisping. Lightly spray the underside (meat side) with olive oil to prevent sticking.
- Preheat your air fryer to 400 °F (200 °C), then place the pork belly skin-side up in the basket. Cook for about 20–25 minutes until you hear the skin crackling. The high heat helps the fat render out and forms a beautifully blistered crust. You should see a golden, bubbly surface—that’s how you know it’s working.
- Once the skin crackles, reduce the temperature to 320 °F (160 °C). This slower cooking lets the meat become tender while giving enough time for the interior fat to melt away, without burning the skin. Continue cooking for another 10–15 minutes or until a meat thermometer reads 145 °F in the thickest part of the meat.
- Remove the pork belly from the air fryer and let it rest on a cutting board for about 10 minutes. This allows the meat fibers to reabsorb the juices, so when you slice it you’ll get moist, flavorful cuts with crisp skin on top. Cut with a sharp knife perpendicular to the score lines, and enjoy it hot for the best texture.