I started making this Pumpkin Banana Pancakes Recipe on a chilly Sunday when I had half a can of pumpkin puree sitting in my fridge and two overripe bananas begging to be used before they went bad. One bite in, and I knew this combination was a keeper for my family’s weekly breakfast rotation.
The batter comes together in one bowl with no fancy equipment, the pancakes turn out soft and fluffy every single time, and the warm spice smell that fills my kitchen while they cook is honestly half the reason I make them so often.
Whether I’m feeding my toddler, meal-prepping for busy weekdays, or just craving a cozy fall breakfast, this recipe never lets me down. I’ve tweaked it enough times now that I feel confident sharing exactly how I make it so you can enjoy the same fluffy results at home.

Cooking Time
- Prep Time: 10 minutes
- Cook Time: 15 minutes
- Total Time: 25 minutes
Ingredients
- 1 cup all-purpose flour (or swap in oat flour for a heartier, naturally gluten-free base)
- 1 tablespoon brown sugar (adds a light caramel note; skip it if you want a no-added-sugar version)
- 2 teaspoons baking powder (this is what gives the pancakes their fluffy lift)
- 1 teaspoon pumpkin pie spice (or use cinnamon if that’s all you have on hand)
- ¼ teaspoon salt (balances the sweetness so the pancakes don’t taste flat)
- ¾ cup milk (any kind works, so dairy-free pours are totally fine here)
- 1 large egg (helps bind the batter and adds a protein boost)
- ½ cup pumpkin puree (make sure it’s plain pumpkin, not pumpkin pie filling)
- 1 ripe banana, mashed (the riper it is, the sweeter and more flavorful your pancakes will be)
- 1 tablespoon melted butter or oil (keeps the pancakes moist instead of dry)
- Butter or oil, for greasing the pan
Note: This recipe serves 3-4 people and makes about 10-12 small pancakes.
Equipment You Need
- Mixing bowls: one for wet ingredients and one for dry ingredients
- Whisk or fork: to blend the batter smoothly without overworking it
- Non-stick skillet or griddle: for even cooking without sticking
- Measuring cups and spoons: for accurate ingredient amounts
- Spatula: for flipping the pancakes without breaking them
- Ladle or ¼ cup measuring cup: to pour consistent pancake sizes

How to Make Pumpkin Banana Pancakes Recipe?
Making these pancakes is easier than it looks, and you really only need two bowls to pull it off. I like to get my dry ingredients whisked first so I’m not scrambling halfway through once the wet mixture is ready. From there, it’s just mixing, pouring, and flipping until you have a warm, fluffy stack ready to serve.
Step 1: Whisk the Dry Ingredients
In a medium bowl, whisk together the flour, brown sugar, baking powder, pumpkin pie spice, and salt until everything looks evenly blended. Whisking these together first means the baking powder gets evenly distributed, so you won’t end up with any bitter pockets in your finished pancakes. Set this bowl aside while you prepare the wet mixture in a separate bowl.
Step 2: Mix the Wet Ingredients
In a separate bowl, whisk the milk, egg, pumpkin puree, mashed banana, and melted butter together until the mixture looks smooth and well combined. Take your time mashing the banana beforehand so there are no big lumps left sitting in the batter. This wet mixture is really where all the moisture, sweetness, and flavor of the pancakes comes from.
Step 3: Combine into a Batter
Pour the dry ingredients into the wet mixture and stir gently with a spatula until just combined. I always remind myself not to overmix at this stage, since a few small lumps in the batter are totally fine and expected. Overmixing activates the gluten too much and leads to dense, chewy pancakes instead of light, fluffy ones.
Step 4: Heat Your Pan
Warm a non-stick skillet or griddle over medium-low heat and lightly grease it with a little butter or oil. I like to test the pan with a small drop of batter first to make sure it’s actually hot enough before committing a full pancake. If the test drop sizzles gently without burning right away, you’re ready to start cooking the rest.
Step 5: Cook the Pancakes
Pour about ¼ cup of batter onto the skillet for each pancake, leaving a little space between them so they don’t merge together. Cook for 2-3 minutes until small bubbles form on the surface and the edges start to look set and slightly dry. This is your cue that the bottom has turned golden and is ready for flipping.
Step 6: Flip and Finish Cooking
Carefully flip each pancake with a spatula and cook for another 1-2 minutes on the other side. You’ll know they’re done when both sides are an even golden brown and the center springs back gently when lightly pressed. Transfer them to a plate and repeat with the remaining batter until it’s all used up.
Additional Tips for Making This Recipe Better
- I always use a ripe, spotty banana because it blends in smoothly and adds natural sweetness without extra sugar.
- I let my batter rest for five minutes before cooking, and I find it gives noticeably fluffier pancakes.
- I keep my heat at medium-low, since pumpkin batter burns faster than plain pancake batter if the pan is too hot.
- I make a double batch on weekends so I always have a freezer stash ready for hectic mornings.
- I add a splash of extra milk if my batter feels too thick, since pumpkin puree brands vary in moisture content.
Common Mistakes to Avoid
- I’ve overmixed the batter before, and it left me with tough, rubbery pancakes instead of soft ones.
- I once used pumpkin pie filling instead of plain puree, and the pancakes turned out way too sweet and spiced.
- I’ve cooked on heat that was too high, which burned the outside while the inside stayed raw and gummy.
- I skipped resting the batter once when I was in a rush, and the pancakes came out flatter than usual.
- I flipped pancakes too early before bubbles fully formed, and they fell apart in the pan.
How to Serve Pumpkin Banana Pancakes?
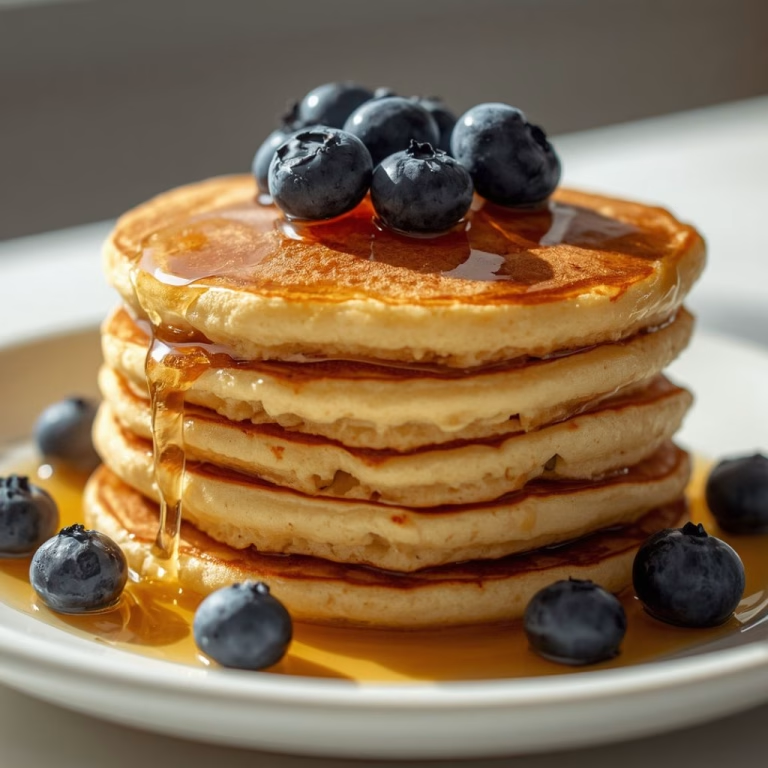
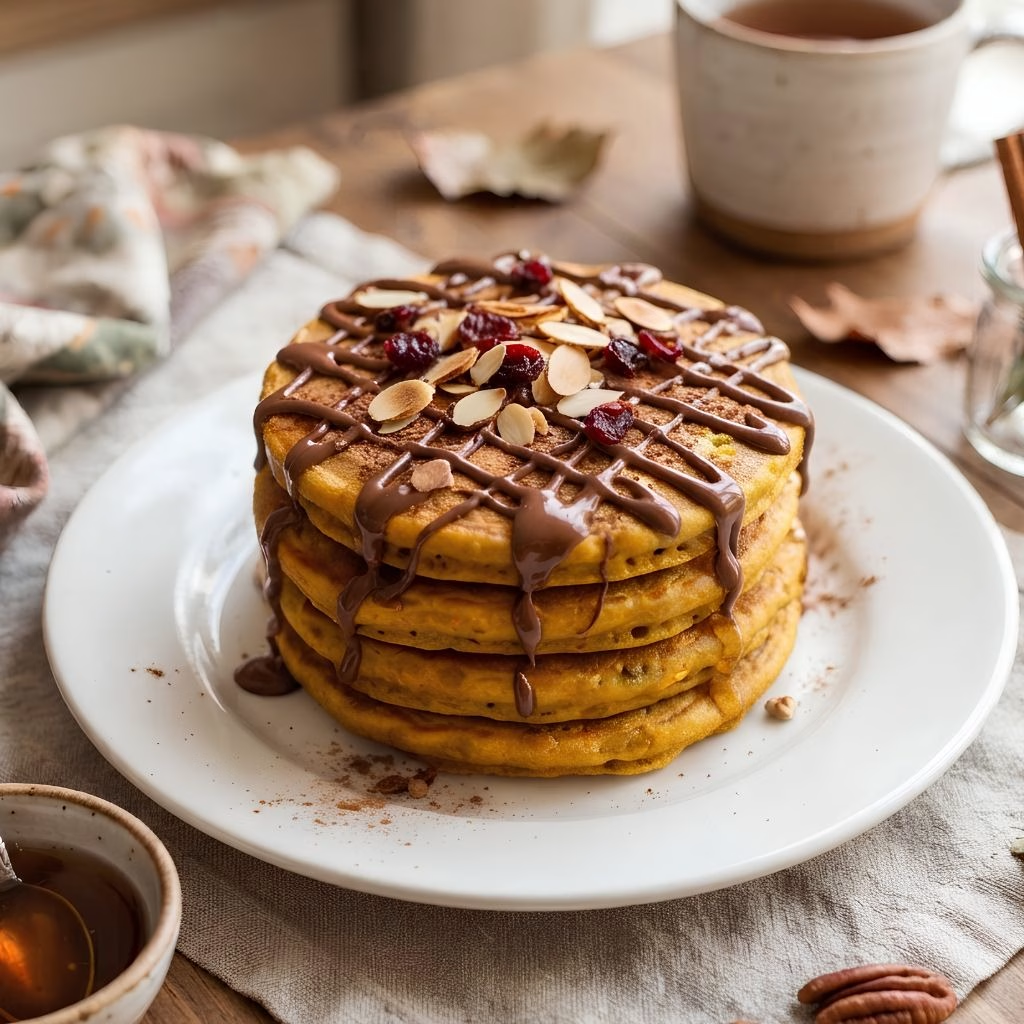
I love stacking these pancakes high on a plate with a pat of butter melting right in the center of the top one. A drizzle of maple syrup and a few extra banana slices on top make them look bakery-worthy in seconds, even on a rushed weekday morning.
For an extra finishing touch, I’ll sometimes dust the stack with a little cinnamon, scatter on some toasted pecans, or add a dollop of yogurt on the side for a creamy, tangy contrast. When I’m serving these to my toddler, I skip the syrup altogether and just add extra banana slices, since the pancakes are plenty sweet on their own.
Variations
- Dairy-free: use almond milk or oat milk and swap the butter for coconut oil.
- Sugar-free: skip the brown sugar and rely on the banana’s natural sweetness instead.
- Pumpkin banana oat pancakes: replace the flour with blended rolled oats for a heartier, fiber-rich texture.
- Pumpkin banana protein pancakes: stir in a scoop of vanilla protein powder for an extra nutrition boost.
- Pumpkin banana almond flour pancakes: swap in almond flour for a lower-carb, gluten-free option.
- Banana pumpkin pancakes no flour: blend oats, banana, pumpkin, and egg together for a simple flourless batter.
- Mix-ins: fold in chocolate chips, chopped walnuts, or a handful of raisins for extra flavor.
Nutritional Information
Here’s a general breakdown per serving of these pancakes, though exact values will vary based on your ingredient swaps:
- Calories: approximately 180-220 kcal
- Protein: approximately 5-7 grams
- Carbohydrates: approximately 28-32 grams
- Fat: approximately 6-8 grams
Make Ahead and Storage
You can prepare the batter up to a day in advance and keep it covered in the fridge until you’re ready to cook. This makes busy mornings so much easier since all that’s left to do is heat the pan and pour.
Once cooked, store leftover pancakes in an airtight container in the refrigerator for up to 3 days. Reheat them in a toaster, skillet, or microwave until warmed through.
For longer storage, freeze cooled pancakes in a single layer before transferring them to a freezer bag, where they’ll keep well for up to 2 months. Reheat straight from frozen in a toaster for a quick, no-fuss breakfast.
Why You’ll Love This Recipe
These pumpkin banana pancakes check every box for an easy, family-friendly breakfast that doesn’t feel like a chore to make.
- Quick and simple: the batter comes together in one bowl with basic pantry staples in under 10 minutes.
- Kid and baby-friendly: soft texture and mild spice make it easy to serve to little ones, including toddlers and babies just starting solids.
- Naturally sweetened: ripe banana means you can easily cut back on added sugar without sacrificing flavor.
- Endlessly customizable: swap the flour, add protein powder, or mix in extras to match whatever you’re craving.
- Freezer-friendly: a big batch means you always have a wholesome breakfast ready to reheat on busy days.
FAQs
Can I make these pumpkin banana pancakes for my baby or toddler?
Yes, these pancakes work well for babies and toddlers since they’re soft, mildly spiced, and easy to cut into small pieces or strips for little hands.
Can I make this recipe without flour?
Yes, you can blend oats, banana, pumpkin, and egg together to create a simple flourless batter with a slightly denser texture.
How do I store leftover pancakes?
Keep them in an airtight container in the fridge for up to 3 days, or freeze them for up to 2 months for longer storage.
Can I substitute the egg in this recipe?
Yes, a flax egg or an extra quarter cup of mashed banana can work as a substitute, though the texture will be slightly denser.
Why are my pancakes turning out dense instead of fluffy?
This usually happens from overmixing the batter or cooking on heat that’s too high, so stir gently and keep your pan at medium-low.

Pumpkin Banana Pancakes Recipe
Ingredients
Method
- In a medium bowl, whisk together the flour, brown sugar, baking powder, pumpkin pie spice, and salt until everything looks evenly blended. Whisking these together first means the baking powder gets evenly distributed, so you won’t end up with any bitter pockets in your finished pancakes. Set this bowl aside while you prepare the wet mixture in a separate bowl.
- In a separate bowl, whisk the milk, egg, pumpkin puree, mashed banana, and melted butter together until the mixture looks smooth and well combined. Take your time mashing the banana beforehand so there are no big lumps left sitting in the batter. This wet mixture is really where all the moisture, sweetness, and flavor of the pancakes comes from.
- Pour the dry ingredients into the wet mixture and stir gently with a spatula until just combined. I always remind myself not to overmix at this stage, since a few small lumps in the batter are totally fine and expected. Overmixing activates the gluten too much and leads to dense, chewy pancakes instead of light, fluffy ones.
- Warm a non-stick skillet or griddle over medium-low heat and lightly grease it with a little butter or oil. I like to test the pan with a small drop of batter first to make sure it’s actually hot enough before committing a full pancake. If the test drop sizzles gently without burning right away, you’re ready to start cooking the rest.
- Pour about ¼ cup of batter onto the skillet for each pancake, leaving a little space between them so they don’t merge together. Cook for 2-3 minutes until small bubbles form on the surface and the edges start to look set and slightly dry. This is your cue that the bottom has turned golden and is ready for flipping.
- Carefully flip each pancake with a spatula and cook for another 1-2 minutes on the other side. You’ll know they’re done when both sides are an even golden brown and the center springs back gently when lightly pressed. Transfer them to a plate and repeat with the remaining batter until it’s all used up.
Notes
- I always use a ripe, spotty banana because it blends in smoothly and adds natural sweetness without extra sugar.
- I let my batter rest for five minutes before cooking, and I find it gives noticeably fluffier pancakes.
- I keep my heat at medium-low, since pumpkin batter burns faster than plain pancake batter if the pan is too hot.
- I make a double batch on weekends so I always have a freezer stash ready for hectic mornings.
- I add a splash of extra milk if my batter feels too thick, since pumpkin puree brands vary in moisture content.