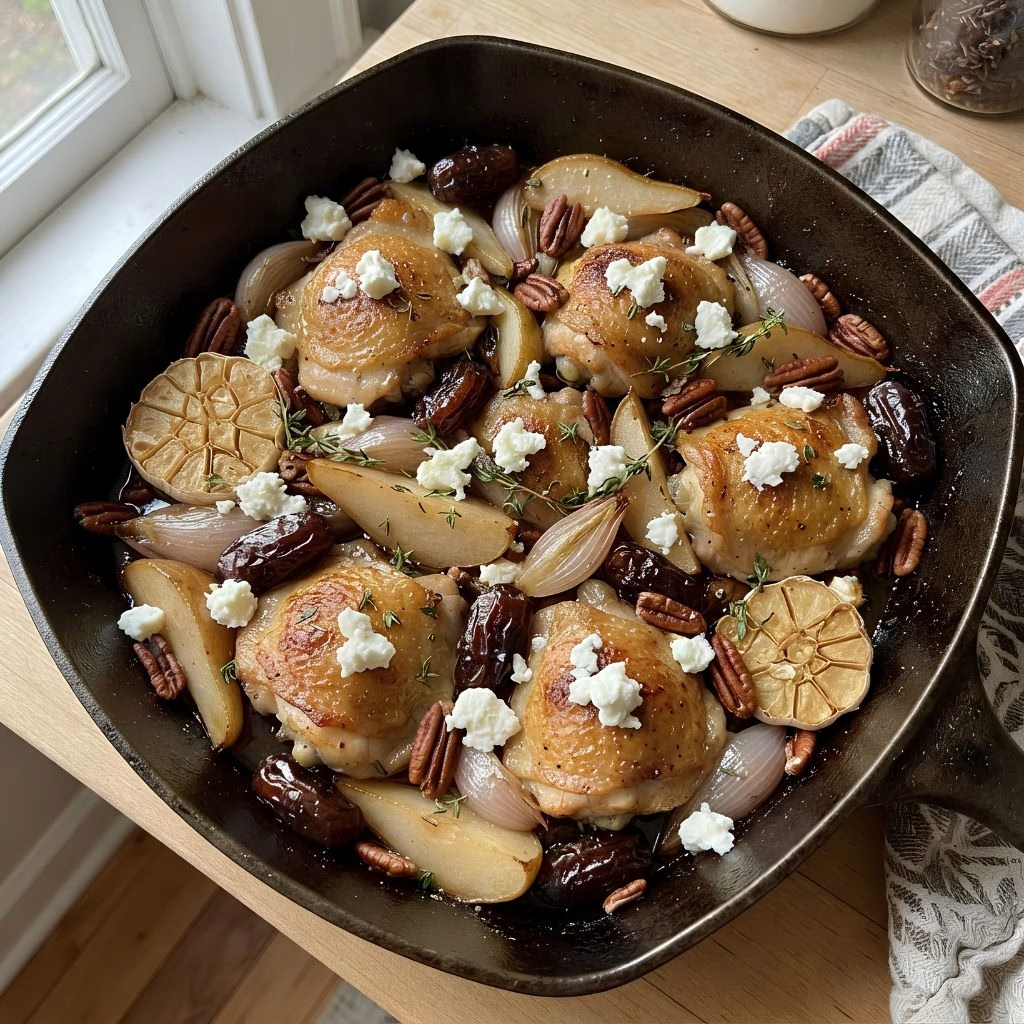
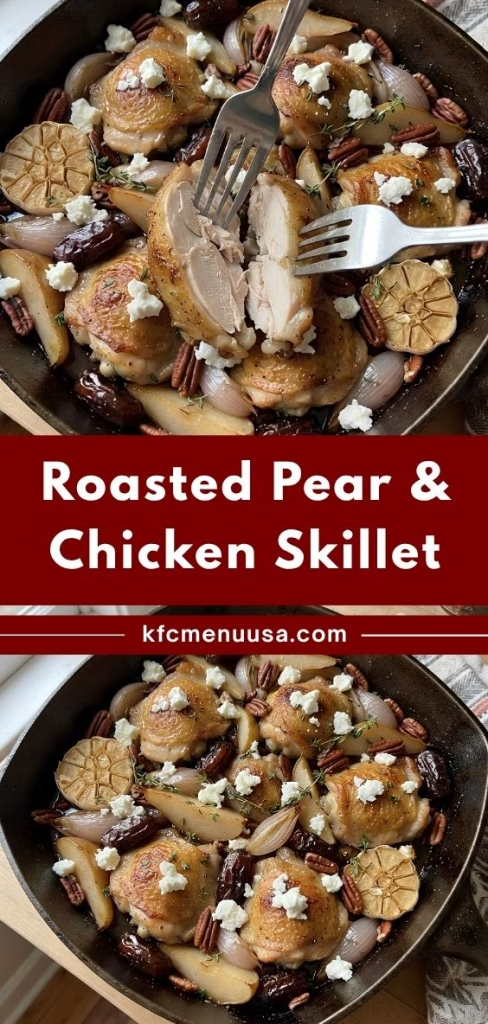
I first made this Roasted Pear and Chicken Skillet Recipe on a night when I genuinely did not feel like cooking, and it ended up becoming one of my favorite weeknight dinners. I love how the chicken thighs turn golden and crisp while the pears soften into these sweet, jammy little bites right alongside them.
The smell of maple, warm spices, and roasting fruit filling my kitchen is honestly half the reason I keep making this. It comes together in one pan, which means less cleanup for me, and more time to actually sit down and enjoy the meal. If you want something that feels a little fancy but takes almost no effort, this is it.
Cooking Time
- Prep Time: 10 minutes
- Cook Time: 40 minutes
- Total Time: 50 minutes
Ingredients
- 4 bone-in, skin-on chicken thighs, this cut stays juicy and crisps up beautifully in the oven
- 3 firm pears, cut into wedges, Bosc pears hold their shape best when roasted
- 2 shallots, cut into wedges, they turn sweet and slightly caramelized as they cook
- 1 whole garlic bulb, halved crosswise, roasting it whole mellows the flavor and makes it spreadable
- 2 tablespoons neutral cooking oil, avocado or grapeseed oil works well for high heat
- 1 tablespoon maple syrup, adds a subtle sweetness that balances the savory chicken
- 2 teaspoons kosher salt, seasons the chicken and vegetables evenly throughout
- 1 teaspoon garam masala, or swap in allspice for a warm, cozy flavor
- 1/2 teaspoon ground ginger, adds a gentle warmth without overpowering the dish
- 1/2 teaspoon red pepper flakes, gives just a little kick, skip it if you prefer mild
- 1/3 cup raw pecans, toast beautifully in the last few minutes for crunch
- 6 dates, halved and pitted, they melt into sticky, caramel-like bites
- 2 ounces goat cheese, crumbled, adds a creamy, tangy finish, use fresh rather than pre-crumbled for best texture
Note: This recipe serves 4 people comfortably.
Equipment You Need
- Oven-safe skillet, such as cast iron, holds everything and goes straight from stovetop to oven
- Chef’s knife, for cutting the pears, shallots, and dates
- Cutting board, gives you a stable surface for prepping ingredients
- Mixing bowl, for tossing the chicken and vegetables with oil and spices
- Tongs, make it easy to arrange and turn the chicken pieces
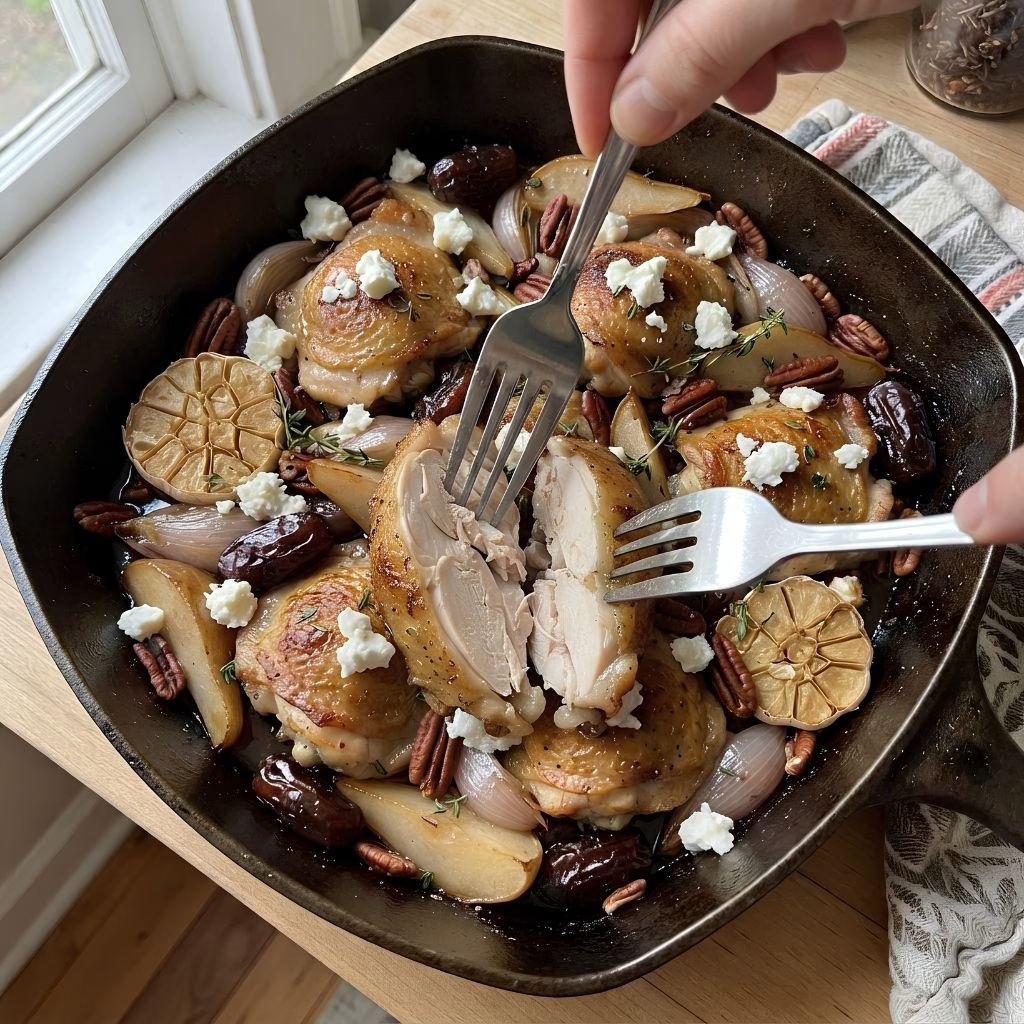
How to Make Roasted Pear and Chicken Skillet Recipe?
This recipe comes together in just a handful of steps, and most of the work is really just tossing everything together. I always prep my ingredients first so the actual cooking goes smoothly. Once everything is in the skillet, the oven does most of the heavy lifting for you.
Preheat and Prep
I start by preheating my oven to 425°F so it is fully hot by the time my skillet goes in. While it heats, I cut my pears into wedges, slice the shallots, and halve the garlic bulb. Getting everything prepped ahead of time makes the next steps much faster.
Season the Chicken and Vegetables
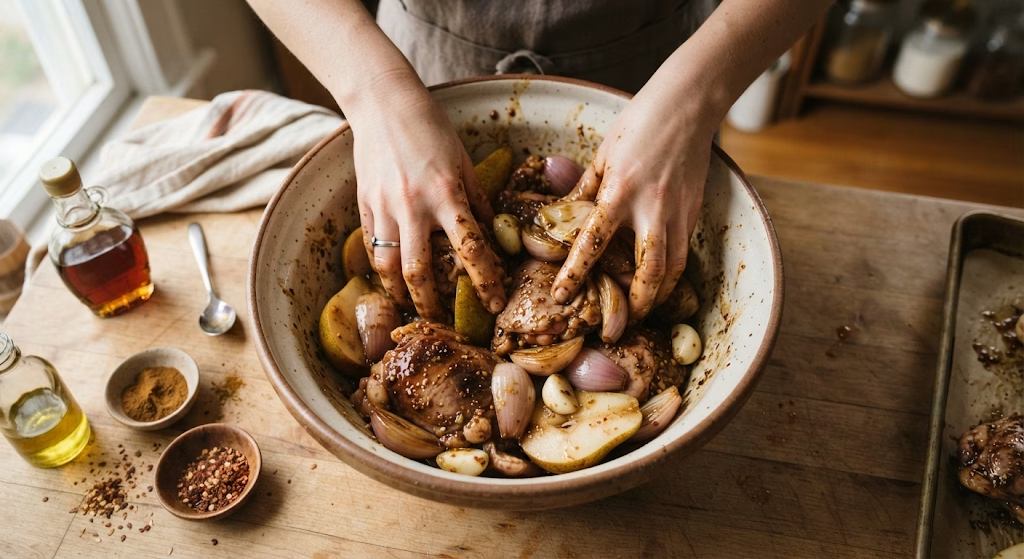
In a large mixing bowl, I toss the chicken thighs, pears, shallots, and garlic with the oil, maple syrup, salt, garam masala, ginger, and red pepper flakes. I really use my hands here to make sure every piece is coated evenly. This step is where all the flavor gets built.
Arrange Everything in the Skillet
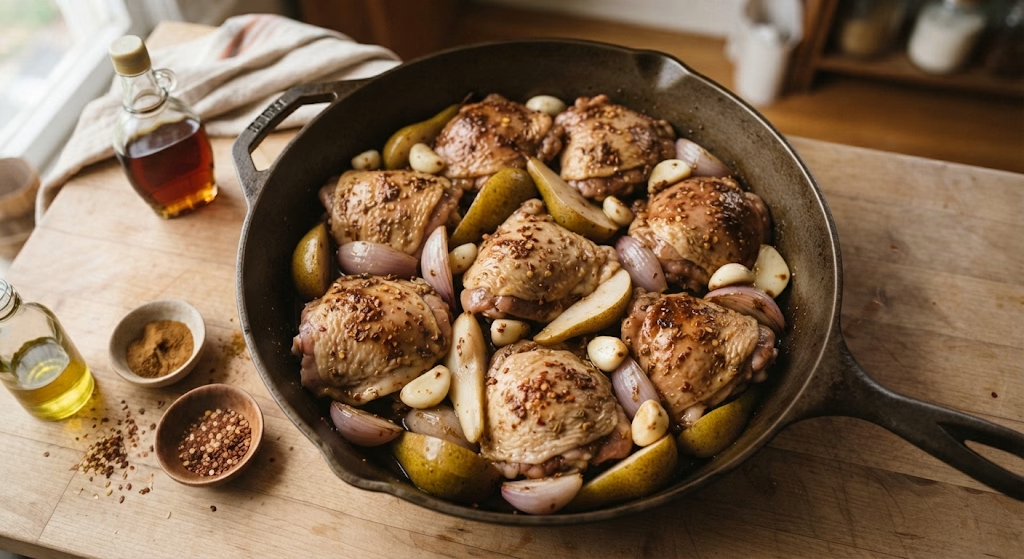
I transfer the seasoned chicken and vegetables into my oven-safe skillet, making sure the chicken thighs are skin-side up and not overlapping. Giving everything a little breathing room helps it roast instead of steam. I nestle the pears and shallots in the gaps around the chicken.
Roast Until Golden
I slide the skillet into the oven and let it roast for about 30 minutes. This is enough time for the chicken skin to turn deeply golden and for the pears to start softening and caramelizing at the edges. I try not to open the oven too often so the heat stays consistent.
Add the Pecans and Dates
Once the initial roasting time is up, I pull the skillet out and scatter the pecans and halved dates over everything. Back into the oven it goes for another 10 minutes. This short second roast toasts the pecans and lets the dates turn soft and sticky.
Finish with Goat Cheese and Rest
As soon as the skillet comes out of the oven, I crumble the goat cheese right over the top while everything is still hot. I let it rest for about 5 minutes so the cheese softens slightly and the juices settle. Then it is ready to serve straight from the skillet.
Additional Tips for Making This Recipe Better
I have made this dish enough times now to have picked up a few tricks that really make a difference.
- I always pat my chicken thighs dry before seasoning them, since this helps the skin crisp up instead of steaming.
- I like to cut my pears into fairly thick wedges because thin slices tend to turn mushy by the time the chicken is done.
- I make sure my skillet is large enough that nothing is too crowded, since crowding leads to soggy results instead of caramelization.
- I taste my spice mix before tossing everything together, since garam masala brands vary a lot in intensity.
- I let the dish rest for a few minutes before serving, because the flavors settle and the goat cheese gets that perfect creamy texture.
Common Mistakes to Avoid
- I once used chicken breasts without adjusting the time, and they dried out fast, so I stick to bone-in thighs or watch breasts closely.
- I learned the hard way that overcrowding the skillet steams the chicken skin instead of crisping it, so I always give everything space.
- I used to add the pecans at the very start, and they burned before the chicken finished, so now I add them in the last 10 minutes only.
- I skipped patting the chicken dry once, and the skin came out pale and soft instead of golden and crisp.
- I added the goat cheese too early once and it melted completely into the pan instead of staying creamy on top.
How to Serve Roasted Pear and Chicken Skillet?
I love serving this dish straight out of the skillet since it looks so rustic and inviting on the table. A bed of warm quinoa or farro underneath soaks up all those roasted juices beautifully. For a pop of color, I sometimes scatter fresh thyme or parsley over the top right before serving.
A simple green salad on the side with a light vinaigrette balances out the richness of the goat cheese and pecans nicely. When I want to switch things up with seafood, I also enjoy serving dishes such as Boston Baked Cod alongside a simple salad or grain.
Variations
- For a dairy-free version, I skip the goat cheese or swap in a dairy-free cheese alternative.
- For a sweeter finish, I drizzle a little extra maple syrup over the top right before serving.
- For added crunch, I toss in some toasted walnuts or almonds along with the pecans.
- For a different flavor profile, I swap the garam masala for smoked paprika and a pinch of cinnamon.
- For a lighter option, I use boneless, skinless chicken thighs and reduce the cooking time slightly.
Nutritional Information
Here is a rough breakdown per serving, based on four servings total.
- Calories: approximately 480 per serving
- Protein: approximately 32 grams per serving
- Carbohydrates: approximately 34 grams per serving
- Fat: approximately 24 grams per serving
Make Ahead and Storage
I like to prep the chicken and vegetables the night before and keep them tossed with the seasoning in an airtight container in the fridge, ready to roast the next day.
Leftovers keep well in an airtight container in the refrigerator for up to 3 days. I reheat portions in a 350°F oven for about 10 minutes so the chicken skin crisps back up instead of turning soggy in the microwave.
I do not recommend freezing this dish since the pears and goat cheese change texture significantly once thawed, becoming mushy and grainy.
Why You’ll Love This Recipe?
This dish has earned a permanent spot in my dinner rotation for a few solid reasons.
- It is a true one-pan meal, which means minimal cleanup for me after a long day.
- It looks impressive enough for guests but takes barely any hands-on effort to pull together.
- It is easy to adapt with different spices, nuts, or cheese depending on what I have on hand.
- The combination of savory chicken and sweet roasted pears feels special without requiring any fancy technique.
- It reheats well, so I often make a double batch and enjoy the leftovers for lunch the next day.
I also like alternating this kind of fruit-forward dinner with seafood dishes such as Tropical Grouper in Spicy Coconut Sauce when I want something different.
FAQs
Can I make chicken with pears in the oven instead of a skillet?
Yes, an oven-safe skillet works perfectly for this, since it goes from stovetop to oven with no extra dishes needed.
What other chicken and pear recipes can I try?
You can try pear and chicken salads, pear-glazed baked chicken, or a chicken and pear stir-fry for variety.
Can I make this with a balsamic glaze instead of maple syrup?
Yes, a balsamic chicken and pears version works well, just swap the maple syrup for a tablespoon of balsamic reduction.
Is there a simpler version of this chicken and pear recipe?
Yes, you can skip the pecans and dates and just roast the chicken, pears, and shallots with the spices for a simpler meal.
Can I use chicken breast instead of thighs?
Yes, boneless chicken breast works, but I watch the time closely since breasts cook faster and dry out more easily.
Can I turn this into a chicken and pear casserole?
Yes, you can layer the same ingredients in a baking dish instead of a skillet for a casserole-style version.
Can I make a pear sauce to go with the chicken?
Yes, simmering extra pears with a splash of stock and a little maple syrup makes a quick sauce to spoon over the chicken.
Can I add apples along with the pears?
Yes, roasted chicken with pears and apples works great, just use a mix of both cut into similar-sized wedges.

Roasted Pear and Chicken Skillet Recipe
Ingredients
Method
- I start by preheating my oven to 425°F so it is fully hot by the time my skillet goes in. While it heats, I cut my pears into wedges, slice the shallots, and halve the garlic bulb. Getting everything prepped ahead of time makes the next steps much faster.
- In a large mixing bowl, I toss the chicken thighs, pears, shallots, and garlic with the oil, maple syrup, salt, garam masala, ginger, and red pepper flakes. I really use my hands here to make sure every piece is coated evenly. This step is where all the flavor gets built.
- I transfer the seasoned chicken and vegetables into my oven-safe skillet, making sure the chicken thighs are skin-side up and not overlapping. Giving everything a little breathing room helps it roast instead of steam. I nestle the pears and shallots in the gaps around the chicken.
- I slide the skillet into the oven and let it roast for about 30 minutes. This is enough time for the chicken skin to turn deeply golden and for the pears to start softening and caramelizing at the edges. I try not to open the oven too often so the heat stays consistent.
- Once the initial roasting time is up, I pull the skillet out and scatter the pecans and halved dates over everything. Back into the oven it goes for another 10 minutes. This short second roast toasts the pecans and lets the dates turn soft and sticky.
- As soon as the skillet comes out of the oven, I crumble the goat cheese right over the top while everything is still hot. I let it rest for about 5 minutes so the cheese softens slightly and the juices settle. Then it is ready to serve straight from the skillet
Notes
- I always pat my chicken thighs dry before seasoning them, since this helps the skin crisp up instead of steaming.
- I like to cut my pears into fairly thick wedges because thin slices tend to turn mushy by the time the chicken is done.
- I make sure my skillet is large enough that nothing is too crowded, since crowding leads to soggy results instead of caramelization.
- I taste my spice mix before tossing everything together, since garam masala brands vary a lot in intensity.
- I let the dish rest for a few minutes before serving, because the flavors settle and the goat cheese gets that perfect creamy texture.