I’ve been making my own crackers for years now, and honestly, I still get a little thrill every time a batch comes out of the oven golden and crisp. I used to think crackers were one of those “buy them, don’t bake them” foods until I tried a nut and seed version at home. Once I saw how forgiving the process was, I never looked back.
This Seed and Nut Crackers Recipe uses just nuts, seeds, and a couple of pantry staples, so it’s naturally gluten-free, dairy-free, and friendly for low-carb and keto eating. If you love a good crunch with your cheese board or soup, this one’s for you.

Cooking Time
- Prep Time: 30 minutes
- Cook Time: 30 minutes
- Total Time: 1 hour
Ingredients
- 1/2 cup almonds – these grind down into a fine, neutral meal that forms the backbone of the cracker.
- 1/2 cup hazelnuts – adds a warm, toasty flavor; walnuts or macadamias work as a swap.
- 1/2 cup pumpkin seeds – brings a mild, earthy bite and a bit of texture.
- 1 cup sunflower seeds – the main bulk seed; process half of them for a smoother bite.
- 1/2 cup golden flax seeds – a gelatinous seed that helps bind everything together as it soaks up water.
- 1/2 cup chia seeds – another binder; grinding them first gives an even better hold.
- 1/2 cup whole psyllium husk – this is the real glue of the recipe, so don’t skip or skimp on it.
- 1/4 cup golden flaxseed meal – adds extra binding power and a subtle nutty depth.
- 1 tsp sea salt – wakes up every other flavor, so never leave it out.
- 1 1/2 cups warm water – helps activate the psyllium and flax so the dough comes together.
Note: this recipe makes about 64 small crackers, plenty for snacking, sharing, or gifting.
Equipment You Need
- Food processor – grinds the nuts and firmer seeds into a fine, even meal.
- Large mixing bowl – for combining the dry ingredients and mixing in the water by hand.
- Rolling pin – rolls the mixture into a thin, even sheet between parchment sheets.
- Parchment paper – prevents sticking while you roll, score, and bake the dough.
- Baking sheet – holds the rolled sheet in the oven for even baking.
- Sharp knife or pizza cutter – scores the dough into cracker-sized pieces before baking.
- Cooling rack – lets air circulate underneath so the crackers crisp up properly.
- Measuring cups and spoons – keeps your nut-to-seed ratio consistent every time.
How to Make Seed and Nut Crackers Recipe?
This recipe comes together in a handful of simple stages: grinding, mixing, rolling, scoring, and baking. None of it is technical, and there’s no yeast or proofing involved, so you really can’t go far wrong. Here’s exactly how I do it at home.
Preheat the Oven
Start by setting a rack in the middle of your oven and heating it to 350°F (175°C). Getting the oven fully preheated before the dough goes in helps the crackers bake evenly from edge to center. It only takes a few minutes, so use this time to measure out your nuts and seeds.
Grind the Nuts and Firmer Seeds
Add the almonds, hazelnuts, and pumpkin seeds to a food processor fitted with an S-blade and pulse until you get a fine, flour-like meal. I usually toss in half of the sunflower seeds here too if I want a smoother texture. If you don’t own a food processor, a strong blender works just as well.
Mix the Dry Ingredients
Tip the ground nut mixture into a large bowl along with the remaining sunflower seeds, flax seeds, chia seeds, psyllium husk, flaxseed meal, and salt. Stir everything together well before adding any liquid, so the binders are evenly distributed and don’t clump in one spot once the water goes in.
Add the Water by Hand
Pour in the warm water and mix everything together using a spoon or your hands, not a food processor. The psyllium and chia start gelling almost instantly, so hand-mixing gives you far more control. If the dough feels dry, add water a tablespoon at a time until it holds together.
Roll Out the Dough
Divide the mixture roughly in half. Place one portion between two sheets of parchment paper and roll it out into a thin, even layer. If a hole appears, just pinch off a little dough from elsewhere and patch it before moving on.
Score Into Crackers
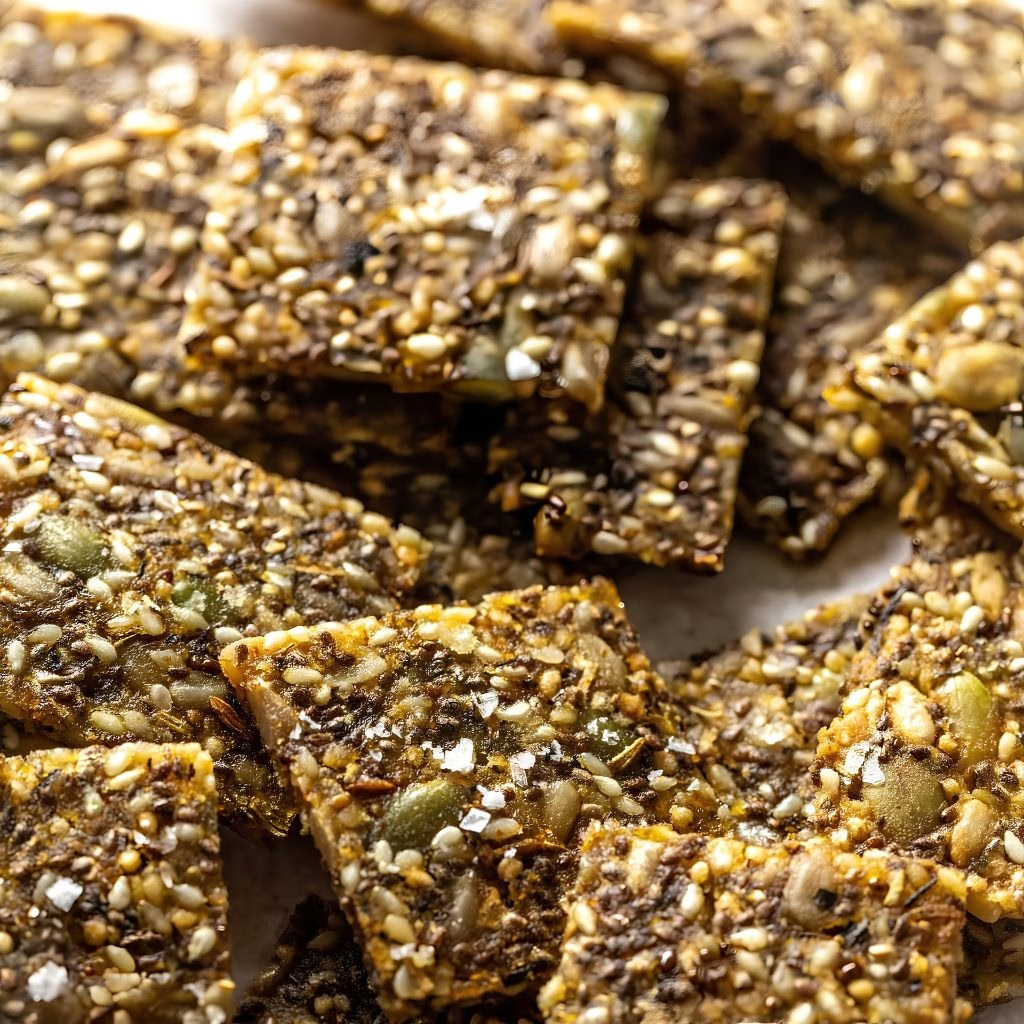
Peel back the top sheet of parchment and use a knife tip to score the dough into whatever shapes you like squares, triangles, or diamonds all work well. Scoring now means the crackers snap apart cleanly later instead of shattering unevenly.
Bake Until Golden
Slide the dough, still on its parchment, onto a baking sheet and bake for about 30 minutes, flipping halfway through so both sides crisp up evenly. Keep an eye on the edges near the end, since thinner spots can brown faster than the center.
Cool Completely
Transfer the baked sheet onto a wire cooling rack rather than leaving it on the pan. Air circulating underneath stops steam from softening the bottom. Once it’s fully cool, snap the crackers apart along your scored lines and they’re ready to eat.
Additional Tips for Making This Recipe Better
I’ve made this recipe more times than I can count, and a few small habits have made a real difference for me.
- I always mix the water in by hand instead of the food processor, since the gel forms too fast and turns sticky if the blade touches it.
- I grind my chia seeds instead of leaving them whole, since I find the crackers hold together noticeably better.
- I rotate my baking sheet once, halfway through baking, because my oven runs hotter at the back.
- I patch any holes in the rolled dough right away rather than baking around them, since gaps just turn into weak, crumbly spots.
- I let the crackers cool fully on a rack before storing them, otherwise trapped steam softens the crunch I worked so hard for.
Common Mistakes to Avoid
- I once tried adding the water in my food processor and ended up with a gluey paste climbing up the blade instead of a scoopable dough.
- I skipped rotating the tray once and ended up with crackers that were golden on one side and pale on the other.
- I rolled the dough too thick in my early attempts, which left the centers chewy instead of crisp.
- I stored a warm batch straight in a container and the trapped steam turned my crunchy crackers soft within an hour.
- I used old, stale flaxseed meal once and the flavor turned slightly bitter, so I now buy it fresh or grind my own.
How to Serve Seed and Nut Crackers
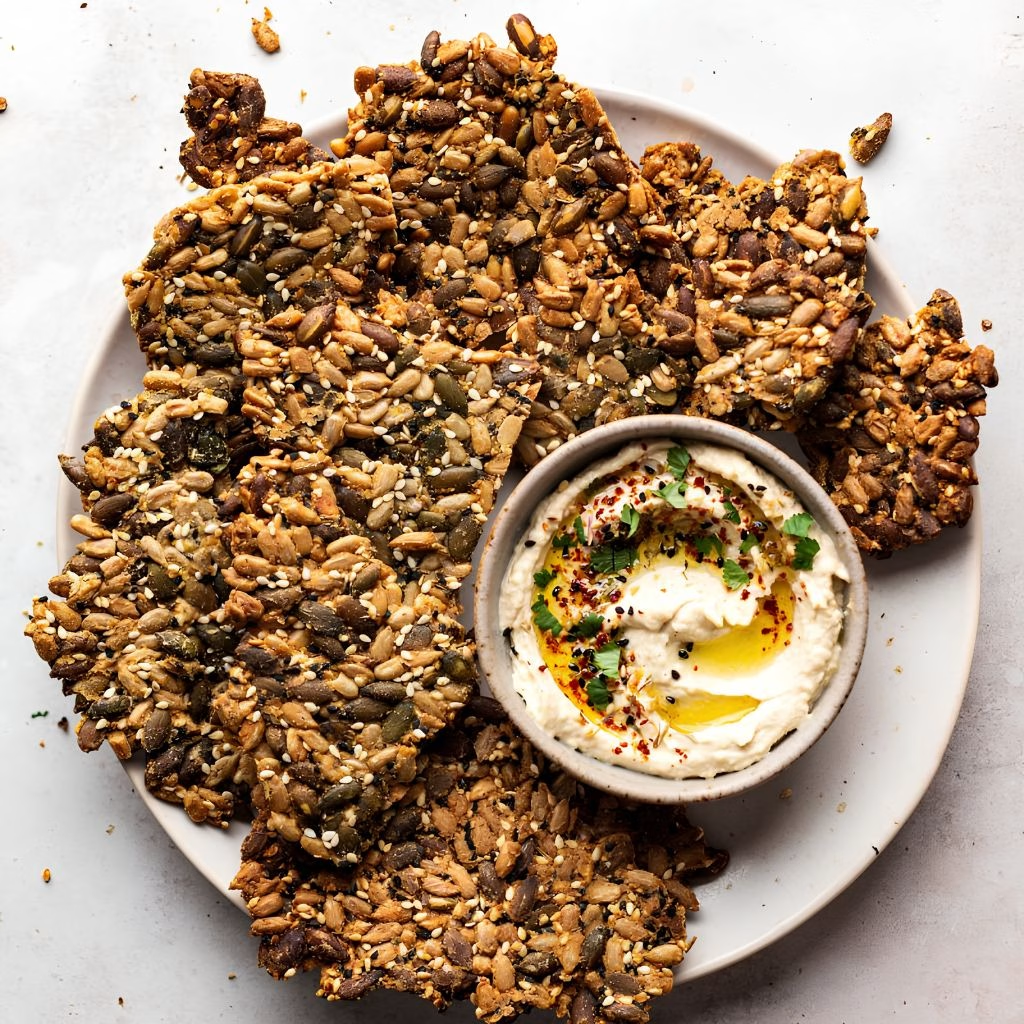
These crackers are endlessly versatile, which is honestly my favorite thing about them. I love laying out a wooden board with a wedge of soft cheese, a small dish of olive tapenade, and these crackers stacked in a fan shape for guests to grab. They also pair beautifully with a bowl of hummus or guacamole for dipping, or crumbled over a bowl of soup for texture.
If you’re building a snack board at home, this hummus dip recipe makes an excellent dip partner alongside these crackers. For a lighter presentation, arrange them upright in a small jar or vase-style holder so people can pick and choose as they pass by.
Variations
- Dairy-free and vegan: this recipe is already free of dairy and eggs, so no swaps are needed here.
- Sugar-free: keep it as is, or fold in a pinch of cinnamon for warmth without added sugar.
- Herb and garlic: mix in dried rosemary, thyme, or garlic powder for a savory, herby cracker.
- Sweet and fruity: add a few chopped dried figs or a touch of orange zest for a sweeter cracker to pair with cheese.
- Nut-free: swap the almonds and hazelnuts for extra pumpkin and sunflower seeds if you need a nut-free version.
- Spicy kick: stir in some cracked black pepper or a pinch of chili flakes for a bit of heat.
Nutritional Information
Here’s a rough idea of what one small cracker offers, based on a batch of 64:
- Calories: 57
- Protein: 2g
- Carbohydrates: 4g
- Fat: 4g
Make Ahead and Storage
These crackers are a great make-ahead snack since they only get better as the flavors settle. Once fully cooled, keep them in an airtight container at room temperature for up to a week, or in the fridge for up to a month if your kitchen runs warm and humid.
For longer storage, freeze the crackers in a sealed, airtight container for up to three months. There’s no need to thaw them slowly — just let them sit at room temperature for a few minutes and they’ll crisp right back up.
Why You’ll Love This Recipe
I keep coming back to this recipe because it checks so many boxes at once.
- It’s genuinely hard to mess up: there’s no yeast, no proofing, and very little that can go wrong along the way.
- It’s endlessly customizable: swap the nuts, seeds, or add-ins to match whatever you have in your pantry that day.
- It fits so many diets: it’s naturally vegan, gluten-free, grain-free, and low-carb, so it works for a crowd with different needs.
- It stores beautifully: a single batch keeps me stocked with snacks for weeks if I freeze part of it.
- It feels a little fancy: serving homemade crackers on a cheese board always gets a few compliments, even though the effort is minimal.
If you enjoy building your own pantry staples from scratch, you might also like trying a batch of homemade granola bars for another wholesome snack that travels well.
FAQs
Can I use different nuts or seeds than the recipe calls for?
Yes, almonds and hazelnuts can be swapped for walnuts, pecans, or macadamias, and pumpkin or sunflower seeds can be swapped for each other in similar amounts.
Do I really need psyllium husk, or can I skip it?
Psyllium is the main binder here, so skipping it isn’t recommended, though some bakers have had luck replacing it with extra ground flaxseed.
Why did my cracker dough turn gluey instead of scoopable?
This usually happens when water is mixed in using a food processor instead of by hand, since the blade whips the gel into a sticky paste.
How long do these crackers stay fresh?
They stay crisp for about a week at room temperature, up to a month refrigerated, and up to three months in the freezer.
Can I make these crackers thicker, like a flatbread?
Yes, rolling the dough a bit thicker and extending the baking time slightly gives a heartier, more bread-like result.

Seed and Nut Crackers Recipe
Ingredients
Method
- Start by setting a rack in the middle of your oven and heating it to 350°F (175°C). Getting the oven fully preheated before the dough goes in helps the crackers bake evenly from edge to center. It only takes a few minutes, so use this time to measure out your nuts and seeds.
- Add the almonds, hazelnuts, and pumpkin seeds to a food processor fitted with an S-blade and pulse until you get a fine, flour-like meal. I usually toss in half of the sunflower seeds here too if I want a smoother texture. If you don’t own a food processor, a strong blender works just as well.
- Tip the ground nut mixture into a large bowl along with the remaining sunflower seeds, flax seeds, chia seeds, psyllium husk, flaxseed meal, and salt. Stir everything together well before adding any liquid, so the binders are evenly distributed and don’t clump in one spot once the water goes in.
- Pour in the warm water and mix everything together using a spoon or your hands, not a food processor. The psyllium and chia start gelling almost instantly, so hand-mixing gives you far more control. If the dough feels dry, add water a tablespoon at a time until it holds together.
- Divide the mixture roughly in half. Place one portion between two sheets of parchment paper and roll it out into a thin, even layer. If a hole appears, just pinch off a little dough from elsewhere and patch it before moving on.
- Peel back the top sheet of parchment and use a knife tip to score the dough into whatever shapes you like — squares, triangles, or diamonds all work well. Scoring now means the crackers snap apart cleanly later instead of shattering unevenly.
- Slide the dough, still on its parchment, onto a baking sheet and bake for about 30 minutes, flipping halfway through so both sides crisp up evenly. Keep an eye on the edges near the end, since thinner spots can brown faster than the center.
- Transfer the baked sheet onto a wire cooling rack rather than leaving it on the pan. Air circulating underneath stops steam from softening the bottom. Once it’s fully cool, snap the crackers apart along your scored lines and they’re ready to eat.
Notes
- I always mix the water in by hand instead of the food processor, since the gel forms too fast and turns sticky if the blade touches it.
- I grind my chia seeds instead of leaving them whole, since I find the crackers hold together noticeably better.
- I rotate my baking sheet once, halfway through baking, because my oven runs hotter at the back.
- I patch any holes in the rolled dough right away rather than baking around them, since gaps just turn into weak, crumbly spots.
- I let the crackers cool fully on a rack before storing them, otherwise trapped steam softens the crunch I worked so hard for.