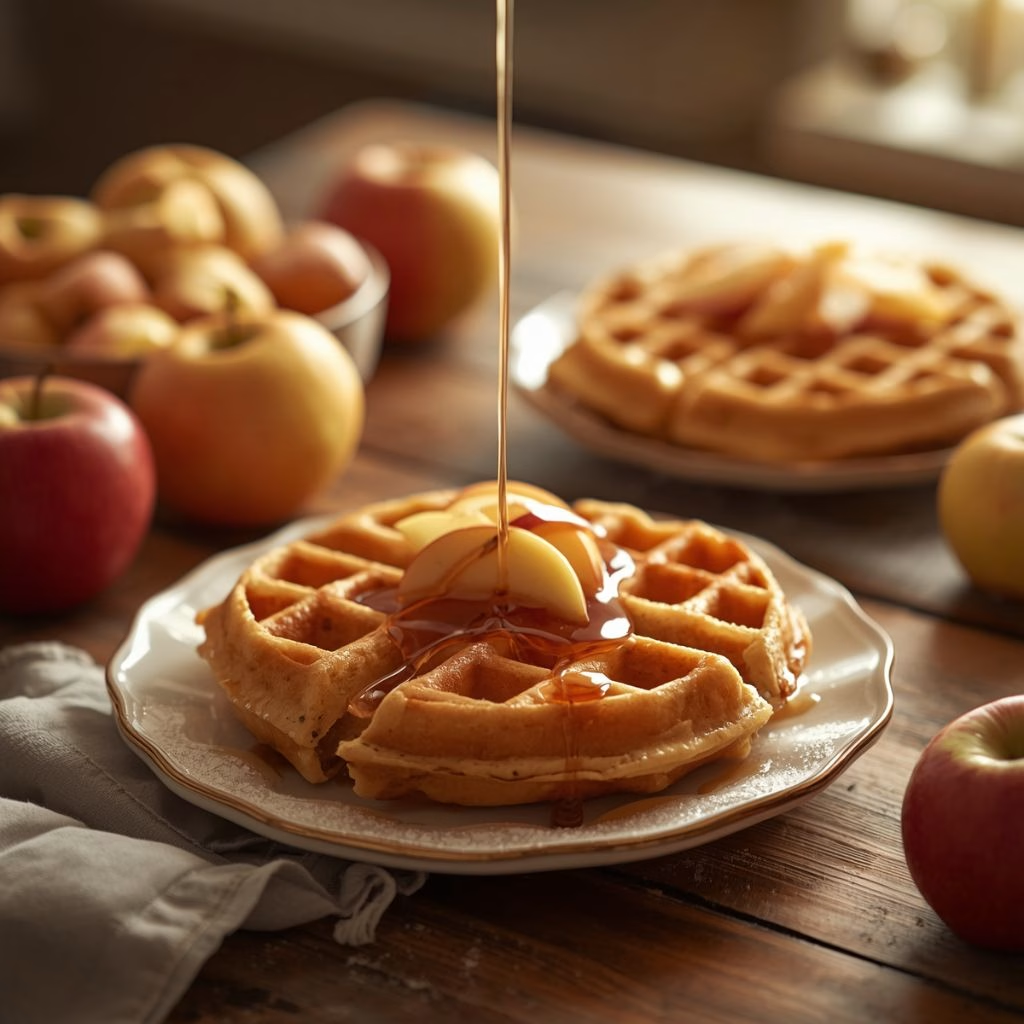
I make this Apple Cider Waffles Recipe every single time the air turns cool and the local orchard starts pressing fresh cider. I love how the whole kitchen smells like cinnamon and warm apples before the waffle iron even beeps. Me and my family fight over the last one every time, and honestly, I don’t blame anyone.
This recipe came together after a few messy test batches, and I promise the version below is the one that finally got it right. Whether you want a sweet stack drizzled in syrup or a savory base for something like pulled pork, these waffles deliver every time.

Cooking Time
- Prep Time: 15 minutes
- Cook Time: 20 minutes
- Total Time: 35 minutes
Ingredients
- 2 cups all-purpose flour — this is the base of the batter and keeps the waffles sturdy enough to hold toppings
- 2 teaspoons baking powder — gives the waffles their lift, so don’t skip it or they’ll turn out flat
- 1 teaspoon baking soda — reacts with the apple cider’s acidity for extra fluff
- 1/2 teaspoon salt — balances the sweetness and wakes up the other flavors
- 2 teaspoons ground cinnamon — the flavor that makes these taste like fall in every bite
- 1/2 teaspoon ground nutmeg — adds warmth, but use freshly grated if you have it for the best aroma
- 1/4 cup brown sugar — brings a little caramel note, light or dark both work fine
- 2 large eggs — bind the batter together and add richness
- 2 cups apple cider — use real pressed cider, not apple juice, for the deepest apple flavor
- 1/3 cup melted butter — keeps the waffles from drying out and gives crisp edges
- 1 teaspoon vanilla extract — rounds out the spice and sweetness nicely
Note: This recipe serves 4 to 6 people, depending on waffle size and appetite.
Equipment You Need
- Waffle iron — cooks the batter into crisp, golden waffles
- Large mixing bowl — for combining the dry ingredients
- Medium mixing bowl — for whisking the wet ingredients
- Whisk — helps you avoid lumps in the batter
- Measuring cups and spoons — for accurate ingredient amounts
- Ladle or 1/2 cup measuring cup — makes pouring batter onto the iron mess-free
- Cooling rack — keeps cooked waffles from getting soggy while you finish the batch
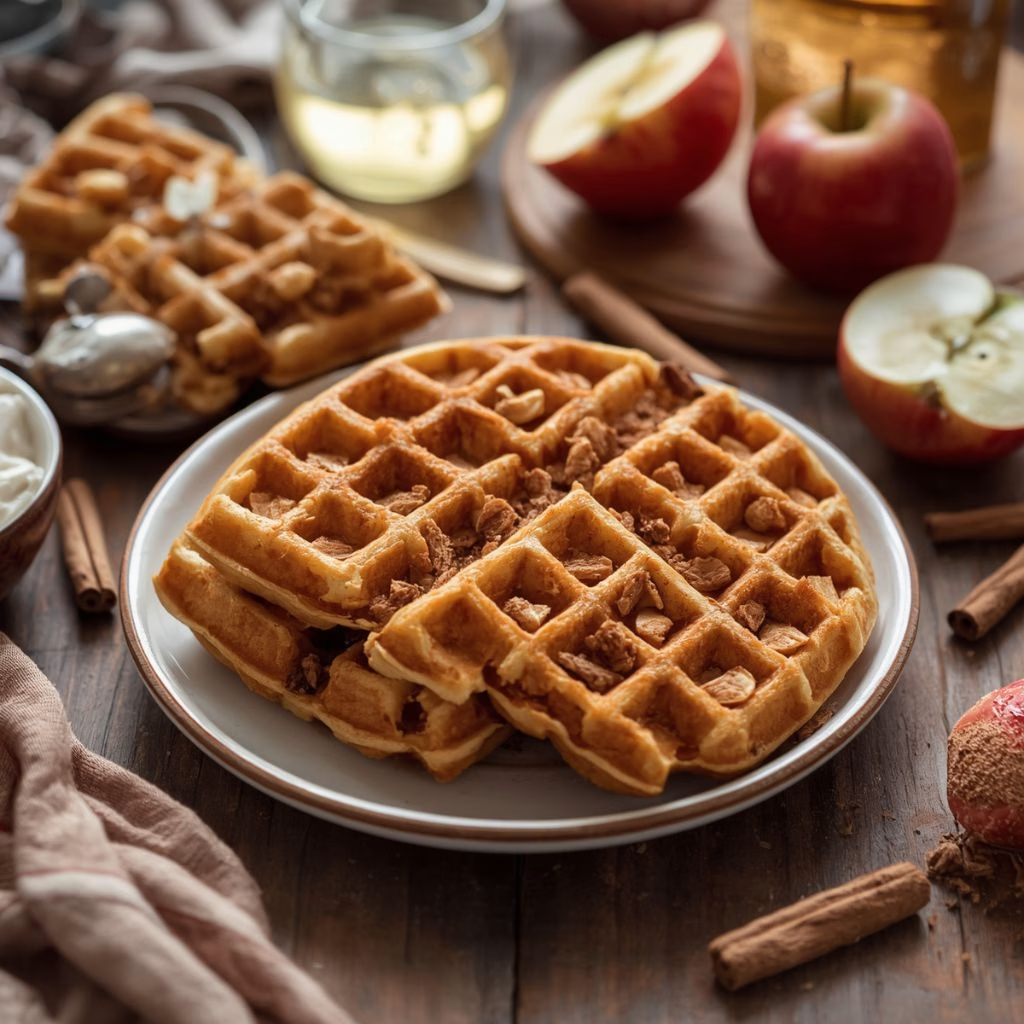
How to Make Apple Cider Waffles Recipe?
This part is honestly the easiest step of the whole process. I like to get my dry ingredients whisked first so the wet mixture can go straight in without any waiting around. Here’s exactly how I put this batter together every time.
Mix the Dry Ingredients
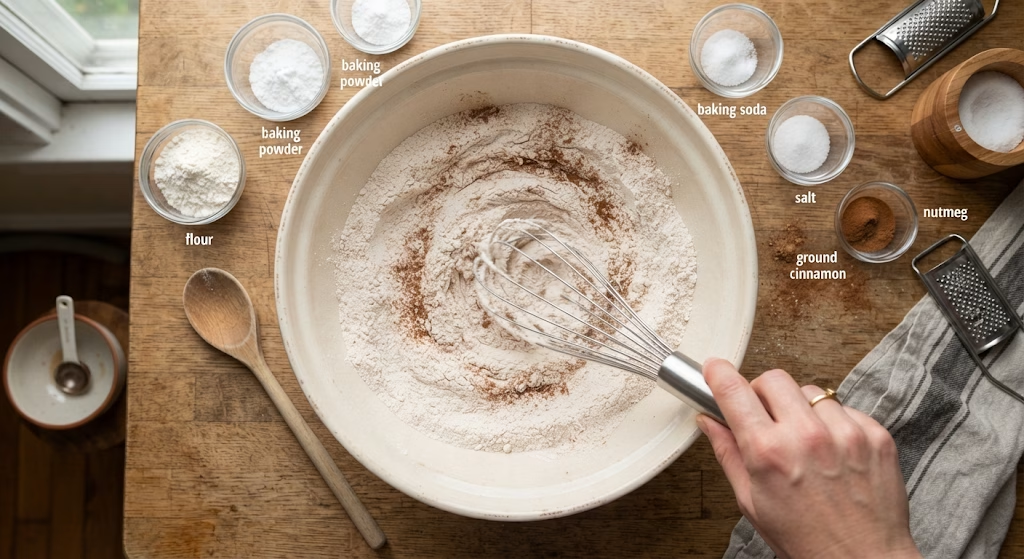
I start by adding the flour, baking powder, baking soda, salt, cinnamon, and nutmeg into a large bowl. A quick whisk here spreads the leavening evenly through the flour. This little step keeps you from biting into a pocket of baking soda later, which nobody wants.
Whisk the Wet Ingredients
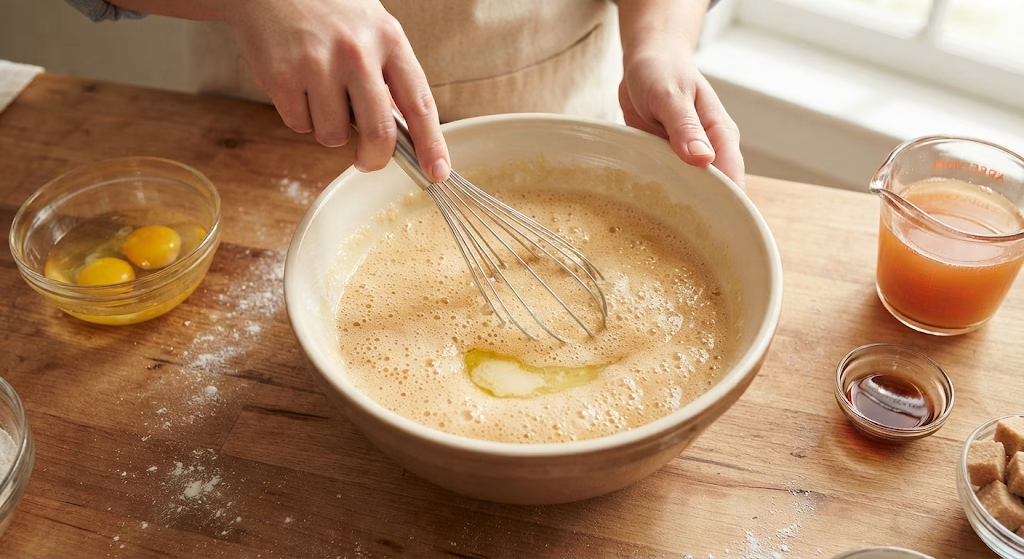
In a separate bowl, I whisk the eggs until they’re a bit frothy, then stir in the apple cider, melted butter, brown sugar, and vanilla. Whisking the eggs first helps the batter come together smoother. Make sure your butter isn’t piping hot or it can scramble the eggs slightly.
Combine the Batter
I pour the wet ingredients into the dry ingredients and stir just until no dry streaks remain. Overmixing is the enemy here, since it makes waffles tough instead of light. A few small lumps in the batter are completely fine and even expected.
Let the Batter Rest
While I preheat the waffle iron, I let the batter sit on the counter for about five minutes. This little rest gives the baking soda time to react with the cider’s acidity. You’ll actually see some tiny bubbles forming on the surface.
Preheat and Grease the Waffle Iron
I always preheat my waffle iron fully before adding any batter, since a cold iron leads to pale, soggy waffles. A light spray of nonstick cooking spray or a quick brush of melted butter keeps everything from sticking. Do this every round, not just the first one.
Cook the Waffles
I ladle the batter into the center of the hot iron, close the lid, and let it cook until golden and crisp. Most waffle irons take three to five minutes depending on size and heat setting. Resist the urge to peek too early, since lifting the lid can tear the waffle in half.
Keep Waffles Warm
Since waffle irons only make one or two at a time, I keep finished waffles on a wire rack in a 200°F oven while I finish the batch. Stacking them directly on a plate traps steam and makes them soggy. This little trick keeps every waffle just as crisp as the first one.
Additional Tips for Making This Recipe Better
I’ve made this recipe more times than I can count, so here are the tricks that actually make a difference for me.
- I always use fresh apple cider from a local orchard when I can, since the flavor is so much richer than the shelf-stable kind.
- I never skip resting the batter for a few minutes, since it noticeably improves the texture.
- I like grating my own nutmeg right before mixing, because the smell alone makes the kitchen feel like autumn.
- I keep my waffle iron on a slightly higher heat setting for extra crispy edges, which I personally prefer over a softer waffle.
- I double the batch and freeze the extras, since in the future I am always grateful for a quick breakfast on busy mornings.
Common Mistakes to Avoid
I’ve made every one of these mistakes myself, so learn from my trial and error.
- Using cold butter straight into the batter — I learned this clumps up instead of blending smoothly, so let it cool slightly after melting.
- Skipping the waffle iron preheat — I rushed this once and ended up with pale, chewy waffles instead of crisp ones.
- Overfilling the iron with batter — I did this early on and had cider batter oozing out the sides and making a mess.
- Stacking hot waffles on top of each other — I found this traps steam and turns a crisp waffle soggy within minutes.
- Overmixing the batter — I once stirred too long trying to get it perfectly smooth, and the waffles turned out dense instead of light.
How to Serve Apple Cider Waffles?
I love serving these waffles stacked two or three high with a generous drizzle of warm maple syrup running down the sides. For something extra special, I top mine with a spoonful of apple cider caramel sauce and a dollop of fresh whipped cream. A sprinkle of cinnamon or a few thin apple slices fanned across the top makes the whole plate look like it came from a café.
On busier mornings, I’ll simply serve these plain alongside crispy bacon or sausage links for a heartier meal. They also work wonderfully as a savory base under pulled pork and a scoop of apple slaw if you want something completely different for dinner. If you’re putting together a spread with other easy handheld ideas, Tuna Pickle Boats Recipe and Cucumber Sushi Boats Recipe can also fit nicely alongside a variety of casual dishes.
Variations
- Dairy-free option — swap the melted butter for melted coconut oil or a neutral vegetable oil.
- Lower-sugar version — cut the brown sugar down to two tablespoons or leave it out entirely if your toppings are already sweet.
- Whole wheat swap — replace up to half of the flour with whole wheat flour for a heartier texture.
- Pumpkin twist — stir in a few tablespoons of pumpkin puree along with extra cinnamon for a cozy pumpkin apple version.
- Nutty crunch — fold in a handful of chopped pecans or walnuts right before cooking for extra texture.
- Gluten-free swap — use a 1:1 gluten-free flour blend in place of the all-purpose flour.
Nutritional Information
Here’s a rough estimate per waffle, based on this recipe making about six servings.
- Calories: approximately 210 kcal
- Protein: approximately 5 grams
- Carbohydrates: approximately 32 grams
- Fat: approximately 8 grams
Make Ahead and Storage
You can mix the dry ingredients up to a day ahead and store them in an airtight container on the counter, then whisk in the wet ingredients right before cooking. Cooked waffles keep well in the refrigerator for up to three days when stored in an airtight container or sealed bag.
For longer storage, let the waffles cool completely, then freeze them in a single layer before transferring to a freezer bag, where they’ll keep for up to two months. Reheat straight from frozen in a toaster or a 350°F oven for about eight to ten minutes until crisp and heated through again.
Why You’ll Love This Recipe?
This one has earned a permanent spot in my fall breakfast rotation, and here’s why I think you’ll love it too.
- It comes together fast — the batter takes about fifteen minutes to mix, so it fits into even a rushed weekday morning.
- It’s incredibly versatile — you can serve it sweet with syrup and caramel or savory alongside pulled pork and slaw.
- It freezes beautifully — I always make a double batch so future breakfasts are practically effortless.
- It’s easy to customize — swapping in whole wheat flour, pecans, or a splash of pumpkin puree changes the whole experience.
- It smells incredible while cooking — the cinnamon and apple cider combination fills the kitchen with the best fall aroma.
FAQs
Can I turn this batter into apple cider donut waffles?
Yes, I’ve done this by adding a bit more sugar and rolling the warm waffles in a cinnamon-sugar mixture right after cooking. It gives them that classic apple cider donut flavor in waffle form. Just let them cool for a minute so the coating sticks properly.
Can I make a healthy pumpkin waffle version of this recipe?
Absolutely, I’ve swapped in pumpkin puree for part of the apple cider and cut back on the added sugar. It keeps the fall flavor while lightening things up a bit. Whole wheat flour works well here too if you want extra fiber.
How do I make pumpkin pecan waffles from this batter?
I simply stir in a few tablespoons of pumpkin puree along with extra cinnamon, then fold in chopped pecans before cooking. It gives the waffles a nutty crunch and deeper pumpkin flavor. This combination has become one of my favorite fall variations.
Can I use a Krusteaz or Dash pumpkin waffle mix instead of this homemade batter?
You can, and both work fine if you’re short on time, though I personally prefer the flavor of homemade batter. If using a boxed mix, I just add a splash of apple cider and a pinch of extra cinnamon for that same cozy taste. A Dash mini waffle maker works especially well for smaller, quicker batches.
Are these good winter waffles, and can I use grandma’s old fashioned apple cider recipe?
Yes, I make these all winter long, not just in fall, since the warm spices feel comforting any time it’s cold outside. If you have access to grandma’s old fashioned homemade apple cider, it makes these waffles taste even richer.

Apple Cider Waffles Recipe
Ingredients
Method
- I start by adding the flour, baking powder, baking soda, salt, cinnamon, and nutmeg into a large bowl. A quick whisk here spreads the leavening evenly through the flour. This little step keeps you from biting into a pocket of baking soda later, which nobody wants.
- In a separate bowl, I whisk the eggs until they’re a bit frothy, then stir in the apple cider, melted butter, brown sugar, and vanilla. Whisking the eggs first helps the batter come together smoother. Make sure your butter isn’t piping hot or it can scramble the eggs slightly.
- I pour the wet ingredients into the dry ingredients and stir just until no dry streaks remain. Overmixing is the enemy here, since it makes waffles tough instead of light. A few small lumps in the batter are completely fine and even expected.
- While I preheat the waffle iron, I let the batter sit on the counter for about five minutes. This little rest gives the baking soda time to react with the cider’s acidity. You’ll actually see some tiny bubbles forming on the surface.
- I always preheat my waffle iron fully before adding any batter, since a cold iron leads to pale, soggy waffles. A light spray of nonstick cooking spray or a quick brush of melted butter keeps everything from sticking. Do this every round, not just the first one.
- I ladle the batter into the center of the hot iron, close the lid, and let it cook until golden and crisp. Most waffle irons take three to five minutes depending on size and heat setting. Resist the urge to peek too early, since lifting the lid can tear the waffle in half.
- Since waffle irons only make one or two at a time, I keep finished waffles on a wire rack in a 200°F oven while I finish the batch. Stacking them directly on a plate traps steam and makes them soggy. This little trick keeps every waffle just as crisp as the first one.
Notes
- I always use fresh apple cider from a local orchard when I can, since the flavor is so much richer than the shelf-stable kind.
- I never skip resting the batter for a few minutes, since it noticeably improves the texture.
- I like grating my own nutmeg right before mixing, because the smell alone makes the kitchen feel like autumn.
- I keep my waffle iron on a slightly higher heat setting for extra crispy edges, which I personally prefer over a softer waffle.
- I double the batch and freeze the extras, since in the future I am always grateful for a quick breakfast on busy mornings.