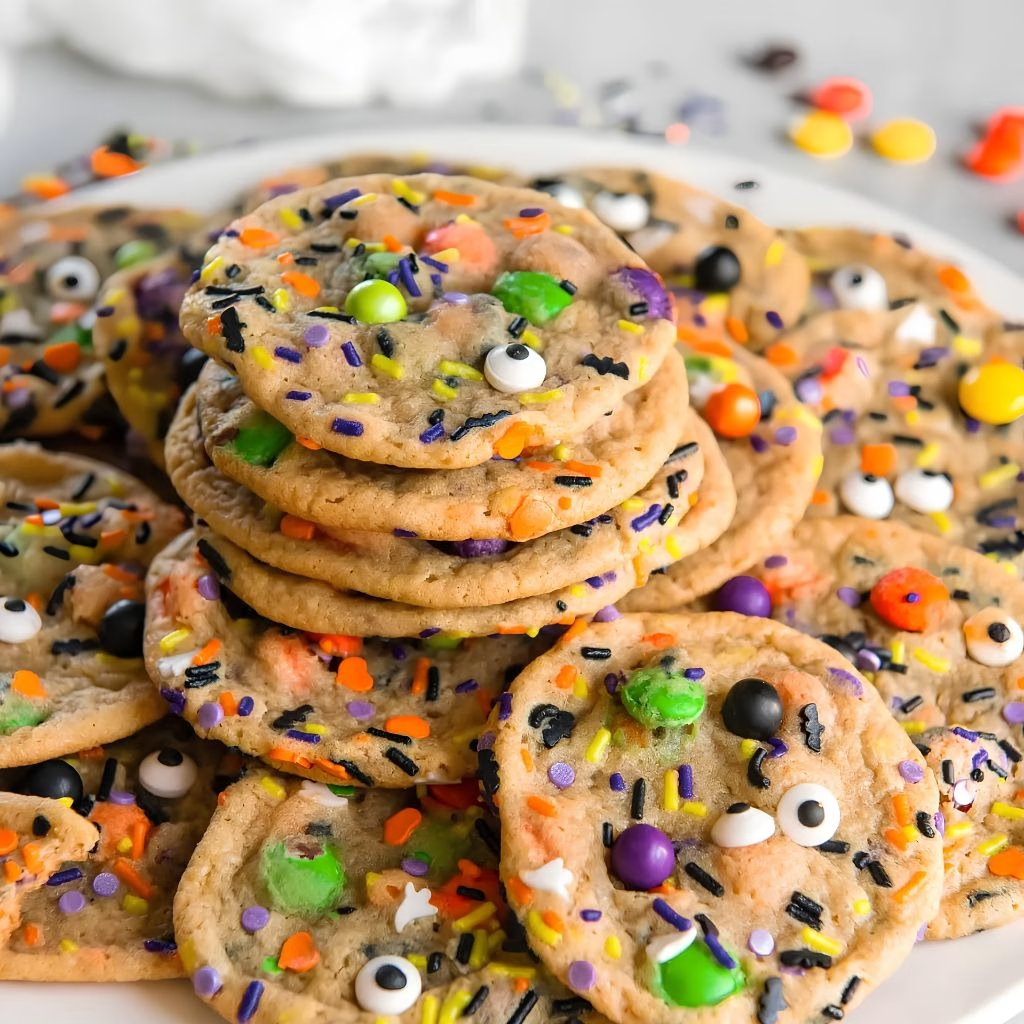
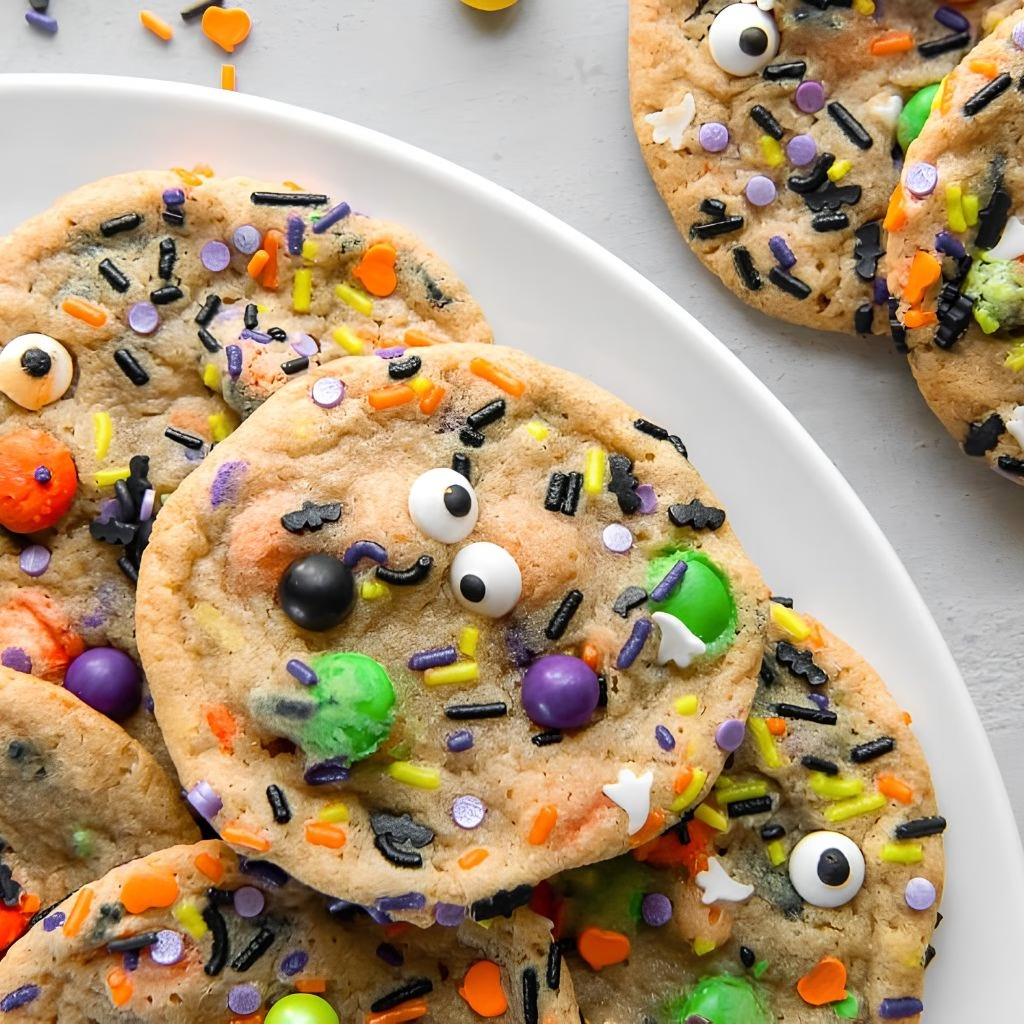
I love finding an excuse to bake with my kids, and Halloween gives me the perfect one every single year. I start with my favorite chewy cookie dough base, then let the kids dump in a pile of Halloween M&M’s and candy-eye sprinkles until it looks properly spooky.
Every time I make this batch, I’m reminded of how little effort it takes to turn an everyday cookie into a festive treat. I’ve tweaked this Kids Halloween Cookie Recipe over a few Octobers until I finally landed on a version that stays soft in the middle with just the right crisp edge. I promise once you try it, this will become your go-to scary halloween cookies recipe every fall.

Cooking Time
- Prep Time: 15 minutes (plus 30 minutes chilling)
- Cooking Time: 10 minutes
- Total Time: 55 minutes
Ingredients
- 2 ¼ cups all-purpose flour – this builds the base structure of the dough, so spoon it into your cup and level it instead of scooping directly from the bag
- 1 teaspoon cornstarch – keeps the cookies soft and a little pillowy in the center
- 1 teaspoon baking soda – helps the dough rise and spread just enough
- ½ teaspoon salt – balances out all the sweetness from the sugar and candy
- ¾ cup unsalted butter, melted – melted butter gives these cookies a chewier bite than creamed butter would
- ¾ cup brown sugar, packed – adds moisture and that deep caramel flavor
- ¼ cup granulated sugar – helps the edges turn a touch crisp
- 1 large egg – binds the dough together
- 1 egg yolk – the extra yolk is my trick for a richer, chewier cookie
- 1 teaspoon vanilla extract – use pure vanilla, not imitation, for the best flavor
- 1 cup Halloween M&M’s – if you can’t find the seasonal bag, just pick out orange, purple and black candies from a regular bag
- ¼ cup Halloween sprinkles with candy eyes – these are what make the cookies look genuinely spooky
Note: this recipe makes about 24 cookies, enough to share with a classroom or a small Halloween party.
Equipment You Need
- Large mixing bowl – for whisking the dry ingredients together
- Hand mixer or stand mixer – to beat the butter and sugars until light
- Baking sheet – for baking the cookies in batches
- Parchment paper – prevents sticking and makes cleanup easy
- Cookie scoop – keeps every cookie the same size so they bake evenly
- Wire cooling rack – lets air circulate so the cookies cool without going soggy on the bottom
How to Make This Kids Halloween Cookie Recipe?
This dough comes together with basic pantry staples, so there’s nothing fussy about it. I like getting my kids involved right from the start since measuring and stirring are easy jobs for little hands. Here’s exactly how I put this recipe together from start to finish.
Whisk the Dry Ingredients
In a medium bowl, whisk together the flour, cornstarch, baking soda and salt. This step makes sure the baking soda gets distributed evenly through the flour so you don’t end up with a weird bitter spot in one bite. I always set this bowl aside while I work on the wet ingredients so it’s ready to go.
Beat the Butter and Sugars
In a separate large bowl, beat the melted butter, brown sugar and granulated sugar together until the mixture turns light in color, about four minutes. I know it feels like a long time to stand there mixing, but this step is what gives the cookies their chewy texture later on.
Add the Egg and Vanilla
Add the egg, egg yolk and vanilla extract to the butter mixture and beat until everything is fully combined. The dough should look smooth and glossy at this point. I like scraping down the sides of the bowl here so nothing gets left unmixed at the bottom.
Combine Wet and Dry Ingredients
Add the flour mixture into the wet ingredients and mix just until combined. I try not to overmix here because that’s what makes cookies turn out tough instead of tender. A few streaks of flour disappearing is exactly when you want to stop.
Fold in the Candy
Gently fold in the Halloween M&M’s and candy-eye sprinkles by hand. This is my kids’ favorite part, and I always let them pour the candy in themselves. Save a few extra M&M’s to press on top of each dough ball before baking for a prettier finished cookie.
Chill the Dough
Cover the bowl and refrigerate the dough for at least 30 minutes. Chilling firms up the butter so the cookies hold their shape instead of spreading into thin, flat discs. I know it’s tempting to skip this step, but I promise it makes a real difference in the final texture.
Scoop and Bake
Preheat your oven to 350°F and line a baking sheet with parchment paper. Scoop the chilled dough into balls, space them a couple inches apart, and bake for 9 to 11 minutes, until the edges look set but the centers still look a little soft. They’ll continue cooking slightly as they cool on the pan.
Cool and Serve
Let the cookies rest on the baking sheet for about five minutes before moving them to a wire rack. This short resting period lets the centers finish setting so the cookies don’t fall apart when you transfer them. Once they’re fully cool, they’re ready to share.
Additional Tips for Making This Recipe Better
I’ve made this batch more times than I can count, and I’ve picked up a few tricks along the way that really help.
- I always weigh my flour or spoon-and-level it, because scooping straight from the bag packs in too much and leaves the cookies dry.
- I press a few extra M&M’s onto the tops of the dough balls right before baking so every cookie looks colorful, not just the ones that got lucky mix-ins.
- I bake one test cookie first if I’m using a new oven, just to check my exact timing before committing the whole tray.
- I never skip chilling the dough, even when I’m short on time, since it’s the single biggest factor in how these cookies turn out.
- I rotate my baking sheet halfway through baking because my oven runs hotter in the back.
Common Mistakes to Avoid
- I’ve overmixed the dough before, and it made the cookies dense instead of chewy, so now I stop mixing the moment the flour disappears.
- I used to skip chilling when I was in a rush, and the cookies spread into flat, greasy puddles every time.
- I once used cold butter thinking it wouldn’t matter, but melted butter really is what gives this dough its chewy texture.
- I’ve overbaked cookies by waiting for the centers to look fully done, when really I should pull them while they still look slightly underbaked.
- I crowded too many cookies on one sheet once, and they baked into each other instead of staying separate rounds.
How to Serve These Halloween Cookies?
I like piling these cookies onto a black or orange platter with a few extra candy eyes and sprinkles scattered around for effect. A drizzle of melted white chocolate across the top adds a nice contrast against the colorful M&M’s if you want to dress them up further.
These cookies also pair really well as part of a bigger Halloween dessert table alongside classic treats like chocolate chip cookies, so guests have a mix of festive and familiar options to choose from. For parties, I like stacking a few cookies in cellophane bags tied with orange ribbon as an easy grab-and-go favor for kids.
Variations
- Dairy-free option – swap the butter for a plant-based butter stick and use a dairy-free chocolate candy instead of M&M’s.
- Nut-free friendly – this recipe is naturally nut-free, which makes it an easy choice for school parties.
- Chocolate lover’s twist – add a half cup of mini chocolate chips along with the M&M’s for extra richness.
- Sugar cookie swap – if you’d rather decorate with icing, try this recipe as a base for halloween sugar cookies recipe style cut-outs instead of drop cookies.
- Spider web version – drizzle melted white chocolate in a spiral, then drag a toothpick through it to create a web pattern.
- Pumpkin spice version – add a half teaspoon of pumpkin spice to the dry ingredients for a warm, fall-forward flavor.
Nutritional Information
Here’s a rough estimate per cookie, based on a batch of 24.
- Calories: 145 kcal
- Protein: 2 g
- Carbohydrates: 20 g
- Fat: 7 g
Make Ahead and Storage
You can make the cookie dough up to 3 days in advance and keep it covered in the refrigerator until you’re ready to bake. This actually deepens the flavor a bit, so I don’t mind planning ahead when I have time.
Once baked, these cookies stay fresh in an airtight container at room temperature for about 5 days. I like separating layers with parchment paper so the candy pieces don’t stick to each other.
To freeze, you can freeze either the baked cookies or the raw dough balls for up to 3 months. I usually freeze scooped dough balls on a tray first, then transfer them to a freezer bag so I can bake a few at a time straight from frozen, just adding an extra minute or two to the bake time.
Why You’ll Love This Recipe?
This cookie recipe has earned a permanent spot on my October baking list, and here’s why.
- Quick and simple – the dough comes together in about 15 minutes, which makes it realistic for a weeknight baking session with kids.
- Kid-approved fun – measuring, stirring and pouring in candy gives little hands plenty to do, and they’re always proud of the final result.
- Easy to customize – you can swap in different candy, add spices, or turn this into a halloween cookies recipe easy enough for any skill level.
- Great for sharing – one batch makes enough for a classroom party, a Halloween gathering, or just a stocked cookie jar at home.
- Freezer-friendly – having dough balls ready in the freezer means fresh cookies are only ever a bake away.
FAQs
Can I use regular M&M’s instead of the Halloween ones?
Yes, you can simply pick out the orange, purple and black candies from a bag of regular M&M’s if the seasonal bag isn’t available near you.
Do I really need to chill the dough?
I’d say yes, since chilling keeps the cookies from spreading too thin and gives you that chewy, bakery-style texture.
Can I skip the sprinkles and candy eyes?
Absolutely, this dough works fine without them, or you can swap them out for chocolate chips or chopped nuts instead.
How long do these cookies stay fresh?
Stored in an airtight container, they’ll stay fresh for about 5 days at room temperature, or up to 3 months in the freezer.
Can kids help make this recipe safely?
Yes, this is one of the easiest halloween sugar cookies pillsbury-style alternatives to bake with kids, since most of the fun steps like mixing candy and scooping dough don’t involve the oven at all. If you’re looking for another kid-friendly bake to try next, this monster cookies recipe is just as easy to put together.

Kids Halloween Cookie Recipe
Ingredients
Method
- In a medium bowl, whisk together the flour, cornstarch, baking soda and salt. This step makes sure the baking soda gets distributed evenly through the flour so you don’t end up with a weird bitter spot in one bite. I always set this bowl aside while I work on the wet ingredients so it’s ready to go.
- In a separate large bowl, beat the melted butter, brown sugar and granulated sugar together until the mixture turns light in color, about four minutes. I know it feels like a long time to stand there mixing, but this step is what gives the cookies their chewy texture later on.
- Add the egg, egg yolk and vanilla extract to the butter mixture and beat until everything is fully combined. The dough should look smooth and glossy at this point. I like scraping down the sides of the bowl here so nothing gets left unmixed at the bottom.
- Add the flour mixture into the wet ingredients and mix just until combined. I try not to overmix here because that’s what makes cookies turn out tough instead of tender. A few streaks of flour disappearing is exactly when you want to stop.
- Gently fold in the Halloween M&M’s and candy-eye sprinkles by hand. This is my kids’ favorite part, and I always let them pour the candy in themselves. Save a few extra M&M’s to press on top of each dough ball before baking for a prettier finished cookie.
- Cover the bowl and refrigerate the dough for at least 30 minutes. Chilling firms up the butter so the cookies hold their shape instead of spreading into thin, flat discs. I know it’s tempting to skip this step, but I promise it makes a real difference in the final texture.
- Preheat your oven to 350°F and line a baking sheet with parchment paper. Scoop the chilled dough into balls, space them a couple inches apart, and bake for 9 to 11 minutes, until the edges look set but the centers still look a little soft. They’ll continue cooking slightly as they cool on the pan.
- Let the cookies rest on the baking sheet for about five minutes before moving them to a wire rack. This short resting period lets the centers finish setting so the cookies don’t fall apart when you transfer them. Once they’re fully cool, they’re ready to share.
Notes
- I always weigh my flour or spoon-and-level it, because scooping straight from the bag packs in too much and leaves the cookies dry.
- I press a few extra M&M’s onto the tops of the dough balls right before baking so every cookie looks colorful, not just the ones that got lucky mix-ins.
- I bake one test cookie first if I’m using a new oven, just to check my exact timing before committing the whole tray.
- I never skip chilling the dough, even when I’m short on time, since it’s the single biggest factor in how these cookies turn out.
- I rotate my baking sheet halfway through baking because my oven runs hotter in the back.