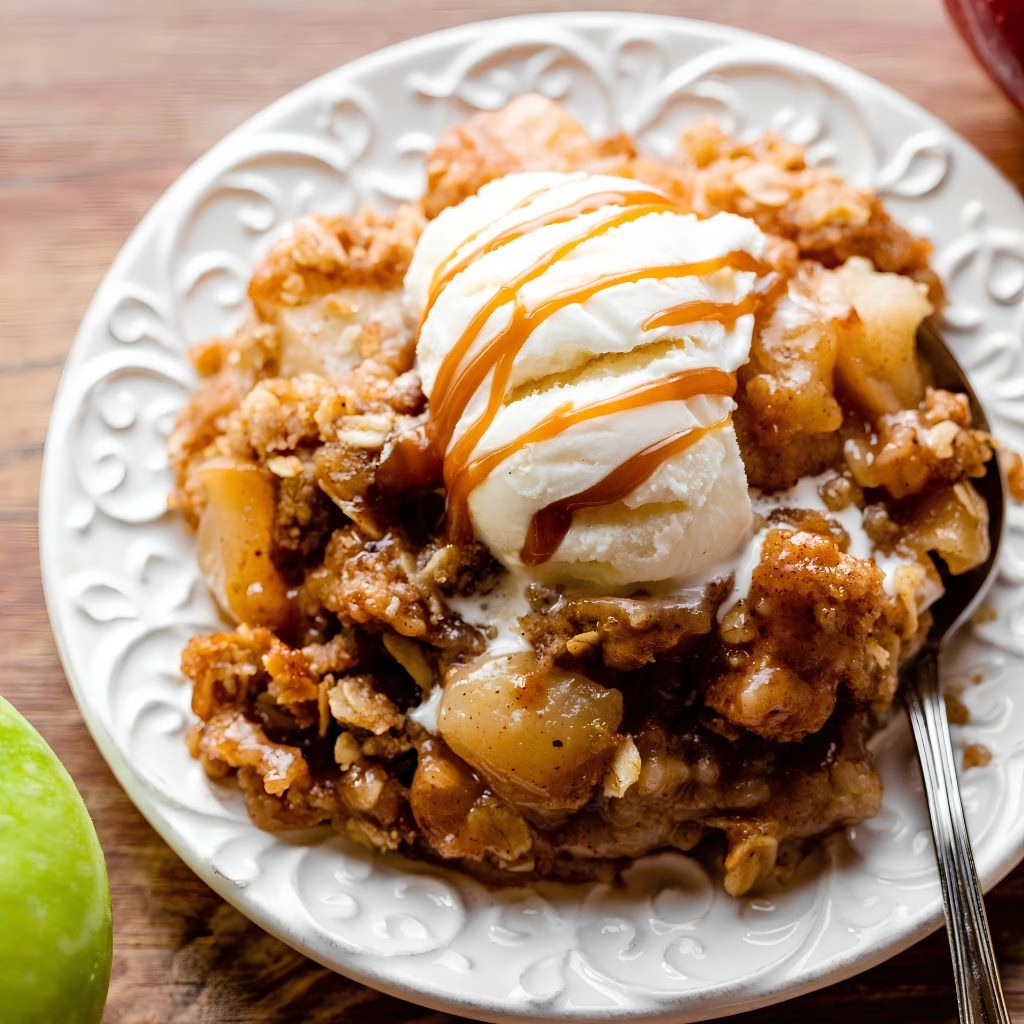
I still remember the first time I pulled a bubbling Easy Apple Crisp Recipe out of my oven the whole kitchen smelled like cinnamon and warm butter, and I knew instantly this was going into my regular rotation. I’ve made this easy apple crisp recipe more times than I can count now, tweaking it here and there until I landed on the version I’m sharing with you today.
It’s the kind of dessert I turn to when I want something cozy but don’t have the patience for a full pie crust. Whether you’re new to baking or you’ve made a hundred crisps before, I promise this one is foolproof. Grab a few apples and let’s get into it.
Cooking Time
- Prep Time: 15 minutes
- Cooking Time: 40 minutes
- Total Time: 55 minutes
Ingredients
- 6 cups apples, peeled and sliced — I like a mix of tart and sweet apples for the best balance of flavor
- 1 tablespoon lemon juice — keeps the apple slices from browning while you prep the rest
- 3/4 cup granulated sugar — sweetens the apple filling and helps create that syrupy base
- 1 teaspoon ground cinnamon — the classic warm spice that makes apple crisp taste like fall
- 1/4 teaspoon ground nutmeg — adds a subtle depth that pairs beautifully with the cinnamon
- 1 cup old-fashioned rolled oats — gives the topping its signature crisp, chewy texture
- 1 cup all-purpose flour — helps bind the topping into that crumbly, golden crust
- 3/4 cup brown sugar, packed — adds moisture and a rich caramel flavor to the topping
- 1/2 teaspoon salt — balances the sweetness and keeps the flavors from tasting flat
- 3/4 cup unsalted butter, melted — brings everything in the topping together into a buttery crumble
Note: This recipe serves 6.
Equipment You Need
- 2-quart baking dish — holds the apple filling and topping without overflowing in the oven
- Large mixing bowl — for tossing the apple slices with sugar, lemon juice, and spices
- Medium mixing bowl — for combining the oat and brown sugar topping
- Measuring cups and spoons — for accurate ingredient amounts
- Sharp paring knife or apple peeler — makes peeling and slicing the apples quick and easy
- Rubber spatula or wooden spoon — for mixing the filling and spreading the topping evenly

How to Make Easy Apple Crisp Recipe?
This apple crisp comes together in two simple parts: a spiced apple filling and a buttery oat topping. I promise you don’t need any fancy technique here, just a little mixing and stirring. Once both parts are ready, it’s really just a matter of layering and baking until your kitchen smells incredible.
Prep Your Oven and Dish
Preheat your oven to 350°F before you start anything else, since apple crisp bakes best in a fully heated oven. Lightly grease your 2-quart baking dish with butter or nonstick spray so the filling doesn’t stick to the edges. I always do this step first so I’m not scrambling once my apples are sliced and ready to go.
Prepare the Apple Filling
Peel and slice your apples into even, thin pieces so they cook at the same rate. In a large bowl, toss the apple slices with lemon juice, granulated sugar, cinnamon, and nutmeg until every slice is coated. Let the mixture sit for a few minutes while you make the topping, since this helps the apples release a little juice.
Make the Oat Topping
In a separate medium bowl, stir together the oats, flour, brown sugar, and salt until well combined. Pour the melted butter over the dry mixture and stir with a fork or spatula until it turns into a thick, crumbly texture. You want it clumpy, not runny, so add a touch more flour if it feels too wet.
Assemble the Crisp
Pour the apple filling into your prepared baking dish and spread it into an even layer. Sprinkle the oat topping evenly over the apples, covering as much of the surface as you can. Don’t press it down too firmly, since a loose topping bakes up crispier than a packed one.
Bake Until Golden and Bubbly
Place the dish in your preheated oven and bake for 35 to 40 minutes, until the topping is deep golden brown. You’ll know it’s ready when you see the apple filling bubbling up around the edges of the dish. If the topping browns too quickly, loosely tent it with foil for the last few minutes.
Cool and Serve
Let the apple crisp rest for about 10 minutes before serving so the filling has time to set slightly. This short cooling period also means you won’t burn your tongue on that molten apple filling. Serve it warm, on its own or with your favorite topping.
Additional Tips for Making This Recipe Better
I’ve made this apple crisp dozens of times, and these are the little things I’ve learned along the way that genuinely make a difference.
- I always use a mix of apple varieties, because relying on just one type can leave the filling either too mushy or too firm.
- I slice my apples fairly thin and uniform, since uneven pieces cook unevenly and I end up with some slices still hard.
- I never skip the lemon juice, because it keeps the apples from browning and adds a nice brightness to the sweetness.
- I like to chill my topping mixture for 10 minutes before sprinkling it on, since cold butter crisps up better in the oven.
- I always bake on a rimmed baking sheet placed under my dish, because bubbling juices can drip and make a mess in my oven.
Common Mistakes to Avoid
- I used to skip peeling my apples to save time, and honestly, the tough skins made the texture less enjoyable peel them if you can.
- I once used quick oats instead of old-fashioned oats, and my topping turned mushy instead of crisp, so I always stick to rolled oats now.
- I’ve learned not to overcrowd the baking dish, because too much filling means the topping doesn’t cook through evenly.
- I made the mistake of pulling my crisp out too early once, and the apples were still crunchy in the middle always check for that bubbling filling.
- I’ve also over-sweetened it before by not accounting for how sweet my apples already were, so now I taste-test my apple mix first.
How to Serve Easy Apple Crisp
I almost always serve this warm, straight from the oven, with a generous scoop of vanilla ice cream melting right into the filling. A light drizzle of caramel sauce on top takes it up a notch if you’re serving guests. For a lighter touch, a dollop of whipped cream or a spoonful of Greek yogurt works beautifully too.
If you love apple desserts as much as I do, you might also enjoy trying an easy apple pie recipe for another cozy way to use up your apples. I like to sprinkle a few extra oats or a dash of cinnamon on top right before serving for a little visual appeal.
Variations
- Swap the butter for a plant-based alternative to make this a dairy-free apple crisp without losing the crumbly texture.
- Use a sugar substitute like monk fruit sweetener or reduce the sugar significantly for a lower-sugar version of this dessert.
- Try this as an apple crisp recipe without oats by using extra flour and chopped pecans or walnuts for crunch instead.
- Add a handful of chopped nuts like pecans or walnuts to the topping for extra texture and a nuttier flavor.
- Mix in some fresh cranberries or pears with the apples for a fun twist on the classic filling.
- If you want something closer to an old fashioned apple crisp recipe, swap the brown sugar topping for a simple flour, sugar, and butter crumble instead of oats.
Nutritional Information
Here’s a general idea of what one serving of this apple crisp looks like, though exact numbers will vary based on your specific ingredients.
- Calories: approximately 380 per serving
- Protein: approximately 3g per serving
- Carbohydrates: approximately 62g per serving
- Fat: approximately 15g per serving
Make Ahead and Storage
You can prep the apple filling and the oat topping separately up to a day ahead, then store them in the fridge in separate covered containers until you’re ready to bake.
Leftover baked apple crisp keeps well in the fridge for up to 4 days when stored in an airtight container.
To freeze, let the crisp cool completely, then wrap it tightly and freeze for up to 3 months; reheat it straight from frozen in a 350°F oven until warmed through.
Why You’ll Love This Recipe
This easy apple crisp recipe has earned its spot as one of my go-to fall desserts, and here’s why I think you’ll fall for it too.
- It’s genuinely easy to make. There’s no pie crust to fuss over, so even if you’re new to baking, this comes together without stress.
- It’s endlessly customizable. Whether you want a dairy-free version or you’re searching for an apple crisp recipe without oats, this base adapts easily.
- It reheats beautifully. Unlike some desserts that lose their charm the next day, this one tastes just as good warmed up again.
- It works for a crowd or a cozy night in. I’ve served this at potlucks and eaten it solo on a random Tuesday, and it never disappoints either way.
- It uses simple pantry ingredients. You likely already have most of what you need, making it one of those easy apple crisp recipes with few ingredients you can whip up on a whim.
FAQs
Can I use a different type of apple for this recipe?
Yes, absolutely. I recommend a mix of tart apples like Granny Smith and sweeter ones like Honeycrisp or Gala for the best balance of flavor.
Can I make this apple crisp recipe without oats?
Yes, you can swap the oats for extra flour and chopped nuts if you’d rather have a smoother, more traditional crumble topping.
How do I know when my apple crisp is done baking?
Look for a deep golden topping and bubbling filling around the edges of the dish, which usually happens around the 35 to 40 minute mark.
Can I make a 3 ingredient apple crisp recipe instead?
You technically can simplify it down to apples, a boxed cake mix, and butter, though the flavor won’t be quite as rich as this fuller version.
Is this recipe similar to the apple crisp recipe pioneer woman makes?
It shares the same basic concept of spiced apples under a buttery oat topping, though every home cook, myself included, tends to put their own spin on the classic.
If you love easy fall desserts like this one, you’ll probably enjoy browsing a few more sweet treats, including these Cherry Pie Poppers, which make a fun bite-sized addition to any dessert table.

Easy Apple Crisp Recipe
Ingredients
Method
- Preheat your oven to 350°F before you start anything else, since apple crisp bakes best in a fully heated oven. Lightly grease your 2-quart baking dish with butter or nonstick spray so the filling doesn’t stick to the edges. I always do this step first so I’m not scrambling once my apples are sliced and ready to go.
- Peel and slice your apples into even, thin pieces so they cook at the same rate. In a large bowl, toss the apple slices with lemon juice, granulated sugar, cinnamon, and nutmeg until every slice is coated. Let the mixture sit for a few minutes while you make the topping, since this helps the apples release a little juice.
- In a separate medium bowl, stir together the oats, flour, brown sugar, and salt until well combined. Pour the melted butter over the dry mixture and stir with a fork or spatula until it turns into a thick, crumbly texture. You want it clumpy, not runny, so add a touch more flour if it feels too wet.
- Pour the apple filling into your prepared baking dish and spread it into an even layer. Sprinkle the oat topping evenly over the apples, covering as much of the surface as you can. Don’t press it down too firmly, since a loose topping bakes up crispier than a packed one.
- Place the dish in your preheated oven and bake for 35 to 40 minutes, until the topping is deep golden brown. You’ll know it’s ready when you see the apple filling bubbling up around the edges of the dish. If the topping browns too quickly, loosely tent it with foil for the last few minutes.
- Let the apple crisp rest for about 10 minutes before serving so the filling has time to set slightly. This short cooling period also means you won’t burn your tongue on that molten apple filling. Serve it warm, on its own or with your favorite topping.
Notes
- I always use a mix of apple varieties, because relying on just one type can leave the filling either too mushy or too firm.
- I slice my apples fairly thin and uniform, since uneven pieces cook unevenly and I end up with some slices still hard.
- I never skip the lemon juice, because it keeps the apples from browning and adds a nice brightness to the sweetness.
- I like to chill my topping mixture for 10 minutes before sprinkling it on, since cold butter crisps up better in the oven.
- I always bake on a rimmed baking sheet placed under my dish, because bubbling juices can drip and make a mess in my oven.