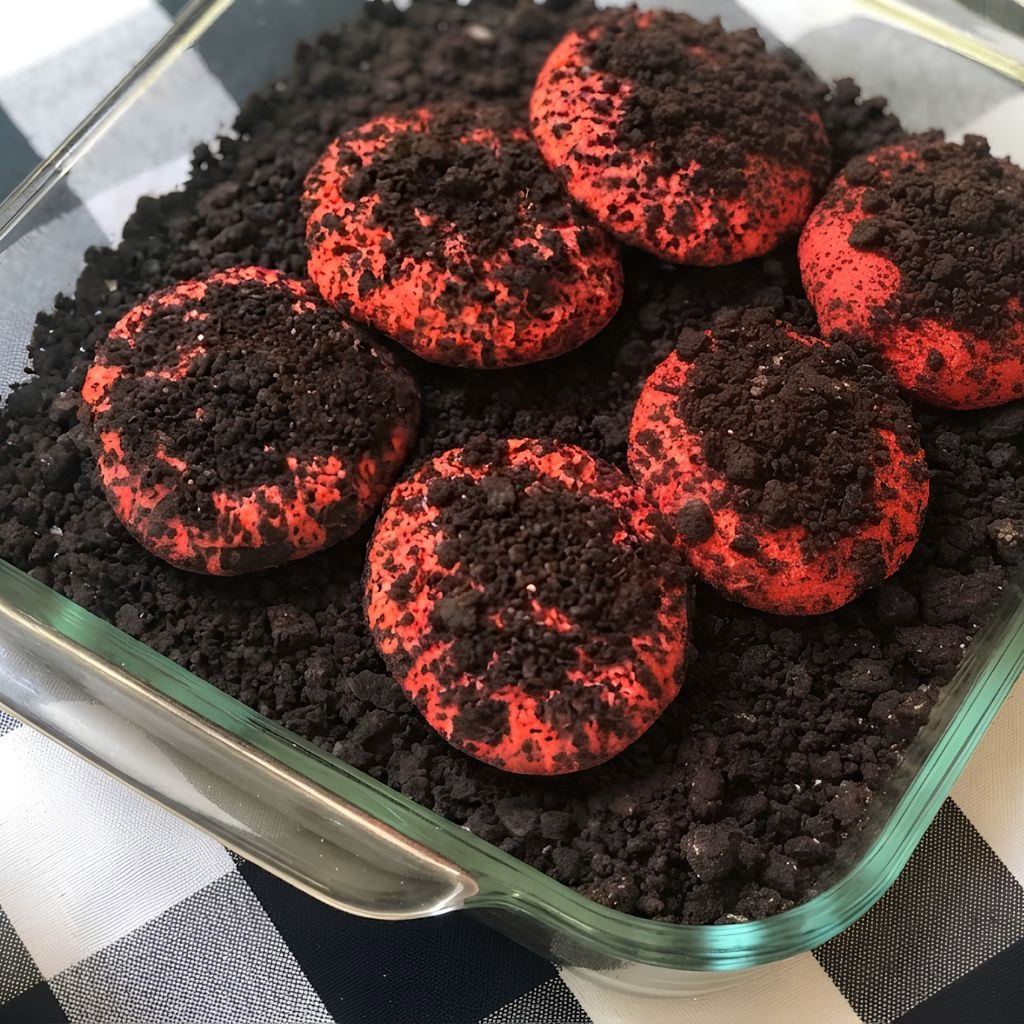
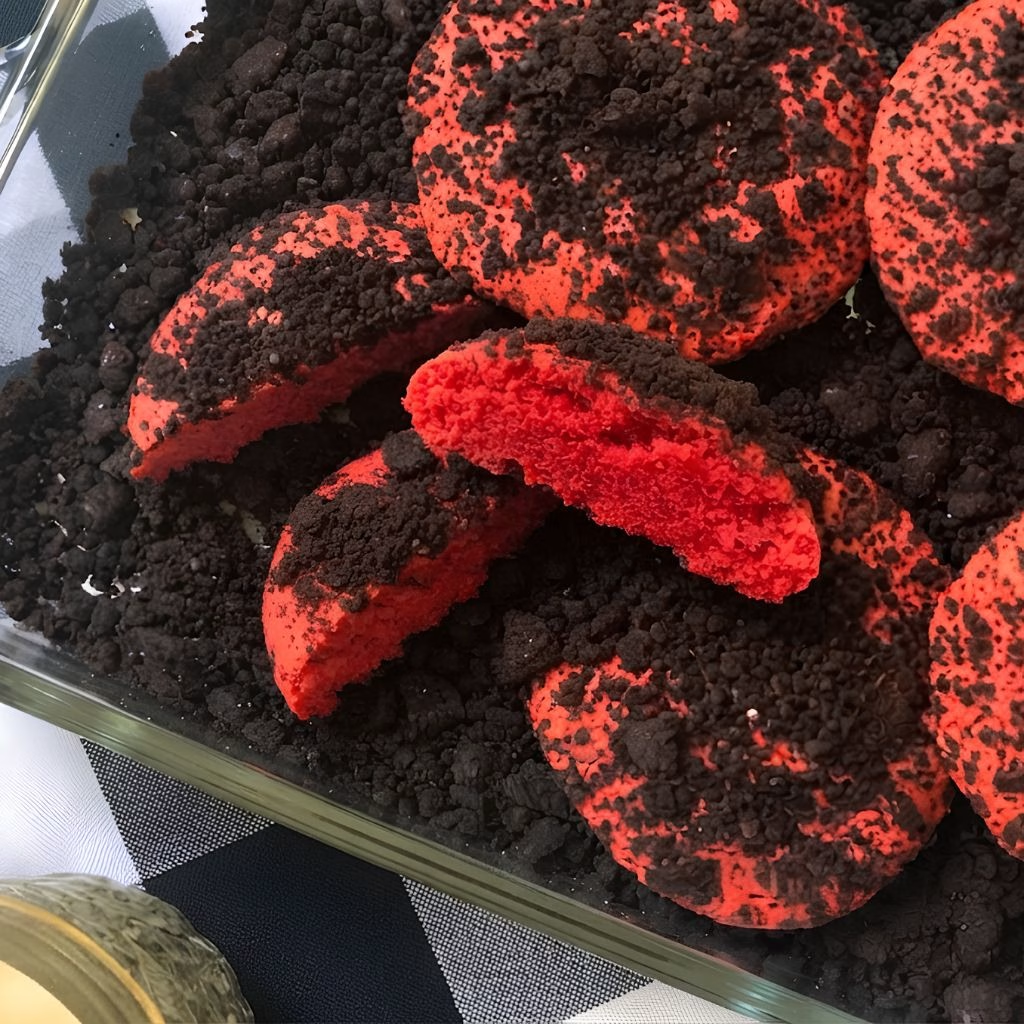
I still remember the first time I pulled a tray of this Easy Graveyard Cookie Recipe out of the oven and my kitchen instantly smelled like a bakery on Halloween night. The blood-red cocoa centers hiding under a crumbly “dirt” coating always get a reaction, whether it’s from my kids or from guests at a spooky-season party.
I make these every October now, and I honestly can’t imagine Halloween baking without them. If you love easy, quick cookie recipes that still look impressive, this one is about to become a seasonal staple for you too.

Cooking Time
- Prep Time: 40 minutes (includes a 30-minute chill)
- Cooking Time: 12–14 minutes
- Total Time: Approximately 55 minutes
Ingredients
- 1 package chocolate sandwich cookie crumbs (or crushed Oreos) – this is your “graveyard dirt” coating, so don’t skip it
- 1 1/2 cups all-purpose flour – gives the cookie its sturdy, chewy base
- 2 tablespoons unsweetened cocoa powder – adds that deep chocolate note under the red color
- 1 teaspoon baking powder – helps the cookies puff up slightly instead of baking flat
- 1/2 teaspoon kosher salt – balances the sweetness and sharpens the chocolate flavor
- 1/2 teaspoon cinnamon – a subtle warm spice that makes the cookie taste more complex
- 1 1/4 cups granulated sugar – sweetens the dough and helps with that soft, chewy texture
- 4 tablespoons (1/2 stick) unsalted butter, melted – keep it melted, not softened, for the right dough consistency
- 1/2 teaspoon red gel food coloring – gel works better than liquid for a true “blood red” shade
- 1 teaspoon vanilla extract – rounds out the flavor and takes the edge off the cocoa
- 2 large eggs – bind everything together and add richness
Note: This recipe makes about 24 cookies, so it easily serves a Halloween party, a classroom treat table, or a house full of trick-or-treaters.
Equipment You Need
- Medium mixing bowl – for sifting and combining the dry ingredients
- Large mixing bowl – for whisking the wet ingredients together
- Whisk – to blend the butter, sugar, eggs, and food coloring smoothly
- Plastic wrap – to cover the dough while it chills in the fridge
- Two baking sheets – gives you enough room to bake all the cookies without crowding
- Parchment paper – prevents sticking and makes cleanup effortless
- Cookie scoop or tablespoon – keeps every cookie roughly the same size
- Wire cooling rack – lets air circulate so the cookies cool evenly
How to Make Easy Graveyard Cookie Recipe?
Making these graveyard cookies is a lot simpler than the spooky end result suggests. The dough comes together in two bowls with basic pantry staples, and the “dirt” coating does most of the visual heavy lifting. Here’s exactly how I put mine together every time.
Sift the Dry Ingredients
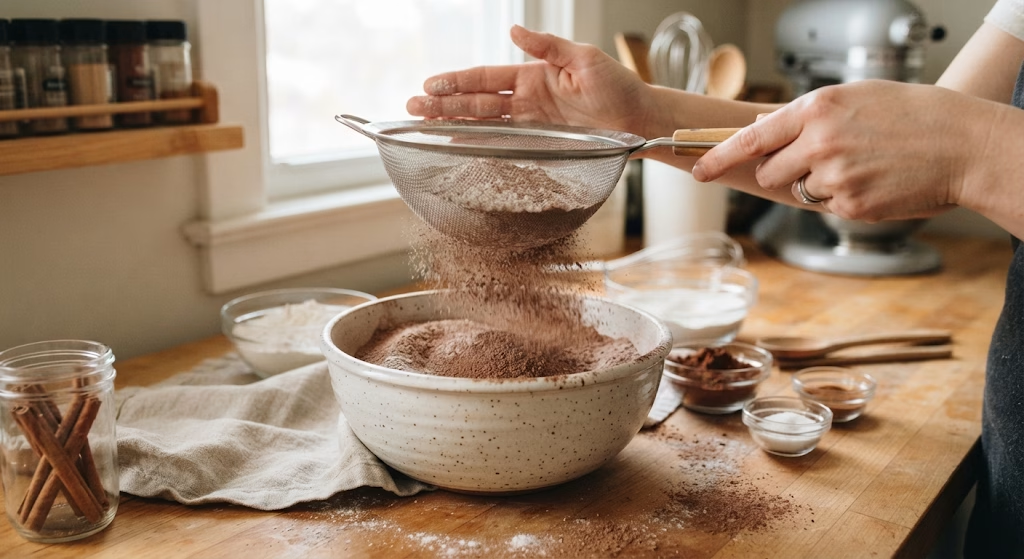
I start by sifting the flour, cocoa powder, baking powder, salt, and cinnamon into a medium bowl. Sifting matters here because cocoa powder tends to clump, and you don’t want cocoa pockets in your finished cookie. This only takes a minute, but it makes the dough much smoother later.
Whisk the Wet Ingredients
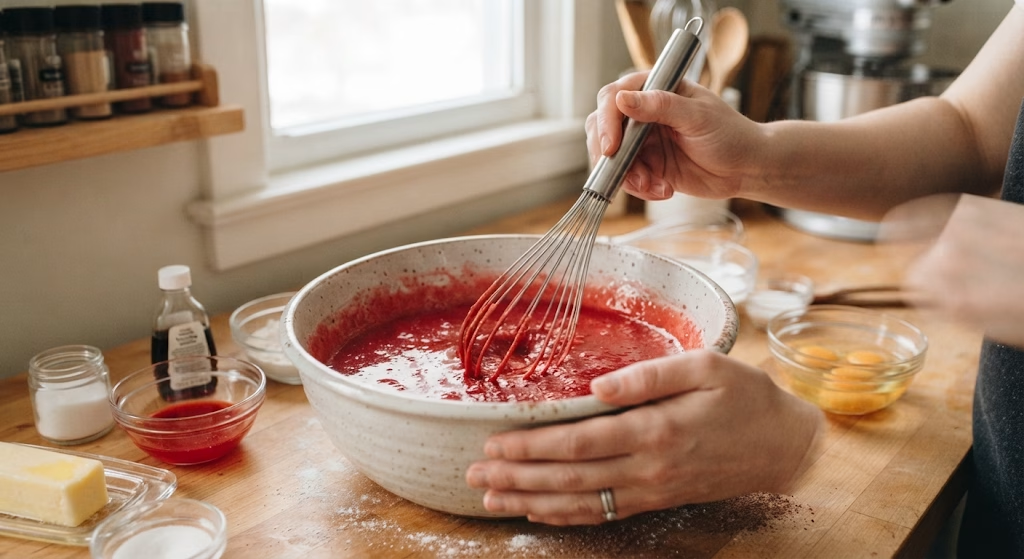
In a separate large bowl, I whisk together the sugar, melted butter, red gel food coloring, vanilla extract, and eggs until the mixture looks fully blended and evenly red. I make sure the butter isn’t hot, since warm butter can start cooking the eggs slightly, which throws off the texture.
Combine and Chill the Dough
Next, I fold the dry mixture into the wet mixture just until no streaks of flour remain. I cover the bowl with plastic wrap and refrigerate it for at least 30 minutes. This chilling step firms up the butter again, which keeps the cookies from spreading too thin in the oven.
Preheat and Prep Your Pans
While the dough chills, I preheat my oven to 375°F and line two baking sheets with parchment paper. Getting the oven fully preheated before the dough goes in helps the cookies set their shape quickly instead of melting out flat on a lukewarm pan.
Roll and Coat in “Dirt”
Once the dough is chilled, I scoop tablespoon-sized portions, roll them into balls, and roll each ball completely in the cookie crumbs. I space them about 3 inches apart on the prepared sheets, since they do spread a little as they bake.
Bake and Cool
I bake the cookies for 12 to 14 minutes, until they feel just slightly firm when I touch the top. I let them rest on the pan for 5 minutes before moving them to a wire rack to finish cooling completely.
Additional Tips for Making This Recipe Better
- I always use gel food coloring instead of liquid, because liquid coloring can water down the dough and mute the red shade.
- I never skip the chilling step, even when I’m short on time, since it’s the difference between a thick cookie and a flat, greasy one.
- I like to weigh my dough portions with a small cookie scoop so every cookie bakes evenly and finishes at the same time.
- I press a few extra crumbs into the tops of the cookies right before baking, since some crumbs fall off during rolling.
- I keep a close eye on the last batch, since ovens run slightly hot toward the back and cookies can overbake fast in the final minute.
Common Mistakes to Avoid
- I once rushed the chilling step and ended up with cookies that spread into thin, crispy discs instead of soft rounds don’t skip it.
- I’ve overmixed the dough before, which made the cookies tough instead of tender, so I fold just until the flour disappears.
- I learned the hard way that crowding the baking sheet causes cookies to bake unevenly and merge together at the edges.
- I used to pull cookies the moment they looked done, but they actually firm up more while cooling, so slightly underbaked is safer.
- I forgot to sift my cocoa powder once and ended up with bitter little clumps in a few bites, so I never skip that step now.
How to Serve Easy Graveyard Cookie Recipe?
I like to arrange these cookies on a slate or dark serving tray so the red centers and dark “dirt” coating really stand out. For a party, I dust a few extra cookie crumbs around the plate to look like scattered soil, and I’ll tuck in a couple of plastic tombstone picks or candy pumpkins for a playful graveyard scene.
They also pair nicely with a cold glass of milk or hot apple cider for a cozy fall dessert table. If you’re setting out a full Halloween spread, they sit well next to other Halloween candy bark recipe, which adds some crunch and color variety to the table.
Variations
- Dairy-free: swap the butter for a plant-based butter alternative and check your cookie crumbs for a dairy-free label.
- Sugar-free: use a granulated sugar substitute designed for baking, in an equal swap for the regular sugar.
- Flavor boost: add a pinch of espresso powder to the dry mix to deepen the chocolate flavor without adding coffee taste.
- Nutty twist: fold in 1/4 cup of finely chopped pecans or walnuts for extra texture inside the dough.
- Spiced version: increase the cinnamon slightly and add a pinch of nutmeg for a warmer, fall-forward flavor.
Nutritional Information
Here’s a general estimate per cookie, based on a batch of 24, though exact values will vary depending on the brands you use.
- Calories: approximately 90–100 kcal
- Protein: about 1–2 grams
- Carbohydrates: roughly 14–16 grams
- Fat: around 3–4 grams
Make Ahead and Storage
You can make the dough up to 2 days in advance and keep it tightly wrapped in the fridge until you’re ready to bake. This actually deepens the flavor a bit, so I don’t mind prepping it ahead of a party.
Baked cookies stay fresh in an airtight container at room temperature for about 4 to 5 days. I like to place a small piece of parchment between layers so the crumb coating doesn’t stick to the cookie above it.
To freeze, place baked and fully cooled cookies in a freezer-safe bag for up to 2 months, or freeze the raw dough balls (before rolling in crumbs) on a tray, then transfer them to a bag. Bake frozen dough balls straight from the freezer, adding a minute or two to the bake time.
Why You’ll Love This Recipe?
There’s a reason these cookies show up on my Halloween baking list every single year. They’re simple, festive, and they never fail to get a reaction from anyone who sees the red center for the first time.
- Easy to make: the whole process uses two bowls and basic pantry ingredients, so there’s no complicated technique involved.
- Great make-ahead option: since the dough chills anyway, you can prep it days before you actually need to bake.
- Naturally festive: the red-and-black color combo does the decorating work for you, without piping bags or fondant.
- Easy to customize: from dairy-free swaps to added nuts or spices, this dough adapts to whatever you’re craving.
- Crowd-pleasing size: with 24 cookies per batch, it’s enough for a classroom party, a potluck, or a full trick-or-treat night.
If you’re planning a bigger dessert spread, these cookies also work well alongside other easy quick cookie recipes, and if you want something chewier for the same table, myno-bake Halloween snack mix recipe is a fun, hands-off addition that kids especially love helping to make.
FAQs
Can I use regular chocolate sandwich cookies instead of pre-made crumbs?
Yes, just remove the cream filling, pulse the chocolate wafers in a food processor, or crush them in a sealed bag with a rolling pin.
Why did my cookies turn out flat?
This usually means the dough wasn’t chilled long enough, or the butter was too warm when it went into the mixture.
Can I skip the red food coloring?
You can, though the cookies will taste the same, they just won’t have that signature “blood red” cocoa center that makes them look spooky.
How far in advance can I make these for a party?
You can bake them up to 2 days ahead and store them at room temperature, or freeze the dough and bake fresh the day of your event.
Can I make these gluten-free?
Yes, a 1:1 gluten-free all-purpose flour blend works well here, though the texture may be slightly more delicate than the original.

Easy Graveyard Cookie Recipe
Ingredients
Method
- I start by sifting the flour, cocoa powder, baking powder, salt, and cinnamon into a medium bowl. Sifting matters here because cocoa powder tends to clump, and you don’t want cocoa pockets in your finished cookie. This only takes a minute, but it makes the dough much smoother later.
- In a separate large bowl, I whisk together the sugar, melted butter, red gel food coloring, vanilla extract, and eggs until the mixture looks fully blended and evenly red. I make sure the butter isn’t hot, since warm butter can start cooking the eggs slightly, which throws off the texture.
- Next, I fold the dry mixture into the wet mixture just until no streaks of flour remain. I cover the bowl with plastic wrap and refrigerate it for at least 30 minutes. This chilling step firms up the butter again, which keeps the cookies from spreading too thin in the oven.
- While the dough chills, I preheat my oven to 375°F and line two baking sheets with parchment paper. Getting the oven fully preheated before the dough goes in helps the cookies set their shape quickly instead of melting out flat on a lukewarm pan.
- Once the dough is chilled, I scoop tablespoon-sized portions, roll them into balls, and roll each ball completely in the cookie crumbs. I space them about 3 inches apart on the prepared sheets, since they do spread a little as they bake.
- I bake the cookies for 12 to 14 minutes, until they feel just slightly firm when I touch the top. I let them rest on the pan for 5 minutes before moving them to a wire rack to finish cooling completely.
Notes
- I always use gel food coloring instead of liquid, because liquid coloring can water down the dough and mute the red shade.
- I never skip the chilling step, even when I’m short on time, since it’s the difference between a thick cookie and a flat, greasy one.
- I like to weigh my dough portions with a small cookie scoop so every cookie bakes evenly and finishes at the same time.
- I press a few extra crumbs into the tops of the cookies right before baking, since some crumbs fall off during rolling.
- I keep a close eye on the last batch, since ovens run slightly hot toward the back and cookies can overbake fast in the final minute.