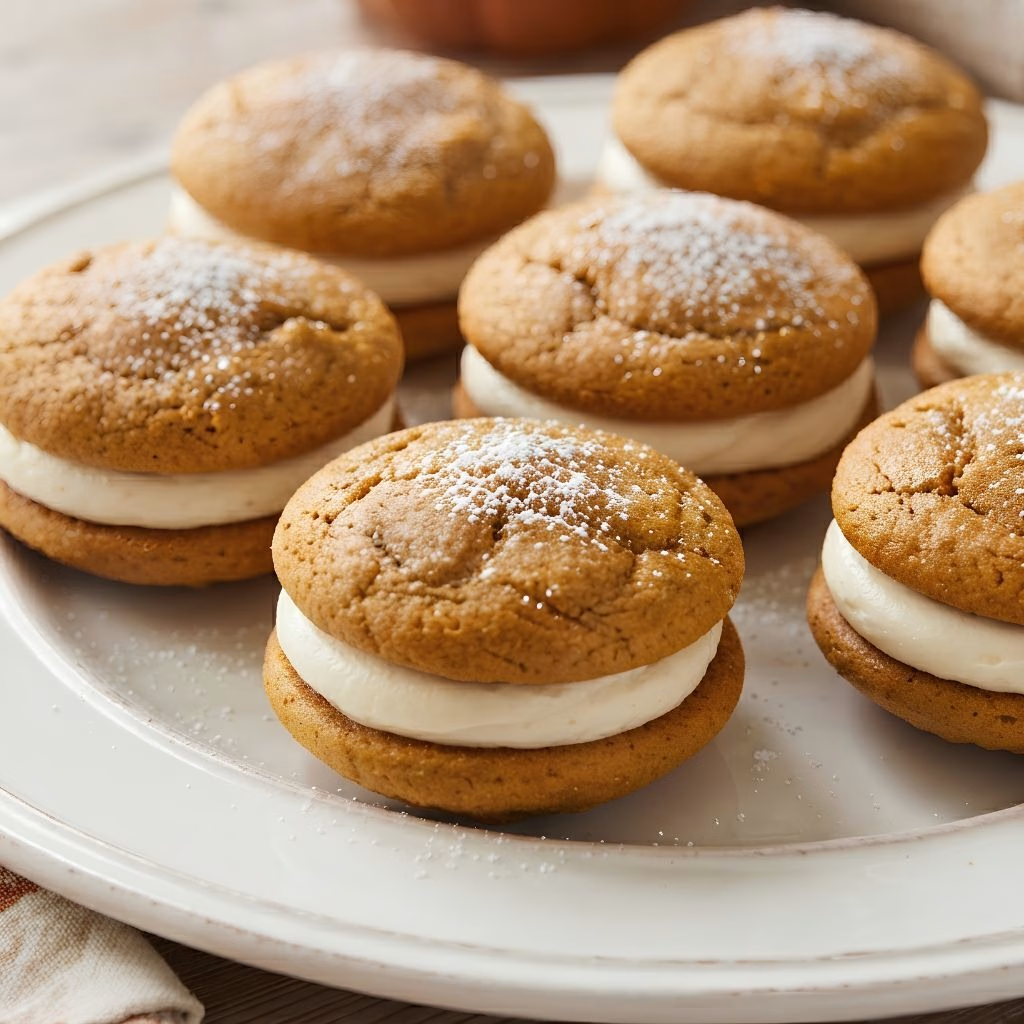
I still remember the first time I pulled a tray of this Pumpkin Whoopie Pie Recipe out of the oven my kitchen smelled like cinnamon, cloves, and cozy fall afternoons. I’ve made whoopie pies more times than I can count now, and this pumpkin version with a fluffy cream cheese filling is the one my family asks for every October.
It’s soft, a little spicy, and ridiculously easy to pull off even on a weeknight. I’m walking you through exactly how I make mine, step by step, so you can skip the trial and error I went through. Trust me, once you make a batch, you’ll be hooked too.

Cooking Time
- Prep Time: 25 minutes
- Cook Time: 12 minutes
- Total Time: 37 minutes (plus cooling time)
Ingredients
- 3 cups all-purpose flour – this is the base of the cookie, giving it structure without making it dense
- 1 teaspoon baking powder – helps the cookies puff up into that signature cake-like texture
- 1 teaspoon baking soda – reacts with the brown sugar and pumpkin for extra lift
- 1 teaspoon salt – balances the sweetness and sharpens the spice flavors
- 1 1/2 tablespoons ground cinnamon – the backbone of that classic fall flavor
- 1/2 tablespoon ground ginger – adds warmth without overpowering the pumpkin
- 1/2 tablespoon ground cloves – a little goes a long way, so don’t be tempted to add more
- 2 cups packed brown sugar – keeps the cookies moist and gives a deep caramel note
- 1 cup vegetable oil – oil keeps these cookies soft for days, unlike butter which firms up
- 1 1/2 cups pumpkin puree – use canned pure pumpkin, not pumpkin pie filling, or the batter turns too sweet
- 2 large eggs – bind everything together and add richness
- 1 teaspoon pure vanilla extract – rounds out the spices with a warm background note
- 8 ounces cream cheese, softened – the star of the filling, so let it sit at room temp for a smooth mix
- 1/2 cup unsalted butter, softened – adds richness and helps the filling hold its shape
- 3 cups powdered sugar – sweetens and thickens the filling to a pipeable consistency
- 1 teaspoon vanilla extract (for filling) – ties the filling flavor back to the cookies
Note: This recipe makes about 12–14 whoopie pies, perfect for a family gathering or a fall bake sale.
Equipment You Need
- Two large baking sheets – for spacing out the cookie dough evenly
- Parchment paper – prevents sticking and makes cleanup effortless
- Stand mixer or hand mixer – makes quick work of both the batter and the filling
- Mixing bowls (two large, one medium) – to keep dry and wet ingredients separate
- Cookie scoop – gives you uniform, round cookies every time
- Wire cooling rack – lets air circulate so cookies cool evenly
- Piping bag or zip-top bag – makes filling the cookies neat and mess-free
How to Make Pumpkin Whoopie Pie Recipe?
I know this looks like a long ingredient list, but the process itself is really simple. It comes together in three basic stages: mix the cookie batter, bake, then whip up the filling. Here’s exactly how I do it every single time.
Step 1: Preheat and Prep
I always start by preheating my oven to 350°F and lining two baking sheets with parchment paper. This small step matters more than people think, since a properly heated oven gives the cookies that soft, even rise. While the oven warms up, I set my ingredients out so everything is ready to go.
Step 2: Whisk the Dry Ingredients
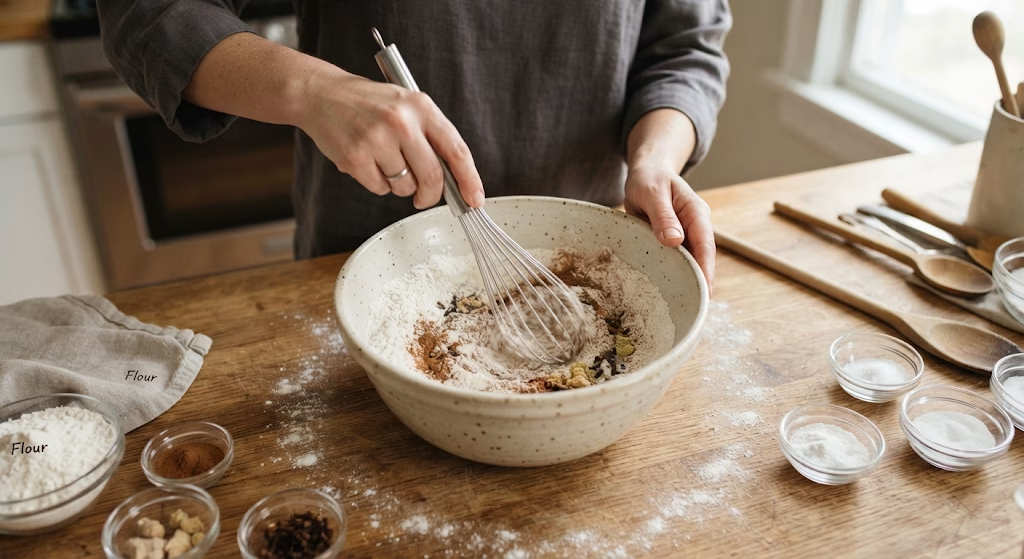
In a medium bowl, I whisk together the flour, baking powder, baking soda, salt, cinnamon, ginger, and cloves. Whisking instead of just stirring helps distribute the spices evenly, so you don’t end up with a bite that’s overloaded with cloves. I set this bowl aside while I move on to the wet ingredients.
Step 3: Mix the Wet Ingredients
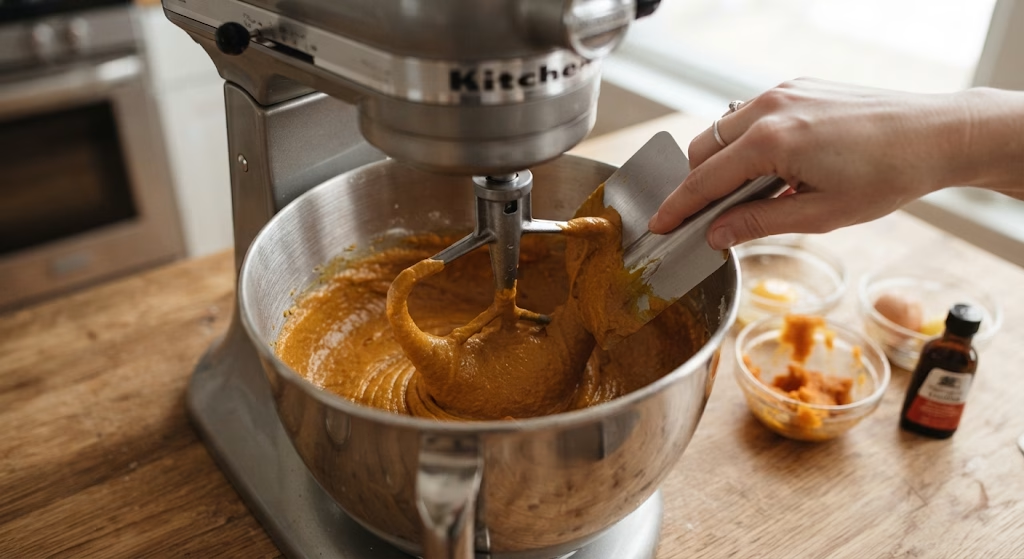
In my stand mixer, I beat the brown sugar and oil together until they look smooth and combined. Then I add the pumpkin puree, eggs, and vanilla, mixing until the batter turns a rich, even orange color. This is the base flavor of your cookie, so take a moment to scrape down the bowl.
Step 4: Combine and Fold
I add the dry ingredients into the wet mixture in two batches, folding gently with a spatula instead of overmixing. Overmixing activates the gluten and can make your cookies tough instead of soft. The batter should look thick, glossy, and slightly sticky when you’re done.
Step 5: Scoop and Bake
Using my cookie scoop, I drop rounded portions of batter onto the prepared sheets, leaving about two inches between each one. I bake them for 10 to 12 minutes, until they spring back lightly when touched. I always rotate my trays halfway through for even baking.
Step 6: Cool Completely
This step tests my patience every time, but it’s non-negotiable. I let the cookies cool on the tray for a few minutes, then transfer them to a wire rack. Filling warm cookies melts the frosting instantly, so I always wait until they’re fully cool.
Step 7: Make the Cream Cheese Filling
While the cookies cool, I beat the softened cream cheese and butter together until smooth and fluffy. Then I slowly add the powdered sugar and vanilla, beating until it holds soft peaks. If it feels too soft, I pop it in the fridge for ten minutes to firm up.
Step 8: Assemble the Whoopie Pies
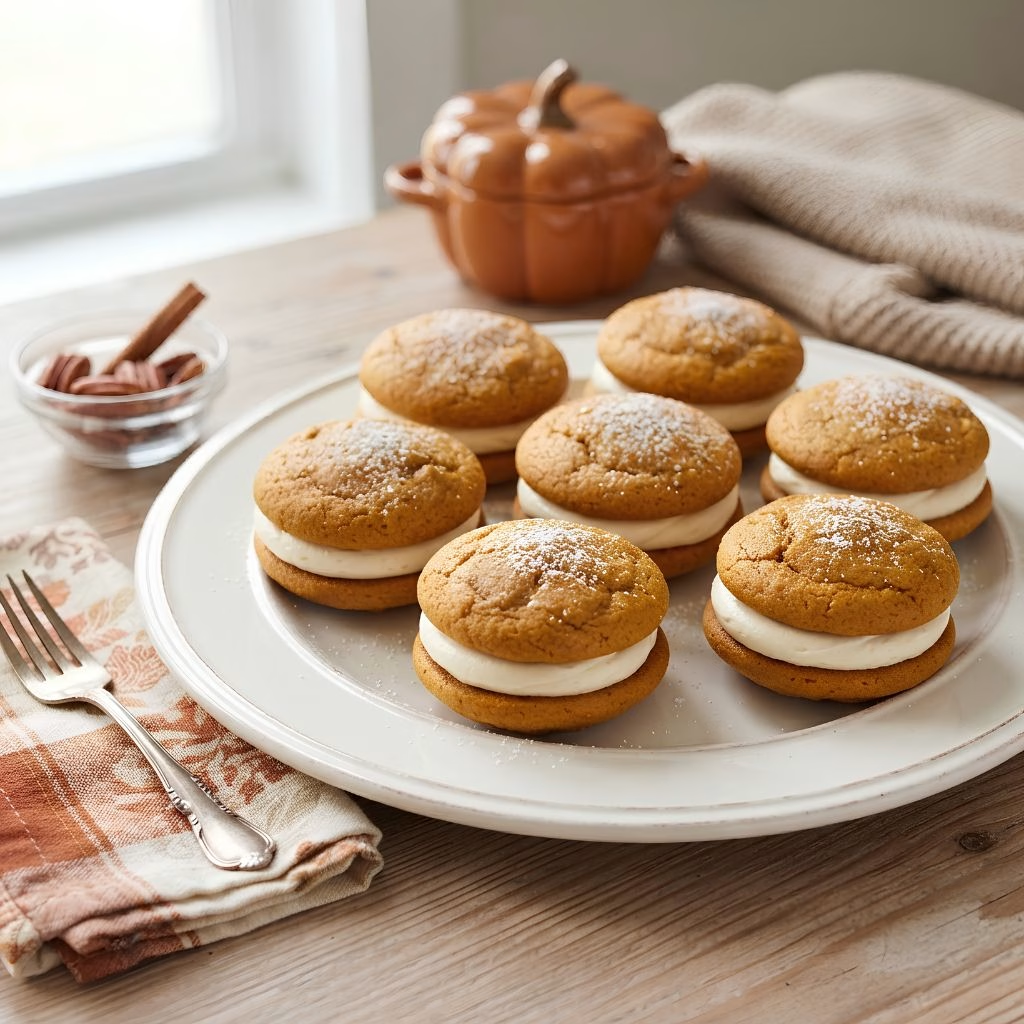
Finally, I match cookies up by size, then pipe or spread the filling onto the flat side of one cookie before topping it with another. I press gently so the filling reaches the edges without oozing out everywhere. And that’s it your pumpkin whoopie pies are ready to enjoy.
Additional Tips for Making This Recipe Better
I’ve made enough batches of these to pick up a few tricks along the way, and I think they make a real difference.
- I always chill my dough for 15 minutes if it feels too soft to scoop, especially in warm weather.
- I use an ice cream scoop for uniform cookies, so every whoopie pie pairs up nicely in size.
- I never skip sifting the powdered sugar for the filling, since it keeps the frosting silky and lump-free.
- I like adding a pinch of pumpkin pie spice to the filling for an extra flavor boost.
- I always let my cream cheese and butter come fully to room temperature before mixing, or the filling turns lumpy.
Common Mistakes to Avoid
I learned most of these the hard way, so hopefully this saves you a batch or two.
- I once used pumpkin pie filling instead of pure pumpkin puree, and the cookies turned out way too sweet and wet.
- I’ve overbaked cookies before just because they looked pale pull them once they spring back, even if the color seems light.
- I tried filling cookies while they were still warm once, and the frosting melted into a mess.
- I didn’t measure my spices carefully the first time and the cloves completely overpowered the pumpkin flavor.
- I skipped softening my cream cheese fully once, and I ended up with a lumpy, uneven filling.
How to Serve Pumpkin Whoopie Pies?
I love serving these piled onto a rustic wooden board or a tiered cake stand for a fall party. They look beautiful stacked with a light dusting of cinnamon or powdered sugar on top. A drizzle of caramel sauce over the top adds a nice glossy finish for special occasions.
If I’m setting up a dessert table, I’ll pair them alongside other seasonal treats, and honestly they go really well next to something like a classic pumpkin pie, similar to the one on for guests who want variety. For an everyday treat, I just wrap one in parchment paper for an easy grab-and-go snack.
Variations
- Swap the cream cheese filling for a marshmallow fluff filling for a sweeter, fluffier bite.
- Use maple extract instead of vanilla in the filling for a cozy maple twist.
- Make it dairy-free by using vegan butter and dairy-free cream cheese in the filling.
- Reduce the sugar slightly and add a splash of orange juice for a lighter, less-sweet version.
- Try a chocolate spin by swapping the spices for cocoa powder, similar to the flavor profile in a classic chocolate whoopie pie.
- Add mini chocolate chips to the batter for little pockets of melty chocolate in every bite.
Nutritional Information
Here’s a general breakdown per whoopie pie, though exact numbers vary based on portion size and ingredients used.
- Calories: approximately 320 kcal
- Protein: 3g
- Carbohydrates: 45g
- Fat: 15g
Make Ahead and Storage
I usually make the cookies and filling a day ahead, storing them separately in airtight containers in the fridge, then assembling right before serving so they stay fresh and neat.
Once assembled, these whoopie pies keep well in the refrigerator for up to 5 days in an airtight container. I always let them sit at room temperature for about 10 minutes before eating so the filling softens back up.
For longer storage, I freeze assembled whoopie pies individually wrapped for up to 2 months. I just thaw them in the fridge overnight before serving, and they taste just as good as fresh.
Why You’ll Love This Recipe?
There are so many reasons this has become one of my go-to fall bakes, and I think you’ll feel the same once you try it.
- Easy to make: The batter comes together in one bowl with simple pantry staples, so there’s no complicated technique involved.
- Perfect texture: These cookies stay soft for days thanks to the oil and pumpkin, unlike drier cake-style cookies.
- Customizable: You can swap the filling, spices, or mix-ins endlessly to make it your own every time you bake.
- Crowd-pleaser: I’ve never brought these to a gathering without someone asking for the recipe afterward.
- Great for make-ahead baking: Since they store and freeze so well, I can prep them days before I actually need them.
FAQs
Can I use fresh pumpkin instead of canned?
Yes, just make sure it’s well-drained and pureed smooth, since fresh pumpkin often holds more moisture than canned.
Why did my whoopie pies turn out flat?
This usually happens if your baking soda or baking powder is old, or if the batter was overmixed and lost its structure.
Can I make these ahead of a party?
Absolutely, I bake the cookies a day ahead and just assemble them a few hours before serving for the freshest texture.
What can I substitute for cream cheese in the filling?
Marshmallow fluff or a simple buttercream both work well if you want a different filling texture or flavor.
How do I keep the filling from melting out?
Make sure your cookies are completely cool before filling, and chill the assembled whoopie pies for 15 minutes to help everything set.

Pumpkin Whoopie Pie Recipe
Ingredients
Method
- I always start by preheating my oven to 350°F and lining two baking sheets with parchment paper. This small step matters more than people think, since a properly heated oven gives the cookies that soft, even rise. While the oven warms up, I set my ingredients out so everything is ready to go.
- In a medium bowl, I whisk together the flour, baking powder, baking soda, salt, cinnamon, ginger, and cloves. Whisking instead of just stirring helps distribute the spices evenly, so you don’t end up with a bite that’s overloaded with cloves. I set this bowl aside while I move on to the wet ingredients.
- In my stand mixer, I beat the brown sugar and oil together until they look smooth and combined. Then I add the pumpkin puree, eggs, and vanilla, mixing until the batter turns a rich, even orange color. This is the base flavor of your cookie, so take a moment to scrape down the bowl.
- I add the dry ingredients into the wet mixture in two batches, folding gently with a spatula instead of overmixing. Overmixing activates the gluten and can make your cookies tough instead of soft. The batter should look thick, glossy, and slightly sticky when you’re done.
- Using my cookie scoop, I drop rounded portions of batter onto the prepared sheets, leaving about two inches between each one. I bake them for 10 to 12 minutes, until they spring back lightly when touched. I always rotate my trays halfway through for even baking.
- This step tests my patience every time, but it’s non-negotiable. I let the cookies cool on the tray for a few minutes, then transfer them to a wire rack. Filling warm cookies melts the frosting instantly, so I always wait until they’re fully cool.
- While the cookies cool, I beat the softened cream cheese and butter together until smooth and fluffy. Then I slowly add the powdered sugar and vanilla, beating until it holds soft peaks. If it feels too soft, I pop it in the fridge for ten minutes to firm up.
- Finally, I match cookies up by size, then pipe or spread the filling onto the flat side of one cookie before topping it with another. I press gently so the filling reaches the edges without oozing out everywhere. And that’s it your pumpkin whoopie pies are ready to enjoy.
Notes
- I always chill my dough for 15 minutes if it feels too soft to scoop, especially in warm weather.
- I use an ice cream scoop for uniform cookies, so every whoopie pie pairs up nicely in size.
- I never skip sifting the powdered sugar for the filling, since it keeps the frosting silky and lump-free.
- I like adding a pinch of pumpkin pie spice to the filling for an extra flavor boost.
- I always let my cream cheese and butter come fully to room temperature before mixing, or the filling turns lumpy.