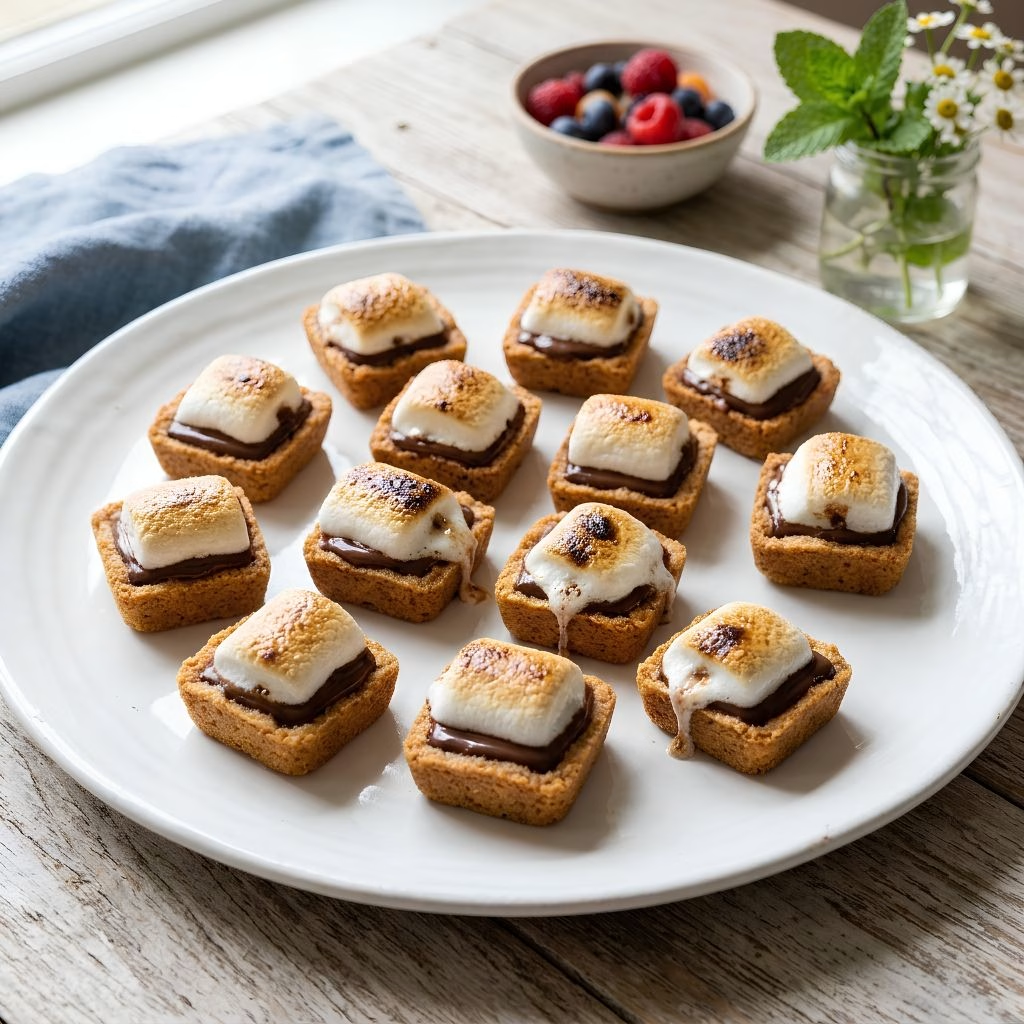
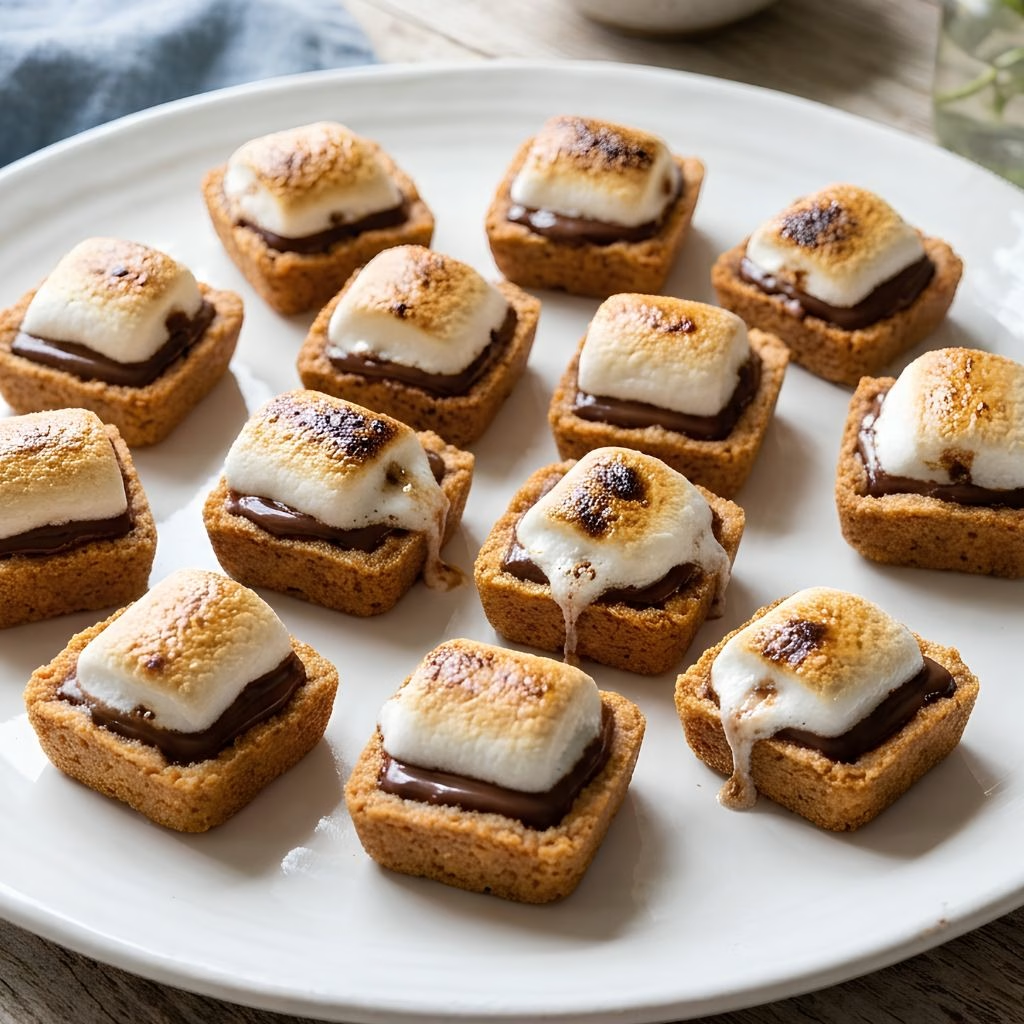
I still remember the first time I made this Graham Cracker Smores Bites Recipe for a backyard party, and I honestly couldn’t believe how fast they disappeared from the tray. I love that I get every bit of a classic campfire s’more the crunchy crust, the melty chocolate, the toasty marshmallow without lighting a single match.
I bake mine in a mini muffin pan, and within twenty minutes I’m pulling out two dozen little bites that look like I spent hours in the kitchen. Whenever I need a quick dessert for a potluck, a birthday, or just a random Tuesday craving, this is the recipe I reach for. Once you try it, I promise it’ll become your go-to s’mores recipe too.
Cooking Time
- Prep Time: 10 minutes
- Cook Time: 7 minutes
- Total Time: 17 minutes
Ingredients
- 7 whole graham crackers, finely crushed (about 1 cup of crumbs) — this forms the buttery base, so crush them fine for a crust that holds together.
- ¼ cup powdered sugar — adds a touch of sweetness and helps bind the crumb mixture smoothly.
- 6 tablespoons unsalted butter, melted — pro tip: use melted, not softened, butter so the crumbs press together evenly.
- 2 milk chocolate candy bars, broken into rectangles (1.55 oz each) — classic milk chocolate melts beautifully, but you can swap in dark chocolate for a richer bite.
- 12 large marshmallows, sliced in half — cutting them in half gives you the perfect gooey topping without overwhelming the crust.
Note: this recipe makes 24 mini s’mores bites, enough to serve around 8 to 10 people as a party dessert.
Equipment You Need
- Mini muffin pan — the key tool that shapes these into bite-sized s’mores.
- Mixing bowl — for combining the graham cracker crumbs, sugar, and butter.
- Measuring cups and spoons — to keep your ingredient ratios accurate.
- Small spoon or tart shaper — to press the crumb mixture into each muffin cup.
- Oven mitts — for safely handling the hot pan during baking and broiling.
How to Make Graham Cracker Smores Bites Recipe?
I like to keep this process simple, and honestly, that’s the whole appeal of this recipe. Once my ingredients are measured out, I’m only a few short steps away from a warm tray of mini s’mores. Here’s exactly how I put mine together every time.
Preheat the Oven and Prep the Pan
I always start by preheating my oven to 350°F so it’s fully ready when my crust mixture is done. While it heats, I lightly grease my mini muffin pan so the bites release cleanly later. This small step saves me from any sticking frustration once the bites are baked and set.
Make the Graham Cracker Crust
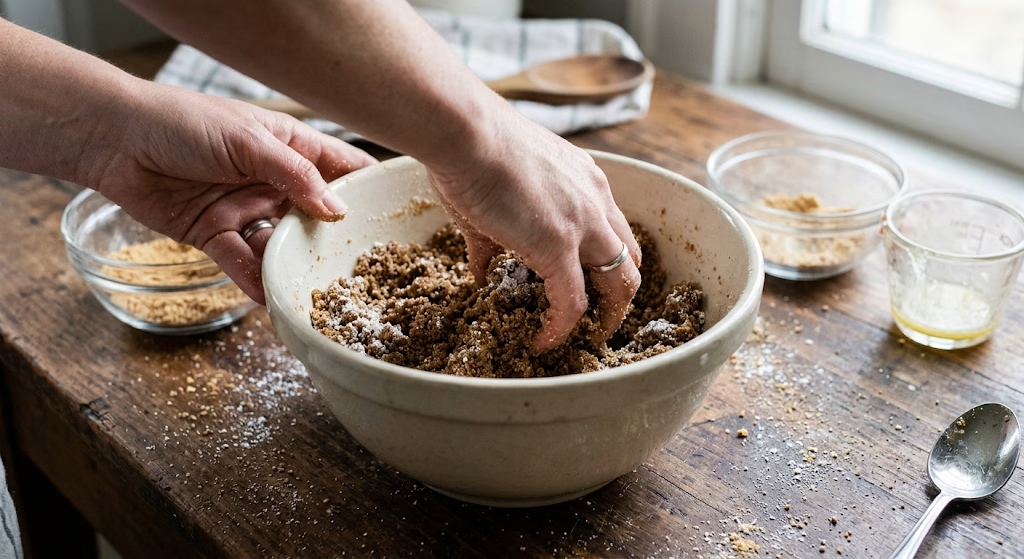
I crush my graham crackers into fine crumbs using a food processor, though a zip-top bag and rolling pin works just as well. Then I stir the crumbs together with powdered sugar and melted butter until everything looks like damp sand. I want the mixture to hold its shape when I press it between my fingers.
Press the Crumbs Into the Pan
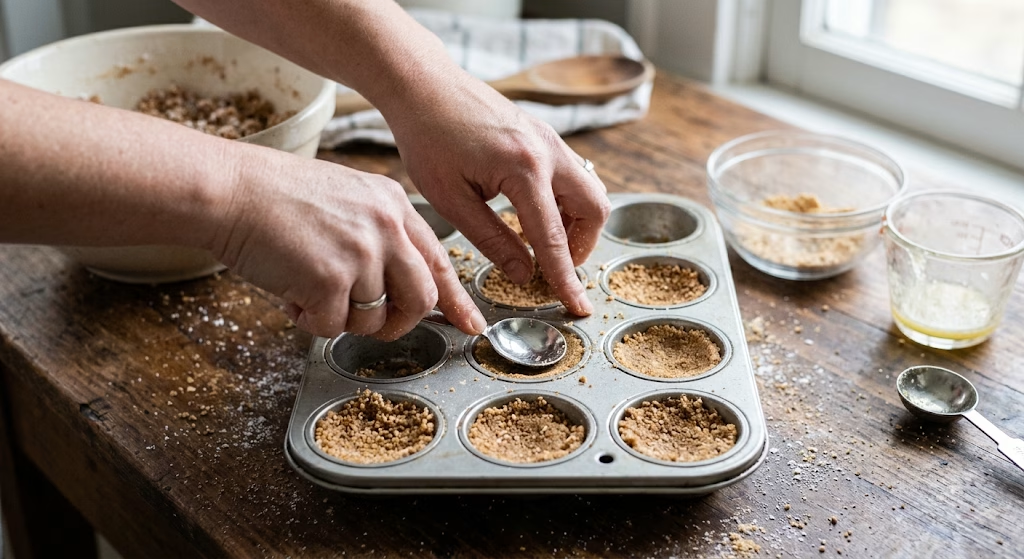
I spoon the crumb mixture evenly into each cup of my mini muffin pan, using about a tablespoon per cup. I press down firmly with my fingers or the back of a small spoon to form a shallow, compact crust. Getting this layer tight now keeps my bites from crumbling apart later.
Bake the Crusts
I slide the pan into my preheated oven and bake the crusts for 4 to 5 minutes, just until the edges turn a light golden color. I keep a close eye on them since mini portions bake fast and can overcook quickly. While they bake, I break my chocolate bars into rectangles sized to fit each cup.
Add the Chocolate and Marshmallow
As soon as the crusts come out, I place one chocolate rectangle into each warm cup so it starts softening right away. Then I top each one with a marshmallow half, cut-side down, pressing it gently onto the chocolate. The residual heat from the crust gets everything melting beautifully.
Broil for a Toasted Finish
If I want that classic toasted marshmallow look, I pop the pan back into the oven on broil for 1 to 2 minutes, watching constantly. Marshmallows go from golden to burnt in seconds under a broiler, so I never walk away during this step. Once they’re bronzed and puffy, I pull the pan out immediately.
Cool and Remove the Bites
I let the s’mores bites cool in the pan for about 5 minutes so the chocolate can firm up slightly before I move them. Using a small offset spatula, I gently lift each bite out of its cup without pressing into the gooey marshmallow top. From there, they’re ready to serve warm or at room temperature.
Additional Tips for Making This Recipe Better
I’ve made these graham cracker s’mores bites more times than I can count, and these small tweaks have made a real difference for me.
- I always grease my muffin pan generously, even if it says nonstick, because sticky marshmallows and melted chocolate can cling stubbornly otherwise.
- I let the baked crusts sit for a minute before adding chocolate so I don’t accidentally crack the edges while they’re too hot and fragile.
- I use mini marshmallows instead of halved large ones when I want a slightly neater, more uniform top on each bite.
- I keep my oven light on during the broiling step so I can watch the marshmallows without opening the door and losing heat.
- I double the recipe when I’m hosting a bigger crowd, since these mini s’mores bites vanish faster than almost anything else I serve.
Common Mistakes to Avoid
Over the years, I’ve learned these pitfalls the hard way, so I’m sharing them to help you skip the trial and error.
- I once walked away during broiling and came back to blackened marshmallows, so now I stand right at the oven the entire time.
- I used to skip greasing the pan, and my crusts tore apart when I tried to remove them. Light grease really does matter.
- I crushed my graham crackers too coarsely once, and the crust wouldn’t hold together at all when pressed into the cups.
- I added the chocolate before the crust had any warmth left, and it barely softened, so timing the chocolate step matters.
- I overfilled a few cups with crumb mixture, and the crust baked unevenly, so I stick to about a tablespoon per cup now.
How to Serve Graham Cracker S’mores Bites?
I love arranging these on a round wooden board or a tiered dessert stand so the golden crusts and toasted marshmallow tops are the star of the table. A light dusting of extra graham cracker crumbs or a drizzle of melted chocolate over the top makes them look extra special for parties.
If I’m feeling fun, I’ll add a tiny skewer or toothpick to each bite so guests can grab them easily without getting sticky fingers. These also pair wonderfully next to a hot cocoa bar or alongside other graham cracker s’mores recipe favorites for a full dessert spread.
For an easy grab-and-go treat, I sometimes pack a few into mini cupcake liners, similar to how you’d find packaged s’mores bites at Costco or Trader Joe’s.
Variations
- Swap milk chocolate for dark chocolate or white chocolate chunks for a different flavor profile.
- Add a thin layer of peanut butter under the chocolate for a peanut butter s’mores bites recipe twist.
- Use gluten-free graham crackers to make this dessert suitable for gluten-sensitive guests.
- Try a sugar-free powdered sugar substitute and sugar-free chocolate for a lighter version.
- Mix mini chocolate chips into the crust itself for extra chocolate in every single bite.
- Top with a sprinkle of sea salt right after broiling for a sweet-and-salty finish.
Nutritional Information
Here’s a general estimate per s’mores bite, based on a batch of 24 servings.
- Calories: approximately 90-100 kcal
- Protein: approximately 1 gram
- Carbohydrates: approximately 12 grams
- Fat: approximately 5 grams
Make Ahead and Storage
You can prep parts of this recipe in advance to make the party day easier on yourself.
Make Ahead: I often crush my graham crackers and mix the crust a day in advance, storing it covered in the fridge. This saves me time the day I actually want to bake and assemble the bites.
Storage: I keep leftover s’mores bites in an airtight container at room temperature for up to 2 days. After that, the marshmallow topping starts to lose its soft texture and the crust can get a bit stale.
Reheating: When I want that fresh-baked feel again, I warm the bites in a 300°F oven for 2 to 3 minutes just until the chocolate softens slightly. I avoid the microwave since it tends to make the marshmallow rubbery instead of gooey.
Freezing: I don’t recommend freezing the fully assembled bites, since the marshmallow texture changes once thawed. Instead, I freeze just the baked crusts in a sealed bag for up to a month and add fresh chocolate and marshmallows when I’m ready to serve.
Why You’ll Love This Recipe?
This graham cracker s’mores bites recipe has earned a permanent spot in my dessert rotation, and here’s why I think you’ll feel the same way.
- It’s incredibly quick: From start to finish, I’m done in under 20 minutes, which makes it perfect for last-minute dessert needs.
- It’s naturally portion-controlled: Since each bite is pre-sized in the muffin pan, I never have to worry about awkward slicing or messy servings.
- It’s endlessly customizable: I can swap chocolate types, add peanut butter, or adjust sweetness depending on who I’m serving.
- It travels well: Unlike a campfire s’more, I can pack these into a container and bring them to any gathering without a mess.
- It satisfies every age group: Kids and adults both reach for seconds, which makes it one of my most requested treats at family get-togethers.
FAQs
Can I make graham cracker s’mores bites without a mini muffin pan?
I’ve tried using a regular muffin pan in a pinch, but the bites come out larger and take a minute or two longer to bake, so keep a close eye on them.
Why did my crust fall apart when I removed it from the pan?
This usually happens to me when I don’t grease the pan enough or when the crumbs are too coarse, so I make sure to crush them finely and grease generously.
Can I use mini marshmallows instead of large ones?
Yes, I swap in mini marshmallows often, usually using 3 to 4 per cup, and they melt just as beautifully as the halved large ones.
How far in advance can I prepare these for a party?
I usually bake the crusts and prep the toppings up to a day ahead, then assemble and broil everything right before guests arrive for the freshest taste.
Are these the same as store-bought s’mores bites from Walmart or Amazon?
Not quite homemade graham cracker s’mores bites taste fresher and let me control the chocolate and marshmallow ratio, unlike pre-packaged versions you’d find at Walmart or Amazon.
If you’re building out a full dessert spread, I’d also recommend trying a peanut butter cookie bars recipe, which pairs nicely with the toasted marshmallow flavor here. And if chocolate is more your thing, my chocolate chip cookie recipe makes a great companion treat on the same dessert table.

Graham Cracker Smores Bites Recipe
Ingredients
Method
- I always start by preheating my oven to 350°F so it’s fully ready when my crust mixture is done. While it heats, I lightly grease my mini muffin pan so the bites release cleanly later. This small step saves me from any sticking frustration once the bites are baked and set.
- I crush my graham crackers into fine crumbs using a food processor, though a zip-top bag and rolling pin works just as well. Then I stir the crumbs together with powdered sugar and melted butter until everything looks like damp sand. I want the mixture to hold its shape when I press it between my fingers.
- I spoon the crumb mixture evenly into each cup of my mini muffin pan, using about a tablespoon per cup. I press down firmly with my fingers or the back of a small spoon to form a shallow, compact crust. Getting this layer tight now keeps my bites from crumbling apart later.
- I slide the pan into my preheated oven and bake the crusts for 4 to 5 minutes, just until the edges turn a light golden color. I keep a close eye on them since mini portions bake fast and can overcook quickly. While they bake, I break my chocolate bars into rectangles sized to fit each cup.
- As soon as the crusts come out, I place one chocolate rectangle into each warm cup so it starts softening right away. Then I top each one with a marshmallow half, cut-side down, pressing it gently onto the chocolate. The residual heat from the crust gets everything melting beautifully.
- If I want that classic toasted marshmallow look, I pop the pan back into the oven on broil for 1 to 2 minutes, watching constantly. Marshmallows go from golden to burnt in seconds under a broiler, so I never walk away during this step. Once they’re bronzed and puffy, I pull the pan out immediately.
- I let the s’mores bites cool in the pan for about 5 minutes so the chocolate can firm up slightly before I move them. Using a small offset spatula, I gently lift each bite out of its cup without pressing into the gooey marshmallow top. From there, they’re ready to serve warm or at room temperature.
Notes
- I always grease my muffin pan generously, even if it says nonstick, because sticky marshmallows and melted chocolate can cling stubbornly otherwise.
- I let the baked crusts sit for a minute before adding chocolate so I don’t accidentally crack the edges while they’re too hot and fragile.
- I use mini marshmallows instead of halved large ones when I want a slightly neater, more uniform top on each bite.
- I keep my oven light on during the broiling step so I can watch the marshmallows without opening the door and losing heat.
- I double the recipe when I’m hosting a bigger crowd, since these mini s’mores bites vanish faster than almost anything else I serve.