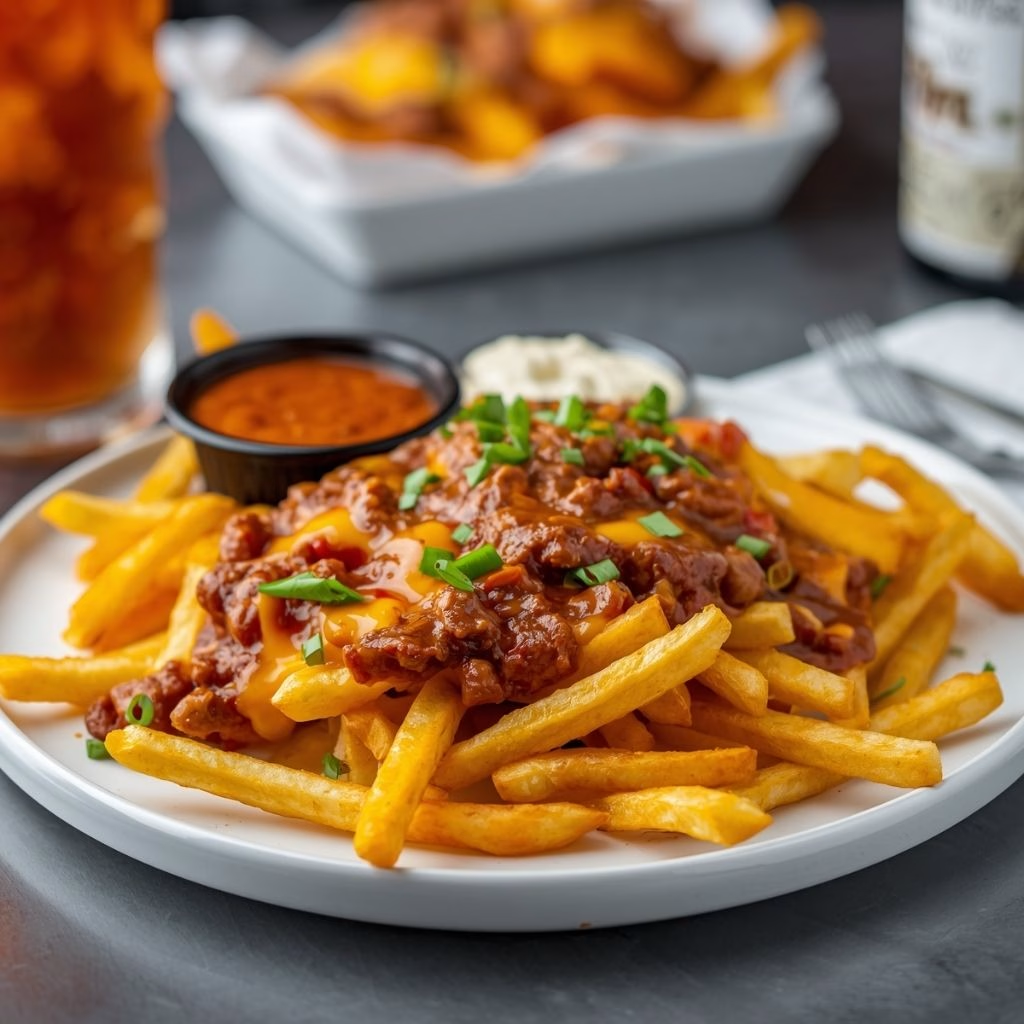
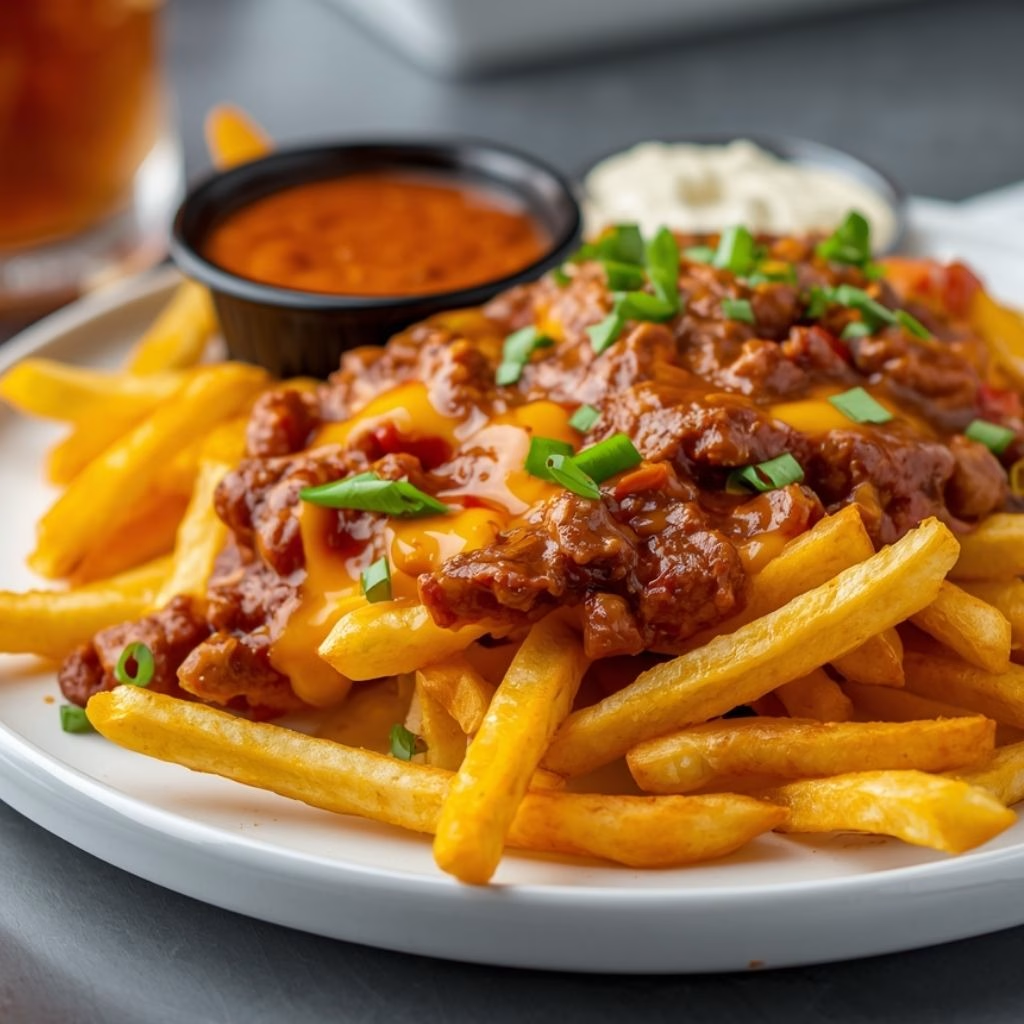
I make this Chili Cheese Fries Recipe whenever I need something warm, messy, and genuinely satisfying, and it never lets me down. I load up a tray of golden fries with a quick, thick homemade chili and pile on the cheese until it’s melty and bubbling.
It’s the kind of simple chili cheese fries recipe I turn to for game day, movie night, or just a random Tuesday craving. Once you try my version, you’ll understand why I skip takeout chili cheese fries near me and just make my own instead. It comes together fast, and every bite is loaded with flavor.

Cooking Time
- Prep Time: 10 minutes
- Cook Time: 30 minutes
- Total Time: 40 minutes
Ingredients
- 1 (28-32 ounce) bag frozen French fries – regular, crinkle, or steak-cut fries all work well here.
- 2 to 3 cups shredded cheddar cheese – fresh-shredded cheese melts smoother than the bagged kind.
- 1 tablespoon olive oil – helps soften the onions and jalapeños without sticking.
- 1 medium onion, diced – builds the savory base flavor of the chili.
- 1 to 2 jalapeños, diced – optional, but they add a nice mild kick.
- 3 to 4 cloves garlic, minced – adds depth; don’t skip this even in a simple chili cheese fries recipe.
- 1 pound lean ground beef – lean beef keeps the chili from turning greasy.
- 1 to 2 tablespoons chili powder – the backbone of the chili cheese fries sauce flavor.
- 1 teaspoon ground cumin – gives the chili that warm, earthy taste.
- 1/2 teaspoon smoked paprika – optional, but it adds a nice smoky depth.
- 1/4 to 1/2 teaspoon cayenne pepper – optional, only if I want extra heat.
- Salt and black pepper, to taste – always season as you go.
- 3 tablespoons tomato paste – key for a thick chili cheese fries sauce that clings to the fries.
- 1 (8-ounce) can tomato sauce or 1 cup crushed tomatoes – forms the saucy base.
- 1 (10-ounce) can diced tomatoes with green chiles – or plain diced tomatoes if I want it milder.
- 1/2 cup beef broth – loosens the chili just enough to simmer properly.
- 1 (15-ounce) can kidney or pinto beans, drained and rinsed – optional for those who like a heartier chili.
- Sour cream, sliced green onions, pickled jalapeños, diced tomatoes, hot sauce – for topping and garnish.
Note: This recipe serves 6 to 8 people, depending on portion size.
Equipment You Need
- Large baking sheet – for baking the fries until they’re crisp.
- Deep skillet or pot – for cooking the ground beef and simmering the chili.
- Wooden spoon or spatula – for breaking up the beef and stirring the chili.
- Measuring cups and spoons – for accurate ingredient portions.
- Cheese grater – for shredding your own cheese fresh, if you prefer that over bagged shreds.
How to Make Chili Cheese Fries Recipe?
Making chili cheese fries at home is much easier than it looks, and most of the work happens while the fries are in the oven. I like to get the chili going first so both components finish around the same time. Here’s exactly how I put mine together every time.
Bake the Fries Until Extra Crispy
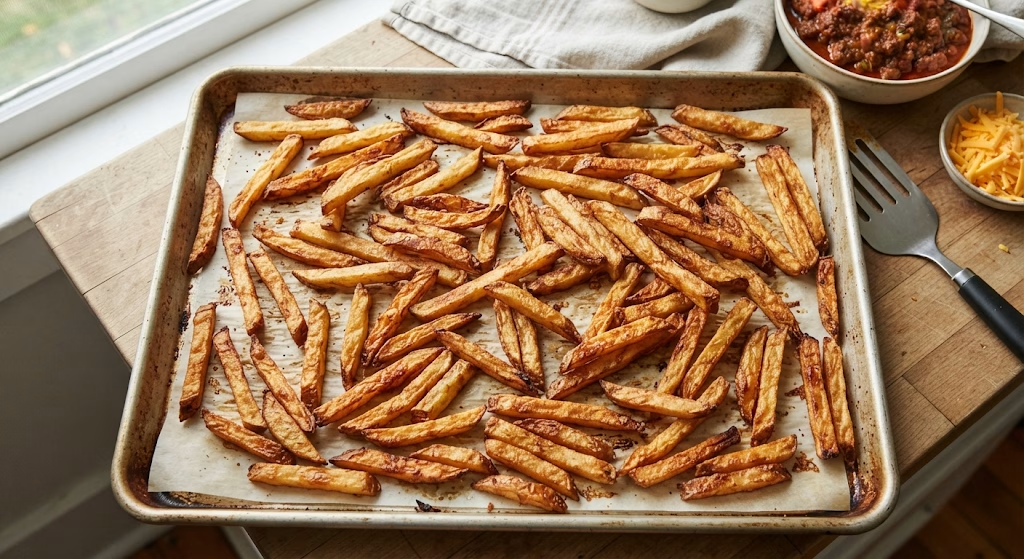
I spread the frozen fries in a single layer on a baking sheet and bake them according to the package directions, then leave them in a few extra minutes past that time. This little trick keeps them from turning soggy once the chili and cheese go on top. Crispy fries really are the foundation of a good chili cheese fries recipe easy enough for anyone to nail.
Cook the Onion, Jalapeño, and Garlic
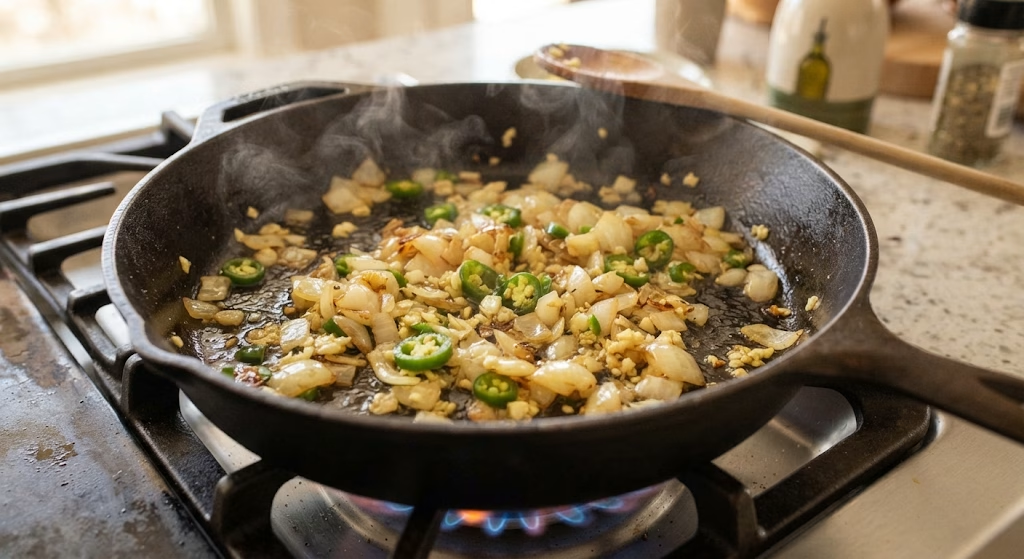
While the fries bake, I heat olive oil in a deep skillet over medium heat and add the diced onion and jalapeño. I let them cook for a few minutes until soft, then stir in the garlic for about thirty seconds. This builds the aromatic base that gives the chili its flavor before the beef even goes in.
Brown the Ground Beef
Next, I add the ground beef straight into the skillet and break it up as it cooks. It usually takes five to six minutes to brown fully. If there’s excess grease pooling in the pan, I drain it off so the finished chili doesn’t turn oily on top of the fries.
Add the Spices and Tomato Paste
Once the beef is browned, I stir in the chili powder, cumin, smoked paprika, cayenne, salt, pepper, and tomato paste. I cook everything together for about a minute so the spices bloom and the tomato paste darkens slightly. This step is what gives the chili its rich, deep flavor.
Simmer the Chili Until Thick
I pour in the tomato sauce, diced tomatoes, and beef broth, then bring everything to a simmer. I let it cook uncovered for ten to fifteen minutes, stirring occasionally, until the chili is thick enough to mound on a spoon. A thick chili is essential so it doesn’t turn your crispy fries soggy underneath.
Stir in the Beans, If Using
If I’m adding beans, this is when they go in. I stir them into the chili and let everything simmer for another three to five minutes. For a thicker texture, I sometimes mash a few beans right in the pot, which helps the chili cling to the fries even better.
Assemble the Fries, Chili, and Cheese
Once the fries are done, I pile them onto the baking sheet or a heatproof platter. I sprinkle about a third of the cheese directly onto the hot fries first, which acts like a little shield against sogginess. Then I spoon the thick chili over the top and finish with the remaining cheese.
Melt the Cheese and Serve
I slide the tray back into the oven at 425°F for five to eight minutes, just until the cheese is fully melted and bubbly. If I want a few golden spots, I’ll broil it for the last thirty to sixty seconds while watching closely. Then I top it with sour cream, green onions, and jalapeños and serve it immediately while everything is hot.
Additional Tips for Making This Recipe Better
I’ve made this more times than I can count, and these small adjustments have made a real difference for me.
- I always add that first thin layer of cheese before the chili goes on it keeps the fries from getting mushy underneath.
- I simmer my chili a little longer than I think I need to, since a looser chili is the biggest reason fries turn soggy.
- I like using fresh-shredded cheese instead of the pre-shredded bags because it melts so much smoother.
- When I’m short on time, I’ll use canned chili and just simmer it uncovered for a few minutes to thicken it up.
- I keep my toppings on the side and add them right before serving so they stay fresh and don’t wilt into the heat.
Common Mistakes to Avoid
- I’ve learned the hard way that using thin, flimsy fries leads to a soggy mess thicker cut fries hold up so much better.
- I used to skip draining the beef, and it made my chili greasy and watery on top of the fries.
- I once rushed the simmering step, and the chili turned out too thin to stay put on the fries.
- I’ve overloaded the tray with chili before, which drowned the fries instead of topping them less is more here.
- I forgot to preheat my baking sheet once, and the fries came out limp instead of crisp, so I never skip that step now.
How to Serve Chili Cheese Fries?
I usually serve this straight from the baking sheet while it’s still hot and bubbly, since that’s when it looks the most inviting. A dollop of sour cream in the center, a scattering of chopped green onions, and a few slices of pickled jalapeño make it look like something you’d order from a restaurant.
If I’m feeding a crowd, I’ll add small bowls of extra toppings like diced tomatoes, hot sauce, and shredded cheese so everyone can customize their own plate. It also pairs really well as a side next to burgers or chicken wings for a full game-day spread.
Variations
- Swap the ground beef for shredded chicken or ground turkey for a lighter version.
- Try a chili cheese fries recipe with no meat version using black beans or lentils instead of beef.
- Use a warmed can of chili for a chili cheese fries recipe with canned chili when you’re short on time.
- Skip the beans entirely for a chili cheese fries recipe no beans that’s smoother in texture.
- Drizzle on a warm cheese sauce instead of shredded cheese for an extra gooey finish.
- Add pepper jack cheese or a dash of hot sauce for a spicier version, similar to what you’d find at Sonic chili cheese fries recipe fans love, or the style served at Burger King chili cheese fries recipe copycats.
Nutritional Information
Here’s a general breakdown per serving for this cheese fries recipe, though exact values will vary based on your toppings and portion size.
- Calories: approximately 439 kcal
- Protein: approximately 23 grams
- Carbohydrates: approximately 37 grams
- Fat: approximately 23 grams
Make Ahead and Storage
You can make the chili up to three days ahead of time and store it in an airtight container in the refrigerator. This actually makes assembly quicker on the day you want to serve it.
For leftovers, I recommend storing the chili and fries separately whenever possible, since fries lose their crunch quickly once mixed with chili. Reheat the chili on the stovetop and re-crisp the fries in the oven or air fryer before combining them again.
This dish doesn’t freeze particularly well once assembled, but the chili on its own freezes nicely for up to three months. Just thaw it in the fridge overnight and simmer it again until thickened before spooning it over freshly cooked fries.
Why You’ll Love This Recipe
This chili cheese fries recipe has become one of my go-to comfort meals, and here’s why it keeps earning a spot on my table.
- It’s genuinely easy to make. With frozen fries and a quick homemade chili, this comes together in about forty minutes without much hands-on effort.
- It’s endlessly customizable. Whether you want it spicier, meatless, or without beans, this recipe adapts to whatever you’re craving that day.
- It’s perfect for feeding a group. I’ve served this at parties and game-day gatherings, and it always disappears fast.
- The flavor really delivers. Between the thick, seasoned chili and the melted cheddar, every single bite has something going on.
- It beats takeout every time. I’d rather make this at home than search for chili cheese fries near me, since homemade always tastes fresher.
FAQs
Can I use frozen fries for this chili cheese fries recipe?
Yes, frozen fries work great here. Just bake them a few minutes longer than the package suggests so they stay crispy under the toppings.
Do chili cheese fries need beans?
Not necessarily. Beans are common, but you can easily leave them out for a smoother, more topping-style chili.
What’s the best cheese for chili cheese fries?
Freshly shredded cheddar or a cheddar-pepper jack blend melts the smoothest and gives you that classic gooey pull.
Can I use canned chili instead of making it from scratch?
Absolutely. Just warm the canned chili and simmer it uncovered for a few minutes to thicken before spooning it over the fries.
How do I keep my chili cheese fries from getting soggy?
Bake the fries until extra crispy, keep the chili thick rather than watery, and add a thin layer of cheese directly on the fries before the chili goes on.
If you love loaded fries like this, you’ll probably enjoy this Cheesy Loaded Fries recipe too, and if chili dishes are your thing, don’t miss this Chili Dog recipe for another way to enjoy that same thick, meaty chili.

Chili Cheese Fries Recipe
Ingredients
Method
- I spread the frozen fries in a single layer on a baking sheet and bake them according to the package directions, then leave them in a few extra minutes past that time. This little trick keeps them from turning soggy once the chili and cheese go on top.
- While the fries bake, I heat olive oil in a deep skillet over medium heat and add the diced onion and jalapeño. I let them cook for a few minutes until soft, then stir in the garlic for about thirty seconds. This builds the aromatic base that gives the chili its flavor before the beef even goes in.
- Next, I add the ground beef straight into the skillet and break it up as it cooks. It usually takes five to six minutes to brown fully. If there’s excess grease pooling in the pan, I drain it off so the finished chili doesn’t turn oily on top of the fries.
- Once the beef is browned, I stir in the chili powder, cumin, smoked paprika, cayenne, salt, pepper, and tomato paste. I cook everything together for about a minute so the spices bloom and the tomato paste darkens slightly. This step is what gives the chili its rich, deep flavor.
- I pour in the tomato sauce, diced tomatoes, and beef broth, then bring everything to a simmer. I let it cook uncovered for ten to fifteen minutes, stirring occasionally, until the chili is thick enough to mound on a spoon. A thick chili is essential so it doesn’t turn your crispy fries soggy underneath.
- If I’m adding beans, this is when they go in. I stir them into the chili and let everything simmer for another three to five minutes. For a thicker texture, I sometimes mash a few beans right in the pot, which helps the chili cling to the fries even better.
- Once the fries are done, I pile them onto the baking sheet or a heatproof platter. I sprinkle about a third of the cheese directly onto the hot fries first, which acts like a little shield against sogginess. Then I spoon the thick chili over the top and finish with the remaining cheese.
- I slide the tray back into the oven at 425°F for five to eight minutes, just until the cheese is fully melted and bubbly. If I want a few golden spots, I’ll broil it for the last thirty to sixty seconds while watching closely. Then I top it with sour cream, green onions, and jalapeños and serve it immediately while everything is hot.
Notes
- I always add that first thin layer of cheese before the chili goes on it keeps the fries from getting mushy underneath.
- I simmer my chili a little longer than I think I need to, since a looser chili is the biggest reason fries turn soggy.
- I like using fresh-shredded cheese instead of the pre-shredded bags because it melts so much smoother.
- When I’m short on time, I’ll use canned chili and just simmer it uncovered for a few minutes to thicken it up.
- I keep my toppings on the side and add them right before serving so they stay fresh and don’t wilt into the heat.