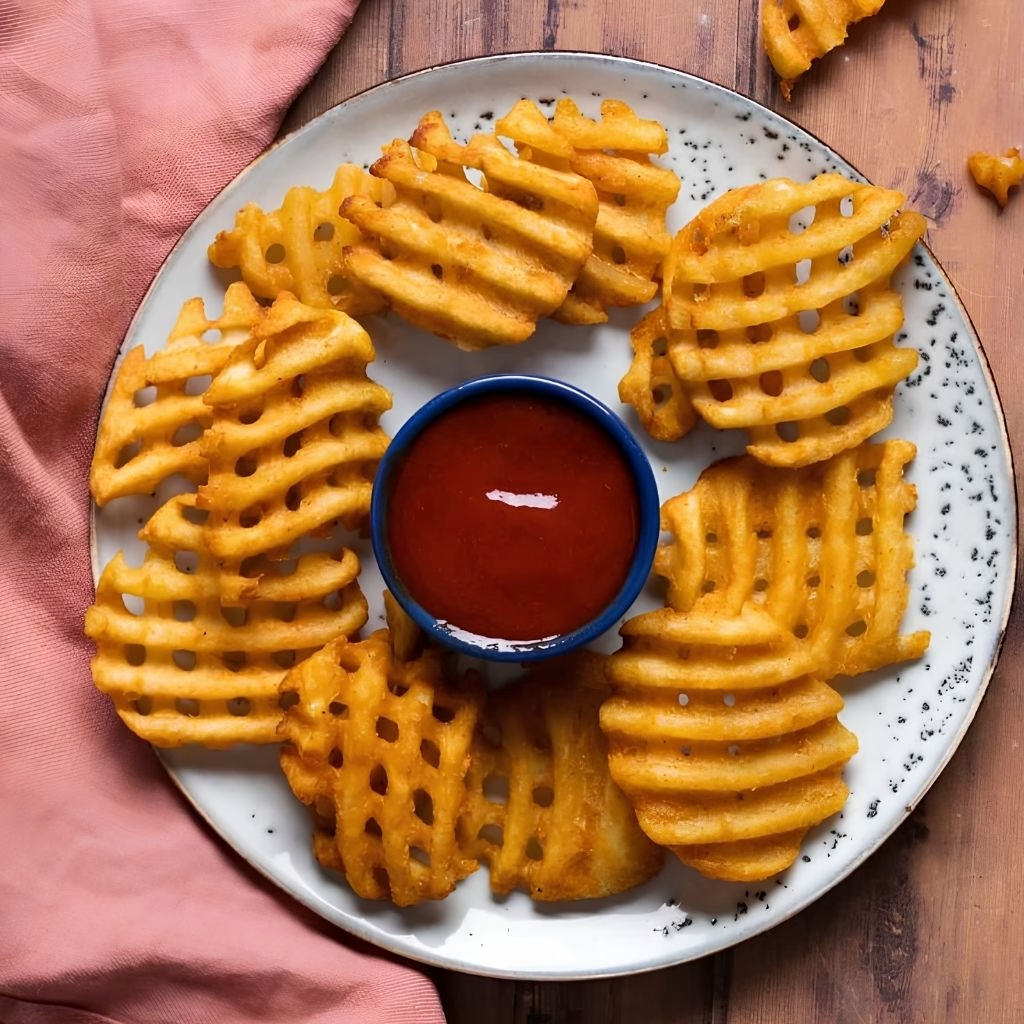
I still remember the first time I tried making Homemade Waffle Fries Recipe instead of driving through for my usual chicken-and-fries fix. I honestly thought I needed some fancy waffle fries cutter to pull it off, but it turned out to be way simpler than I expected.
Once I got the hang of the cutting technique, I was hooked on how those little criss-cross windows trap extra seasoning in every bite. Now I make a batch almost every weekend, and I promise once you try this version, you won’t miss the drive-thru waffle fries chick-fil-a fans love so much. Let me walk you through exactly how I make mine crispy on the outside and fluffy in the middle every single time.

Cooking Time
- Prep Time: 20 minutes (plus 30 minutes soaking)
- Cooking Time: 15 minutes
- Total Time: 1 hour 5 minutes
Ingredients
- 4 large russet potatoes – I always reach for russets because their high starch and low moisture make the crispiest fries.
- 1 quart vegetable or peanut oil – a neutral, high smoke point oil is key for that golden double-fry crunch.
- 1 teaspoon fine sea salt – added right after frying so it clings to the hot, oily surface.
- 1/2 teaspoon garlic powder (optional) – gives the fries a subtle savory boost without overpowering the potato flavor.
- 1/2 teaspoon smoked paprika (optional) – I like this for a little color and a mild smoky note.
- Ice water, enough to submerge the sliced potatoes – this pulls out surface starch so the fries crisp up better.
Note: this recipe serves 4 people as a side dish.
Equipment You Need
- Waffle fries cutter or mandoline with a crinkle blade – creates the signature waffle pattern in one pass.
- Sharp chef’s knife – my backup tool for how to make waffle fries with a knife when I don’t want to dig out the mandoline.
- Large pot or deep fryer – for both the blanching and final frying stages.
- Slotted spoon or spider strainer – to lift the fries safely out of hot oil.
- Baking sheet lined with paper towels – for draining and resting the fries between fries.
- Large mixing bowl – to hold the potatoes in ice water while they soak.
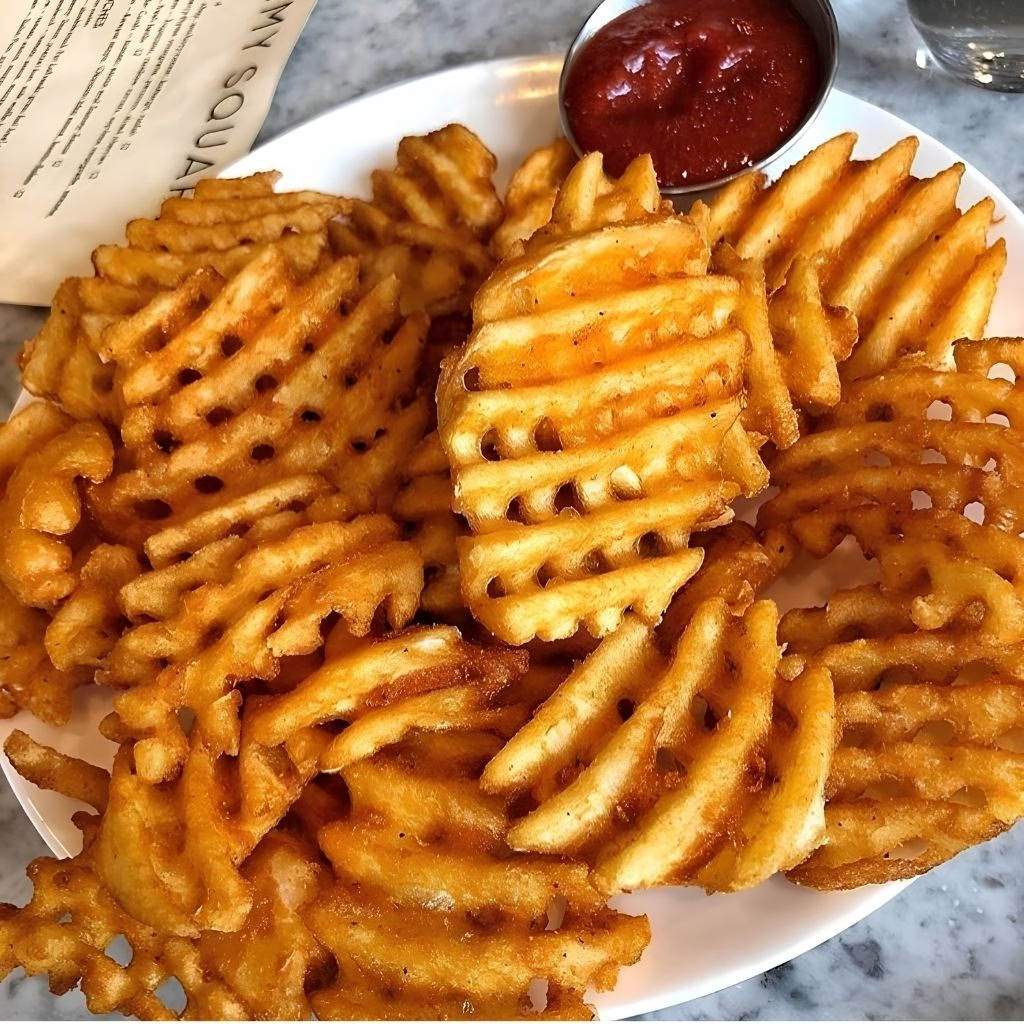
How to Make Homemade Waffle Fries Recipe?
I know frying can sound intimidating, but this process is really just a few simple stages repeated with patience. Once you’ve sliced your potatoes, the rest is mostly waiting for the oil to do its job. Here’s exactly how I break it down in my own kitchen every time.
Wash and Prep the Potatoes
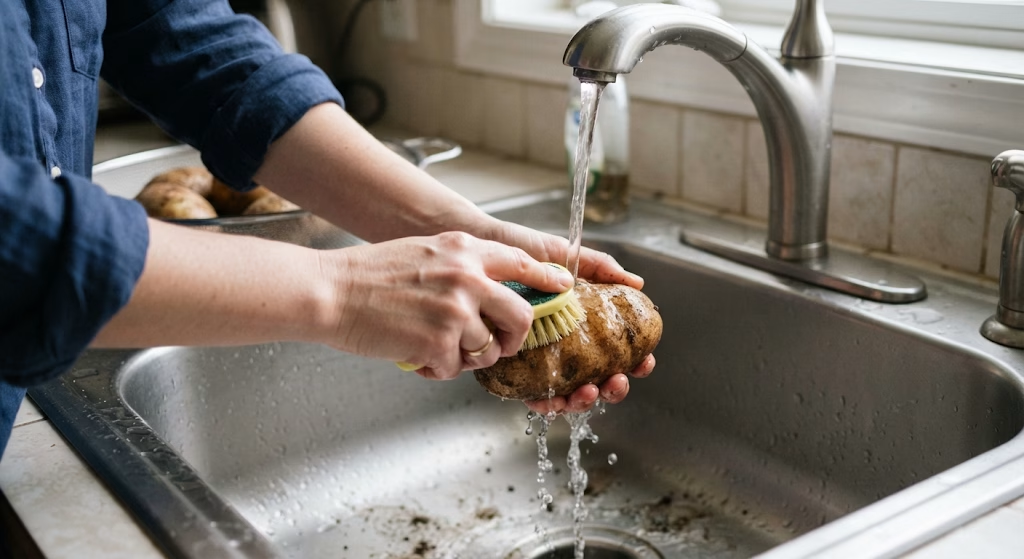
I start by scrubbing the russet potatoes under cold water since I like to keep the skins on for extra texture and nutrients. Pat them completely dry with a clean towel before you start slicing so your cutter or knife doesn’t slip. This step only takes a couple of minutes but sets you up for clean, even cuts.
Cut the Waffle Shapes
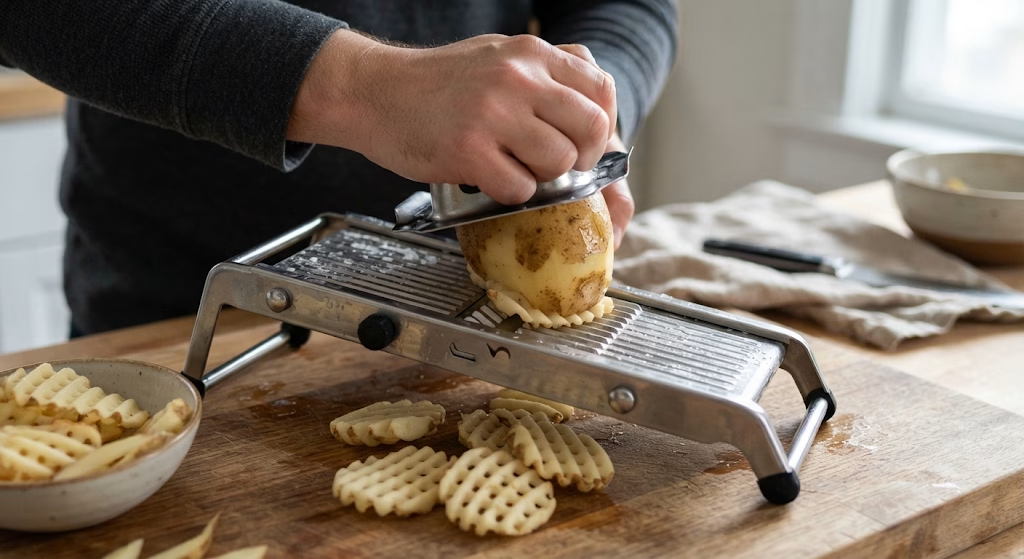
If you’re wondering how to cut waffle fries, set your mandoline to its thickest setting and make one slice down the potato, then give it a quarter turn before slicing again. Repeat this rotating motion all the way through each potato to build that signature waffle pattern.
If you don’t own one, learning how to make waffle fries without a mandoline just means using your knife at an angle, turning the potato the same way between cuts.
Soak the Sliced Potatoes
Drop your waffle-cut slices into a bowl of ice water and let them sit for about 30 minutes. This soak pulls excess starch out of the potato, which is the real secret to a crispier finished fry. I’ve skipped this step before out of impatience, and the difference in crunch was very noticeable.
Dry the Fries Thoroughly
Drain the potatoes and spread them across a clean towel, patting each piece until it’s completely dry. Any leftover moisture will cause the hot oil to splatter and can also make your fries soggy instead of crisp. I usually let mine air-dry for a few extra minutes while my oil heats up.
Blanch in Warm Oil
Heat your oil to around 325°F and fry the potatoes in batches for about 4 to 5 minutes, just until they’re soft but still pale. This first fry cooks the inside of the potato gently without browning the outside yet. Lift them out with a slotted spoon and let them rest on your paper towel-lined sheet.
Fry Again Until Golden
Raise your oil temperature to 375°F and fry the blanched potatoes a second time for 2 to 3 minutes, until they turn deep golden and crisp. This second, hotter fry is what creates that shatteringly crunchy exterior everyone loves. Work in small batches so the oil temperature doesn’t drop too much.
Season and Serve Immediately
While the fries are still hot, toss them with sea salt and any optional seasonings like garlic powder or smoked paprika. I find seasoning immediately after frying helps everything stick evenly to the surface. Serve them right away while they’re at their crispiest.
Additional Tips for Making This Recipe Better
I’ve made more batches of these than I can count, and here are a few things I’ve learned along the way that genuinely make a difference.
- I always cut my potatoes to a consistent thickness so they cook evenly in both fry rounds.
- I never skip the ice water soak, since it’s the single biggest factor in how crispy my fries turn out.
- I keep my oil temperature steady with a thermometer instead of guessing, because fluctuating heat gives uneven results.
- I fry in small batches so the fries have room to crisp instead of steaming each other.
- I season the moment they come out of the oil, while they’re still glistening with a bit of surface oil.
Common Mistakes to Avoid
- I used to overcrowd the pot, and it dropped the oil temperature so much that my fries turned out greasy instead of crisp.
- I once skipped drying the potatoes fully, and the oil splattered everywhere while the fries stayed soft.
- I’ve tried skipping the double fry to save time, but the texture just isn’t the same without that second crisp-up round.
- I salted fries too early before frying, which drew out moisture and made them limp.
- I’ve used a low smoke point oil once, and it left a slightly burnt taste behind before the fries even got crispy.
How to Serve Homemade Waffle Fries?
I love piling these onto a wide platter so the waffle shapes show off their pattern instead of hiding in a deep bowl. A sprinkle of fresh chopped parsley or a light dusting of extra paprika on top makes them look almost restaurant-style.
I usually set out a couple of dipping options on the side, like ranch, honey mustard, or a quick copycat of the KFC Sauce recipe, since that tangy dip pairs beautifully with the crispy edges.
For a heartier presentation, I sometimes serve them alongside a main like crispy chicken tenders so the plate feels like a full comfort-food meal.
Variations
- Air fryer version: for homemade waffle fries in air fryer style, skip deep frying and cook at 400°F for about 15 to 18 minutes, shaking the basket halfway through.
- Frozen shortcut: if you’re short on time, waffle fries frozen from the store can be baked instead, though the texture is never quite as fresh as cutting your own.
- Spicy kick: toss the hot fries with a pinch of cayenne or chili powder for extra heat.
- Cheesy topping: melt cheddar over the fries and add crumbled bacon for a loaded fries twist.
- No crinkle cutter method: for how to make waffle fries without a crinkle cutter, a sharp knife angled the same way at each turn gets you close to the same pattern.
Nutritional Information
Here’s a rough idea of what one serving of these homemade waffle fries looks like nutritionally.
- Calories: approximately 280 per serving
- Protein: about 4 grams
- Carbohydrates: around 38 grams
- Fat: roughly 13 grams
Make Ahead and Storage
You can slice and soak the potatoes up to a day ahead of time, just keep them fully submerged in the refrigerator so they don’t brown. Once cooked, leftover fries keep well in an airtight container in the fridge for up to 3 days.
I don’t recommend microwaving leftovers since they turn soft; instead, reheat them in a hot oven or air fryer for a few minutes to bring back the crunch. For longer storage, freeze the blanched (first-fried) potatoes in a single layer before the second fry, then fry straight from frozen whenever a craving hits.
Why You’ll Love This Recipe
This waffle fries recipe has become one of my regular go-to sides, and here’s why I think you’ll feel the same way about it.
- Easy to customize: I can swap seasonings depending on my mood, from garlic and paprika to a spicy cayenne kick, so it never feels repetitive.
- Better than takeout: making these at home means I control the salt, oil quality, and freshness, which always beats a soggy drive-thru order.
- Great for sharing: the unique waffle shape makes these fun for parties, and everyone ends up fighting over the crispy broken pieces.
- Budget-friendly: a few potatoes and some oil cost far less than ordering fries every time the craving strikes.
- Flexible cooking methods: whether I’m deep frying, baking, or using my air fryer, this recipe adapts to whatever equipment I have on hand that day.
FAQs
Can I make waffle fries without a mandoline?
Yes, a sharp knife works fine if you rotate the potato a quarter turn between each angled slice to build the waffle pattern.
Why are my waffle fries not crispy?
Usually it’s from skipping the ice water soak, not drying the potatoes fully, or skipping the second hot fry that creates the crunchy exterior.
Can I bake these instead of frying?
Yes, toss the cut potatoes in a bit of oil and bake at 425°F for about 25 to 30 minutes, flipping halfway through, though they’ll be less crisp than fried.
What’s the best potato for waffle fries?
Russet potatoes are my top pick since their higher starch content gives a fluffier interior and crispier outside once fried.
Can I use frozen waffle fries instead of cutting my own?
Yes, waffle fries frozen from the store can be baked or air-fried as a shortcut, though homemade ones taste noticeably fresher. If you want to compare, my Secret Recipe Fries post covers another seasoned fry option worth trying too.

Homemade Waffle Fries Recipe
Ingredients
Method
- I start by scrubbing the russet potatoes under cold water since I like to keep the skins on for extra texture and nutrients. Pat them completely dry with a clean towel before you start slicing so your cutter or knife doesn’t slip. This step only takes a couple of minutes but sets you up for clean, even cuts.
- If you’re wondering how to cut waffle fries, set your mandoline to its thickest setting and make one slice down the potato, then give it a quarter turn before slicing again. Repeat this rotating motion all the way through each potato to build that signature waffle pattern. If you don’t own one, learning how to make waffle fries without a mandoline just means using your knife at an angle, turning the potato the same way between cuts.
- Drop your waffle-cut slices into a bowl of ice water and let them sit for about 30 minutes. This soak pulls excess starch out of the potato, which is the real secret to a crispier finished fry. I’ve skipped this step before out of impatience, and the difference in crunch was very noticeable.
- Drain the potatoes and spread them across a clean towel, patting each piece until it’s completely dry. Any leftover moisture will cause the hot oil to splatter and can also make your fries soggy instead of crisp. I usually let mine air-dry for a few extra minutes while my oil heats up.
- Heat your oil to around 325°F and fry the potatoes in batches for about 4 to 5 minutes, just until they’re soft but still pale. This first fry cooks the inside of the potato gently without browning the outside yet. Lift them out with a slotted spoon and let them rest on your paper towel-lined sheet.
- Raise your oil temperature to 375°F and fry the blanched potatoes a second time for 2 to 3 minutes, until they turn deep golden and crisp. This second, hotter fry is what creates that shatteringly crunchy exterior everyone loves. Work in small batches so the oil temperature doesn’t drop too much.
- While the fries are still hot, toss them with sea salt and any optional seasonings like garlic powder or smoked paprika. I find seasoning immediately after frying helps everything stick evenly to the surface. Serve them right away while they’re at their crispiest.
Notes
- I always cut my potatoes to a consistent thickness so they cook evenly in both fry rounds.
- I never skip the ice water soak, since it’s the single biggest factor in how crispy my fries turn out.
- I keep my oil temperature steady with a thermometer instead of guessing, because fluctuating heat gives uneven results.
- I fry in small batches so the fries have room to crisp instead of steaming each other.
- I season the moment they come out of the oil, while they’re still glistening with a bit of surface oil.