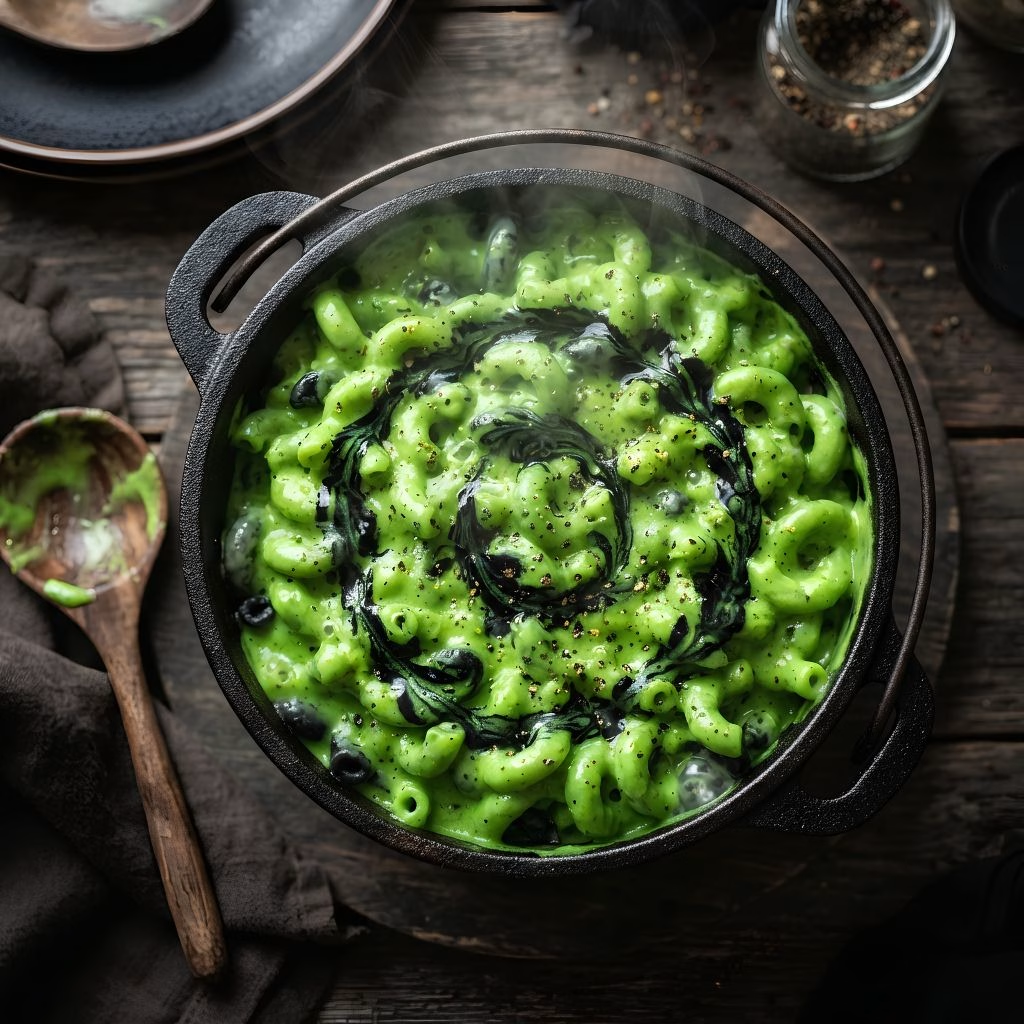
I made this Cursed Cauldron Mac and Cheese Recipe on a rainy October evening when I wanted something comforting but also a little bit theatrical. I was honestly nervous that black pasta and glowing green cheese sauce would taste as strange as they looked, but the first spoonful proved me completely wrong.
Underneath all that spooky color, it is just a rich, silky, homemade cheese sauce wrapped around perfectly tender noodles. My family kept going back for more, and my niece asked me three times whether it was really safe to eat. That reaction alone told me this recipe was going straight into my Halloween rotation, and I have made it every year since.
Cooking Time
Here is roughly how long this cursed pot takes from start to finish in my kitchen.
- Prep Time: 15 minutes
- Cooking Time: 20 minutes
- Total Time: 35 minutes
Ingredients
Every ingredient here earns its place, so I have added a quick note on what each one actually does.
- 12 oz black squid ink pasta or elbow macaroni – the dark base that makes the green sauce pop
- 1 tsp black gel food coloring (only if using regular pasta) – gel works far better than liquid drops
- 2 cups shredded sharp white cheddar cheese – grate it fresh, pre-shredded bags melt grainy
- 1 cup shredded mozzarella cheese – this is what gives you that slow, stretchy pull
- 2 tbsp unsalted butter – the fat base of your roux, do not swap for oil
- 2 tbsp all-purpose flour – thickens the sauce so it clings instead of sliding off
- 2 cups whole milk – whole or 2% only, skim makes a thin and sad sauce
- 4 to 6 drops neon green gel food coloring – add it slowly, you can always deepen the shade
- 1/2 tsp freshly cracked black pepper – the little flecks of ash that sell the whole look
- 1/2 tsp garlic powder – a quiet background flavor so the dish is not just cheese
- 1 tsp salt for the pasta water – seasons the noodles from the inside out
Note: This quantity serves several, comfortably feeding 4 to 6 people as a main dish or 8 as a side.
Equipment You Need
Nothing fancy is required, but these few items make the process smoother.
- Large pot – for boiling the pasta with plenty of room
- Medium saucepan – where you build the roux and cheese sauce
- Balloon whisk – keeps the sauce lump-free while the milk goes in
- Box grater – for shredding your own cheese fresh
- Colander – to drain the pasta quickly before it overcooks
- Wooden spoon or silicone spatula – for folding the pasta into the sauce
- Mini cauldrons, black bowls, or a cast iron pan – for that dramatic final presentation
How to Make a Cursed Cauldron Mac and Cheese Recipe?
The whole thing comes together in two pots running side by side. While the pasta boils, you build the cheese sauce, and then they meet at the end. Follow the order below and you will have dinner on the table in about half an hour.
Boil the Pasta
Bring a large pot of water to a rolling boil and add the salt. Drop in the pasta and cook it to just under al dente, since it will soften a little more in the hot sauce. If you are dyeing regular macaroni, stir the black gel coloring into the boiling water before adding the noodles.
Drain and Hold
Drain the pasta in a colander but do not rinse it. That thin layer of starch on the surface is what helps the cheese sauce grip every noodle. Set it aside and give it an occasional toss so it does not clump together while you finish the sauce.
Build the Roux
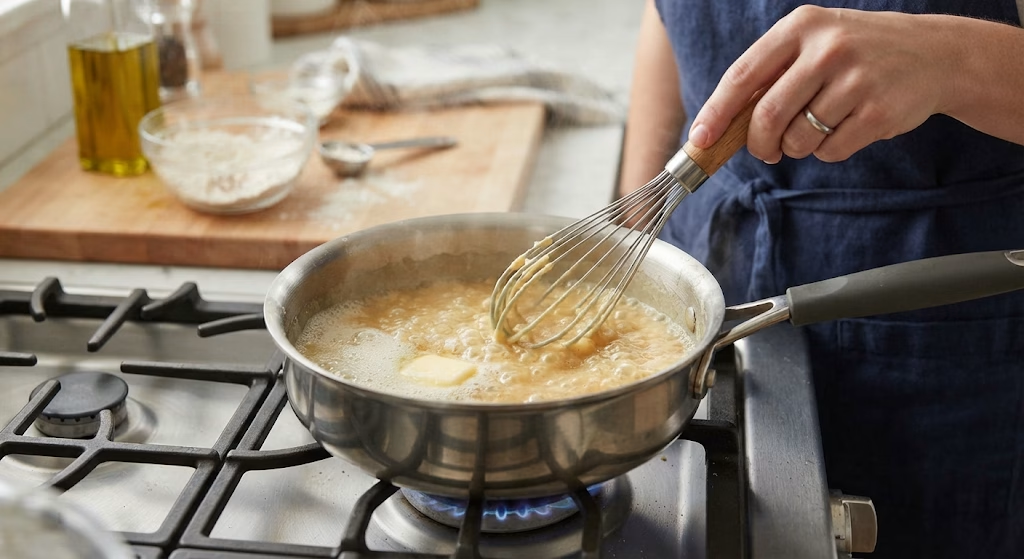
Melt the butter in your saucepan over medium heat until it foams gently. Whisk in the flour and keep whisking for about a minute until the mixture looks smooth and smells slightly nutty. This short cooking step removes the raw flour taste that ruins so many homemade cheese sauces.
Whisk in the Milk
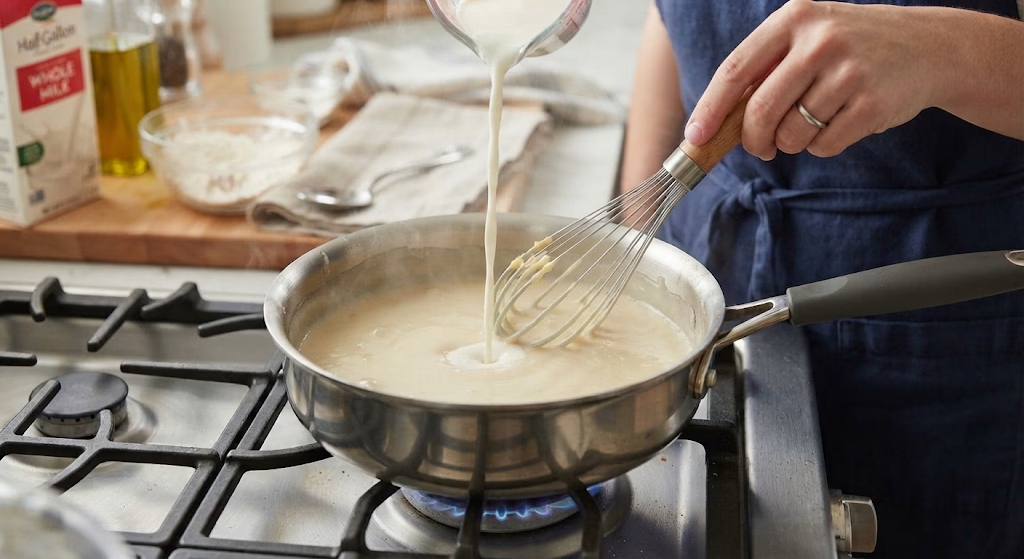
Pour the milk in slowly, a splash at a time, whisking constantly as you go. Adding it all at once is the fastest way to end up with lumps you cannot whisk out. Keep stirring over medium heat until the sauce thickens enough to coat the back of your spoon.
Melt in the Cheese
Turn the heat down to low before the cheese goes anywhere near the pan. Add the cheddar and mozzarella in small handfuls, stirring until each addition disappears completely. Low and slow is the rule here, because high heat will split the sauce and leave it oily.
Cast the Green Spell
Take the pan off the heat and add the green gel coloring a few drops at a time. Stir thoroughly after each addition until the color is even throughout. I usually stop at four drops, but go deeper if you want that full radioactive swamp effect.
Season the Brew
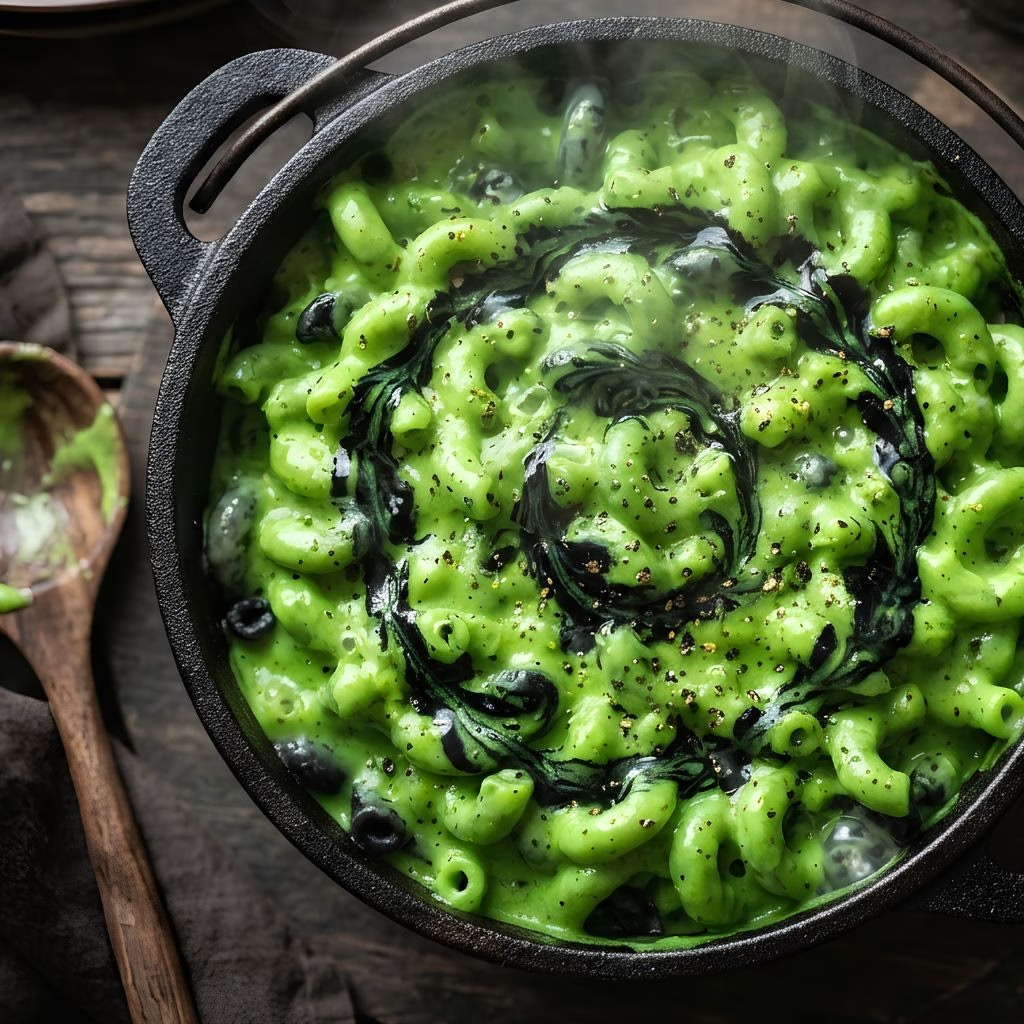
Stir in the black pepper and garlic powder, then taste the sauce properly. Cheese brings its own salt, so season carefully rather than dumping it in. Those black pepper flecks floating in the green also look exactly like ash from a witch’s fire.
Combine and Coat
Tip the drained pasta into the sauce and fold it through gently with your spatula. Keep turning until every strand is coated and the color looks uniform. If it feels too thick, loosen it with a splash of warm milk until it moves like lava.
Serve from the Cauldron
Spoon it straight into mini cauldrons, black bowls, or a cast iron pan while it is still steaming. A tiny swirl of black gel coloring dragged across the top right before serving makes it look like something is brewing underneath. Serve immediately, because this dish is at its creamiest in the first ten minutes.
Additional Tips for Making This Recipe Better
These are the small adjustments I picked up after making this several times.
- I always let my milk sit out for fifteen minutes first, because room temperature milk blends into the roux far more smoothly than cold milk straight from the fridge.
- I grate my own cheese every single time now, since the anti-caking powder on bagged cheese left my sauce slightly gritty the first time I tried it.
- I add the green coloring off the heat, because I noticed the color shifts and dulls if it sits over a flame for too long.
- I reserve about half a cup of pasta water before draining, and a splash of it rescues the sauce whenever it tightens up too much.
- I taste the sauce before the pasta goes in, since it is almost impossible to season evenly once everything is combined.
Common Mistakes to Avoid
Here are the slip-ups I made so you do not have to.
- I once boiled my cheese sauce and watched it turn oily and separated, so now I always drop the heat before adding cheese.
- I used liquid food coloring my first attempt and got a pale, watery green, so I stick to gel coloring only.
- I overcooked the pasta once and ended up with mush after it sat in the hot sauce, so I now pull it a minute early.
- I dumped the milk all at once and spent ten minutes fighting lumps, so I add it gradually now without exception.
- I over-salted a batch before tasting, forgetting how salty sharp cheddar already is, and it was barely edible.
How to Serve Cursed Cauldron Mac and Cheese?
Presentation is honestly half the fun with this dish, so I never just plate it plainly.
I serve it in small black bowls or mini cast iron pots so it genuinely looks like individual cauldrons lined up on the table. A drizzle of black gel coloring swirled across the surface at the last second creates that eerie marbled effect that photographs beautifully.
Cracked black pepper and a scatter of finely chopped chives add both flavor and the impression of herbs tossed into a brew. I like to set the bowls on a dark tray with a few plastic spiders or dried leaves around them for atmosphere. For a full spooky spread, I pair it with garlic bread cut into bone shapes and finish the night with a Halloween Cauldron Cake so the cauldron theme carries all the way through dessert.
Variations
There is plenty of room to adapt this recipe to different tastes and diets.
- Dairy-free version: use oat milk, vegan butter, and a good melting plant-based cheddar for a surprisingly creamy result
- Gluten-free version: swap in gluten-free pasta and use cornstarch instead of flour to thicken the sauce
- Extra sharp twist: replace half the mozzarella with gruyere or smoked gouda for a deeper, savory flavor
- Spicy brew: stir in a pinch of cayenne, chipotle powder, or a spoonful of hot sauce for a warming kick
- Protein boost: fold in shredded rotisserie chicken, crumbled bacon, or sliced sausage to make it a full meal
- Baked finish: top with black breadcrumbs and grill for five minutes until the surface bubbles and crisps
- Different colors: use purple or blood red gel coloring instead of green for a completely different curse
Nutritional Information
These are approximate values per serving based on six servings from one batch.
- Calories: 485
- Protein: 21 g
- Carbohydrates: 48 g
- Fat: 24 g
Make Ahead and Storage
Making It Ahead
I can prepare the cheese sauce up to a day in advance and keep it covered in the fridge. When I am ready to serve, I reheat it gently over low heat with a splash of milk until it loosens back up. Then I boil fresh pasta and combine the two, which gives a far better texture than reheating the finished dish.
Refrigerator Storage
Leftovers keep well in an airtight container in the fridge for three to four days. The pasta keeps absorbing sauce as it sits, so it will look noticeably thicker the next day. That is completely normal and it comes back to life easily with a little extra milk.
Reheating
I reheat individual portions on the stovetop over low heat with two or three tablespoons of milk stirred in. In the microwave, I go at fifty percent power in one-minute bursts, stirring between each one. High heat in either method will make the sauce break, so patience really pays off here.
Freezing
This dish can be frozen for up to two months in a sealed freezer-safe container. I thaw it overnight in the fridge before reheating slowly with added milk and a fresh handful of cheese. The texture is a little softer than fresh, so I only freeze it when I have made a genuinely large batch.
Why You’ll Love This Recipe?
There are a few reasons this one has earned a permanent spot in my October menu.
- It is genuinely quick to make. From the moment I put the water on to the moment it hits the table is about thirty-five minutes, which is faster than most baked mac and cheese recipes.
- It looks far more impressive than the effort involved. Guests assume I spent hours on something this dramatic, when really it is a basic roux with food coloring stirred in.
- It is endlessly customizable. I can make it dairy-free, gluten-free, spicy, or meaty without changing the method at all, so nobody at the table gets left out.
- Kids and adults both love it. The spooky color gets the children excited while the sharp cheddar sauce keeps it satisfying for grown-ups who are not fans of sweet Halloween food.
- It works beyond Halloween too. I have made the same sauce without the coloring for regular weeknight dinners, and it holds up as a genuinely good mac and cheese, especially alongside lighter treats like Halloween Ghost Cupcakes.
FAQs
Can I use regular macaroni instead of black pasta?
Yes, absolutely. Just stir a teaspoon of black gel food coloring into the boiling water before adding the noodles and they will come out beautifully dark.
Does the food coloring change the taste?
Gel food coloring is used in such tiny amounts that it does not affect flavor at all. Liquid coloring, however, can water down the sauce and dull the color, so I avoid it.
Why did my cheese sauce turn grainy?
This almost always comes down to heat or pre-shredded cheese. Keep the pan on low once the cheese goes in, and grate your own blocks for the smoothest result.
Can I make this vegetarian?
It already is, as long as your cheese is made with vegetarian rennet. Just check the label on your cheddar if that matters to you.
How far in advance can I make this for a party?
I would make the sauce a day ahead and combine it with freshly boiled pasta right before serving. Fully assembled, it is best eaten within about twenty minutes of finishing.

Cursed Cauldron Mac and Cheese Recipe
Ingredients
Method
- Bring a large pot of water to a rolling boil and add the salt. Drop in the pasta and cook it to just under al dente, since it will soften a little more in the hot sauce. If you are dyeing regular macaroni, stir the black gel coloring into the boiling water before adding the noodles.
- Drain the pasta in a colander but do not rinse it. That thin layer of starch on the surface is what helps the cheese sauce grip every noodle. Set it aside and give it an occasional toss so it does not clump together while you finish the sauce.
- Melt the butter in your saucepan over medium heat until it foams gently. Whisk in the flour and keep whisking for about a minute until the mixture looks smooth and smells slightly nutty. This short cooking step removes the raw flour taste that ruins so many homemade cheese sauces.
- Pour the milk in slowly, a splash at a time, whisking constantly as you go. Adding it all at once is the fastest way to end up with lumps you cannot whisk out. Keep stirring over medium heat until the sauce thickens enough to coat the back of your spoon.
- Turn the heat down to low before the cheese goes anywhere near the pan. Add the cheddar and mozzarella in small handfuls, stirring until each addition disappears completely. Low and slow is the rule here, because high heat will split the sauce and leave it oily.
- Take the pan off the heat and add the green gel coloring a few drops at a time. Stir thoroughly after each addition until the color is even throughout. I usually stop at four drops, but go deeper if you want that full radioactive swamp effect.
- Stir in the black pepper and garlic powder, then taste the sauce properly. Cheese brings its own salt, so season carefully rather than dumping it in. Those black pepper flecks floating in the green also look exactly like ash from a witch’s fire.
- Tip the drained pasta into the sauce and fold it through gently with your spatula. Keep turning until every strand is coated and the color looks uniform. If it feels too thick, loosen it with a splash of warm milk until it moves like lava.
- Spoon it straight into mini cauldrons, black bowls, or a cast iron pan while it is still steaming. A tiny swirl of black gel coloring dragged across the top right before serving makes it look like something is brewing underneath. Serve immediately, because this dish is at its creamiest in the first ten minutes.
Notes
- I always let my milk sit out for fifteen minutes first, because room temperature milk blends into the roux far more smoothly than cold milk straight from the fridge.
- I grate my own cheese every single time now, since the anti-caking powder on bagged cheese left my sauce slightly gritty the first time I tried it.
- I add the green coloring off the heat, because I noticed the color shifts and dulls if it sits over a flame for too long.
- I reserve about half a cup of pasta water before draining, and a splash of it rescues the sauce whenever it tightens up too much.
- I taste the sauce before the pasta goes in, since it is almost impossible to season evenly once everything is combined