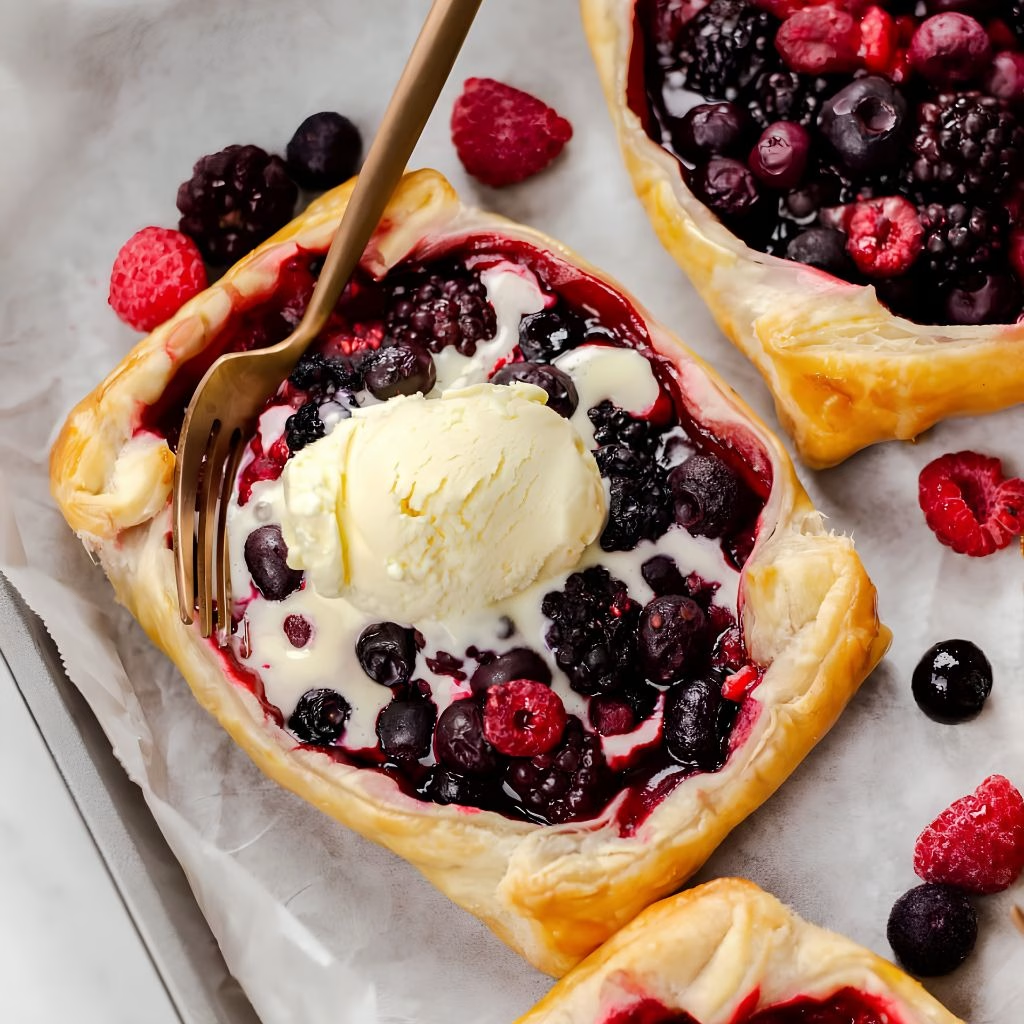
I still remember the first time I pulled a Mixed Berry Puff Pastry Tart Recipe out of the oven and watched the edges turn that perfect golden brown. That moment turned into this mixed berry puff pastry tart, a dessert I now make whenever I want something impressive without spending my whole afternoon in the kitchen.
It comes together with just a handful of ingredients and barely any prep work. I love that it works for casual weeknights and holiday tables alike. If you’re putting together a spread with different flavors, the Firecracker Salmon Rolls Recipe can also make a fun savory addition. Once you try it, I promise it’ll become one of your go-to desserts too.

Cooking Time
- Prep Time: 10 minutes
- Cook Time: 20 minutes
- Total Time: 30 minutes
Ingredients
- 1 sheet puff pastry, thawed – this is your base, so let it fully defrost or it will crack when you unroll it
- 1 cup strawberries, quartered – adds natural sweetness and a juicy bite
- 1 cup blueberries – bring a mild, floral sweetness that balances the tarter berries
- 1 cup raspberries – give the filling its slightly tangy flavor
- 1 cup blackberries – add deep color and a rich, jammy texture once baked
- 1/4 cup brown sugar – sweetens the filling and helps create a light syrupy texture
- 1/4 teaspoon cinnamon – adds warmth that balances the tartness of the berries
- 1 tablespoon cornstarch – thickens the berry juices so your tart doesn’t turn soggy
- 1 egg, beaten – brushed on top for that glossy, golden finish
- Powdered sugar, optional – a light dusting makes the tart look bakery-style
Note: This recipe serves 8.
Equipment You Need
- Baking sheet – to hold and bake the assembled tart
- Rolling pin – to smooth out any creases in the puff pastry
- Colander – for rinsing the berries before mixing
- Medium mixing bowl – for combining the berries with sugar and cornstarch
- Pastry brush – for applying the egg wash evenly
- Parchment paper – keeps the tart from sticking to the pan
How to Make Mixed Berry Puff Pastry Tart Recipe?
This recipe really only involves three stages: prepping your ingredients, building the tart, and baking it until golden. I like to lay everything out on the counter first so the process feels quick and stress-free. Here’s exactly how I put mine together every time.
Prep the Puff Pastry and Oven
I always set my puff pastry out about 40 minutes before I plan to start baking so it has time to soften naturally. Trying to rush this step usually leads to cracked or torn dough. Once it’s ready, I preheat my oven to 400°F so it’s fully hot when the tart goes in.
Roll Out the Pastry
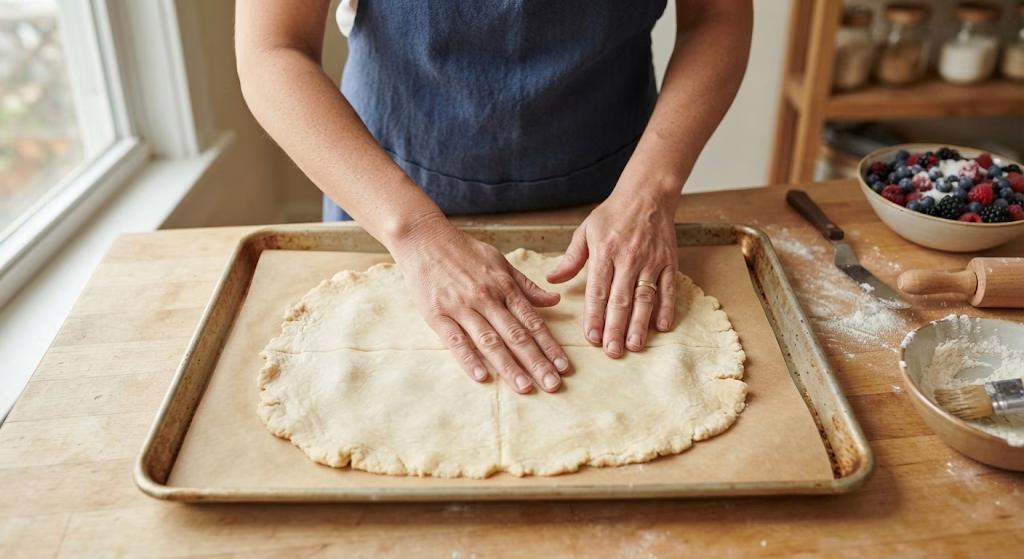
I unroll the thawed pastry directly onto a lined baking sheet and gently smooth out the fold lines with my hands or a rolling pin. I don’t stress about making the edges perfectly straight since a slightly rustic look actually adds to the charm. This base is what holds all that berry filling together.
Rinse and Prepare the Berries
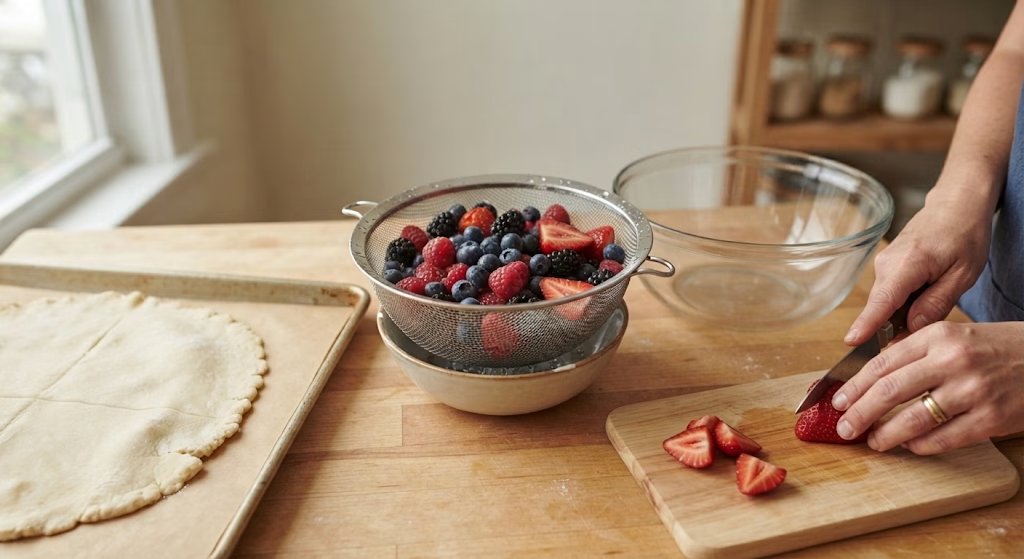
Next, I rinse all four berries in a colander and let them drain well before adding them to a mixing bowl. If I’m using strawberries, I quarter the larger ones so every bite has an even texture. Removing excess water here helps prevent a soggy tart later.
Mix the Berry Filling
I add the brown sugar, cinnamon, and cornstarch right into the bowl with the berries. Then I mix everything gently so the berries stay mostly intact instead of turning mushy. This step is where all that warm, sweet-tart flavor comes together.
Assemble the Tart
I spoon the berry mixture onto the center of the pastry, leaving about a 1 1/2-inch border of dough uncovered. Then I fold the edges up and over the filling, tucking the corners under so it holds its shape. It doesn’t need to look flawless, since the rustic edges bake up beautifully.
Add the Egg Wash and Bake
I lightly beat one egg and brush it over the exposed pastry edges for a shiny, golden finish. Then I slide the tart into my preheated oven and bake it for 15 to 20 minutes, until the crust turns a deep golden brown. My kitchen always smells incredible at this point.
Cool and Serve
Once it’s out of the oven, I let the tart rest for a few minutes so the filling can set slightly. I usually dust mine with powdered sugar right before serving. It’s ready to slice and enjoy warm, at room temperature, or even chilled.
Additional Tips for Making This Recipe Better
I’ve made this tart more times than I can count, and here’s what I’ve learned along the way:
- I always pat my berries dry after rinsing since extra moisture is the main cause of a soggy crust.
- I like using a rectangular baking stone instead of a regular sheet pan because it helps the pastry bake more evenly.
- If I want a deeper flavor, I add a small pinch of ground ginger to the berry mixture along with the cinnamon.
- I keep an eye on the tart during the last five minutes of baking since ovens vary and puff pastry can go from golden to too dark quickly.
- I bake mine on a rimmed pan now, since I lost some berry juice off a flat sheet the first time I made it.
Common Mistakes to Avoid
- I once skipped drying my berries and ended up with a filling that leaked everywhere, so now I always drain them well first.
- I used to skip the cornstarch thinking it wasn’t necessary, but the filling turned watery without it.
- I’ve learned not to overfill the pastry, since too much filling makes it hard to fold and seal the edges properly.
- I tried skipping the egg wash once for a picture-perfect finish, but the crust came out noticeably paler, so I only skip it now if I actually need an egg-free version.
- I baked mine at too low a temperature once, and the bottom never got that crisp, flaky texture I love.
How to Serve Mixed Berry Puff Pastry Tart?
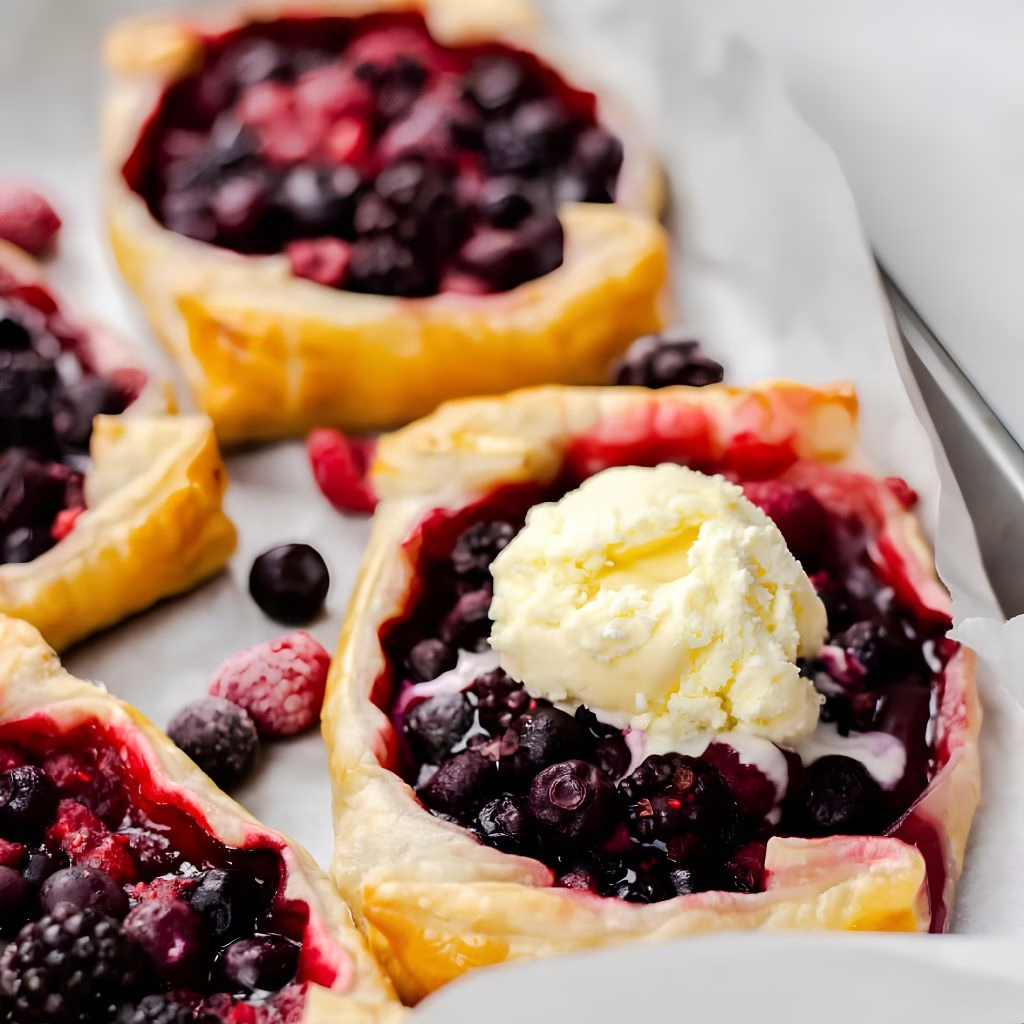
This tart looks beautiful served straight from the pan, sliced into rustic squares or wedges on a wooden board. I like adding a light dusting of powdered sugar right before it goes to the table since it gives that classic bakery look.
A scoop of vanilla ice cream melting slightly over a warm slice takes it to another level. For a brunch spread, I’ll add a few fresh mint leaves and extra whole berries around the platter for color.
It also pairs wonderfully with a drizzle of honey or a dollop of lightly sweetened whipped cream. For a savory contrast on the same spread, the Miso Soy Salmon Sashimi Bowl Recipe brings a completely different flavor profile to the table.
Variations
- Dairy-Free Option: this recipe is naturally dairy-free as written, so no swaps are needed there.
- Sugar-Free Version: swap the brown sugar for a granulated sugar substitute that measures the same.
- Cream Cheese Addition: spread a thin layer of sweetened cream cheese under the berries for a richer filling.
- Different Berries: swap in cherries or diced peaches for part of the mix if you want a seasonal twist.
- Nutty Crunch: sprinkle sliced almonds over the egg wash before baking for extra texture.
- Citrus Boost: add a small splash of lemon juice to the berry filling for brighter flavor.
- Mini Tart Version: cut the pastry into smaller squares and portion the filling for individual mini tarts.
Nutritional Information
Here’s a quick look at what one serving of this tart offers:
- Calories: 238
- Protein: 3g
- Carbohydrates: 29g
- Fat: 12g
Make Ahead and Storage
You can prepare this tart in advance and store it in the refrigerator until you’re ready to serve it. It holds up well chilled, at room temperature, or gently warmed, so it fits easily into any schedule.
To reheat, place the tart on a baking sheet in an oven preheated to 350°F for about 6 to 8 minutes, until warmed through. This helps bring back some of that fresh-baked crispness.
If you’d like to freeze it, assemble the tart but freeze it unbaked, then let it thaw before baking as directed. Baked leftovers also freeze well for up to a month when wrapped tightly.
Why You’ll Love This Recipe?
This tart has earned a permanent spot in my dessert rotation, and here’s why I think you’ll feel the same way:
- It comes together fast: with just 30 minutes total, it’s perfect for last-minute guests or a quick sweet craving.
- It’s endlessly flexible: you can swap in whatever berries you have on hand as long as you keep the total amount the same.
- It looks impressive: the golden, rustic pastry edges make it look like it came from a bakery, even though it’s simple to make.
- It fits any occasion: I’ve served this for holidays, casual dinners, and everything in between.
- It’s easy to customize: from cream cheese layers to citrus additions, you can make it your own every time.
FAQs
Can I use frozen mixed berries for this recipe?
Yes, frozen berries work fine here. I recommend thawing them fully and draining off any excess liquid first so your tart doesn’t turn out soggy.
Can this puff pastry tart be made ahead of time?
Yes, you can make it ahead and store it in the fridge until you’re ready to serve. It tastes great warmed, chilled, or at room temperature.
Can I make berry puff pastry turnovers instead of one large tart?
Yes, simply cut your pastry sheet into smaller squares, add a spoonful of filling to each, and fold them into individual turnovers before baking.
Can I add cream cheese to this puff pastry berry recipe?
Yes, spreading a thin layer of sweetened cream cheese under the berries adds a rich, tangy contrast that pairs beautifully with the fruit.
Can I turn this into mini berry tarts with puff pastry?
Yes, cut the pastry into smaller portions, add a bit of filling to each, and fold the edges the same way you would for the full-size tart. Just reduce the baking time slightly since they’re smaller.

Mixed Berry Puff Pastry Tart Recipe
Ingredients
Method
- I always set my puff pastry out about 40 minutes before I plan to start baking so it has time to soften naturally. Trying to rush this step usually leads to cracked or torn dough. Once it's ready, I preheat my oven to 400°F so it's fully hot when the tart goes in.
- I unroll the thawed pastry directly onto a lined baking sheet and gently smooth out the fold lines with my hands or a rolling pin. I don’t stress about making the edges perfectly straight since a slightly rustic look actually adds to the charm. This base is what holds all that berry filling together.
- Next, I rinse all four berries in a colander and let them drain well before adding them to a mixing bowl. If I’m using strawberries, I quarter the larger ones so every bite has an even texture. Removing excess water here helps prevent a soggy tart later.
- I add the brown sugar, cinnamon, and cornstarch right into the bowl with the berries. Then I mix everything gently so the berries stay mostly intact instead of turning mushy. This step is where all that warm, sweet-tart flavor comes together.
- I spoon the berry mixture onto the center of the pastry, leaving about a 1 1/2-inch border of dough uncovered. Then I fold the edges up and over the filling, tucking the corners under so it holds its shape. It doesn’t need to look flawless, since the rustic edges bake up beautifully.
- I lightly beat one egg and brush it over the exposed pastry edges for a shiny, golden finish. Then I slide the tart into my preheated oven and bake it for 15 to 20 minutes, until the crust turns a deep golden brown. My kitchen always smells incredible at this point.
- Once it’s out of the oven, I let the tart rest for a few minutes so the filling can set slightly. I usually dust mine with powdered sugar right before serving. It’s ready to slice and enjoy warm, at room temperature, or even chilled.
Notes
- I always pat my berries dry after rinsing since extra moisture is the main cause of a soggy crust.
- I like using a rectangular baking stone instead of a regular sheet pan because it helps the pastry bake more evenly.
- If I want a deeper flavor, I add a small pinch of ground ginger to the berry mixture along with the cinnamon.
- I keep an eye on the tart during the last five minutes of baking since ovens vary and puff pastry can go from golden to too dark quickly.
- I bake mine on a rimmed pan now, since I lost some berry juice off a flat sheet the first time I made it.