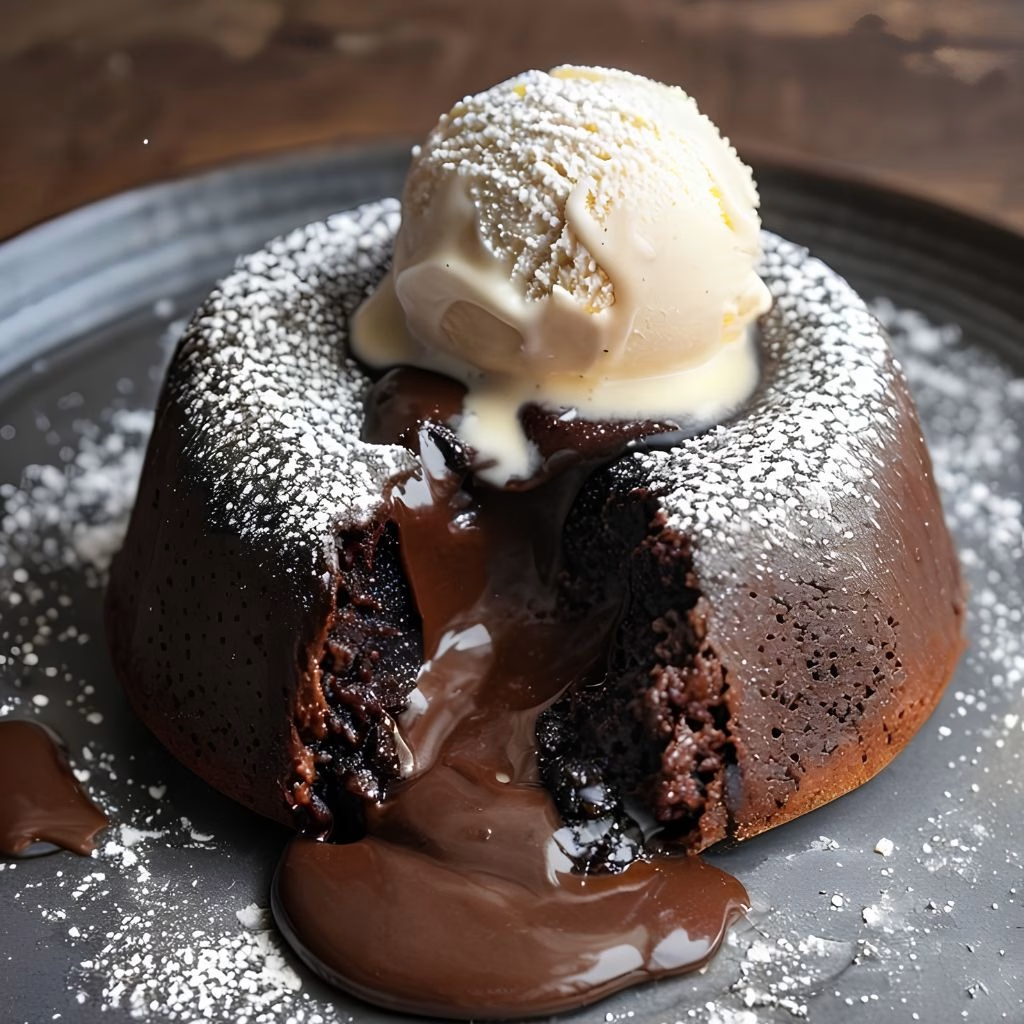
I still remember the first time I cut into one of these and watched warm chocolate spill out like an actual volcano. I’d been intimidated by lava cakes for years, convinced they needed some fancy pastry-chef trick I didn’t have.
Turns out I was wrong, because this recipe leans on a boxed brownie mix and a handful of chocolate truffles to do all the hard work for me. I make these whenever I want a dessert that looks impressive but takes almost no real effort. Once you try Molten Lava Brownies Recipe, I promise it’ll become your go-to for last-minute guests or a random Tuesday chocolate craving.
Cooking Time
- Prep Time: 10 minutes
- Cook Time: 25 minutes
- Total Time: 35 minutes
Ingredients
- 1 box of brownie mix — this is the shortcut that makes the whole recipe nearly foolproof
- ½ cup vegetable oil — keeps the brownies moist and fudgy instead of dry
- 2 large eggs — bind the batter together and give it structure
- 8 milk or dark chocolate truffles, unwrapped — the whole point of the recipe, they melt into that molten center
- Fresh mixed berries — a bright, fresh contrast to all that rich chocolate
- Vanilla ice cream — because warm brownie plus cold ice cream is unbeatable
- Chocolate sauce, for drizzling — optional, but it doubles down on the chocolate factor
- Confectioners’ sugar, for dusting — an easy no-fuss finish if you skip the toppings above
Note: This recipe makes 4 individual molten brownies.
Equipment You Need
- Four 6-ounce ramekins or cocottes — these hold individual portions and help the brownies bake evenly
- Rimmed baking sheet — makes it easy to slide the ramekins in and out of the oven safely
- Mixing bowl — for combining the brownie mix, oil, and eggs
- Measuring cups — to portion the batter accurately into each ramekin
- Wire cooling rack — lets the brownies rest and set slightly before serving
- Cooking spray — for greasing the ramekins so the brownies release cleanly

How to Make Molten Lava Brownies?
This recipe comes together in just a handful of steps, and none of them are complicated. I’m walking you through exactly how I prep, fill, and bake mine so the centers stay perfectly gooey. Follow along and you’ll have warm, chocolatey brownies ready in well under an hour.
Preheat and Prep Your Ramekins
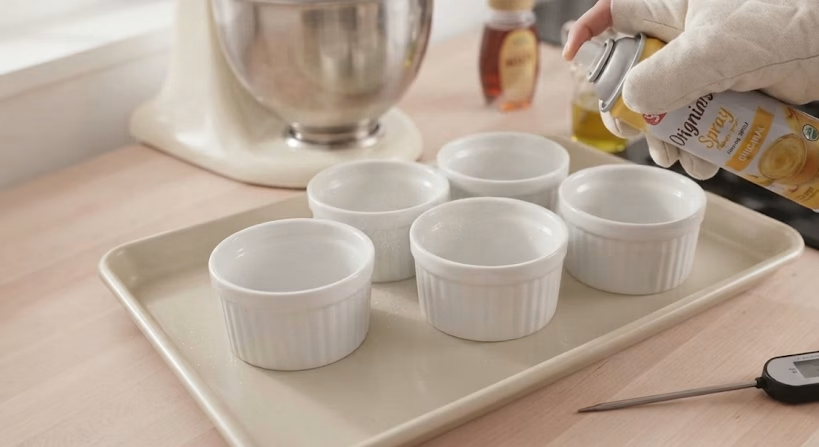
Start by heating your oven to 350°F so it’s fully ready when your batter is. While it warms up, spray the inside of four 6-ounce ramekins with cooking spray so nothing sticks later. Set them on a rimmed baking sheet, which makes transporting them in and out of the oven much easier.
Mix the Brownie Batter
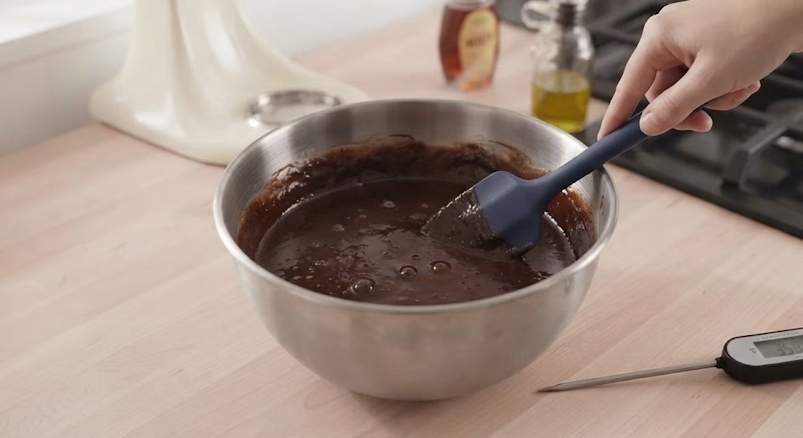
Prepare the brownie mix following the instructions on the box, using the vegetable oil and eggs. I just use one bowl and a spatula, no mixer needed, and it comes together in a couple of minutes. Give it a good stir so everything is fully combined and smooth.
Layer in the Chocolate Truffles
Spoon about ½ cup of batter into each ramekin, then press two chocolate truffles side by side into the center of each one. Top that with another ¼ cup of batter, smoothing it over with the back of a spoon so the truffles are fully covered. This layering is what creates that molten pocket once it bakes.
Bake Until Set on Top
Slide the baking sheet into the oven and bake for about 25 minutes, until the tops look set and dry. The center will still be soft and gooey underneath, which is exactly what you want. Every oven runs a little differently, so keep an eye on the last few minutes.
Cool Slightly Before Serving
Once out of the oven, let the ramekins rest on a wire rack for about 5 minutes. This short cooling time keeps the molten center intact instead of collapsing when you dig in. It also makes them just cool enough to handle without burning your fingers.
Additional Tips for Making This Recipe Better
I’ve made this one enough times to pick up a few tricks that make a real difference. Here’s what I’ve learned works best in my own kitchen.
- I always use room-temperature eggs since they blend into the batter more smoothly than cold ones.
- I like using truffles that are slightly frozen right before baking, because they hold their shape a little longer and give an even more dramatic molten pour.
- I never overbake mine, since even a few extra minutes can turn the gooey center into a fully cooked brownie.
- I grease my ramekins generously, because a stuck brownie ruins the presentation in seconds.
- I set a timer instead of guessing, since these bake fast and it’s easy to lose track of the minutes.
Common Mistakes to Avoid
I’ve made a few missteps along the way, so let me save you the trouble.
- I once overfilled a ramekin and had batter bubbling over onto the baking sheet, so now I stick closely to the measured amounts.
- I baked mine too long the first time and ended up with a solid brownie instead of a molten one, so now I check at the 22-minute mark.
- I forgot to grease a ramekin once and half my brownie stayed stuck inside, so I never skip that step now.
- I let mine cool too long on the rack and the center firmed up before I could serve it, so I stick to about 5 minutes.
- I used cheap, waxy chocolate substitutes once and the center never got that silky melt, so I stick with real chocolate truffles now.
How to Serve Molten Lava Brownies?
These brownies are already dramatic on their own, but a little presentation goes a long way. I like topping mine with a handful of fresh berries for color and a bit of tartness against all that chocolate. A scoop of vanilla ice cream melting slowly over the warm brownie is my favorite way to serve it, especially with a drizzle of chocolate sauce on top.
For something a little more low-key, a simple dusting of confectioners’ sugar looks elegant without any extra work. Serve them straight in the ramekin with a spoon so everyone gets that first dramatic scoop into the molten center.
If you’re planning a seafood-themed dinner before dessert, Crab Cakes with Lemon Aioli Recipe and Crab Eggs Benedict with Caviar Recipe also make memorable additions to a special menu.
Variations
- Swap in dark chocolate truffles instead of milk chocolate for a deeper, less sweet flavor.
- Use a gluten-free brownie mix to make this recipe friendly for gluten-sensitive guests.
- Try white chocolate truffles for a completely different, sweeter molten center.
- Add a pinch of espresso powder to the batter to intensify the chocolate flavor.
- Mix in chopped nuts, like cashews or pecans, for some crunch against the soft center.
- Use dairy-free chocolate truffles and a plant-based brownie mix for a dairy-free version.
Nutritional Information
Here’s a general idea of what one serving looks like, though this will vary based on your exact brownie mix and toppings.
- Calories: approximately 450–500 per serving
- Protein: approximately 5–6 grams
- Carbohydrates: approximately 55–60 grams
- Fat: approximately 24–26 grams
Make Ahead and Storage
You can mix the brownie batter up to a day ahead and keep it covered in the fridge until you’re ready to bake. Just bring it closer to room temperature before spooning it into the ramekins so it bakes evenly.
Leftover baked brownies keep well in an airtight container in the fridge for up to 3 days, though the molten center will firm up once chilled. Reheat them in the microwave for 15-20 seconds to bring back some of that gooey texture before serving.
These don’t freeze particularly well because of the molten center, but you can freeze the unbaked, filled ramekins for up to a month and bake straight from frozen, adding a few extra minutes to the bake time.
Why You’ll Love This Recipe?
This recipe has earned a permanent spot in my dessert rotation for a lot of reasons. Here’s what keeps me coming back to it.
- It’s incredibly easy: with a boxed mix doing most of the work, there’s no complicated technique involved.
- It looks impressive: guests always assume I spent hours on it, when really it’s a 35-minute dessert.
- It’s easy to customize: from the type of chocolate truffle to the toppings, you can make it your own every time.
- It’s perfect for small gatherings: since it’s portioned into individual ramekins, everyone gets their own molten center.
- It satisfies serious chocolate cravings: between the brownie base and the melted truffle center, this is about as chocolatey as dessert gets.
FAQs
What’s the best lava brownie recipe for beginners?
This one is genuinely beginner-friendly since it starts with a boxed brownie mix and just adds chocolate truffles. If you can follow the instructions on a brownie box, you can make this.
Is there a molten lava brownie near me at bakeries or should I make it at home?
Some bakeries and dessert shops do carry molten-style brownies, but availability really depends on your area. Making it at home is usually faster and lets you control the gooeyness yourself.
Can I turn this into a molten lava brownie cake instead of individual portions?
Yes, you can bake the batter in one larger dish with truffles distributed throughout, though the molten effect works best in individual ramekins. A single larger pan will need a longer bake time and a closer eye on doneness.
What’s the difference between molten brownies and a brownie batter lava cake?
Molten brownies use a boxed brownie base with a chocolate filling tucked inside, while a brownie batter lava cake usually refers to a cake-style batter with a similar gooey center. Both aim for that warm, melty middle, just with slightly different bases.
Is a lava brownie with ice cream the best way to serve it?
I think so. The warm, gooey brownie against cold vanilla ice cream is one of the best contrasts in dessert. It’s simple, but it never disappoints.

Molten Lava Brownies Recipe
Ingredients
Method
- Start by heating your oven to 350°F so it’s fully ready when your batter is. While it warms up, spray the inside of four 6-ounce ramekins with cooking spray so nothing sticks later. Set them on a rimmed baking sheet, which makes transporting them in and out of the oven much easier.
- Prepare the brownie mix following the instructions on the box, using the vegetable oil and eggs. I just use one bowl and a spatula, no mixer needed, and it comes together in a couple of minutes. Give it a good stir so everything is fully combined and smooth.
- Spoon about ½ cup of batter into each ramekin, then press two chocolate truffles side by side into the center of each one. Top that with another ¼ cup of batter, smoothing it over with the back of a spoon so the truffles are fully covered. This layering is what creates that molten pocket once it bakes.
- Slide the baking sheet into the oven and bake for about 25 minutes, until the tops look set and dry. The center will still be soft and gooey underneath, which is exactly what you want. Every oven runs a little differently, so keep an eye on the last few minutes.
- Once out of the oven, let the ramekins rest on a wire rack for about 5 minutes. This short cooling time keeps the molten center intact instead of collapsing when you dig in. It also makes them just cool enough to handle without burning your fingers.
Notes
- I always use room-temperature eggs since they blend into the batter more smoothly than cold ones.
- I like using truffles that are slightly frozen right before baking, because they hold their shape a little longer and give an even more dramatic molten pour.
- I never overbake mine, since even a few extra minutes can turn the gooey center into a fully cooked brownie.
- I grease my ramekins generously, because a stuck brownie ruins the presentation in seconds.
- I set a timer instead of guessing, since these bake fast and it’s easy to lose track of the minutes.