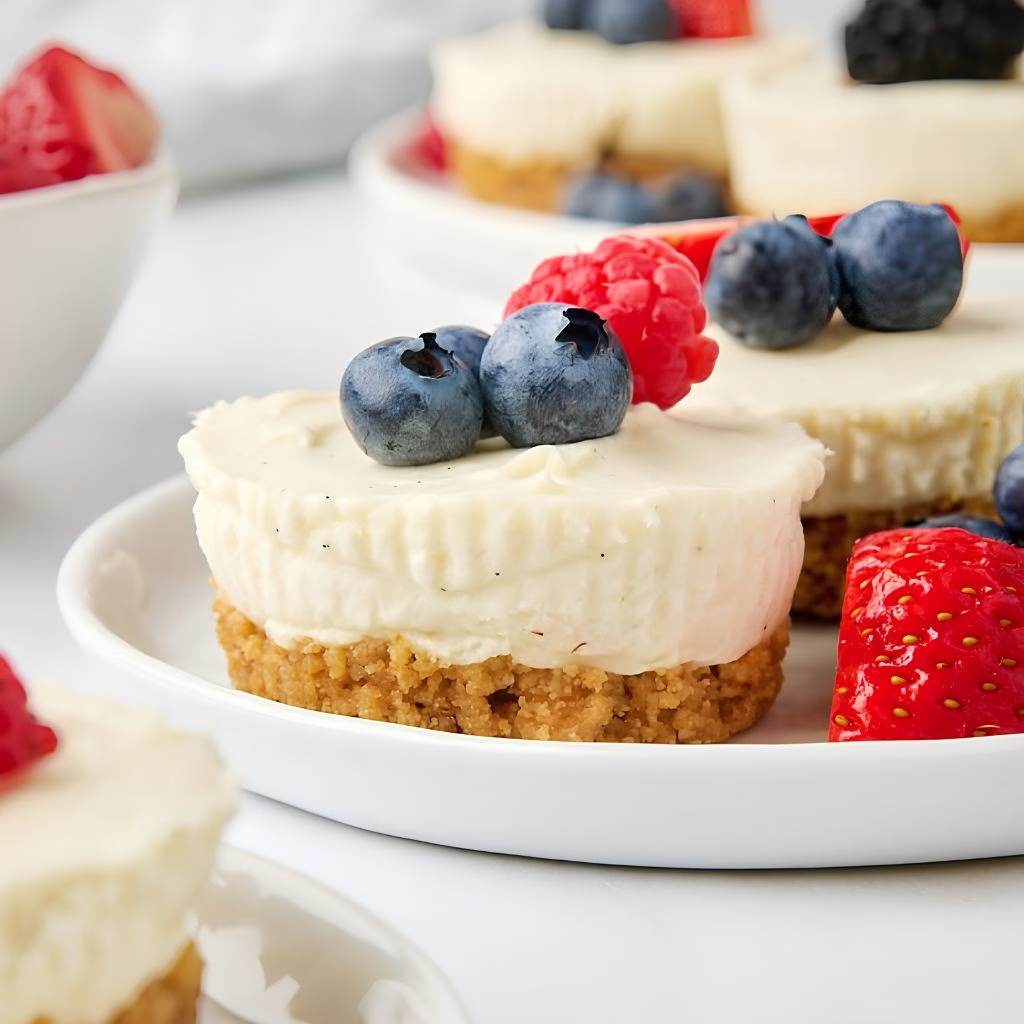
I still remember the first time I made this No-Bake Cheesecake Cups Recipe for a weekend get-together, and I honestly couldn’t believe how little effort they took. I didn’t turn on my oven, I didn’t stress over cracks on top, and I still ended up with a dessert that looked like I’d spent hours on it.
Every bite is creamy, tangy, and just sweet enough, sitting on a buttery graham cracker base that holds together perfectly. Once I unwrapped the liners and saw how neat and pretty they looked, I knew this recipe was going into my regular rotation. If you’ve been searching for quick and easy no-bake mini cheesecakes that actually work every single time, this is the one I keep coming back to.

Cooking Time
- Prep Time: 25 minutes
- Cook Time: 5 minutes (optional crust bake)
- Total Time: 3 hours 30 minutes (includes chilling)
Ingredients
- 2 cups graham cracker crumbs – forms the crunchy base, so crush the crackers fine and even
- 1/3 cup packed brown sugar – adds a deeper, slightly caramel-like sweetness to the crust
- 1/2 cup unsalted butter, melted – binds the crumbs together, don’t skip letting it fully melt
- 1 cup cold heavy cream – whips into stiff peaks and is the real trick behind a sturdy filling
- 16 ounces full-fat brick cream cheese, softened – the star ingredient, so use blocks, not tub-style spread
- 1/3 cup granulated sugar – sweetens the filling without overpowering the tangy cream cheese flavor
- 2 tablespoons sour cream or plain yogurt – adds a smooth tang and helps the texture stay silky
- 1 teaspoon fresh lemon juice – brightens the flavor without making it taste lemony
- 1/2 teaspoon pure vanilla extract – rounds out the flavor with warmth and depth
- Optional toppings: berries, chocolate ganache, or fruit preserves – adds color and a fresh finishing touch
Note: This recipe makes about 24 mini cheesecake cups, perfect for a party-sized crowd.
Equipment You Need
- Two 12-count muffin pans – gives you the individual cup shape for each cheesecake
- Cupcake liners – essential for lifting the cheesecakes out cleanly
- Food processor – turns whole graham crackers into fine, even crumbs
- Hand or stand mixer – whips cream and beats the filling smooth
- Silicone spatula – folds the whipped cream in gently without deflating it
- Piping bag or zip-top bag – makes filling the cups quick and mess-free
How to Make No-Bake Cheesecake Cups Recipe?
I promise this recipe is far easier than it looks once it’s chilling in your fridge. You’re really just building two simple layers, a crust and a whipped filling, then letting cold air do the rest. Here’s exactly how I put mine together every time.
Prepare the Muffin Pans
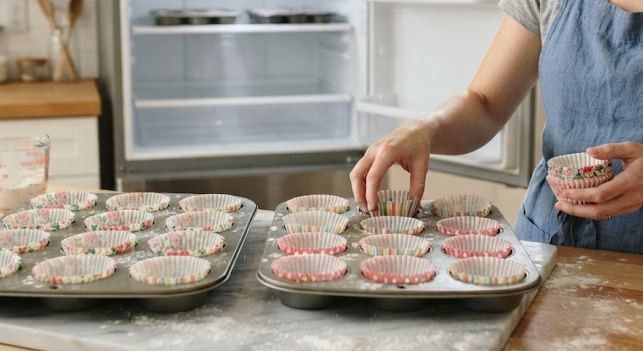
Line both muffin pans with cupcake liners before you start mixing anything. I always check that I have space cleared in my fridge first, since both pans need to fit in there together later. This small step saves a lot of scrambling once your filling is ready to go.
Mix the Graham Cracker Crust
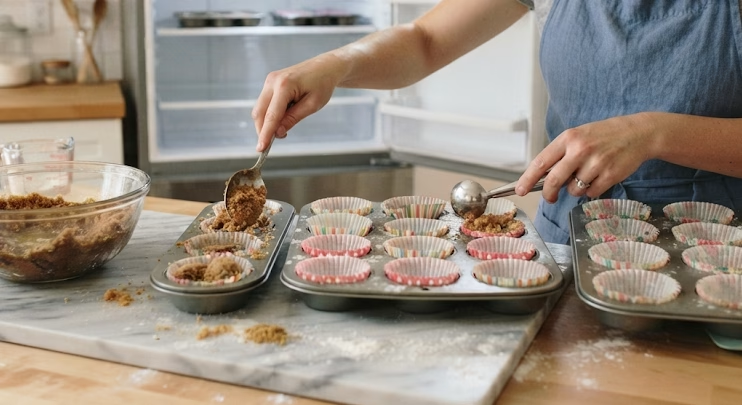
Stir the graham cracker crumbs, brown sugar, and melted butter together in a bowl until it looks like damp sand. Spoon about a tablespoon and a half into each liner, then press it down firmly with the back of a spoon. A tightly packed crust is what keeps these from crumbling apart later.
Bake the Crust (Optional)
I like giving the crusts a quick 5 minutes in a 350°F oven just to firm them up, though this step isn’t required since the recipe is technically no-bake. If you skip it, the crust will still taste great, just slightly more delicate. Let baked crusts cool for about 10 minutes before adding filling.
Whip the Heavy Cream
Beat the cold heavy cream on medium-high speed until stiff peaks form, which takes about 3 minutes. This is the ingredient that gives the filling its light, mousse-like structure, so don’t rush or skip it. Set the whipped cream aside while you prepare the cream cheese mixture.
Make the Cheesecake Filling
Beat the softened cream cheese and granulated sugar together until completely smooth, scraping the bowl as needed. Mix in the sour cream, lemon juice, and vanilla extract until there are no lumps left. Gently fold in the whipped cream using a spatula, turning slowly so you don’t lose all that airiness.
Fill and Smooth the Cups
Spoon or pipe about 2 tablespoons of filling over each crust, then smooth the tops flat with the back of a spoon. I personally prefer piping since it’s quicker and keeps things neater. A simple zip-top bag with the corner snipped off works just as well if you don’t own a piping bag.
Chill Until Set
Refrigerate the cups for at least 3 hours, or up to two days, covering them if they’ll sit longer than a few hours. I never try to rush this in the freezer, since the crust freezes faster than the filling sets. Patience here really is what makes the texture perfect.
Additional Tips for Making This Recipe Better
I’ve made these more times than I can count, and a few small habits genuinely made a difference for me.
- I always use room-temperature cream cheese, since cold cream cheese leaves lumps no matter how long I beat it
- I fold the whipped cream in slowly, because rushing this step deflates the filling and makes it dense
- I press my crust down harder than feels necessary, and it holds together so much better once chilled
- I pipe the filling instead of spooning it, since it’s faster and leaves cleaner, neater tops
- I unwrap the liners soon after taking the cups out of the fridge, before they soften at room temperature
Common Mistakes to Avoid
- I once used cold cream cheese straight from the fridge, and the filling turned out chunky instead of smooth
- I tried freezing a batch to save time, but the crust froze solid while the filling was still soft in the middle
- I skipped packing the crust down firmly once, and it crumbled apart the moment I tried to unwrap it
- I used tub-style cream cheese spread by accident, and the filling never set up firm enough
- I left the cups out too long before serving, and the liners started sticking stubbornly to the sides
How to Serve No-Bake Cheesecake Cups?
These little cups are already pretty on their own, but I love dressing them up a bit right before serving. A spoonful of fresh berries on top adds color and a juicy contrast to the creamy filling. Drizzled chocolate ganache or a swirl of fruit preserves also looks beautiful and takes barely any extra effort.
For a party spread, I like arranging them on a tiered stand so they’re easy for guests to grab and enjoy alongside spinach dip mozzarella sticks recipe and pepperoni pizza roll breadsticks recipe.

Variations
- Dairy-free option: swap the cream cheese and heavy cream for dairy-free alternatives designed to whip and set
- Sugar-free option: use a granulated sugar substitute that measures cup-for-cup in both the crust and filling
- Lemon version: add lemon zest and a bit more lemon juice for a brighter, citrus-forward cheesecake
- Chocolate twist: mix in melted, cooled chocolate for a richer, more indulgent filling
- Crust swap: use crushed digestive biscuits or Biscoff cookies if graham crackers aren’t available near you
- Philadelphia cheesecake cups style: use Philadelphia brand cream cheese for the classic tangy flavor these cups are known for
Nutritional Information
Here’s a general idea of what one mini cheesecake cup contains, though this can shift slightly depending on toppings.
- Calories: around 180 per cup
- Protein: around 2g per cup
- Carbohydrates: around 13g per cup
- Fat: around 13g per cup
Make Ahead and Storage
You can make these cheesecake cups one to two days ahead and keep them refrigerated until you’re ready to serve. Cover the pans with foil or plastic wrap if they’ll be sitting longer than a few hours so they don’t pick up fridge odors.
For longer storage, freeze the fully set cups (liners still on) in a single layer inside an airtight container for up to three months. Thaw them in the refrigerator for at least 24 hours before serving, and avoid refreezing once thawed.
Leftovers keep well covered in the fridge for up to five days, making this a genuinely convenient make-ahead dessert.
Why You’ll Love This Recipe?
This recipe has earned a permanent spot in my dessert lineup for a few solid reasons.
- No oven required: the filling sets entirely in the fridge, so it’s perfect for hot days or busy kitchens
- Great for parties: the individual portions mean no slicing, no mess, and easy serving for a crowd
- Make-ahead friendly: I can prep these a day or two before an event and just pull them out when needed
- Easy to customize: toppings and mix-ins let me change the flavor depending on the occasion
- Beginner friendly: there’s no baking skill needed, just mixing, folding, and patience while it chills
FAQs
Can I make cheesecake cups without a muffin pan?
Yes, you can use small glass or plastic dessert cups instead, layering the crust and filling directly inside them.
Why is my cheesecake cup filling not setting?
This usually means the cream cheese was too cold or the heavy cream wasn’t whipped to stiff peaks before folding.
Can I use Cool Whip instead of heavy cream?
Yes, thawed Cool Whip can replace homemade whipped cream, though the texture may be slightly softer.
How far in advance can I make these cheesecake cups?
You can prepare them up to two days ahead and keep them chilled, or freeze them for up to three months.
Do I have to bake the crust first?
No, baking the crust is optional and only makes it a bit sturdier; skipping it still works fine.

No-Bake Cheesecake Cups Recipe
Ingredients
Method
- Line both muffin pans with cupcake liners before you start mixing anything. I always check that I have space cleared in my fridge first, since both pans need to fit in there together later. This small step saves a lot of scrambling once your filling is ready to go.
- Stir the graham cracker crumbs, brown sugar, and melted butter together in a bowl until it looks like damp sand. Spoon about a tablespoon and a half into each liner, then press it down firmly with the back of a spoon. A tightly packed crust is what keeps these from crumbling apart later.
- I like giving the crusts a quick 5 minutes in a 350°F oven just to firm them up, though this step isn’t required since the recipe is technically no-bake. If you skip it, the crust will still taste great, just slightly more delicate. Let baked crusts cool for about 10 minutes before adding filling.
- Beat the cold heavy cream on medium-high speed until stiff peaks form, which takes about 3 minutes. This is the ingredient that gives the filling its light, mousse-like structure, so don’t rush or skip it. Set the whipped cream aside while you prepare the cream cheese mixture.
- Beat the softened cream cheese and granulated sugar together until completely smooth, scraping the bowl as needed. Mix in the sour cream, lemon juice, and vanilla extract until there are no lumps left. Gently fold in the whipped cream using a spatula, turning slowly so you don’t lose all that airiness.
- Spoon or pipe about 2 tablespoons of filling over each crust, then smooth the tops flat with the back of a spoon. I personally prefer piping since it’s quicker and keeps things neater. A simple zip-top bag with the corner snipped off works just as well if you don’t own a piping bag.
- Refrigerate the cups for at least 3 hours, or up to two days, covering them if they’ll sit longer than a few hours. I never try to rush this in the freezer, since the crust freezes faster than the filling sets. Patience here really is what makes the texture perfect.
Notes
- I always use room-temperature cream cheese, since cold cream cheese leaves lumps no matter how long I beat it
- I fold the whipped cream in slowly, because rushing this step deflates the filling and makes it dense
- I press my crust down harder than feels necessary, and it holds together so much better once chilled
- I pipe the filling instead of spooning it, since it’s faster and leaves cleaner, neater tops
- I unwrap the liners soon after taking the cups out of the fridge, before they soften at room temperature