Oreo Sushi Recipe: A Fun Twist on Your Favorite Treat
I had so much fun making this Oreo sushi, and honestly, it turned out way better than I expected! It’s one of those no-bake desserts that feels super creative but is actually really easy to pull off.
I loved how it came together with just a few basic ingredients, and it looked so much like real sushi that everyone got a kick out of it.
I made it for a casual family get-together, and the kids couldn’t stop asking for more. If you’re a fan of Oreos, this is definitely a sweet treat you’ll enjoy making as much as eating.

Ingredients
Here’s what I used to make my Oreo sushi. Simple, fun, and easy-to-find ingredients that really make this recipe work:
- 28 Oreo cookies (about 1 standard package) – use fresh ones, as stale cookies won’t crush well.
- 4–6 tablespoons of milk – just enough to bind; don’t add too much or the dough gets sticky.
- Gummy candies or fruit roll-ups – these mimic the sushi filling and add a pop of color.
- 3–4 marshmallows (optional) – soften and spread for extra sweetness.2 tablespoons cream cheese (optional) – gives a creamy contrast if you don’t want marshmallows.
Note: This quantity makes several servings, about 12–14 sushi-style pieces depending on slice size.
Variations
You can play around with this recipe to suit your taste or dietary needs. Here are some fun swaps I tried:
- Use gluten-free or reduced-sugar Oreos for a lighter option.
- Swap regular milk for almond, oat, or soy milk if you’re dairy-free.
- Add fresh fruit like bananas or raspberries for a refreshing twist.
- Spread Nutella or peanut butter inside for a rich, indulgent filling.
Cooking Time
This recipe is super quick and doesn’t need baking!
- Prep Time: 15–20 minutes
- Chill Time (optional): 10–15 minutes
- Total Time: 25–35 minutes
Equipment You Need
I kept things simple, and here’s what really helped me out:
- Food processor or blender – crushes Oreos finely and quickly.
- Mixing bowl – for combining the crumbs and milk.olling pin – handy if you don’t have a food processor.
- Plastic wrap or parchment paper – makes rolling neat and easy.
- Sharp knife – cuts the sushi cleanly without crumbling.
- Spatula or spoon – for spreading fillings.
- Cutting board – to slice and arrange the rolls.
How to Make Oreo Sushi Recipe?
This dessert comes together step by step, and it’s surprisingly simple. Here’s how I did it:
Step 1: Crush the Oreos
I tossed the Oreos into my food processor and pulsed them until fine crumbs formed. If you don’t have one, you can use a ziplock bag and a rolling pin—it just takes a bit more patience.

Step 2: Mix in the Milk
I added milk slowly, about a tablespoon at a time, mixing until it formed a dough I could mold. Too much milk makes it sticky, so I chilled it briefly whenever it felt too soft.
Step 3: Flatten the Dough
On a sheet of plastic wrap, I pressed the dough into a rectangle, keeping it even in thickness so the rolls would come out uniform.

Step 4: Add Fillings
This is where I got creative! I lined gummy candies across the dough, and on another batch, I spread a thin layer of cream cheese. You can even try marshmallows for extra sweetness.
Step 5: Roll It Up
Using the plastic wrap, I carefully rolled it just like sushi, pressing gently to keep it tight and firm. It looked surprisingly real at this stage!

Step 6: Chill (Optional)
I popped the roll into the fridge for about 10 minutes, which made slicing so much easier.
Step 7: Slice and Serve
With a sharp knife, I cut the roll into bite-sized “sushi” pieces and arranged them on a platter. They looked adorable and tasted even better!

Additional Tips for Making this Recipe Better
After making Oreo sushi a couple of times, I picked up a few tricks that made it turn out even nicer:
- I always chill the dough before slicing—it makes the cuts clean.
- Using fresh Oreos makes a big difference in texture.
- A drizzle of chocolate syrup over the sushi makes it look fancier.
- I found that adding a fruity filling balances the sweetness really well.
How to Serve Oreo Sushi Recipe?
Presentation really makes this recipe shine. I served mine sushi-style on a tray, and it was a hit! You can
- Arrange the pieces on a platter with chopsticks for fun.
- Garnish with shredded coconut, sprinkles, or edible glitter for color.
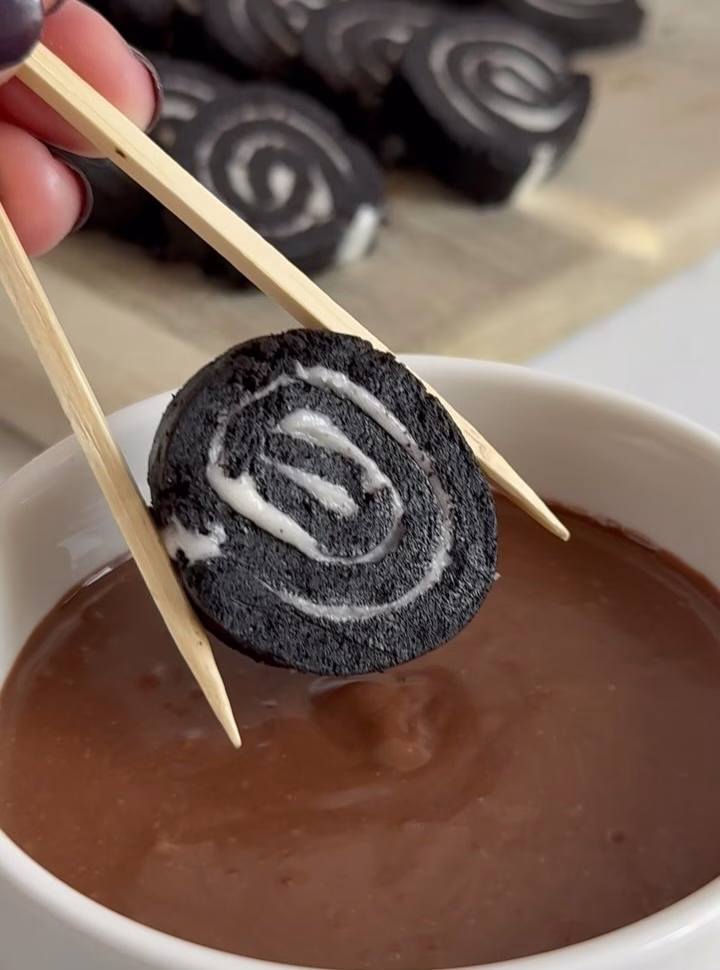
- Add a “dipping sauce” bowl of chocolate or caramel to mimic soy sauce.

Nutritional Information
This is a sweet treat, so enjoy it in moderation. On average, per serving (about 12 slices):
- Calories: 110
- Protein: 1 g
- Carbohydrates: 15 g
- Fat: 4 g
Make Ahead and Storage
Refrigerating
I stored leftovers in an airtight container in the fridge for up to 3 days. They stayed firm and tasted just as good.
Freezing
I froze one roll uncut, and it lasted about a month. I thawed it at room temperature before slicing, and it still held shape well.
Reheating
No reheating needed—it’s a no-bake dessert! Just bring it to room temperature before serving.
Why You’ll Love This Recipe?
This Oreo sushi is such a fun little treat, and here’s why I think you’ll love it:
- Super quick – no baking needed, ready in under 30 minutes.
- Flexible – works with different fillings, toppings, and dietary needs.
- Kid-friendly – fun to make together and perfect for parties.
- Creative – looks just like sushi, but it’s sweet and playful.
- Budget-friendly – only a few ingredients needed!
Oreo Sushi Recipe
Ingredients
Method
- I tossed the Oreos into my food processor and pulsed them until fine crumbs formed. If you don’t have one, you can use a ziplock bag and a rolling pin—it just takes a bit more patience.
- I added milk slowly, about a tablespoon at a time, mixing until it formed a dough I could mold. Too much milk makes it sticky, so I chilled it briefly whenever it felt too soft.
- On a sheet of plastic wrap, I pressed the dough into a rectangle, keeping it even in thickness so the rolls would come out uniform.
- This is where I got creative! I lined gummy candies across the dough, and on another batch, I spread a thin layer of cream cheese. You can even try marshmallows for extra sweetness.
- Using the plastic wrap, I carefully rolled it just like sushi, pressing gently to keep it tight and firm. It looked surprisingly real at this stage!
- I popped the roll into the fridge for about 10 minutes, which made slicing so much easier.
- With a sharp knife, I cut the roll into bite-sized “sushi” pieces and arranged them on a platter. They looked adorable and tasted even better!
Notes
- I always chill the dough before slicing—it makes the cuts clean.
- Using fresh Oreos makes a big difference in texture.
- A drizzle of chocolate syrup over the sushi makes it look fancier.
- I found that adding a fruity filling balances the sweetness really well.