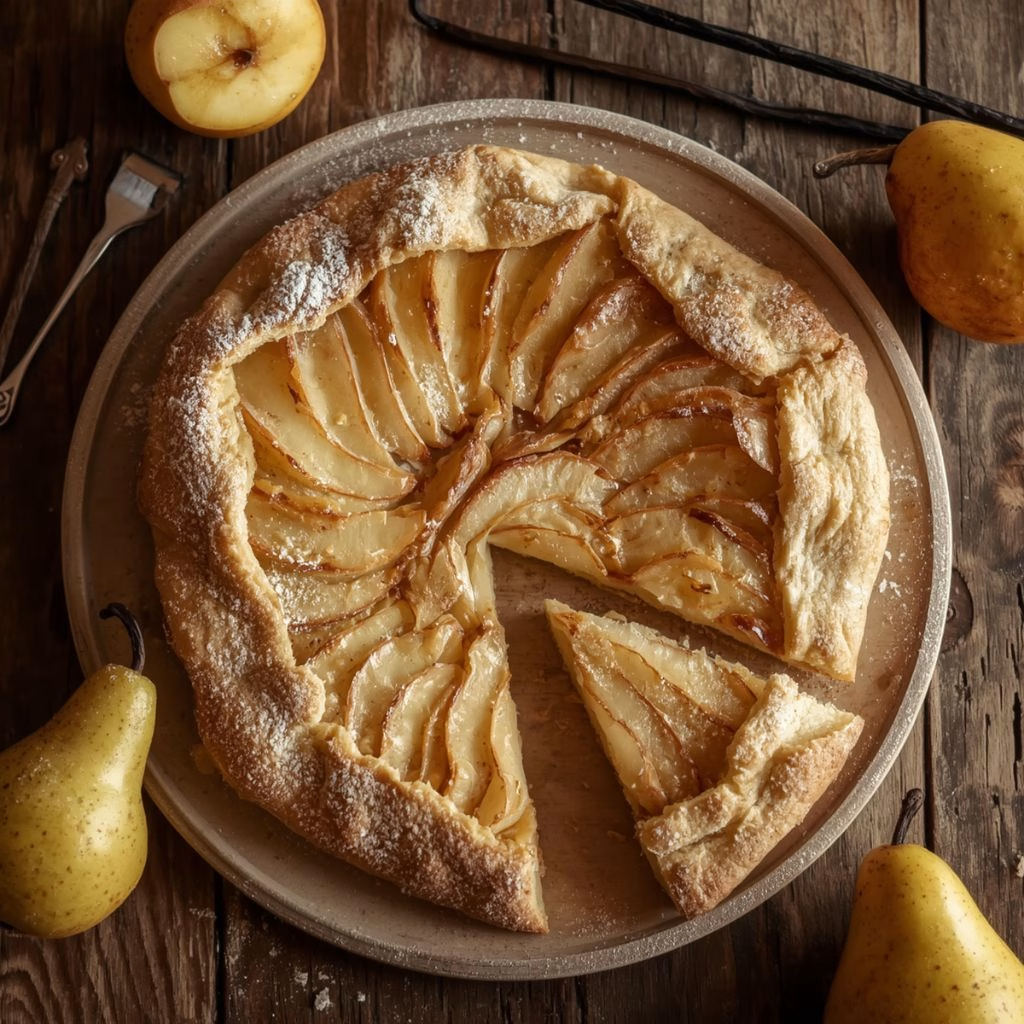
The first time I pulled a Vanilla Pear Galette Recipe out of my oven, I honestly couldn’t stop smiling at how something so effortless looked so impressive. I didn’t fuss over a perfect pie shape, I didn’t need a tart pan, and I still ended up with golden, flaky edges wrapped around soft, spiced pears.
If you love pears but want a dessert that feels a little more special than a plain pie, this is the one I keep coming back to. Let me walk you through exactly how I make it at home.
Cooking Time
- Prep Time: 30 minutes (plus 1 hour chilling)
- Cooking Time: 35-40 minutes
- Total Time: About 2 hours 10 minutes
Ingredients
- 1 ¼ cups all-purpose flour – this is the base of your crust, so measure it properly with a spoon-and-level method
- ½ teaspoon salt – balances the sweetness and wakes up the butter flavor
- ½ cup unsalted butter, cold and cubed – cold butter is the secret to a flaky, layered crust
- 3-4 tablespoons ice water – add slowly, you may not need it all
- 3 large pears, peeled and thinly sliced – Bosc or Anjou hold their shape best when baked
- 1 vanilla bean, scraped (or 1 teaspoon vanilla extract) – gives the filling a warm, real vanilla flavor
- ⅓ cup granulated sugar – sweetens the pears and helps them caramelize
- 1 tablespoon cornstarch – thickens the natural pear juices so your galette isn’t soggy
- 1 tablespoon lemon juice – keeps the pears from browning and adds a light tang
- ¼ teaspoon ground cinnamon – adds gentle warmth without overpowering the vanilla
- 1 egg, beaten – used for the egg wash that gives the crust its golden shine
- 1 tablespoon coarse sugar – sprinkled on top for a little sparkle and crunch
Note: This recipe serves 6-8 people.
Equipment You Need
- Mixing bowl – for combining the flour, butter, and water into dough
- Rolling pin – to roll the chilled dough into a rustic circle
- Baking sheet – provides the flat surface for baking the galette freeform
- Parchment paper – prevents sticking and makes cleanup easy
- Pastry brush – for applying the egg wash evenly
- Sharp knife or mandoline – for slicing pears thinly and evenly
How to Make Vanilla Pear Galette Recipe?
This galette comes together in a few simple stages: making the dough, preparing the pear filling, assembling everything on a baking sheet, and baking it until golden. None of the steps are complicated, but a little patience with chilling makes a real difference.
Make the Dough
I start by whisking the flour and salt together, then cutting in the cold butter until it looks like coarse crumbs. I add ice water a tablespoon at a time until the dough just holds together. I shape it into a disc, wrap it, and chill it for at least an hour.
Prepare the Pear Filling
While the dough chills, I toss my sliced pears with sugar, cornstarch, lemon juice, vanilla, and cinnamon in a bowl. I let this sit for about ten minutes so the pears release a little juice and soak up the flavors evenly.
Roll Out the Dough
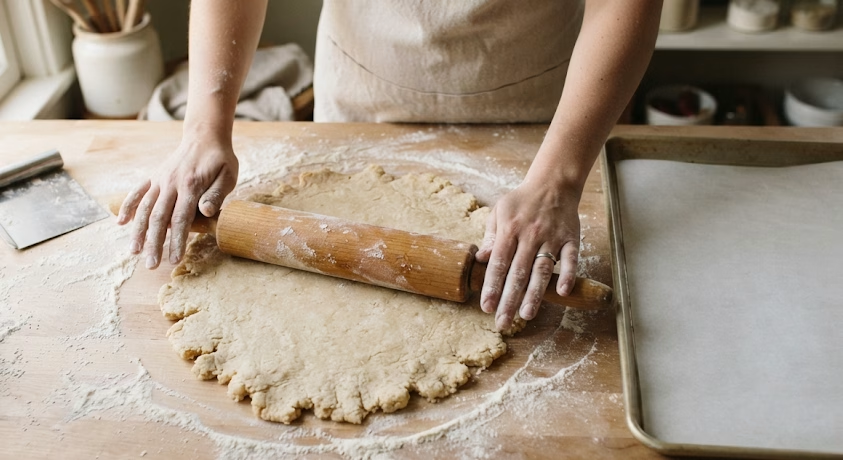
Once the dough is firm, I roll it into a rough 12-inch circle on a lightly floured surface. It doesn’t need to be perfectly round, that’s the beauty of a galette. I transfer it carefully onto my parchment-lined baking sheet.
Arrange the Pears
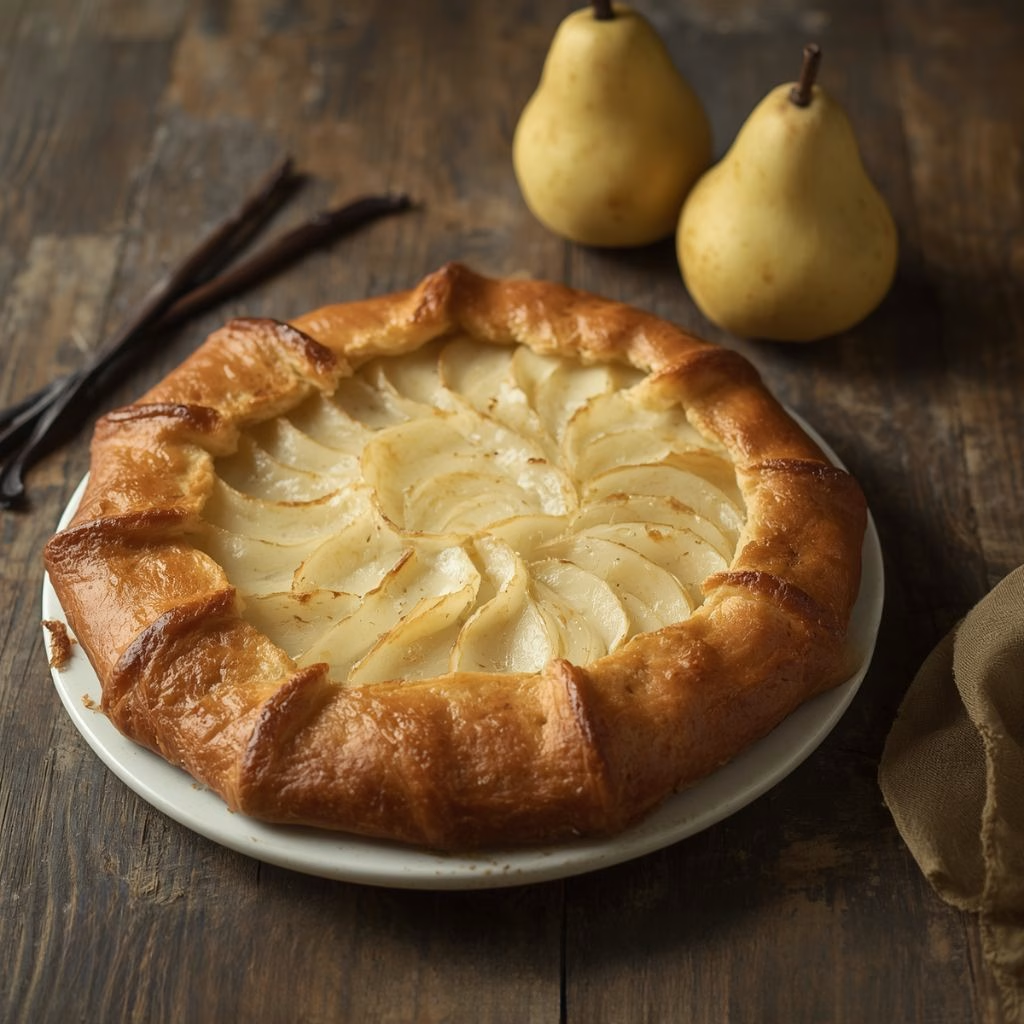
I layer the pear slices in the center of the dough, slightly overlapping them in a circular pattern, leaving about a 2-inch border of dough all around. I pour any leftover juices from the bowl right over the top.

Fold and Chill
Next, I fold the edges of the dough over the pears, pleating as I go to create that classic rustic look. I pop the whole tray into the fridge for 15 minutes so the butter firms back up before baking.
Bake to Golden Perfection
I brush the crust with egg wash and sprinkle coarse sugar on top, then bake at 400°F for 35-40 minutes until the crust is deep golden brown and the pears are tender. I let it cool slightly on the pan before slicing.
Additional Tips for Making This Recipe Better
I’ve made this galette more times than I can count, and here’s what actually helps:
- I always make sure my butter and water are truly cold, warm butter ruins the flaky texture.
- I slice my pears evenly so they cook at the same rate.
- I don’t skip the chilling step before baking, it keeps the crust from slumping in the oven.
- I place a piece of parchment or foil loosely over the crust if it’s browning too fast.
- I let the galette rest for at least 15 minutes before cutting so the filling sets.
Common Mistakes to Avoid
- I once used pears that were too ripe and mushy, and the filling turned watery, so now I pick pears that are firm with just a little give.
- I forgot the cornstarch once and ended up with a soggy bottom crust, so I never skip that step now.
- I tried rolling the dough too thin early on, and it tore under the weight of the pears.
- I didn’t chill the shaped galette before baking once, and the butter melted out before the crust could set properly.
- I overcrowded the pear slices thinking more is better, but it just made the center undercooked.
How to Serve Vanilla Pear Galette?
I love slicing this galette into wedges while it’s still slightly warm and serving it with a scoop of vanilla ice cream melting right into the folds of the crust. For a fancier presentation, I dust the top with powdered sugar and add a few fresh thyme leaves or a drizzle of warm honey. A dollop of lightly sweetened whipped cream also works beautifully if you want something lighter than ice cream.
When I’m putting together a larger spread with both sweet and savory dishes, I also like having options such as Vegan Kimchi Cheese Sweet Corn Pancakes Recipe alongside the dessert. For another savory option on the same table, Slow Cooked Courgettes Creamy Butter Beans Recipe can complement a meal before this rustic dessert.
Variations
- Dairy-free: swap the butter for a plant-based butter alternative in the crust
- Sugar-free: use a monk fruit or erythritol blend in place of granulated sugar
- Spiced version: add a pinch of nutmeg, cardamom, or Chinese five-spice for extra warmth
- Nutty twist: sprinkle chopped walnuts or pecans over the pears before folding the crust
- Puff pastry shortcut: use store-bought puff pastry instead of homemade dough for a quicker, flakier version
- Cheesy addition: crumble a little goat cheese over the pears before baking for a sweet-savory bite
Nutritional Information
Here’s a rough estimate per serving, based on 8 slices:
- Calories: around 240 kcal
- Protein: 3g
- Carbohydrates: 34g
- Fat: 10g
Make Ahead and Storage
You can make the dough up to 2 days ahead and keep it wrapped tightly in the fridge, or freeze it for up to a month before thawing overnight.
Once baked, store leftover galette loosely covered at room temperature for up to 2 days, or in the fridge for up to 4 days for the best freshness.
To reheat, place slices in a 325°F oven for about 10 minutes to bring back the crispness, since the microwave tends to make the crust soft.
Why You’ll Love This Recipe?
This vanilla pear galette has become a fall staple in my kitchen, and here’s why I think you’ll love it too:
- It’s beginner-friendly: there’s no fussy lattice work or pie tin needed, just fold and bake.
- It’s naturally elegant: the rustic, free-form shape looks impressive with almost no extra effort.
- It’s easy to customize: you can swap spices, crusts, or add-ins depending on what you’re craving.
- It highlights real pear flavor: the vanilla enhances the fruit instead of masking it.
- It’s perfect for gatherings: it slices neatly and serves a small crowd without much cleanup.
FAQs
Can I make a pear galette like Ina Garten’s version?
Yes, Ina Garten’s approach uses a similar buttery, flaky crust with sliced pears, though her recipes often lean simpler with just sugar and butter. My version adds vanilla and cornstarch for extra flavor and a firmer filling.
Can I use puff pastry instead of homemade dough?
Absolutely, puff pastry pear galette is a great shortcut that gives you extra flaky, crisp layers with almost no prep work. Just thaw it, arrange your pear filling, and fold the edges before baking.
What makes this the best pear galette recipe to try?
I think it’s the balance of a buttery crust, real vanilla flavor, and perfectly tender pears without any sogginess. The cornstarch and lemon juice really help keep everything from turning watery.
Is this similar to an old fashioned pear galette?
Yes, this recipe follows the same traditional, rustic method used for generations, just a simple dough folded around fruit. I’ve only added a modern touch with vanilla bean for depth.
Can I make a spiced pear galette version?
Definitely, I sometimes add cinnamon, nutmeg, or a pinch of cardamom to the pear filling for a cozy, spiced twist. It pairs beautifully with the natural sweetness of the pears.

Vanilla Pear Galette Recipe
Ingredients
Method
- I start by whisking the flour and salt together, then cutting in the cold butter until it looks like coarse crumbs. I add ice water a tablespoon at a time until the dough just holds together. I shape it into a disc, wrap it, and chill it for at least an hour.
- While the dough chills, I toss my sliced pears with sugar, cornstarch, lemon juice, vanilla, and cinnamon in a bowl. I let this sit for about ten minutes so the pears release a little juice and soak up the flavors evenly.
- Once the dough is firm, I roll it into a rough 12-inch circle on a lightly floured surface. It doesn’t need to be perfectly round, that’s the beauty of a galette. I transfer it carefully onto my parchment-lined baking sheet.
- I layer the pear slices in the center of the dough, slightly overlapping them in a circular pattern, leaving about a 2-inch border of dough all around. I pour any leftover juices from the bowl right over the top.
- Next, I fold the edges of the dough over the pears, pleating as I go to create that classic rustic look. I pop the whole tray into the fridge for 15 minutes so the butter firms back up before baking.
- I brush the crust with egg wash and sprinkle coarse sugar on top, then bake at 400°F for 35-40 minutes until the crust is deep golden brown and the pears are tender. I let it cool slightly on the pan before slicing.
Notes
- I always make sure my butter and water are truly cold, warm butter ruins the flaky texture.
- I slice my pears evenly so they cook at the same rate.
- I don’t skip the chilling step before baking, it keeps the crust from slumping in the oven.
- I place a piece of parchment or foil loosely over the crust if it’s browning too fast.
- I let the galette rest for at least 15 minutes before cutting so the filling sets.