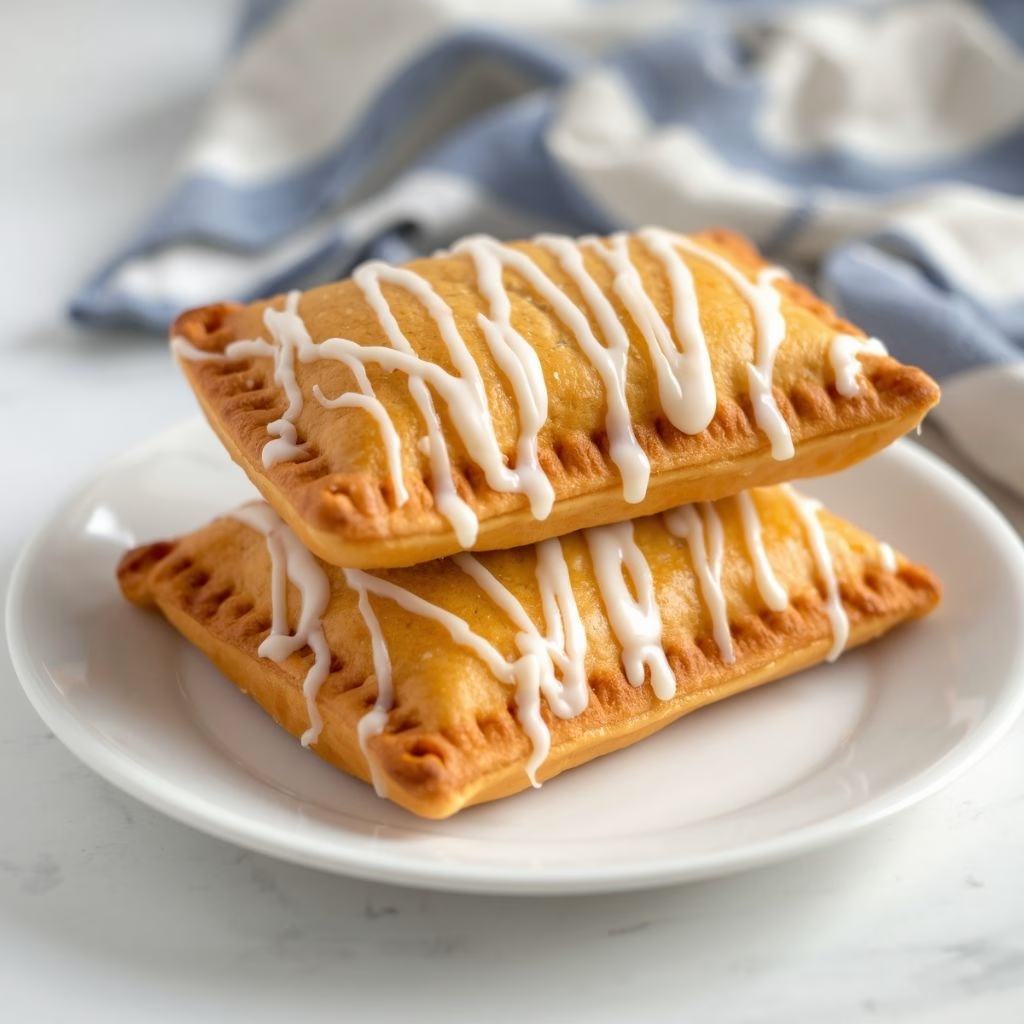
There’s nothing that makes my kitchen smell better than a peach filling bubbling away on the stove. I started making these homemade peach pop tarts a few summers ago when my local farmers market was overflowing with ripe peaches, and I haven’t bought the boxed version since.
I love that I get flaky, buttery layers wrapped around a jammy peach filling, finished with a sweet icing drizzle. Once you see how simple the process is, you’ll probably feel the same way I did the first time I pulled a tray out of the oven. This is my go-to grab-and-go breakfast, and it also happens to work beautifully as an after-dinner treat.

Cooking Time
- Prep Time: 25 minutes
- Cooking Time: 22-25 minutes
- Total Time: about 50 minutes (plus 30 minutes chilling)
Ingredients
- 2 refrigerated pie crust sheets (or use puff pastry sheets if you want an airier, flakier bite)
- 2 cups fresh peaches, peeled and diced (frozen peaches work too, just thaw and drain them first)
- 1/4 cup granulated sugar for balancing the natural tartness of the peaches
- 2 tablespoons brown sugar for a deeper, almost caramel-like flavor
- 1 tablespoon cornstarch to thicken the filling so it doesn’t leak out
- 1 tablespoon lemon juice to brighten the peach flavor and stop browning
- 1/2 teaspoon ground cinnamon for warmth without overpowering the peach
- 1 large egg, beaten, used as an egg wash for sealing and shine
- 1 cup powdered sugar for the glaze, sifted so it stays lump-free
- 2-3 tablespoons milk to thin the glaze to a pourable consistency
- 1/4 teaspoon vanilla extract for a rounder, more fragrant glaze
Note: this recipe serves 6-8 people, depending on how large you cut each tart.
Equipment You Need
- Baking sheet – holds the pastries while they bake evenly
- Parchment paper – keeps the tarts from sticking and makes cleanup easy
- Rolling pin – helps flatten your pastry dough into even sheets
- Small saucepan – used to cook down the peach filling
- Pastry brush – for applying egg wash to seal and brown the crust
- Fork – to crimp the edges and poke steam vents
- Mixing bowls – for the filling and the icing
- Sharp knife or pizza cutter – for cutting clean pastry rectangles
How to Make Homemade Peach Pop Tarts Recipe?
This recipe comes together in three simple stages: making the filling, assembling the tarts, and baking them until golden. I promise none of these steps are complicated, even if you’ve never made a hand pie before. Once you’ve done it once, you’ll find yourself making a batch every time peaches are in season.
Cook the Peach Filling
I start by tossing my diced peaches into a saucepan with both sugars, lemon juice, and cinnamon over medium heat. Once the peaches release their juices, I stir in the cornstarch to thicken everything into a jammy, spoonable filling. This usually takes about 8-10 minutes, and I let it cool completely before I touch the pastry, otherwise it turns the dough soggy.
Roll and Cut the Pastry
While the filling cools, I roll my pie crust or puff pastry sheets out slightly on a lightly floured surface. I cut each sheet into equal rectangles, usually around 3×4.5 inches, so I get a matching top and bottom for every tart. If you like a bigger bite, you can always go for a giant pop tart puff pastry version by cutting fewer, larger rectangles.
Fill and Seal the Tarts
I place about two tablespoons of the cooled peach filling onto one rectangle, leaving a small border around the edges. I brush that border with egg wash, then lay a second rectangle on top and press the edges together firmly. This step matters most for keeping the filling inside while baking.
Crimp and Chill
Using a fork, I crimp all four edges to seal them completely, then poke a few small holes on top so steam can escape. I always chill my assembled tarts for at least 30 minutes, since cold pastry holds its shape and bakes up flakier than dough straight from the counter.
Bake Until Golden
I brush the tops with the remaining egg wash and bake at 375°F for 22-25 minutes, until the pastry turns deep golden brown. I rotate the tray halfway through baking so every tart browns evenly, and I let them cool fully on a wire rack before glazing.
Add the Glaze
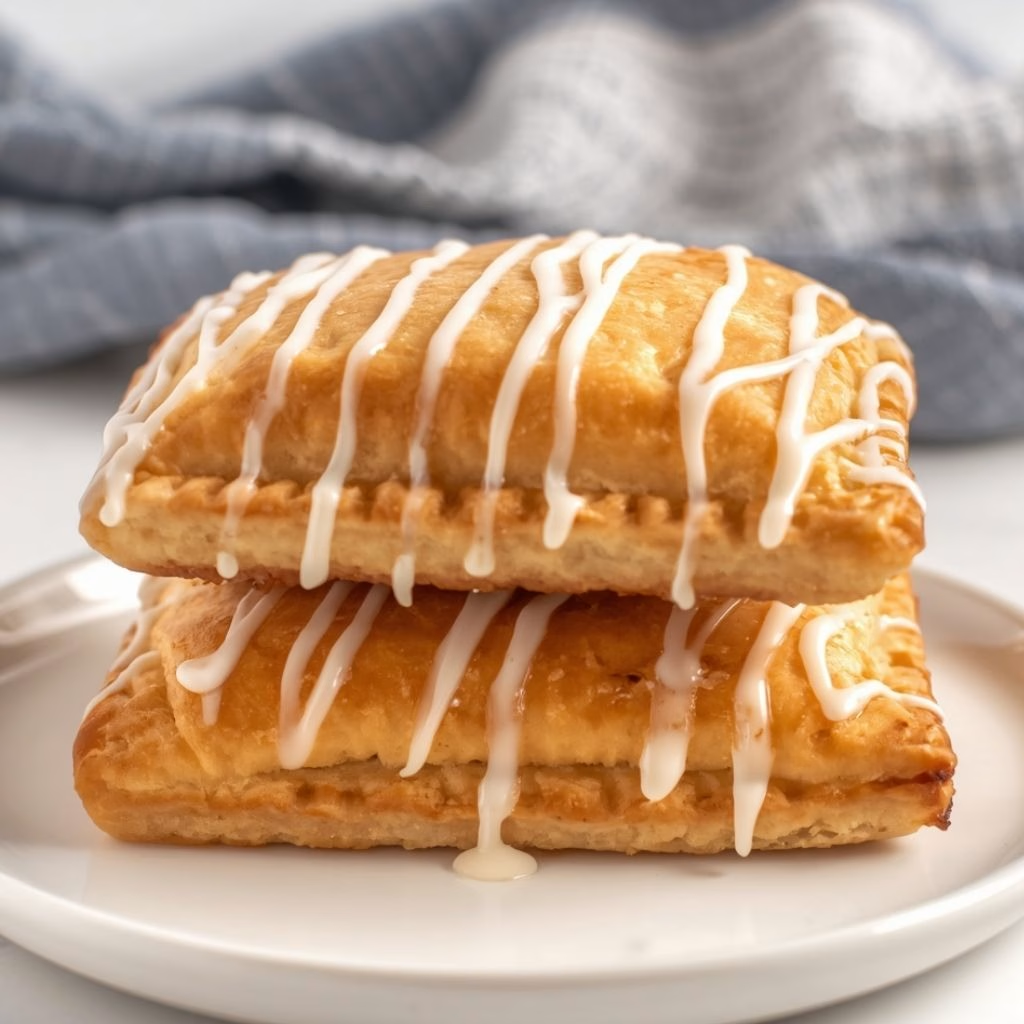
Once the tarts have cooled, I whisk powdered sugar, milk, and vanilla into a smooth glaze and drizzle it generously over the top. I like to let the glaze set for about ten minutes before serving, so it firms up into that classic pop tart shine.
Additional Tips for Making This Recipe Better
I’ve made this peach pop tart recipe more times than I can count, and here’s what actually makes a difference for me:
- I always drain my peaches well if I’m using frozen ones, since extra liquid makes the filling runny and the pastry soggy.
- I chill my assembled tarts before baking every single time, and it’s the single biggest reason mine come out flaky instead of dense.
- I like to double the filling recipe and freeze half so my next batch comes together even faster.
- I brush a thin layer of egg wash on the bottom pastry, under the filling, which helps seal moisture in and keeps the crust crisp.
- I rotate my baking sheet halfway through so I don’t end up with tarts that are golden on one side and pale on the other.
Common Mistakes to Avoid
I’ve made a few of these mistakes myself along the way, so consider this my list of lessons learned:
- I once skipped the cornstarch, thinking the filling would thicken on its own, and ended up with peach syrup leaking out of every seam.
- I didn’t crimp the edges tightly enough the first time I tried this, and half my filling escaped onto the baking sheet.
- I tried skipping the chill step when I was in a rush, and the pastry puffed unevenly and lost its flaky layers.
- I overfilled a few tarts because I wanted more peach flavor, but it just made sealing them nearly impossible.
- I glazed my tarts while they were still warm once, and the icing melted right off instead of setting into a shiny coat.
How to Serve Homemade Peach Pop Tarts
I love setting these out on a simple platter with the glaze drizzled in loose zigzags, since it makes them look like they came straight from a bakery case. A light dusting of extra cinnamon or a few thin peach slices on the side adds a nice pop of color for a brunch spread. If I’m serving them for dessert, I’ll add a small scoop of vanilla ice cream alongside a warm tart for a peach cobbler pop tart feel.
They also travel well wrapped in parchment, making them one of my favorite picnic or lunchbox additions. If you’re building out a full breakfast pastry lineup, my homemade strawberry pop tart recipe pairs really nicely on the same tray for guests who prefer berries over stone fruit.
Variations
- Dairy-free option: skip the milk in the glaze and use a plant-based milk instead, since the rest of the recipe is naturally dairy-free.
- Sugar-free option: swap the sugars for a granulated sugar substitute that measures cup for cup.
- Puff pastry pop tart recipe: use puff pastry sheets instead of pie crust for a lighter, more layered texture, similar to a half baked harvest pop tart style.
- Brown sugar boost: add an extra tablespoon of brown sugar to the filling for a puff pastry pop tarts brown sugar flavor that leans more caramel than fruity.
- Other fruit fillings: swap the peaches for berries, apples, or apricots if you want to turn this into a broader peach pie tart recipe collection.
- Spiced version: add a pinch of nutmeg or cardamom to the filling for a cozier, fall-inspired twist.
For anyone who wants to try the flakier version mentioned above, I’ve also put together a full puff pastry pop tarts recipe that walks through the technique in more detail.
Nutritional Information
Here’s a rough breakdown per tart, based on eight servings from this recipe:
- Calories: approximately 280 per tart
- Protein: approximately 3 grams per tart
- Carbohydrates: approximately 38 grams per tart
- Fat: approximately 13 grams per tart
Make Ahead and Storage
You can prepare the peach filling up to three days in advance and store it in an airtight container in the fridge until you’re ready to assemble your tarts.
Baked and cooled tarts keep well at room temperature for about a day, or in the refrigerator for up to four days if wrapped tightly.
For longer storage, freeze the unglazed, baked tarts in a single layer, then transfer to a freezer bag for up to two months, and reheat straight from frozen in a toaster or oven at 350°F for about ten minutes.
Why You’ll Love This Recipe
I keep coming back to this recipe because it checks every box I care about in a homemade pastry.
- Quick to prepare: most of the work is hands-off cooking time, so I can have a fresh batch ready in under an hour.
- Naturally customizable: I can swap fillings, crusts, or sweeteners depending on what I have in the kitchen that day.
- Better than store-bought: I control exactly how sweet, fruity, and flaky each tart turns out, which I can never say about the boxed version.
- Great for make-ahead mornings: I can freeze a batch and always have breakfast ready without any extra effort on busy days.
- Crowd-pleasing at any event: whether it’s a brunch, picnic, or bake sale, these disappear fast every single time I bring them.
FAQs
Can I use canned peaches instead of fresh?
Yes, you can use canned peaches in a pinch, just be sure to drain them thoroughly and dice any large chunks so the filling doesn’t turn watery.
Can I make these tarts ahead of time?
Absolutely, you can assemble the tarts and refrigerate them unbaked for up to a day, or freeze the baked, unglazed tarts for later.
Why did my filling leak out during baking?
This usually happens when the edges aren’t crimped tightly enough or the filling wasn’t cooled before assembly, so always seal well and let the filling cool fully.
Can I air fry these instead of using the oven?
Yes, you can air fry the assembled tarts at around 350°F for about 10-12 minutes, checking halfway through so they don’t over-brown.
What’s the best way to reheat a leftover tart?
I always reheat mine in a toaster or toaster oven for a few minutes, since it brings back the crisp texture that the microwave just can’t replicate.

Homemade Peach Pop Tarts Recipe
Ingredients
Method
- I start by tossing my diced peaches into a saucepan with both sugars, lemon juice, and cinnamon over medium heat. Once the peaches release their juices, I stir in the cornstarch to thicken everything into a jammy, spoonable filling. This usually takes about 8-10 minutes, and I let it cool completely before I touch the pastry, otherwise it turns the dough soggy.
- While the filling cools, I roll my pie crust or puff pastry sheets out slightly on a lightly floured surface. I cut each sheet into equal rectangles, usually around 3×4.5 inches, so I get a matching top and bottom for every tart. If you like a bigger bite, you can always go for a giant pop tart puff pastry version by cutting fewer, larger rectangles.
- I place about two tablespoons of the cooled peach filling onto one rectangle, leaving a small border around the edges. I brush that border with egg wash, then lay a second rectangle on top and press the edges together firmly. This step matters most for keeping the filling inside while baking.
- Using a fork, I crimp all four edges to seal them completely, then poke a few small holes on top so steam can escape. I always chill my assembled tarts for at least 30 minutes, since cold pastry holds its shape and bakes up flakier than dough straight from the counter.
- I brush the tops with the remaining egg wash and bake at 375°F for 22-25 minutes, until the pastry turns deep golden brown. I rotate the tray halfway through baking so every tart browns evenly, and I let them cool fully on a wire rack before glazing.
- Once the tarts have cooled, I whisk powdered sugar, milk, and vanilla into a smooth glaze and drizzle it generously over the top. I like to let the glaze set for about ten minutes before serving, so it firms up into that classic pop tart shine.
Notes
- I always drain my peaches well if I’m using frozen ones, since extra liquid makes the filling runny and the pastry soggy.
- I chill my assembled tarts before baking every single time, and it’s the single biggest reason mine come out flaky instead of dense.
- I like to double the filling recipe and freeze half so my next batch comes together even faster.
- I brush a thin layer of egg wash on the bottom pastry, under the filling, which helps seal moisture in and keeps the crust crisp.
- I rotate my baking sheet halfway through so I don’t end up with tarts that are golden on one side and pale on the other.