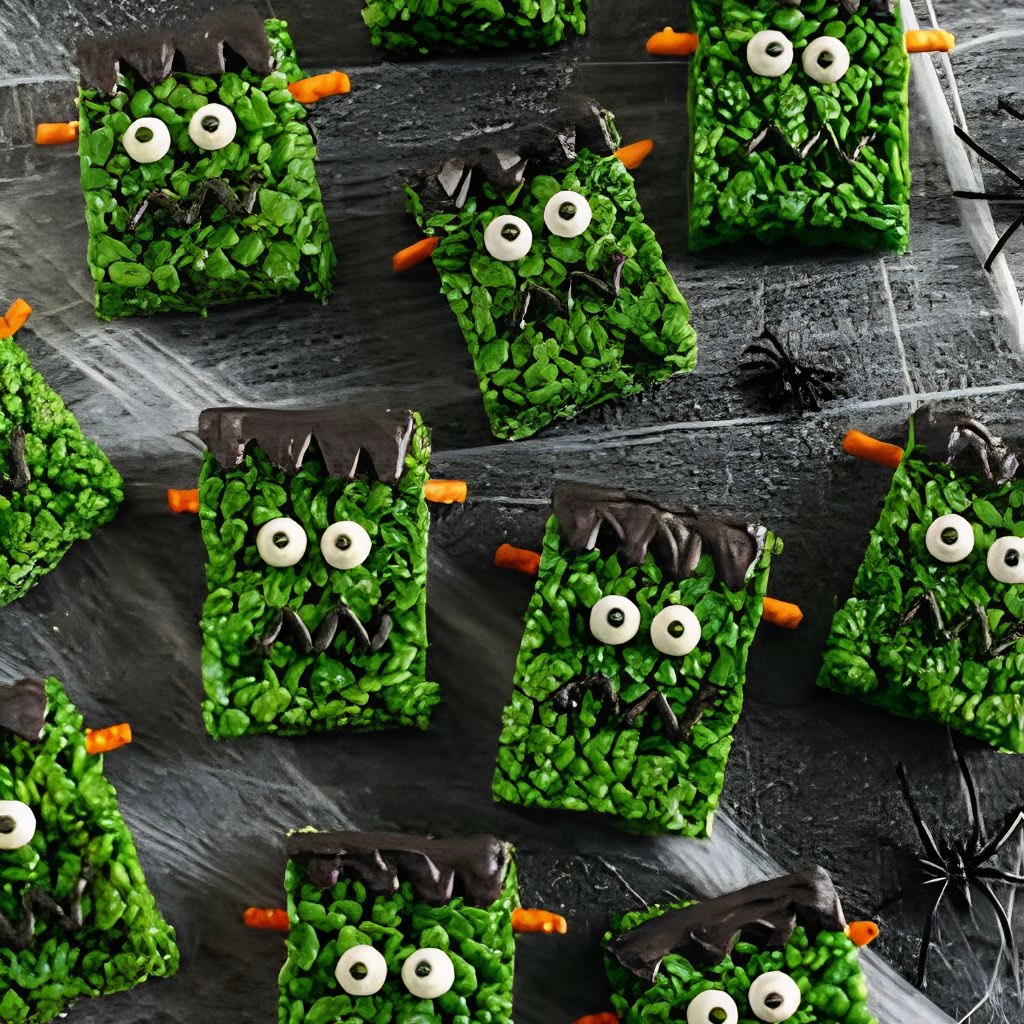
I whip up a batch of this Frankenstein Rice Krispie Treats Recipe every single October, and honestly, they’re the first thing I add to my Halloween baking list. I love that there’s zero oven time involved, just a pot, a spatula, and a few silly decorating supplies.
My kids beg to help with the candy eyes part every year, which makes this one of those recipes that feels more like a memory than a chore. If you want a Halloween treat that looks impressive but takes almost no real effort, this rice krispie treats recipe is exactly what you need.
Cooking Time
- Prep Time: 15 minutes
- Cooking Time: 10 minutes
- Total Time: 55 minutes (includes setting time)
Ingredients
- 6 cups crispy rice cereal — any basic brand works fine, just measure it after pouring so it packs evenly
- 4 tablespoons unsalted butter — controls the saltiness better than salted butter does
- 10 ounces mini marshmallows — minis melt smoother and faster than large marshmallows
- ½ teaspoon vanilla extract — adds a subtle warmth that balances out the sweetness
- Green gel food coloring — gel gives a deeper, more even color than liquid drops
- 1 cup dark chocolate melting wafers — melts smoothly for that classic Frankenstein hair-and-collar look
- Candy eyeballs — the easiest way to instantly give each treat a face
- Black decorating gel or icing — for drawing on those signature Frankenstein stitches
Note: this recipe serves 12, making about 12 generously sized squares.
Equipment You Need
- Large pot or Dutch oven — for melting the butter and marshmallows evenly
- Silicone spatula — prevents sticking while you stir the hot marshmallow mixture
- 9×13-inch baking dish — the standard size for shaping and setting the treats
- Parchment paper — makes lifting and slicing the treats far less messy
- Microwave-safe bowl — for melting your chocolate separately
- Piping bag or small squeeze bottle — gives you control when adding the stitching details
How to Make Frankenstein Rice Krispie Treats Recipe?
This whole process comes together faster than most Halloween treats I’ve tried, and there’s genuinely no way to mess it up too badly. It’s mostly melting, mixing, and shaping before the fun decorating part begins. Here’s exactly how I make mine at home.
Melt the Butter and Marshmallows
Add your butter to a large pot over low heat and let it melt completely. Once melted, add in the mini marshmallows and stir constantly until the mixture turns smooth and fully combined. This usually takes about five minutes on low heat.
Add the Color and Vanilla
Remove the pot from the heat and stir in your vanilla extract along with a few drops of green gel food coloring. Keep stirring until the color spreads evenly through the marshmallow mixture with no white streaks left behind. Add more coloring gradually until you reach the shade you like.
Fold in the Cereal
Pour the crispy rice cereal into the pot and gently fold it into the green marshmallow mixture. Work quickly but gently here, since overmixing can crush the cereal and make your treats dense instead of light.
Press Into the Pan
Transfer the mixture into a parchment-lined 9×13 pan and press it down firmly but evenly using a greased spatula or your hands. Let the pan sit at room temperature for about 20 minutes so everything firms up before cutting.
Cut and Decorate
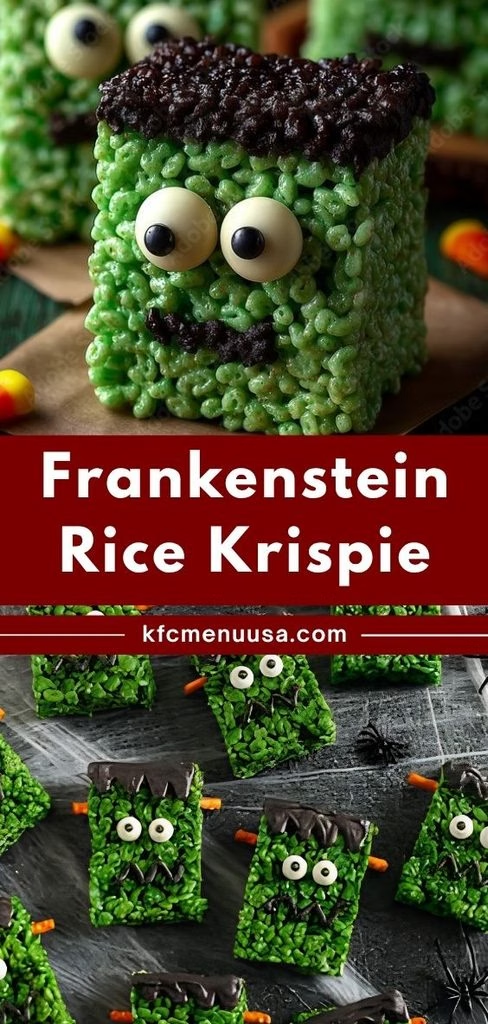
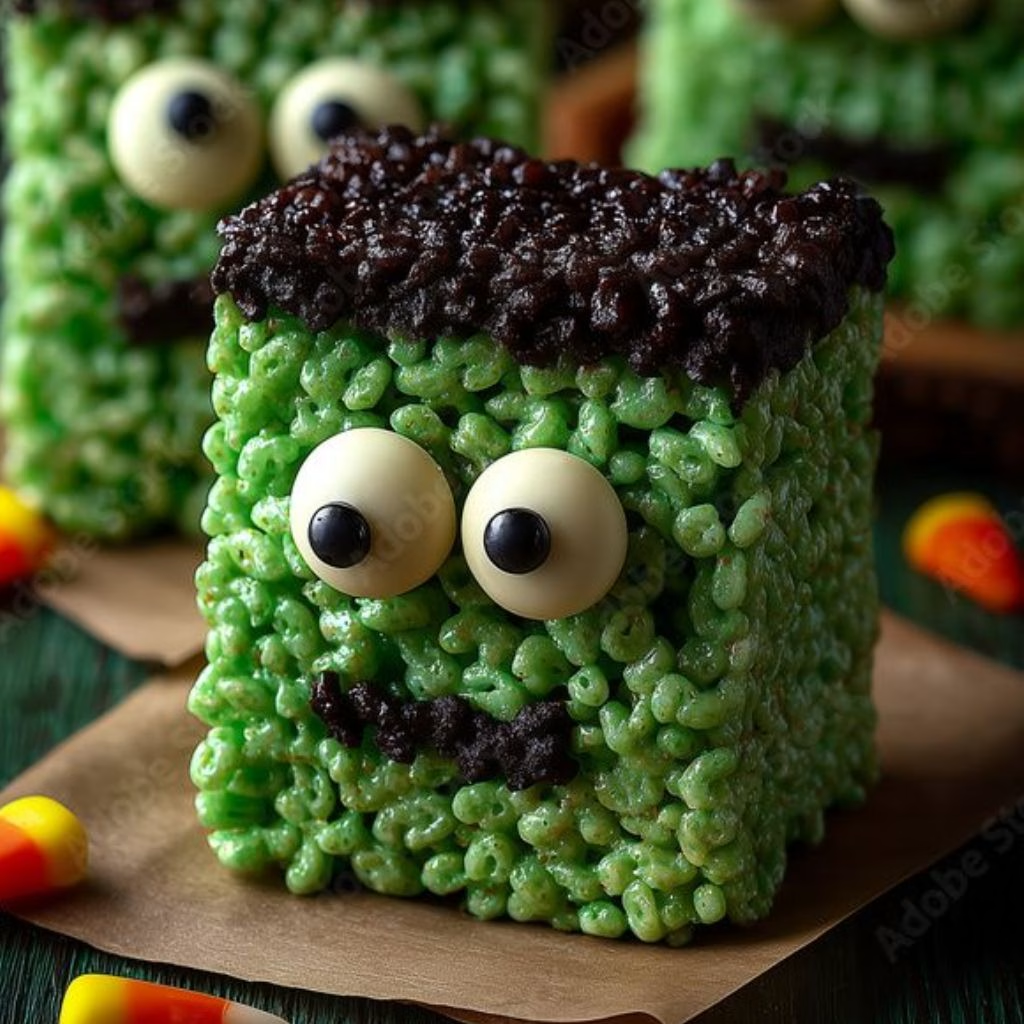
Slice the set treats into rectangles, then dip the top edge of each one into melted dark chocolate for that classic Frankenstein hairline. Finish by adding candy eyeballs and black stitching lines with your piping bag or gel.
Additional Tips for Making This Recipe Better
I’ve made these enough times now to know exactly what helps and what to skip.
- I always use gel food coloring instead of liquid, since liquid drops water down the marshmallow mixture and make it stickier.
- I grease my spatula and hands before pressing the mixture into the pan, which saves me a ton of frustration.
- I let my treats cool completely before dipping them in chocolate, or the chocolate slides right off.
- I keep my chocolate slightly warm while I work, reheating it in ten-second bursts so it doesn’t harden mid-decorating.
- I always make extra chocolate for dipping, since it’s easy to run short halfway through a batch.
Common Mistakes to Avoid
- I once cooked my marshmallow mixture over too high of a heat, and it turned tough and chewy instead of soft.
- I pressed the cereal mixture down way too hard one time, and my treats came out dense and hard to bite through.
- I added too much food coloring at once and had to fight to lighten the shade back down.
- I tried cutting the treats before they had fully set, and the whole pan fell apart into crumbles.
- I stored mine uncovered overnight once, and they turned stale and crunchy by the next morning.
How to Serve Frankenstein Rice Krispie Treats?
I love setting mine out on a black or dark green platter so the bright chocolate collars and candy eyes really pop against the background. Arranging them in rows like little monster squares makes for a fun, cohesive Halloween dessert table.
A light dusting of extra green sprinkles or a scattering of candy bones nearby adds to the spooky theme without much extra work. These treats also look great sitting alongside other Halloween party finger foods, like a plate of witch finger breadsticks for a fuller spread.
Variations
- Swap the classic look for ghost rice krispies recipe styling by skipping the green coloring and dipping in white chocolate instead
- Shape smaller balls from the mixture to make rice krispie marshmallow pumpkins using orange candy melts
- Cut the treats into rounds and add extra black candy legs for a spider rice krispie treats version
- Skip the food coloring altogether for a batch of classic chocolate rice krispie halloween treats
- Use cake pop molds to shape mini frankenstein krispie cakes instead of traditional squares
- Try sunflower seed butter blended into the marshmallow mix if you want a nut-free rice krispie monster treats option
Nutritional Information
Here’s an approximate breakdown per treat, though this can shift slightly depending on brands used.
- Calories: 165 kcal
- Protein: 1 g
- Carbohydrates: 29 g
- Fat: 5 g
Make Ahead and Storage
You can prepare the marshmallow-cereal base up to a day in advance and keep it covered tightly at room temperature before decorating.
Store finished treats in an airtight container at room temperature, where they’ll stay soft and fresh for up to three days.
For longer storage, freeze the undecorated treats in a sealed bag for up to three months, then thaw at room temperature before adding the chocolate and candy details.
Why You’ll Love This Recipe?
This has become one of my most requested Halloween bakes, and here’s exactly why.
- It requires zero baking: With no oven needed, this comes together on the stovetop in under an hour from start to finish.
- It’s endlessly customizable: Whether you’re leaning into ghost rice krispies recipe styling or classic spider rice krispie treats shapes, the same base adapts to any theme.
- It’s a fun kid activity: Little ones love pressing on the candy eyes and drawing stitches, making this a great hands-on baking project.
- It travels beautifully: These hold their shape well in lunchboxes or party trays without falling apart or getting messy.
- It’s budget-friendly: With just a handful of pantry staples and some candy decorations, this rice krispies recipe costs far less than store-bought Halloween treats.
FAQs
Can I make these into rice krispie marshmallow pumpkins instead?
Yes, just shape the mixture into small rounds instead of squares and dip them in orange candy melts with a green stem on top.
Why did my marshmallow mixture turn hard instead of chewy?
This usually means the heat was too high while melting, so keep it on low and stir constantly for the softest texture.
Can I substitute the crispy rice cereal with another brand?
Absolutely, any plain crispy rice cereal works the same way, just avoid flavored varieties since they can throw off the taste.
How long do frankenstein krispie cakes actually stay fresh?
They stay soft for about three days at room temperature in a sealed container, or up to three months if frozen before decorating.
Can I skip the food coloring completely?
Of course, plain untinted treats still taste exactly the same, and you can lean into a chocolate rice krispie halloween treats look instead by simply dipping them in chocolate.
If you’re planning a whole Halloween spread this year, these treats pair really well with something savory too, like a batch of mummy hot dog crescent rolls to round out the party table.

Frankenstein Rice Krispie Treats Recipe
Ingredients
Method
- Add your butter to a large pot over low heat and let it melt completely. Once melted, add in the mini marshmallows and stir constantly until the mixture turns smooth and fully combined. This usually takes about five minutes on low heat.
- Remove the pot from the heat and stir in your vanilla extract along with a few drops of green gel food coloring. Keep stirring until the color spreads evenly through the marshmallow mixture with no white streaks left behind. Add more coloring gradually until you reach the shade you like.
- Pour the crispy rice cereal into the pot and gently fold it into the green marshmallow mixture. Work quickly but gently here, since overmixing can crush the cereal and make your treats dense instead of light.
- Transfer the mixture into a parchment-lined 9×13 pan and press it down firmly but evenly using a greased spatula or your hands. Let the pan sit at room temperature for about 20 minutes so everything firms up before cutting.
- Slice the set treats into rectangles, then dip the top edge of each one into melted dark chocolate for that classic Frankenstein hairline. Finish by adding candy eyeballs and black stitching lines with your piping bag or gel.
Notes
- I always use gel food coloring instead of liquid, since liquid drops water down the marshmallow mixture and make it stickier.
- I grease my spatula and hands before pressing the mixture into the pan, which saves me a ton of frustration.
- I let my treats cool completely before dipping them in chocolate, or the chocolate slides right off.
- I keep my chocolate slightly warm while I work, reheating it in ten-second bursts so it doesn’t harden mid-decorating.
- I always make extra chocolate for dipping, since it’s easy to run short halfway through a batch.