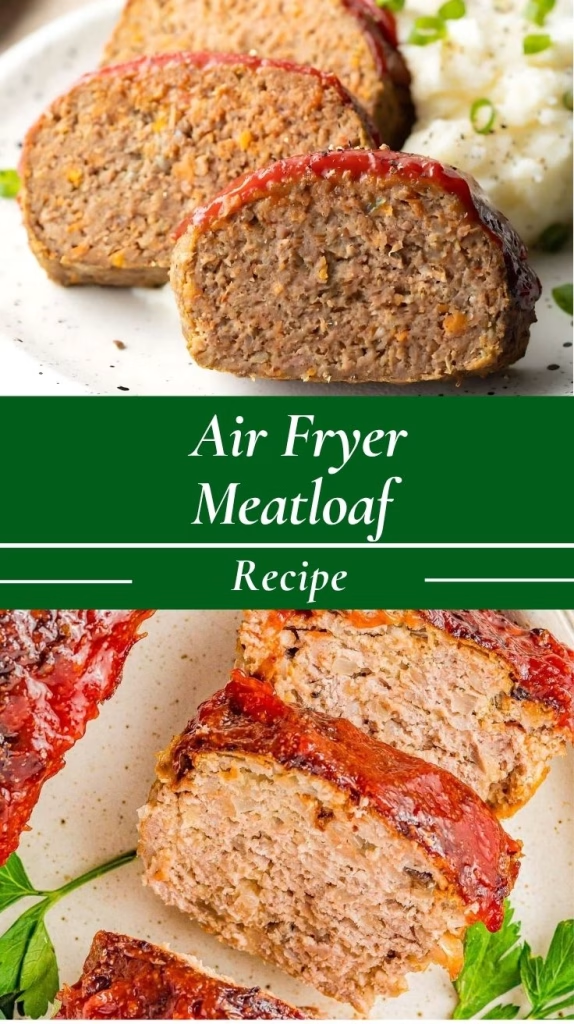
I’ve made meatloaf dozens of times in the oven, but once I discovered the air fryer meatloaf recipe, there was no going back. If you’re anything like me, you probably enjoy a shortcut that doesn’t sacrifice flavor. And this air fryer version? It’s not just quicker—it gives the perfect texture. Juicy on the inside, with that crave-worthy golden crust outside.
Over time, I’ve figured out a few tricks to get the best results every time I make it. Whether you’re trying it for the first time or looking to upgrade your go-to method, here’s everything I’ve learned from countless batches.
Why I Prefer the Air Fryer Over the Oven?
One of the biggest reasons I love using the air fryer is the speed. I used to spend almost an hour waiting for my meatloaf to cook in the oven. But with the air fryer, it’s ready in almost half the time. That means less waiting and more eating.
Plus, the texture is unbeatable. The circulating hot air gives the meatloaf a crispy outer edge while locking in all the juices inside. It doesn’t dry out, which used to happen sometimes in my old oven routine. I noticed this same benefit when I tried a pork belly air fryer recipe—the crust was incredible without overcooking the inside. The same principle totally applies to meatloaf.
How to Make Sure It Doesn’t Fall Apart?
If you’ve ever had a meatloaf fall apart while slicing, I’ve been there too. In the air fryer, it can be even trickier because of the airflow. So here are a few tips I follow:
- Let it rest. I never slice into it right after cooking. Give it about 10 minutes to set—this really helps hold everything together.
- Don’t skip the binder. While I won’t go into ingredients, I’ll say this: don’t skimp on the eggs or breadcrumbs. They’re essential to keeping the loaf firm.
- Shape it tightly. I form a compact loaf using my hands (with gloves or a little oil), making sure it’s even all the way through. The air fryer doesn’t use a pan like an oven version might, so the shape really matters.
How to Avoid a Dry Meatloaf?
Nobody likes dry meatloaf, and trust me, I’ve had a few rough batches while experimenting. These are the tips I always stick to now:
- Don’t overmix. Once all your ingredients are combined, stop mixing. Overworking the meat can make it tough.
- Use meat with a little fat. I usually go for 80/20 ground beef. Too lean, and the meatloaf ends up dry.
- Add moisture-rich extras. Things like chopped onions or a little milk go a long way. I sometimes sneak in a bit of grated zucchini or carrots too—it adds moisture and some bonus nutrients.
This trick actually came from making an air fryer carrots recipe once. Those sweet, tender carrots reminded me how moisture and natural sugars can transform a dish—even something as hearty as meatloaf.
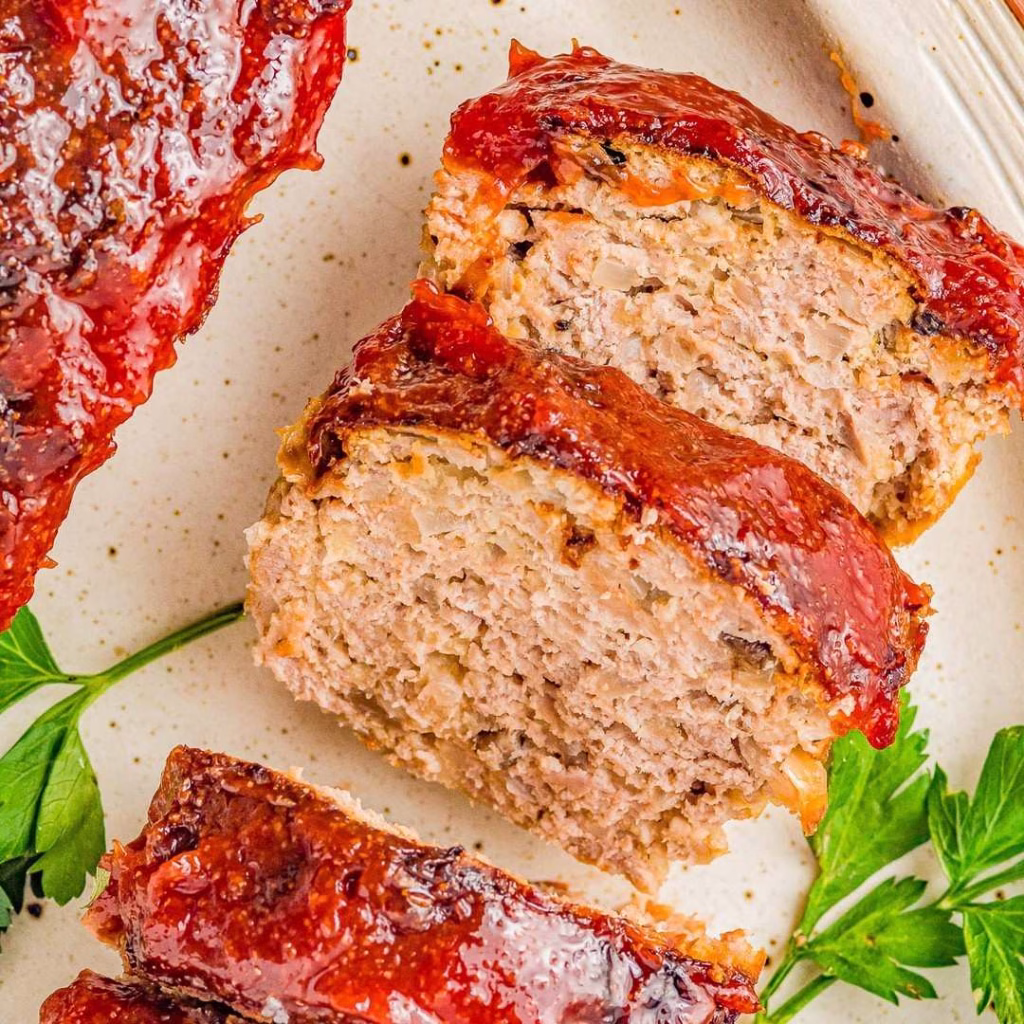
Glazing Tips (Without the Mess)
The glaze is honestly one of my favorite parts. I love how it caramelizes on top in the air fryer. But I used to make a mess trying to apply it. Now, I follow a simple routine:
- I add the glaze in the last 5–10 minutes. That gives it time to cook and caramelize without burning.
- If I want extra flavor, I’ll reserve a little glaze to brush on after it’s done too.
- Don’t go overboard—too much glaze will drip down into the air fryer basket and cause sticking. A light coating works best.
What to Do If the Top Is Getting Too Brown?
This was something that happened to me the first few times. The air fryer’s heat hits from the top, so the glaze or surface can darken too quickly. If that happens:
- I gently lay a piece of foil over the top of the meatloaf while it finishes cooking.
- I sometimes lower the temperature for the last stretch and extend the cook time a bit to balance things out.
That little hack has saved quite a few meatloafs from turning too crusty!
Reheating Meatloaf Without Drying It Out
Leftovers are gold when it comes to meatloaf. But reheating them the wrong way can ruin all that juiciness. Here’s how I reheat mine in the air fryer without drying it out:
- Slice it into thick pieces. That helps it reheat evenly.
- I spritz it with a bit of water or broth before reheating. That little bit of moisture makes a big difference.
- 350°F for about 4–6 minutes works for me. I check and flip halfway through if needed.
You can also microwave it, but honestly, the air fryer keeps the texture so much better. I sometimes reheat a few sides too, like leftover air fryer carrots recipe batches I had on hand. It’s an easy, no-fuss dinner redo.
Can I Freeze Air Fryer Meatloaf?
Yes, and I do it all the time. It’s one of the best meal prep tricks I’ve learned. Here’s what works for me:
- I let the meatloaf cool completely before freezing.
- Then I either slice it and wrap each piece individually (great for grab-and-go lunches) or freeze the whole loaf tightly wrapped in plastic and foil.
- When I’m ready to eat it, I thaw it in the fridge overnight and reheat in the air fryer. Works like a charm.

What Pairs Well with Air Fryer Meatloaf?
One of the fun parts of meatloaf night in my house is picking the sides. Some favorites that never fail:
- Mashed potatoes (classic, right?)
- Roasted veggies (I often toss them in the air fryer after the meatloaf is done)
- Mac and cheese or buttered noodles
- A crisp green salad if I want to balance it out
And if you want to make it a full-on air fryer meal, try adding a blooming onion recipe air fryer style appetizer or even some pork belly air fryer recipe bites on the side for variety. Air fryers really can do it all.

Air Fryer Meatloaf Recipe
Ingredients
Method
- In a large bowl, gently combine the lean beef, milk, egg, torn bread pieces, onion powder, garlic powder, Worcestershire sauce, salt, pepper, and dry mustard using clean hands. The mixture will be slightly wet—that’s exactly as intended to keep it moist. Mixing until just combined prevents a dense texture.
- Spray your air fryer basket with olive oil spray to ensure easy release. Shape the mixture into an even loaf right in the basket—aim for consistency in thickness so it cooks evenly. No preheating is needed since you shape directly in the basket.
- Cook at 350 °F for 15 minutes. While it cooks, whisk together ketchup and BBQ sauce for the glaze. After the initial cook, brush a thin layer of glaze over the top—don’t worry if you don’t use it all. Return the loaf to the air fryer at 350 °F for 10 more minutes. Use a meat thermometer to confirm an internal temperature of 160 °F.
- Let the meatloaf rest for 5 minutes in the basket after cooking. That resting time helps the juices redistribute and makes slicing neater. Serve with any leftover glaze brushed on each slice for extra flavor.