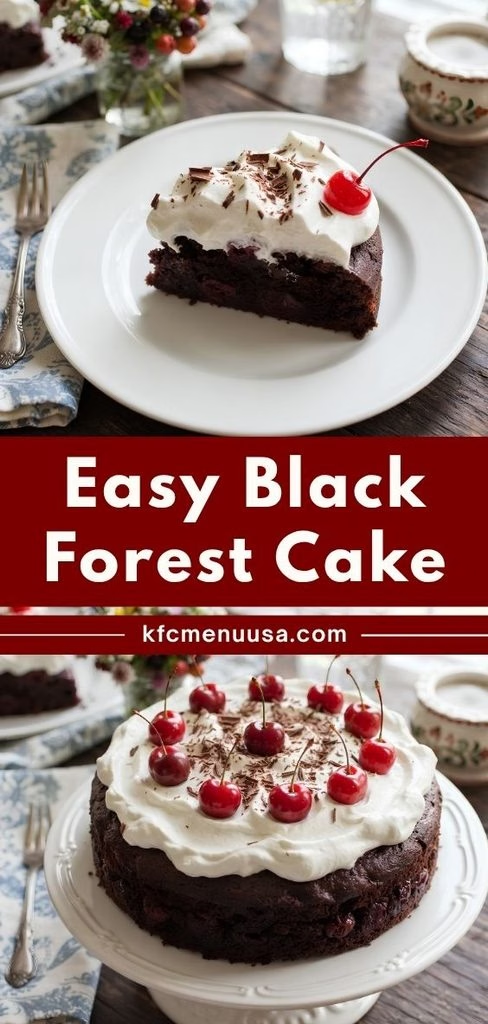
I’ve made my fair share of layered desserts, but this Easy Black Forest Cake Recipe is the one I reach for when I want something that looks fancy without the fuss. I use a boxed cake mix, a can of cherry pie filling, and a few pantry staples, and somehow it still tastes like I spent all afternoon in the kitchen.
The chocolate and cherry combination is just unbeatable, and the whipped cream on top makes every slice feel like a celebration. If you’ve been searching for a simple black forest cake recipe that doesn’t require fancy layering skills, this is it.
Cooking Time
- Prep Time: 5 minutes
- Cook Time: 27 minutes
- Total Time: 32 minutes
Ingredients
- Devil’s food cake mix (15.25 ounces) – this is the chocolate base, and I love that it skips the need to measure out cocoa powder and flour separately
- Eggs (3 large) – these bind the batter together and give the cake its soft, tender crumb
- Cherry pie filling (21 ounces, canned) – the classic fruit layer in any black forest cake recipe, and it keeps the crumb incredibly moist
- Almond extract (1 teaspoon) – just a touch deepens the flavor and gives it that bakery-style aroma
- Whipped topping or heavy cream (8-ounce container, or 1 cup heavy cream whipped fresh) – this is the fluffy, cool finish that balances the rich chocolate
Note: This recipe serves 12.
Equipment You Need
- 9×13-inch baking pan – holds the batter and bakes it evenly into one simple layer
- Large mixing bowl – for combining the cake mix, eggs, pie filling, and almond extract
- Rubber spatula or wooden spoon – helps you stir the batter without overmixing
- Toothpick – checks that the center of the cake is fully baked
- Electric mixer (optional) – useful if you’re whipping your own heavy cream instead of using tub topping

How to Make an Easy Black Forest Cake Recipe?
This is genuinely one of the most forgiving cakes I’ve made, which is exactly why it’s become a regular in my kitchen. There’s no layering, no crumb coat, and no piping involved. You just mix, bake, cool, and top it off.
Preheat and Prepare the Pan
I always start by preheating my oven to 350°F so it’s fully heated by the time my batter is ready. While it warms up, I grease a 9×13-inch pan generously with butter so nothing sticks once it’s baked. This step only takes a minute, but skipping it is one of the easiest ways to end up with a cake that tears when you try to serve it.
Mix the Batter
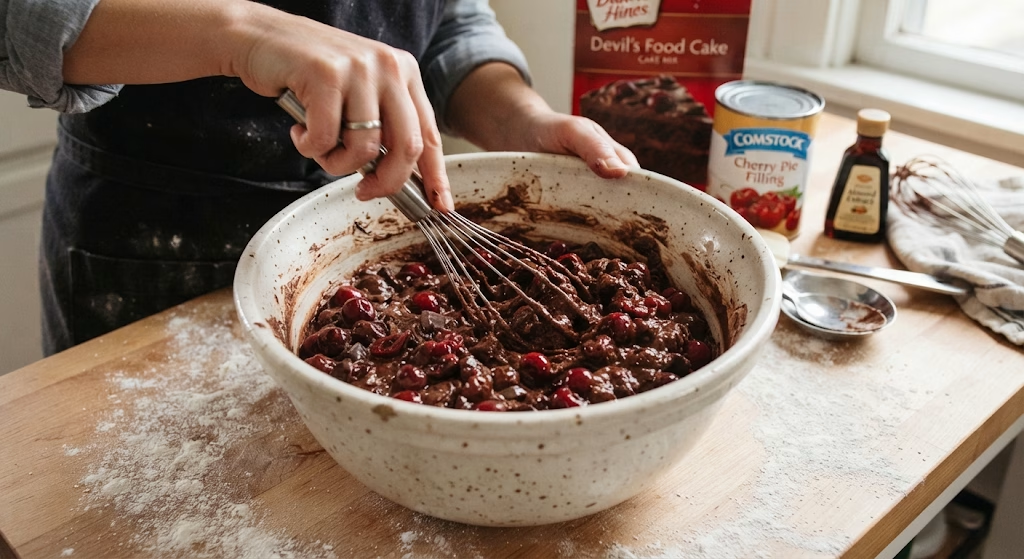
In a large bowl, I combine the devil’s food cake mix, eggs, cherry pie filling, and almond extract. I stir everything together until it’s just combined, making sure there are no dry streaks of cake mix left. The batter will look thicker and chunkier than a typical cake batter because of the cherries, and that’s exactly how it should be.
Bake the Cake
I scoop the batter into my prepared pan and spread it out evenly with a spatula. Then it goes into the oven for 26 to 30 minutes. I start checking around the 26-minute mark by inserting a toothpick into the center. It should come out with a few moist crumbs, not wet batter, but not totally dry either.

Cool Completely
Once it’s out of the oven, I let the cake cool completely on the counter before doing anything else to it. This usually takes about an hour for me. I know it’s tempting to rush this part, but adding whipped cream to a warm cake will melt it instantly and ruin the presentation.
Top with Whipped Cream
When the cake is fully cooled, I spread whipped topping or freshly whipped heavy cream generously over the entire top. I like to swirl it a bit with the back of a spoon so it looks a little rustic and homemade. At this point, the cake is ready to slice and serve.
Additional Tips for Making This Recipe Better
- I always make sure my cake is completely cool before adding the whipped topping, or it slides right off
- I like using full-fat whipped cream because it holds its shape longer than light versions
- When I want a little extra richness, I drizzle some of the cherry juice from the can over the cake before topping it
- I’ve found that chilling the cake for 30 minutes before serving makes slicing much cleaner
- I sometimes swap in a yellow cake mix when I’m craving a lighter, less chocolatey version
Common Mistakes to Avoid
- I used to frost the cake while it was still warm, and the whipped cream melted into a puddle every time I always wait until it’s fully cool now
- I overmixed my batter once and ended up with a denser cake than I wanted, so now I stir just until combined
- I’ve learned not to skip greasing the pan, because even a few stuck corners can ruin a clean slice
- I used to guess on bake time, but checking with a toothpick a few minutes early saves me from drying it out
- I once used light cherry pie filling by accident and found it noticeably less flavorful, so I stick with the regular version now
How to Serve Easy Black Forest Cake
I like to cut this cake into squares and serve it straight from the pan, which keeps things casual and easy for a crowd. For a more polished presentation, I’ll plate individual slices and add a few fresh cherries or a light dusting of shaved chocolate on top.
A mint leaf tucked beside the slice adds a nice pop of color if you’re serving this for a birthday or holiday gathering. This cake also pairs really well with a hot cup of coffee or a scoop of vanilla ice cream on the side.
Variations
- Dairy-free option: use a non-dairy whipped topping and check that your cake mix is dairy-free
- Sugar-free option: use a sugar-free cake mix and a no-sugar-added cherry pie filling
- Boozy twist: for a more traditional black forest cake recipe, brush the cooled cake lightly with kirsch or cherry liqueur before adding the whipped cream
- Extra chocolate: fold mini chocolate chips into the batter for more texture throughout
- Box mix swap: this easy black forest cake recipe with cake mix also works well with a chocolate fudge or dark chocolate cake mix instead of devil’s food
- Betty Crocker version: a Betty Crocker black forest cake works just as well if that’s the brand you keep on hand
If you love easy chocolate desserts like this one, you’ll probably enjoy this chocolate chip cake too — it has that same simple, crowd-pleasing appeal.
Nutritional Information
Here’s a general idea of what one slice of this cake looks like nutritionally, based on 12 servings.
- Calories: 229 kcal
- Protein: 4 grams
- Carbohydrates: 40 grams
- Fat: 7 grams
Make Ahead and Storage
Make Ahead
You can bake the cake itself up to a day in advance and store it, covered and unfrosted, at room temperature. I just wait to add the whipped cream topping until closer to serving time so it stays fresh and fluffy.
Storage
Once topped, I store leftover cake in an airtight container in the refrigerator. It stays fresh and tasty for about 3 to 4 days, and honestly, I think it tastes even better the next day once the flavors settle.
Freezing
I don’t recommend freezing this cake once it has whipped cream on it, since the texture doesn’t hold up well after thawing. If you want to freeze it, wrap the plain baked cake tightly and freeze for up to 2 months, then thaw and top with whipped cream right before serving.
Why You’ll Love This Recipe
This easy black forest cake recipe has earned a permanent spot in my recipe rotation, and here’s why I think you’ll love it too.
- Ease of preparation: with just five ingredients and one bowl, this comes together faster than almost any other cake I make, making it a genuinely small black forest cake recipe in terms of effort, even though it serves a crowd
- No special skills needed: there’s no layering or frosting technique required, so it’s incredibly beginner-friendly
- Versatile for any occasion: I’ve made this for birthdays, potlucks, and random Tuesday cravings, and it fits every single time
- Customizable flavor: you can easily adjust it into a 3 ingredient black forest cake by skipping the almond extract, or dress it up with extra garnishes
- Reliably moist: thanks to the pie filling baked right into the batter, this turns out as one of the most moist black forest cake recipes I’ve tried, every single time
FAQs
Can I make this easy black forest cake recipe without alcohol?
Yes, this version is completely alcohol-free as written. The almond extract gives it plenty of flavor without needing any kirsch or liqueur.
Can I use a different cake mix for this recipe?
Absolutely. While devil’s food is my go-to, a chocolate fudge mix or even a yellow cake mix works well if you want a different flavor profile.
How far in advance can I make this cake?
I usually bake the cake itself up to a day ahead, then add the whipped topping just before serving so it stays nice and fresh.
Can I substitute homemade whipped cream for the tub topping?
Yes, 1 cup of heavy cream whipped to soft peaks works perfectly in place of whipped topping, and I actually prefer the flavor.
Is this a traditional black forest cake recipe?
Not exactly a traditional black forest cake recipe involves multiple layers and kirsch-soaked sponge. This version simplifies all of that into one easy, cherry-studded sheet cake while keeping the same classic flavors.
For another fun chocolate treat that comes together just as easily, check out this chocolate pop tart recipe from the site.

Easy Black Forest Cake Recipe
Ingredients
Method
- I always start by preheating my oven to 350°F so it’s fully heated by the time my batter is ready. While it warms up, I grease a 9×13-inch pan generously with butter so nothing sticks once it’s baked. This step only takes a minute, but skipping it is one of the easiest ways to end up with a cake that tears when you try to serve it.
- In a large bowl, I combine the devil’s food cake mix, eggs, cherry pie filling, and almond extract. I stir everything together until it’s just combined, making sure there are no dry streaks of cake mix left. The batter will look thicker and chunkier than a typical cake batter because of the cherries, and that’s exactly how it should be.
- I scoop the batter into my prepared pan and spread it out evenly with a spatula. Then it goes into the oven for 26 to 30 minutes. I start checking around the 26-minute mark by inserting a toothpick into the center. It should come out with a few moist crumbs, not wet batter, but not totally dry either.
- Once it’s out of the oven, I let the cake cool completely on the counter before doing anything else to it. This usually takes about an hour for me. I know it’s tempting to rush this part, but adding whipped cream to a warm cake will melt it instantly and ruin the presentation.
- When the cake is fully cooled, I spread whipped topping or freshly whipped heavy cream generously over the entire top. I like to swirl it a bit with the back of a spoon so it looks a little rustic and homemade. At this point, the cake is ready to slice and serve.
Notes
- I always make sure my cake is completely cool before adding the whipped topping, or it slides right off
- I like using full-fat whipped cream because it holds its shape longer than light versions
- When I want a little extra richness, I drizzle some of the cherry juice from the can over the cake before topping it
- I’ve found that chilling the cake for 30 minutes before serving makes slicing much cleaner
- I sometimes swap in a yellow cake mix when I’m craving a lighter, less chocolatey version