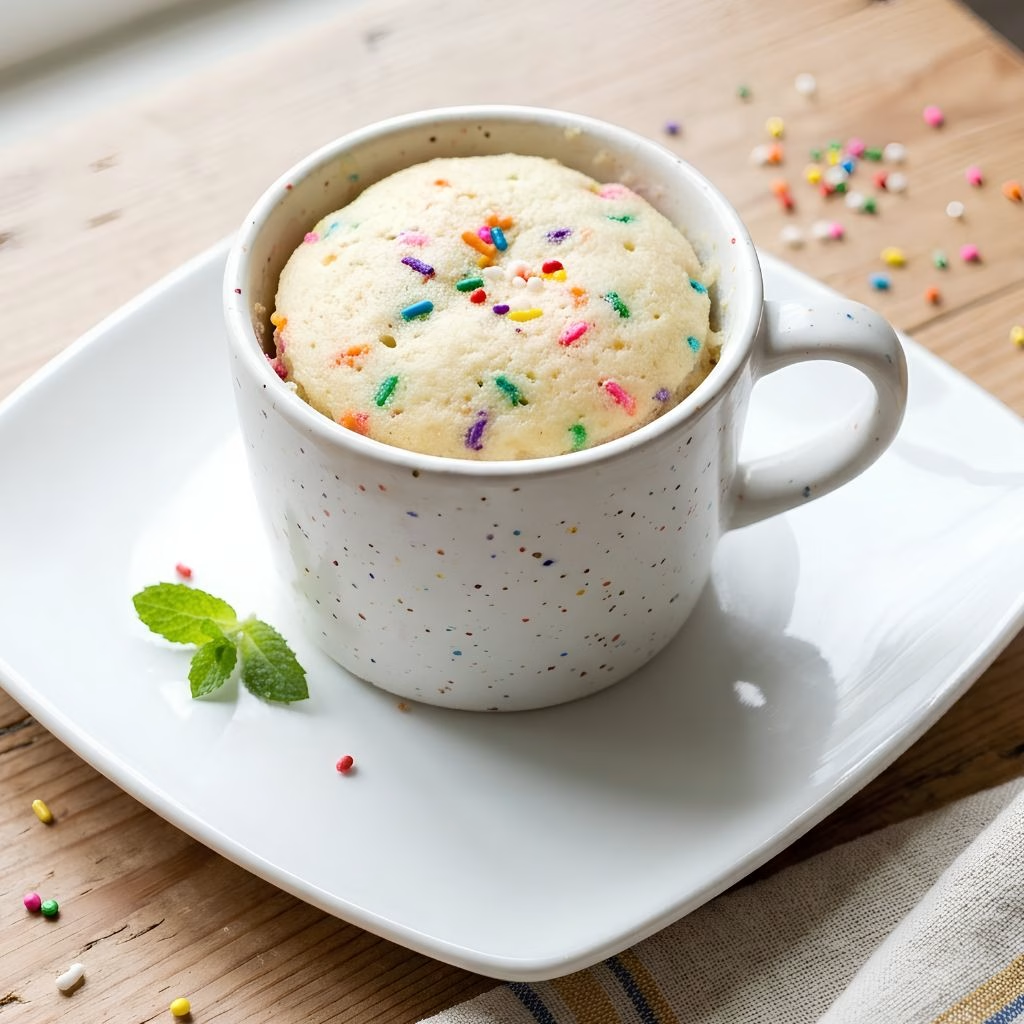
I made this easy kids mug cake on a sleepy afternoon when my little helper wanted something sweet right now. It took me about five minutes from the first scoop of flour to the first happy bite. The cake came out soft, buttery, and tender, with just enough sprinkles to make it feel like a party.
I loved that there was no oven, no mixer, and almost no cleanup, only one mug and a spoon. If you want a simple mug cake recipe that kids can help with, this one is a keeper, and it pairs well with Cranberry White Chocolate Cookies when you want a bigger dessert spread.

Cooking Time
This microwave mug cake recipe is one of the fastest desserts I make. Here is how the time breaks down.
- Prep Time: 3 minutes
- Cooking Time: 2 minutes
- Total Time: 5 minutes
Ingredients
Everything here is a pantry staple, so you can whip this up any time a craving hits. I measured carefully because mug cakes are small and every spoonful counts.
- ¼ cup + 1½ teaspoons all-purpose flour (35 g): gives the cake its soft structure, so spoon and level it.
- 2 tablespoons sugar (25 g): sweetens the cake and keeps the crumb tender.
- ¼ teaspoon baking powder (1 g): lifts the cake so it turns fluffy, not dense.
- A dash of salt: balances the sweetness and makes the vanilla pop.
- 2 tablespoons butter, melted (28 g): adds rich flavor, so let it cool slightly first.
- 3 tablespoons milk (45 ml): makes the batter smooth, and any type of milk works.
- ½ teaspoon vanilla extract (2.5 ml): brings that classic bakery flavor, so use pure vanilla if you can.
- 1 teaspoon sprinkles (4 g): adds color and fun, so fold them in gently at the end.
Note: serves 1
Equipment You Need
You only need a few basic tools, which is part of the charm.
- Microwave-safe ceramic mug: holds the batter and cooks the cake, so pick a wide one.
- Measuring spoons: keep the small amounts of baking powder and vanilla accurate.
- Measuring cups: make it easy to portion the flour.
- Small spoon or fork: mixes the batter and scrapes the bottom of the mug.
- Microwave: cooks the cake in about a minute and a half.
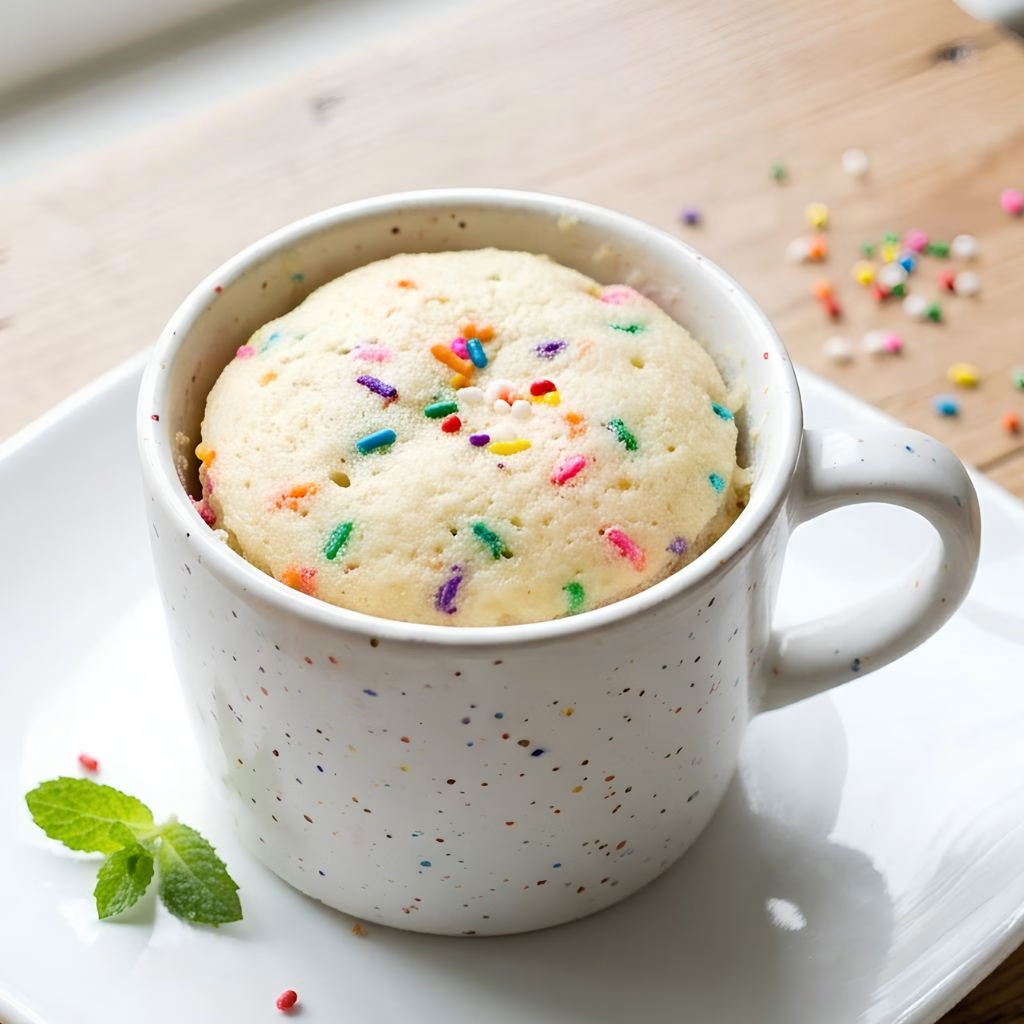
How to Make an Easy Kids Mug Cake Recipe?
Making this cake is quick, and kids can jump in at almost every step. I kept the method simple so even beginners feel confident. Follow the steps in order and you will get a soft, warm cake every time.
Choose the Right Mug
Grab a microwave-safe ceramic mug that holds at least one cup. A wider mug cooks more evenly than a tall, skinny one. Leave plenty of room at the top because the cake rises as it cooks.
Mix the Dry Ingredients
Add the flour, sugar, baking powder, and a dash of salt to the mug. Stir them together with a small spoon until they look evenly blended. This is a great job for kids, because they love stirring.
Add the Wet Ingredients
Pour in the milk, melted butter, and vanilla extract. Stir until the batter is smooth, and scrape the bottom and corners of the mug. Dry flour hides down there, and it makes tough little pockets if you skip this.
Fold in the Sprinkles
Sprinkle in the teaspoon of sprinkles and give the batter one or two gentle stirs. Too much mixing can make the colors bleed into the batter. A light touch keeps the cake bright and cheerful.
Microwave the Cake
Place the mug in the microwave and cook it for 70 to 90 seconds. The top should look just set but still a little shiny. Start with 70 seconds, since every microwave runs a bit differently.
Rest and Serve
Let the mug sit in the microwave for 1 full minute. The cake keeps cooking from the leftover heat and turns soft inside. If the center still looks wet, add 15 to 25 seconds, then rest it again.
Additional Tips for Making This Recipe Better
After testing this cake a few times, I picked up some small habits that make a big difference.
- I always stop cooking a little early, because the cake keeps setting as it cools.
- I start with 70 seconds, then add 15 to 25 seconds only if the center looks wet.
- I use a wide mug, which gave me a more even rise than a narrow one.
- I scrape the bottom of the mug every time, so no dry flour hides under the batter.
- I let the melted butter cool for a few seconds so it never scrambles the batter or cooks the milk unevenly.
- I swapped in cake flour once, and it worked beautifully, giving a slightly softer crumb.
- I let the cake rest the full minute, since that quiet pause is what makes it fluffy.
Common Mistakes to Avoid
Mug cakes are forgiving, but a few slips can change the texture. Here are the ones I ran into myself.
- Overcooking it: I once cooked mine for two full minutes and it turned rubbery, so now I stop at 70 to 90 seconds.
- Skipping the scrape: I used to leave dry flour at the bottom, so now I scrape the whole mug before cooking.
- Using a tiny mug: my first cake bubbled over, so I now choose a mug that holds at least a cup.
- Mixing too hard: heavy stirring made my cake tough, so I stir only until the batter looks smooth.
- Eating it right away: I burned my tongue once, so now I always let it rest for a minute first.
How to Serve Easy Kids Mug Cake Recipe?
This cake tastes great straight from the mug, but a few fun touches make it feel special. I love letting the kids decorate their own. It turns a quick snack into a little activity.
- Add a scoop of vanilla ice cream, which melts into the warm cake.
- Top with whipped cream and a handful of extra sprinkles for a birthday-cake look.
- Drizzle chocolate syrup or caramel sauce over the top for a fancy finish.
- Add fresh berries like strawberries or raspberries for color and a little freshness.
- Serve it in a fun mug, since a colorful cup makes dessert feel like a treat.
- Pair it with a slice of Easy Key Lime Pie when you are serving a crowd and want a small cake for the kids.
Variations
This recipe is flexible, so you can change it to fit your family’s tastes. I tried several swaps, and they all worked well. Here are my favorites.
- Chocolate mug cake: swap a little of the flour for cocoa powder for a simple chocolate mug cake the kids will love.
- Healthier version: use skim milk, cut the sugar in half, or use honey or a sugar substitute.
- Lighter fat: replace the butter with applesauce or coconut oil.
- Whole grain: try white whole wheat flour for a heartier cake.
- Dairy-free: use almond or soy milk with dairy-free butter or coconut oil.
- Nutella swirl: drop a small scoop of Nutella into the center before microwaving.
- Peanut butter: stir in a spoonful for a rich, nutty cake.
- Add-ins: try chocolate chips, shredded coconut, chopped nuts, or a pinch of cinnamon.
- No sprinkles: leave them out if you want a plain vanilla mug cake.
Nutritional Information
Here are the approximate values for one serving of this cake. They can change based on the milk, butter, and add-ins you choose.
- Calories: 458 kcal
- Protein: 5 g
- Carbohydrates: 55 g
- Fat: 24 g
Make Ahead and Storage
This cake is made to be eaten fresh, but a few smart steps can help with planning.
Make Ahead
You can stir the flour, sugar, baking powder, and salt together in advance and keep the mix in a jar. When the craving hits, scoop it into a mug and add the wet ingredients. It saves time and makes the recipe even easier.
Storage
This recipe makes one serving, so leftovers are rare. If you do have some, cover the mug and keep it at room temperature for the same day, or in the fridge for up to 1 day. The texture is best when it is fresh and warm.
Reheating
Warm a leftover cake in the microwave for 10 to 15 seconds. A splash of milk on top keeps it from drying out. Heat it in short bursts so it stays soft.
Freezing
I do not recommend freezing a single mug cake, because the texture turns dry and crumbly. If you want to plan ahead, freeze nothing and keep the dry mix instead. It is much easier to make a fresh cake in minutes.
Why You’ll Love This Recipe?
This little cake has a lot going for it. It is quick, fun, and friendly to beginners. Here is why it has become a favorite in my kitchen.
- Ready in 5 minutes: you go from craving to cake in minutes, which is perfect for after-school snacks or sudden sweet tooth moments.
- Kid-friendly: children can measure, stir, and sprinkle, so it is a great first baking project and builds kitchen confidence.
- Almost no cleanup: you only need one mug and a spoon, so there is no stack of bowls and pans afterward.
- Easy to customize: you can make it dairy-free, lighter, or chocolatey, and add your favorite mix-ins to suit any craving.
- Perfect single serving: it makes one portion, so there is no leftover cake tempting you and no waste.
FAQs
Can I use a different type of milk?
Yes, any milk works in this recipe, including dairy-free options like almond or soy milk. The cake stays soft and tender either way.
Is this a 3 ingredient mug cake?
No, this version uses a few more pantry staples for a fluffier, more flavorful cake. A 3 ingredient mug cake can work in a pinch, but I find this recipe tastes much better.
Can I make it without sprinkles?
Absolutely. The sprinkles only add color and fun, so leave them out for a classic vanilla mug cake. The flavor stays the same.
Why is my mug cake rubbery?
It was most likely cooked too long. Stop when the top looks set but still a little shiny, then let it rest for a minute.
Can I use cake flour instead of all-purpose flour?
Yes, cake flour works well and gives a slightly softer crumb. Use the same amount as the all-purpose flour in the recipe.

Easy Kids Mug Cake Recipe
Ingredients
Method
- Grab a microwave-safe ceramic mug that holds at least one cup. A wider mug cooks more evenly than a tall, skinny one. Leave plenty of room at the top because the cake rises as it cooks.
- Add the flour, sugar, baking powder, and a dash of salt to the mug. Stir them together with a small spoon until they look evenly blended. This is a great job for kids, because they love stirring.
- Pour in the milk, melted butter, and vanilla extract. Stir until the batter is smooth, and scrape the bottom and corners of the mug. Dry flour hides down there, and it makes tough little pockets if you skip this.
- Sprinkle in the teaspoon of sprinkles and give the batter one or two gentle stirs. Too much mixing can make the colors bleed into the batter. A light touch keeps the cake bright and cheerful.
- Place the mug in the microwave and cook it for 70 to 90 seconds. The top should look just set but still a little shiny. Start with 70 seconds, since every microwave runs a bit differently.
- Let the mug sit in the microwave for 1 full minute. The cake keeps cooking from the leftover heat and turns soft inside. If the center still looks wet, add 15 to 25 seconds, then rest it again.
Notes
- I always stop cooking a little early, because the cake keeps setting as it cools.
- I start with 70 seconds, then add 15 to 25 seconds only if the center looks wet.
- I use a wide mug, which gave me a more even rise than a narrow one.
- I scrape the bottom of the mug every time, so no dry flour hides under the batter.
- I let the melted butter cool for a few seconds so it never scrambles the batter or cooks the milk unevenly.
- I swapped in cake flour once, and it worked beautifully, giving a slightly softer crumb.
- I let the cake rest the full minute, since that quiet pause is what makes it fluffy.