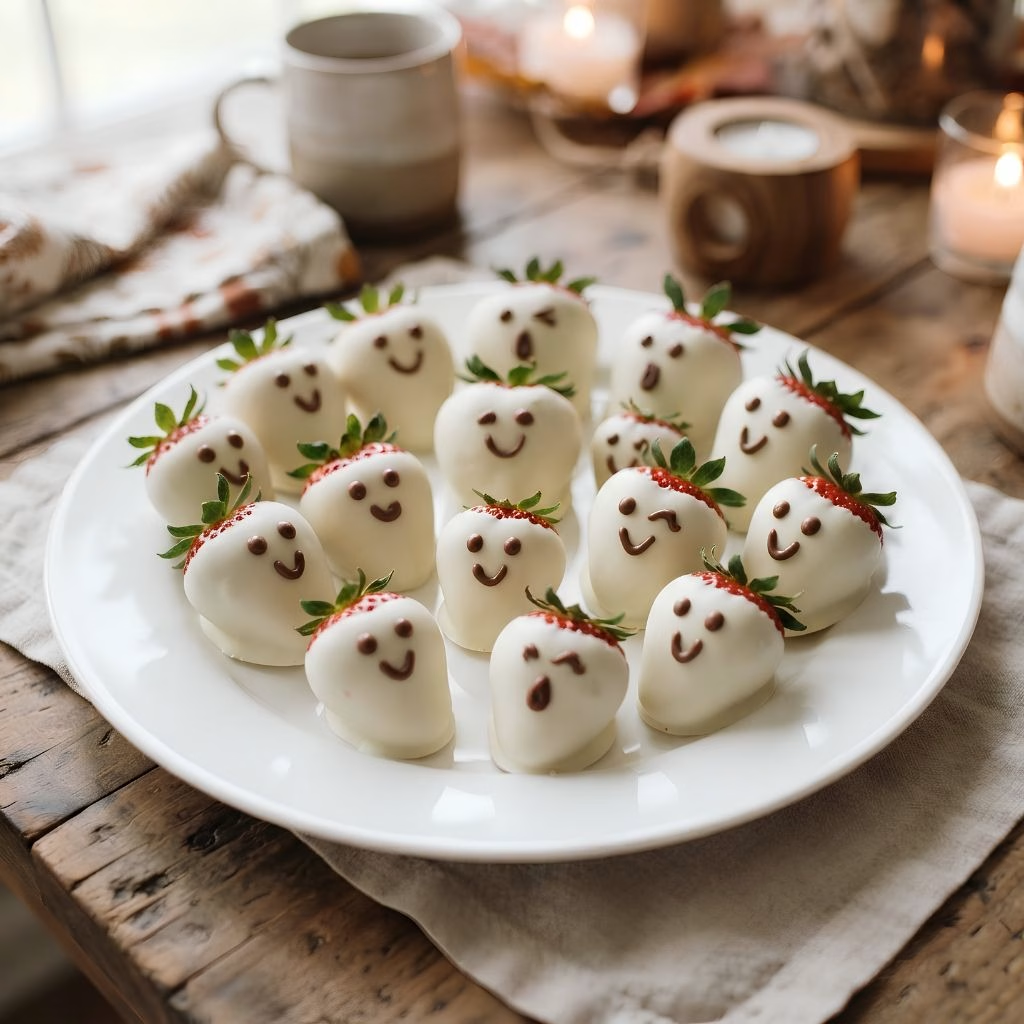
I made this Easy Strawberry Ghost Recipe last Halloween, and I still smile when I think about them. Juicy berries, a smooth white chocolate coat, and tiny chocolate faces make them look spooky and sweet at the same time.
I loved how fast they came together, and my kids could jump in and help. The plate was empty before any of the candy bowls were touched. If you want a fun, lighter treat for your party table, I promise these white chocolate strawberry ghosts are worth making.
Cooking Time
Here is how long this simple recipe takes from start to finish. Most of the work is dipping, so it moves fast.
- Prep Time: 10 minutes
- Cooking Time: 5 minutes
- Total Time: 15 minutes
Ingredients
These ingredients are short and simple. Each one has a job, so I added a quick tip next to it.
- 1 pint fresh strawberries, rinsed and dried: Choose firm, bright berries because they will not ripen once picked.
- 8 ounces white melting chocolate: Melting chocolate sets smoother and shinier than regular chips.
- 1 ounce milk chocolate melting chocolate: This makes the eyes and mouths stand out clearly.
- Parchment paper: It stops the ghosts from sticking while they set.
- Cooking spray (optional): A light mist keeps the parchment from rolling up.
Note: serves several (makes about 12 ghosts)
Equipment You Need
You probably have everything in your kitchen already. Here is what I reach for every time.
- Baking sheet: Holds the parchment and the dipped ghosts while they set.
- Small pot: Melts the white chocolate gently over low heat.
- Rubber spatula: Lets you stir the chocolate constantly without scorching it.
- Paper towels: Dry the berries so the chocolate sticks.
- Hot pad: Keeps your counter safe from the hot pot.
- Small zip-top bag: Works as a quick piping bag for the faces.
- Scissors: Snip a tiny corner off the bag for neat, thin lines.
How to Make Easy Strawberry Ghost Recipe?
This recipe has just a few steps, and each one is easy. The secret is patience while melting the chocolate. Set everything up first, and the dipping part feels like a breeze.
Rinse and Dry the Strawberries
Start by rinsing the strawberries under cool water. Place them on a paper towel and pat them until they are completely dry. Even a few water drops can make the chocolate slide right off.
Prepare Your Baking Sheet
Line a baking sheet with parchment paper. If the paper keeps curling, spray the pan lightly with cooking spray first. Place the berries and a hot pad right beside the pan so everything is within reach.
Melt the White Chocolate
Add only a few pieces of white melting chocolate to a small pot over low heat. Stir constantly with a rubber spatula until it turns smooth. It can take about five minutes, so keep your arm ready, then take the pot off the heat.
Dip and Drag the Ghost Tails
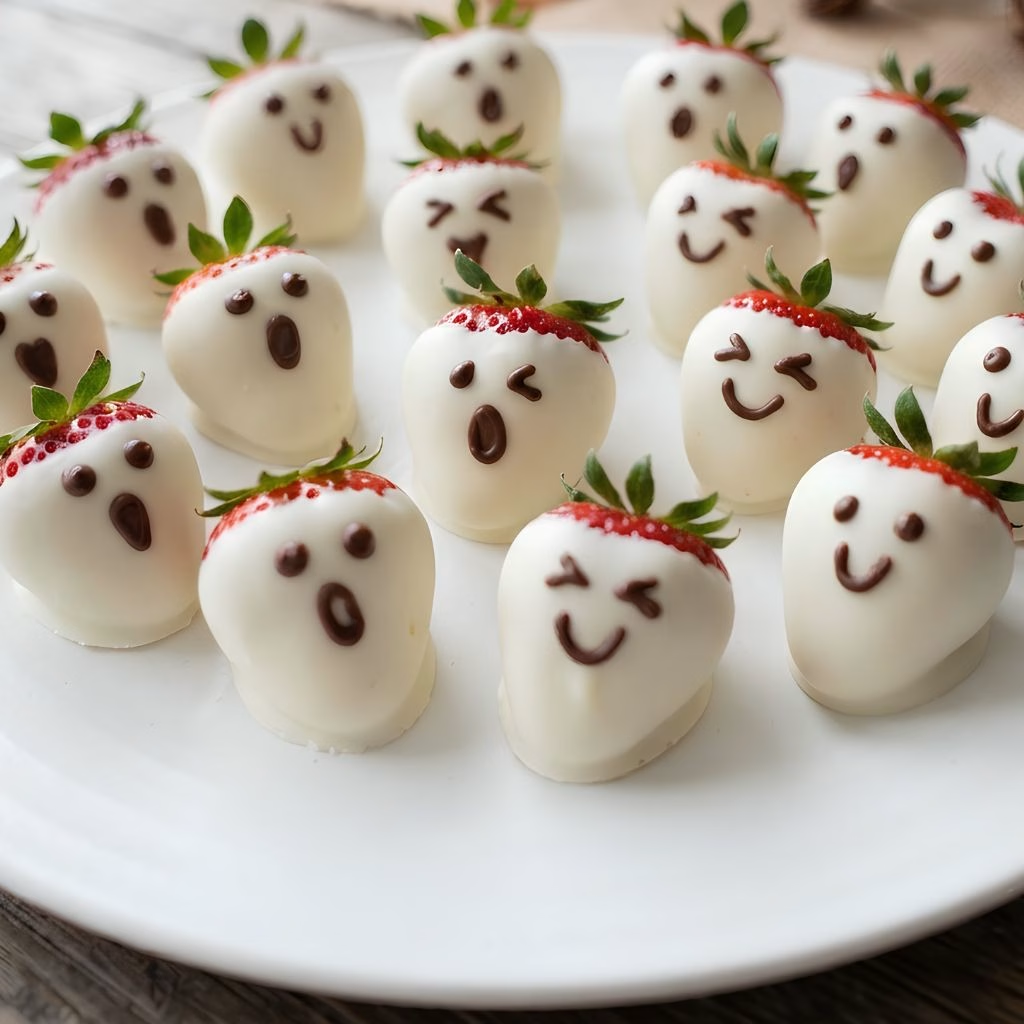
Tilt the pot a little so the chocolate pools to one side. Hold a strawberry by the stem and dip both sides into the chocolate. Set it on the parchment and drag it slightly to form a wavy ghost tail.
Let the Ghosts Set
Repeat the dipping with every strawberry, leaving a little space between each one. Let them sit on the counter until the coating turns hard. This usually takes a short while, so use that time to melt the face chocolate.
Melt the Chocolate for the Faces
Melt the milk chocolate until it is smooth and silky. Pour it into a small zip-top bag and push it down to one corner. Snip a tiny hole in that corner to get ready for piping.
Pipe the Ghost Faces
Gently squeeze two dots for the eyes on each ghost. Add a small mouth below, either round and surprised or a wiggly smile. Try a different expression on each berry so every ghost has its own personality.
Additional Tips for Making This Recipe Better
After making these a few times, I picked up some small tricks that really help. These tips will save you time and a little frustration.
- I always dry my strawberries twice, because a damp berry never holds the chocolate well.
- I melt only a few pieces of chocolate at a time, which keeps it smooth instead of clumpy.
- I hold each berry by the stem, so there is less mess and my fingers stay clean.
- I tilt the pot to the side, which gives me a deeper pool for dipping.
- I draw a tiny test dot on parchment first, so I know the face chocolate flows well.
- I let the kids pipe the faces, since the silly expressions are half the fun.
Common Mistakes to Avoid
These small slips can change how your ghosts turn out. I made a few of them myself, so learn from me.
- Using wet strawberries: I once skipped drying them, and the chocolate slid right off. Pat them completely dry every time.
- Melting on high heat: I scorched a batch this way. Keep the heat low and stir constantly.
- Letting the parchment curl: The paper rolled up and ruined my tails. A light spray of cooking spray holds it down.
- Cutting a big hole in the bag: My first eyes looked like blobs. Snip only a tiny corner for thin lines.
- Piping before the coating sets: The faces smudged on me once. Wait until the white coating is hard.
How to Serve an Easy Strawberry Ghost Recipe?
These ghosts look adorable on a Halloween table, and they are just as fun on a dessert board. Here are my favorite ways to show them off.
Arrange them on a black plate so the white coating pops against the dark color. Pair them with a bowl of mixed berries and some fun treats, like Ghost Fruit Skewers. For a party table, scatter a few spooky candies around the plate, or tuck a small paper sign in front that says “Boo-tiful Berries.” They also make a cute topper next to a glass of strawberry ghost drink for kids.
Variations
You can switch up this recipe in so many ways. Here are some ideas to match your diet or your mood.
- Dairy-free: Use dairy-free white chocolate and dairy-free dark chocolate for the faces.
- Sugar-free: Choose sugar-free melting chocolate to cut down on the sweetness.
- Dark chocolate faces: Swap the milk chocolate for dark chocolate for a bolder look.
- Ghost face strawberries: Pipe wide-open mouths and big eyes to get an extra dramatic scream.
- Strawberry mummies: Drizzle thin white chocolate lines across a berry and add two dots for eyes.
- Strawberry watermelon ghost: Dip chunks of watermelon the same way for a fresh, juicy twist.
- Ghost strawberry cheesecake: Serve one ghost on top of a mini cheesecake cup for a fancy dessert.
- Candy eyes: Press candy eyes into the wet coating if you want a faster, cuter face.
- Ghost strawberry bubblicious: Add a few drops of pink or berry-flavored candy coating on the tails for a bubblegum-style pop of color.
- Strawberry Halloween costume: Dress a few berries up with tiny candy hats or sprinkles, like little costumed guests at the party.
- Banana twist: For another spooky fruit idea, try this Easy Banana Ghost Recipe.
Nutritional Information
Here is a rough idea of what is in each ghost. These numbers are estimates and will change with the brand of chocolate you use.
- Calories: about 75 per ghost
- Protein: about 1 g
- Carbohydrates: about 9 g
- Fat: about 4 g
Make Ahead and Storage
These ghosts are easy to prepare before a party. Use these simple guidelines to keep them fresh.
Make Ahead
You can make ghosts a few hours before your party. Let them set fully, then keep them in a cool place. This way, you are not rushing right before guests arrive.
Storage
Keep leftover ghosts in an airtight container in the fridge. Place parchment between the layers so they do not stick. They taste best within a day or two, while the berries are still firm.
Freezing
I do not freeze these because the berries turn soft and watery when they thaw. The coating can also lose its shine. It is much better to make a fresh small batch.
Reheating
There is no need to reheat the finished ghosts. If you have leftover melted chocolate, gently warm it on low heat while stirring. It will turn smooth again for another round of dipping.
Why You’ll Love This Recipe?
This recipe is a hit for many reasons. Here are the ones that win me over every time.
- Super quick: You only need about 15 minutes from start to finish. That makes it a great last-minute treat for a busy Halloween night.
- Few ingredients: You need strawberries and a bit of melting chocolate. There is no baking, no oven, and no fancy skills.
- Kid friendly: Children love dipping, dragging, and drawing the faces. It becomes a cute activity that everyone enjoys together.
- Lighter treat: Fresh fruit adds a juicy bite among all the heavy candy. It is a nice balance for a sweet-filled holiday.
- Easy to customize: You can change the faces, the chocolate, or even the fruit. Every batch can look different and still taste great.
FAQs
Can I use regular white chocolate chips instead of melting chocolate?
Yes, but melting chocolate gives a smoother and easier coat. Chips can turn thick, so melt them slowly on low heat.
Why is my chocolate not sticking to the strawberries?
The berries are usually still wet. Dry them well with a paper towel before dipping.
How long do strawberry ghosts take to set?
They set on the counter in a short while, once the coating turns hard to the touch. Wait for that before piping the faces.
Can I make these ahead of time?
Yes, you can make them a few hours before serving. Keep them in a cool spot or the fridge until you are ready.
What can I use instead of a piping bag for the faces?
A small zip-top bag with a tiny snipped corner works perfectly. A toothpick also works for drawing simple dots and smiles.

Easy Strawberry Ghost Recipe
Ingredients
Method
- Start by rinsing the strawberries under cool water. Place them on a paper towel and pat them until they are completely dry. Even a few water drops can make the chocolate slide right off.
- Line a baking sheet with parchment paper. If the paper keeps curling, spray the pan lightly with cooking spray first. Place the berries and a hot pad right beside the pan so everything is within reach.
- Add only a few pieces of white melting chocolate to a small pot over low heat. Stir constantly with a rubber spatula until it turns smooth. It can take about five minutes, so keep your arm ready, then take the pot off the heat.
- Tilt the pot a little so the chocolate pools to one side. Hold a strawberry by the stem and dip both sides into the chocolate. Set it on the parchment and drag it slightly to form a wavy ghost tail.
- Repeat the dipping with every strawberry, leaving a little space between each one. Let them sit on the counter until the coating turns hard. This usually takes a short while, so use that time to melt the face chocolate.
- Melt the milk chocolate until it is smooth and silky. Pour it into a small zip-top bag and push it down to one corner. Snip a tiny hole in that corner to get ready for piping.
- Gently squeeze two dots for the eyes on each ghost. Add a small mouth below, either round and surprised or a wiggly smile. Try a different expression on each berry so every ghost has its own personality.
Notes
- I always dry my strawberries twice, because a damp berry never holds the chocolate well.
- I melt only a few pieces of chocolate at a time, which keeps it smooth instead of clumpy.
- I hold each berry by the stem, so there is less mess and my fingers stay clean.
- I tilt the pot to the side, which gives me a deeper pool for dipping.
- I draw a tiny test dot on parchment first, so I know the face chocolate flows well.
- I let the kids pipe the faces, since the silly expressions are half the fun.