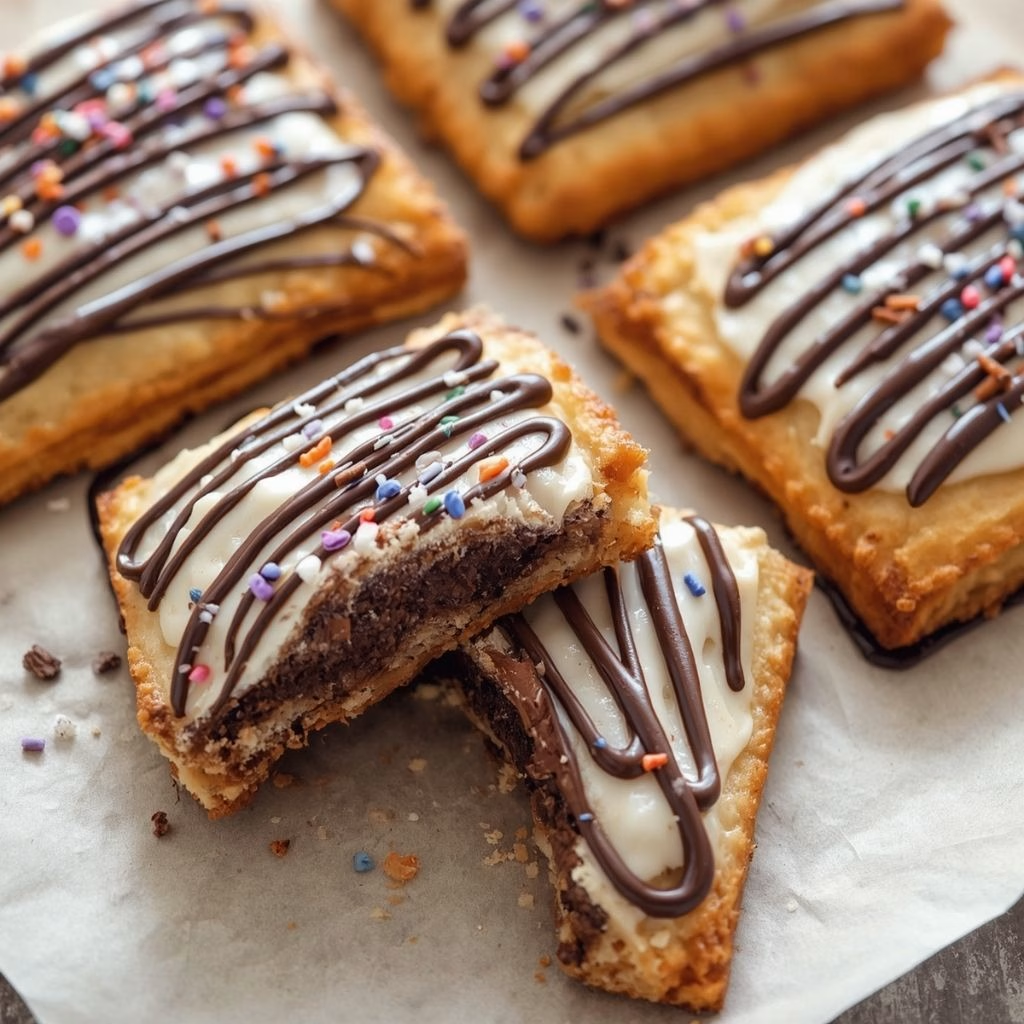
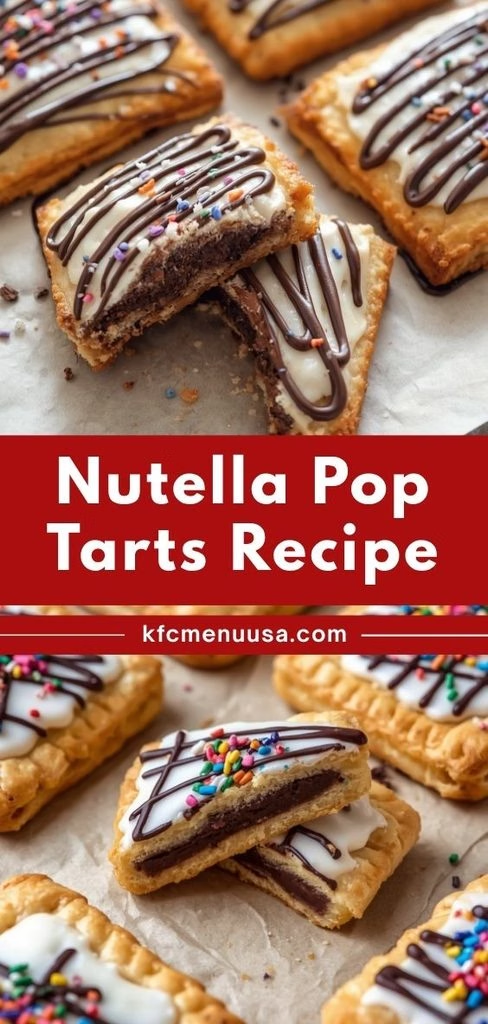
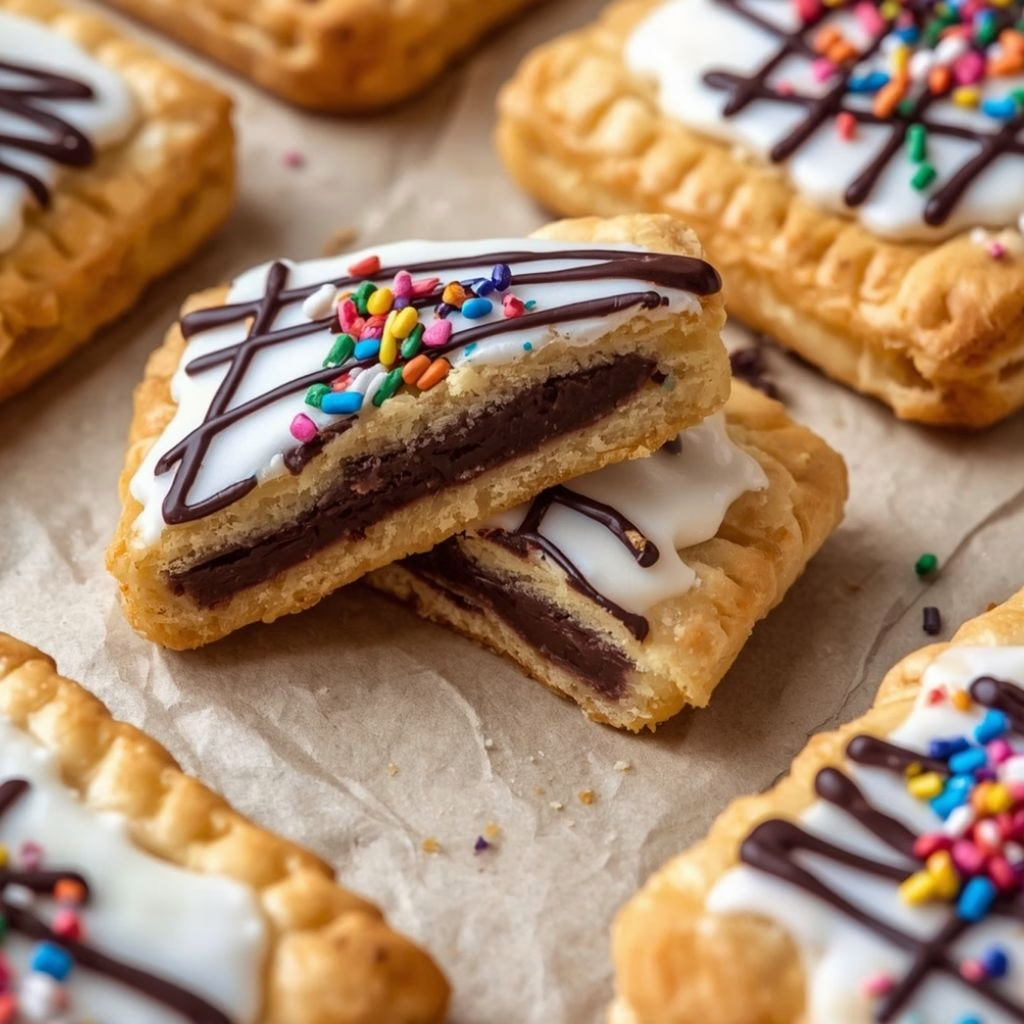
I still remember the first time I pulled a tray of this Nutella Pop Tart Recipe out of the oven. The kitchen smelled like a bakery and the Nutella had gone all warm and glossy inside a golden, flaky crust. I never thought I’d say a copycat breakfast treat could beat the boxed kind, but here we are.
These homemade Nutella pop tarts are buttery, chocolatey, and honestly kind of addictive once you start making them. I make a batch almost every weekend now, and I’m walking you through exactly how I do it.
Cooking Time
- Prep Time: 20 minutes
- Cook Time: 20 minutes
- Total Time: 40 minutes (plus chilling time for the dough)
Ingredients
- 2 sheets pie dough or puff pastry, chilled – puff pastry gives you extra flaky layers, while pie dough keeps things classic and sturdy
- 3/4 cup Nutella – the star of the filling, so use a good quality hazelnut spread for the best flavor
- 1 egg, beaten with 1 tablespoon water – this egg wash gives the crust that shiny, golden bakery look
- 2 tablespoons granulated sugar – sprinkled on top before baking for a light, sweet crunch
- 1 cup powdered sugar – for the simple icing drizzle once the pastries cool
- 2 to 3 tablespoons milk – thins the icing to the right pourable consistency
- 1/2 teaspoon vanilla extract – adds a warm, rounded flavor to the icing
- Sprinkles, optional – purely for fun and a bit of color on top
Note: This recipe makes about 8 pop tarts, so it’s perfect for a small family breakfast or an afternoon snack for the kids.
Equipment You Need
- Rolling pin – helps you roll the pastry dough out evenly without tearing it
- Baking sheet – gives the pop tarts a flat, even surface to bake on
- Parchment paper – keeps the pastries from sticking and makes cleanup easy
- Pastry brush – for spreading the egg wash smoothly over the dough
- Fork – used to crimp and seal the edges of each pop tart
- Pizza cutter or sharp knife – for cutting clean, straight-edged rectangles
- Small mixing bowl – for whisking together the egg wash or icing
- Cooling rack – lets air circulate so the bottoms don’t turn soggy
How to Make Nutella Pop Tarts Recipe?
Making these at home is a lot simpler than it looks, and most of the work is just rolling, filling, and sealing. I promise the process goes fast once your dough is chilled and ready. Here’s exactly how I put mine together every time.
Prepare the Dough
Start by rolling your chilled pie dough or puff pastry out on a lightly floured surface until it’s about an eighth of an inch thick. Keeping the dough cold is important here, since warm dough gets sticky and hard to shape. If it starts to soften while you’re working, pop it back in the fridge for a few minutes before continuing.
Cut the Rectangles
Using a pizza cutter or sharp knife, slice the dough into even rectangles, roughly three by four inches each. Make sure you cut an even number, since you’ll need a top and bottom piece for every pop tart. I like keeping a ruler nearby so all my pieces match up neatly when I seal them later.
Add the Nutella Filling
Spoon about a tablespoon of Nutella onto half of your rectangles, leaving a small border around the edges. Don’t overfill them, or the filling will ooze out during baking. This is also where homemade pop tart filling ideas come in handy if you want to switch things up, like swirling in a little fruit jam alongside the Nutella.
Seal the Edges
Place a second rectangle of dough on top of each filled piece, then press the edges together firmly. Knowing how to seal homemade pop tarts properly makes all the difference, so crimp the border with the tines of a fork all the way around. This locks the filling in and gives you that classic pop tart edge.
Chill Before Baking
Transfer the assembled pop tarts to your parchment-lined baking sheet and pop them in the fridge for about ten minutes. This little chill helps the dough hold its shape in the oven instead of puffing unevenly. I usually preheat my oven to 375 degrees Fahrenheit during this step.
Brush and Bake
Brush the tops with your egg wash and sprinkle a little sugar over each one. Bake for 18 to 22 minutes, until the pastries are deeply golden and flaky. Let them cool on the tray for five minutes before moving them to a cooling rack.
Add the Icing
Once the pop tarts have cooled completely, whisk together the powdered sugar, milk, and vanilla until smooth. Drizzle or spread the icing over the top of each pastry, then add sprinkles right away before the icing sets.
Additional Tips for Making This Recipe Better
I’ve made these more times than I can count, and a few small habits really improved my results.
- I always chill my dough twice, once before rolling and once after assembling, since it keeps the layers flaky instead of greasy.
- I like using puff pastry Nutella pop tarts when I want an extra light, layered texture instead of a denser pie crust bite.
- I never skip the egg wash, because it’s what gives that beautiful golden shine you see in bakery versions.
- I make sure my Nutella is at room temperature before filling, since cold Nutella is much harder to spread evenly.
- I always poke a couple of small vent holes in the top layer so steam can escape instead of splitting the dough.
Common Mistakes to Avoid
- I’ve overfilled my pop tarts before, and the Nutella leaked everywhere in the oven, so I now stick to about a tablespoon per pastry.
- I forgot to seal the edges tightly once, and the filling bubbled straight out the sides while baking.
- I tried skipping the chilling step when I was in a hurry, and the pastries lost their shape and turned out flat.
- I’ve used dough that was too warm, which made it stretch instead of cut cleanly, so cold dough really is non-negotiable.
- I added icing while the pastries were still warm, and it melted right off instead of setting into a nice glaze.
How to Serve Nutella Pop Tarts?
I love serving these slightly warm, right after the icing has set but before it fully hardens, since the Nutella inside is still soft and gooey. For presentation, I like stacking two or three on a plate with a light dusting of powdered sugar and a few fresh berries on the side for color.
A small drizzle of extra melted Nutella over the top makes them look extra bakery-style if you’re serving guests. They also pair nicely with a cup of coffee or hot chocolate for a cozy breakfast spread.
Variations
- Swap the filling for strawberry or grape pop tart recipe style jam if you want a fruity version instead of chocolate
- Try sourdough Nutella pop tarts using a sourdough discard pastry base for a slightly tangy, bakery-style crust
- Use heart-shaped cutters to make homemade heart pop tarts for Valentine’s Day or an anniversary breakfast
- Mix crushed hazelnuts into the Nutella filling for extra crunch and texture
- Make a big batch as a sheet pan pop tart recipe by baking one large sheet and slicing it into squares after baking
- Go dairy-free by using a dairy-free puff pastry and a dairy-free chocolate hazelnut spread
- Add a pinch of cinnamon to the icing for a warmer, spiced finish
Nutritional Information
Here’s a general idea of what one pop tart looks like nutritionally, though this will vary based on the exact brands you use.
- Calories: approximately 320 per pastry
- Protein: approximately 4 grams
- Carbohydrates: approximately 38 grams
- Fat: approximately 17 grams
Make Ahead and Storage
You can prepare the assembled, unbaked pop tarts a day ahead and keep them covered in the fridge until you’re ready to bake. This is a great option if you want fresh pastries in the morning without doing all the prep at once.
Once baked, store leftover pop tarts in an airtight container at room temperature for up to two days, or in the fridge for up to five days. Reheat them in a toaster or oven for a few minutes to bring back that fresh-baked crispness.
To freeze, place unbaked pop tarts in a single layer on a tray until solid, then transfer them to a freezer bag for up to two months. Bake straight from frozen, adding a few extra minutes to the baking time.
Why You’ll Love This Recipe?
This recipe has become a regular in my kitchen for a handful of reasons, and I think you’ll feel the same way once you try it.
- It’s easier than it looks, since the dough does most of the heavy lifting and the filling takes just a minute to add.
- It’s incredibly versatile, letting you swap Nutella for jam, fruit, or even a cinnamon sugar filling depending on your mood.
- It works for both breakfast and dessert, so you’re never stuck wondering when to serve it.
- Kids and adults both love it, which makes it a reliable pick for family mornings or casual get-togethers.
- It reheats beautifully, so leftovers taste just as good the next day straight from the toaster.
FAQs
Can I use puff pastry instead of pie dough?
Yes, puff pastry Nutella pop tarts turn out beautifully flaky and are a great substitute if you prefer a lighter, more layered texture.
How do I keep the filling from leaking out?
Make sure you don’t overfill each pastry and seal the edges tightly with a fork, since this is the key to a clean bake.
Can I make a fruit version instead of chocolate?
Absolutely, a fruit pop tart recipe using strawberry, grape, or raspberry jam works just as well with this same dough and method.
Do I have to add icing?
No, the icing is optional. Some people prefer them plain or with just a dusting of powdered sugar instead.
Can I make these ahead of time for a party?
Yes, you can assemble them the day before and refrigerate, or freeze unbaked pastries and bake fresh whenever you need them.

Nutella Pop Tart Recipe
Ingredients
Method
- Start by rolling your chilled pie dough or puff pastry out on a lightly floured surface until it’s about an eighth of an inch thick. Keeping the dough cold is important here, since warm dough gets sticky and hard to shape. If it starts to soften while you’re working, pop it back in the fridge for a few minutes before continuing.
- Using a pizza cutter or sharp knife, slice the dough into even rectangles, roughly three by four inches each. Make sure you cut an even number, since you’ll need a top and bottom piece for every pop tart. I like keeping a ruler nearby so all my pieces match up neatly when I seal them later.
- Spoon about a tablespoon of Nutella onto half of your rectangles, leaving a small border around the edges. Don’t overfill them, or the filling will ooze out during baking. This is also where homemade pop tart filling ideas come in handy if you want to switch things up, like swirling in a little fruit jam alongside the Nutella.
- Place a second rectangle of dough on top of each filled piece, then press the edges together firmly. Knowing how to seal homemade pop tarts properly makes all the difference, so crimp the border with the tines of a fork all the way around. This locks the filling in and gives you that classic pop tart edge.
- Transfer the assembled pop tarts to your parchment-lined baking sheet and pop them in the fridge for about ten minutes. This little chill helps the dough hold its shape in the oven instead of puffing unevenly. I usually preheat my oven to 375 degrees Fahrenheit during this step.
- Brush the tops with your egg wash and sprinkle a little sugar over each one. Bake for 18 to 22 minutes, until the pastries are deeply golden and flaky. Let them cool on the tray for five minutes before moving them to a cooling rack.
- Once the pop tarts have cooled completely, whisk together the powdered sugar, milk, and vanilla until smooth. Drizzle or spread the icing over the top of each pastry, then add sprinkles right away before the icing sets.
Notes
- I always chill my dough twice, once before rolling and once after assembling, since it keeps the layers flaky instead of greasy.
- I like using puff pastry Nutella pop tarts when I want an extra light, layered texture instead of a denser pie crust bite.
- I never skip the egg wash, because it’s what gives that beautiful golden shine you see in bakery versions.
- I make sure my Nutella is at room temperature before filling, since cold Nutella is much harder to spread evenly.
- I always poke a couple of small vent holes in the top layer so steam can escape instead of splitting the dough.