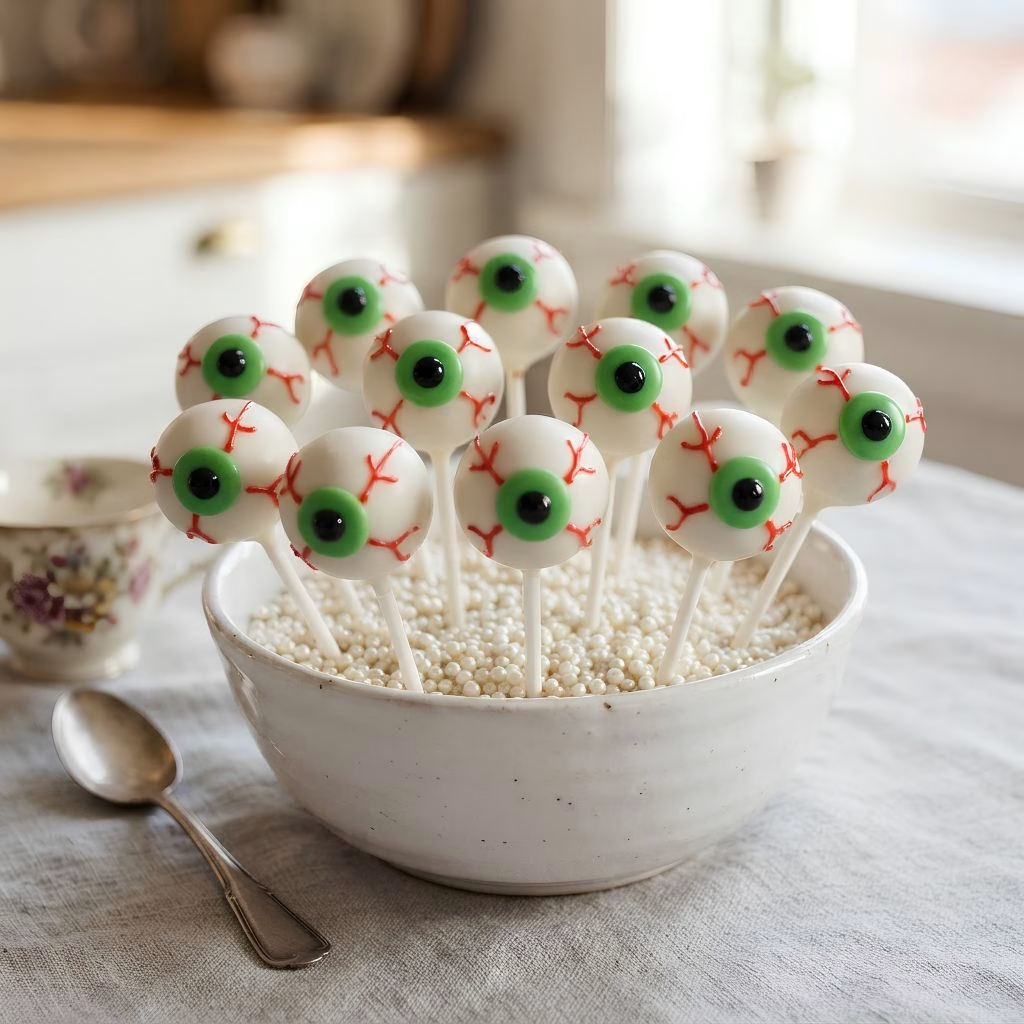
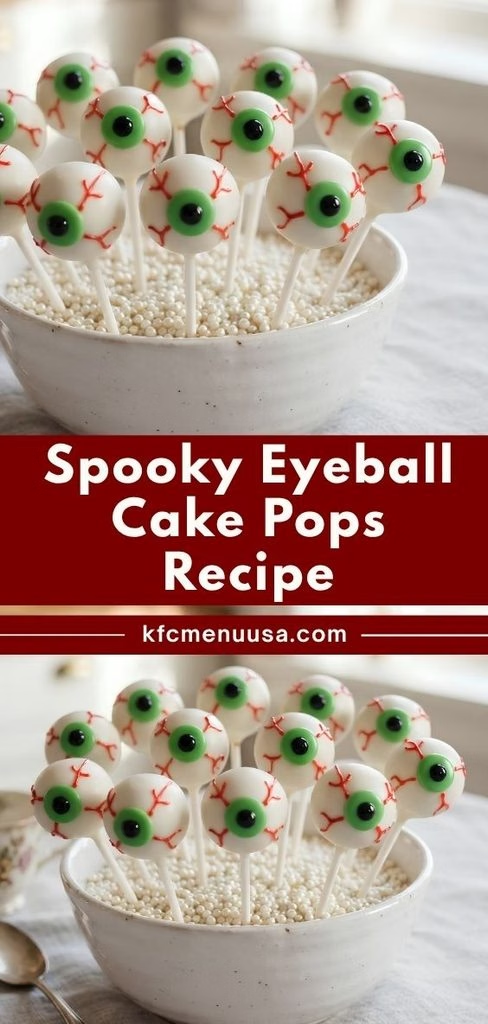
I made this Spooky Eyeball Cake Pops Recipe for the first time for my kid’s classroom Halloween party, and I haven’t stopped making them since. They’re honestly one of the easiest ways I know to turn a plain cake mix into something that gets gasps the second the tray hits the table.
I love that I don’t need any fancy piping skills, just a steady hand and a little patience while they chill. If you’ve been hunting for a halloween cake pops recipe that looks impressive but doesn’t take all day, this is the one I keep coming back to every October.
Cooking Time
- Prep Time: 30 minutes
- Cooking Time: 30 minutes (for baking the cake)
- Total Time: 2 hours 30 minutes (includes freezing and setting time)
Ingredients
- 1 box cake mix (any flavor, red velvet gives a great creepy tint) — the base for your cake pops, prepared according to the package directions
- 1 cup frosting (vanilla or cream cheese) — binds the crumbled cake together into a moldable dough
- 16 ounces white chocolate melting wafers — creates the smooth outer coating that mimics the white of an eye
- Green candy melts or icing gel — used for the colored iris in the center of each eyeball
- Black gel icing or black candy melts — forms the pupil at the center of the iris
- Red gel icing — draws the thin bloodshot veins across the white coating
- Lollipop sticks or cake pop sticks — gives you something to hold while dipping and displaying
Note: this recipe serves about 12, making roughly 24 eyeball cake pops in total.
Equipment You Need
- Large mixing bowl — for crumbling the cake and blending in the frosting
- Rubber spatula — helps work the frosting evenly through the cake crumbs
- Small cookie scoop — keeps every cake ball the same consistent size
- Parchment-lined baking sheet — gives you a clean surface for freezing and setting
- Microwave-safe bowls — for melting your white, green, and black candy coatings
- Toothpicks or a fine paintbrush — for adding small decorative details like veins
How to Make Spooky Eyeball Cake Pops Recipe?
This recipe comes together in stages, so don’t worry if it feels like a lot of steps at first glance. Once you’ve done it once, the whole process becomes second nature. Here’s exactly how I build mine from start to finish.
Bake and Cool the Cake
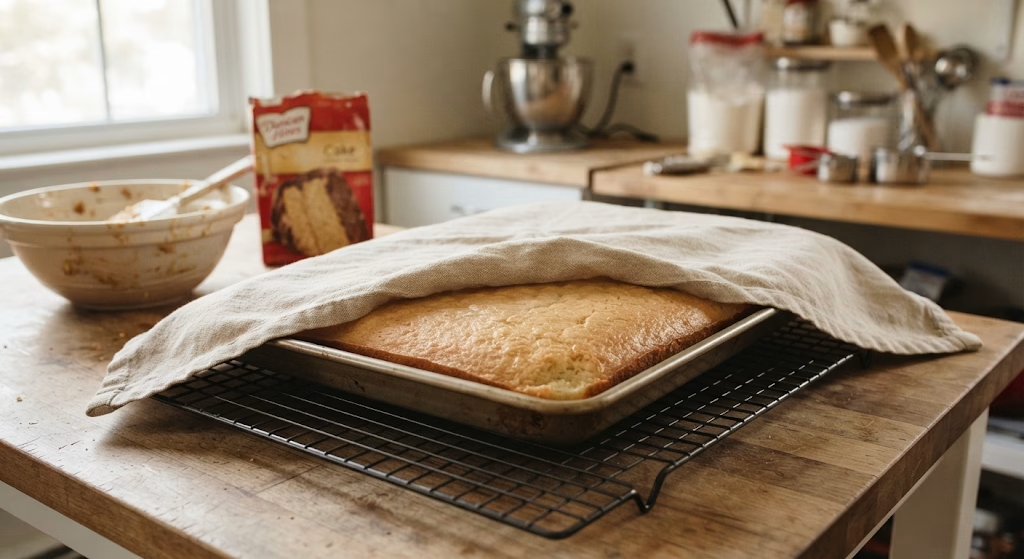
Bake your cake mix according to the package instructions in a 9×13-inch pan, then let it cool completely on a wire rack. I always cover mine with a towel while it cools so it doesn’t dry out on top. A fully cooled cake crumbles much more evenly than a warm one.
Crumble and Mix
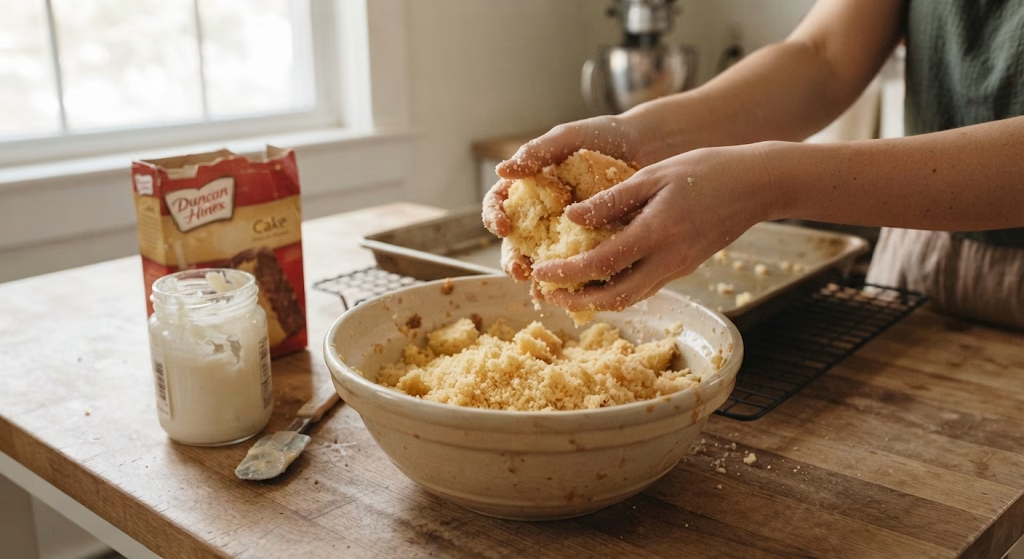
Break the cooled cake into large chunks, then crumble it by hand into a big bowl until you have very fine, even crumbs. Add the frosting and work it in with a spatula or your hands until the frosting disappears completely into the mixture.
Roll Into Balls
Use a small cookie scoop to portion the mixture, then roll each portion between your palms into a smooth, round ball. I like to keep them close to 1.5 inches so they look proportional once coated. Set each one on your parchment-lined tray as you go.
Freeze Until Firm
Place the tray of cake balls in the freezer, uncovered, for at least an hour. This step is what keeps them from falling apart the moment they hit the melted chocolate, so don’t rush past it even if you’re in a hurry.
Coat in White Chocolate
Melt your white chocolate wafers slowly over a double boiler or in short microwave bursts, stirring often. Insert a lollipop stick into each frozen cake ball, then dip it fully into the melted chocolate and gently tap off the excess before setting it upright to dry.
Add the Eyeball Details
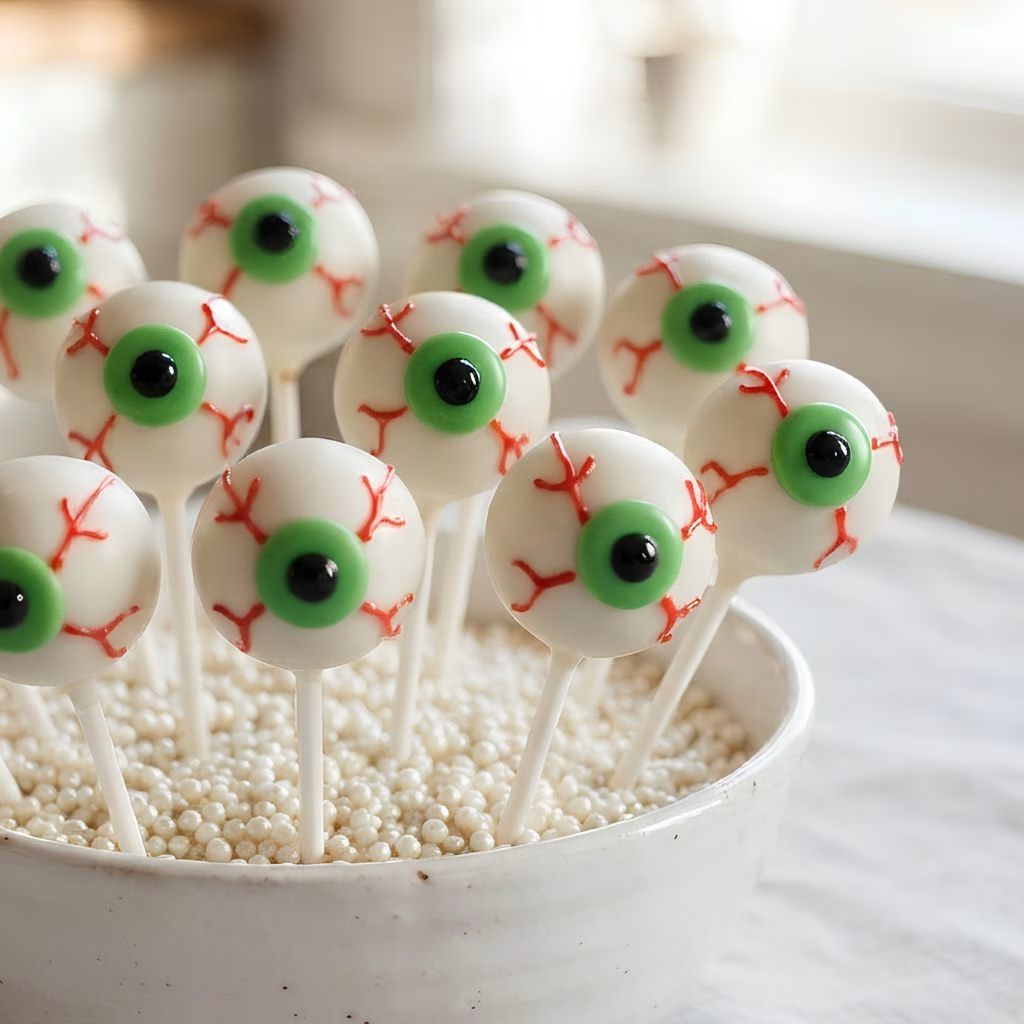
Once your white coating has set, use melted green candy or gel icing to make a small circle in the center for the iris. Add a tiny black dot in the middle for the pupil, then finish with fine red gel lines radiating outward to look like veins.
Additional Tips for Making This Recipe Better
I’ve made a lot of batches of these by now, and here’s what genuinely helps.
- I always freeze my cake balls longer than I think I need to, since a soft center makes the chocolate coating crack apart.
- I melt my chocolate in short bursts and stir constantly, because scorched white chocolate turns grainy and won’t coat smoothly.
- I keep a cup of hot water nearby to dip my toothpick in between drawing veins, which keeps the red lines thin and crisp.
- I like working in small batches of four or five at a time so the chocolate doesn’t harden before I’ve dipped them all.
- I always make a couple of extra cake balls, because at least one or two crack during dipping no matter how careful I am.
Common Mistakes to Avoid
- I skipped the freezer step once because I was short on time, and the cake balls basically dissolved into the warm chocolate.
- I added too much frosting to my cake crumbs, which left the mixture too sticky and hard to roll into clean balls.
- I tried dipping straight from the fridge instead of the freezer, and the temperature difference caused the coating to crack.
- I overheated my white chocolate in the microwave, and it seized up into a thick, unusable clump.
- I rushed the drawing step before the white coating fully set, and my veins smeared instead of staying crisp.
How to Serve Spooky Eyeball Cake Pops?
I like arranging mine upright in a styrofoam block wrapped in black or orange tissue paper, so the whole tray looks like a little eyeball garden. Scatter a few candy spiders or plastic bugs around the base for extra spookiness.
These also look fantastic laid flat on a slate board dusted lightly with cocoa powder, almost like dirt. If you’re setting out a bigger Halloween dessert spread, these pair really nicely next to something rich and gooey like a warm chocolate chip cake for guests who want something a little less spooky-looking.
Variations
- Swap the white chocolate for a dark chocolate coating and use yellow icing for a more monstrous, bloodshot look
- Try mismatched candy colors for the iris, like blue, purple, or orange, for a fun batch of eyeball cake pops on forks at a party table
- Skip the sticks entirely and dip the balls whole to make a spookier plated eyeball cake recipe instead
- Layer the cake balls into a loaf shape and coat in dark chocolate for coffin cake pops instead of round eyeballs
- Use a runny ganache center instead of solid cake for a gooey eyeball lava cake twist
- Add a drop of peppermint or almond extract to your frosting mixture for a flavor boost that pairs nicely with chocolate cake
Nutritional Information
Here’s a general estimate per pop, though actual numbers will vary depending on your cake mix and frosting brand.
- Calories: 150 kcal
- Protein: 1 g
- Carbohydrates: 20 g
- Fat: 7 g
Make Ahead and Storage
You can bake the cake and even roll the cake balls up to two days ahead, keeping them covered tightly in the fridge until you’re ready to coat them.
Once fully decorated, store finished cake pops in an airtight container in the refrigerator, where they’ll stay fresh for up to five days.
For longer storage, freeze the undipped cake balls in a sealed bag for up to two months, then thaw slightly before dipping and decorating.
Why You’ll Love This Recipe?
This has become one of my most requested Halloween treats, and here’s why it’s worth adding to your own list.
- It’s a total showstopper: These look far more complicated than they actually are, which always earns a few surprised reactions at parties.
- It’s beginner friendly: You don’t need any advanced cake decorating skills, just basic dipping and a steady hand for the details.
- It’s easy to customize: From coffin cake pops to a gooier eyeball lava cake version, this base recipe flexes to fit whatever halloween cake pop ideas you’re going for.
- It travels well: Once set, these hold their shape nicely for school parties, potlucks, or any spooky gathering away from home.
FAQs
How do you make halloween cake pops that don’t fall off the stick?
Make sure your cake balls are fully frozen before dipping, and dip the stick tip into melted chocolate first before inserting it into the ball to help it stay secure.
Can I use a boxed cake mix instead of a homemade halloween cake recipe?
Yes, a boxed mix works perfectly fine here and actually makes the process faster, since you skip a lot of the extra prep work.
Why does my white chocolate coating crack?
This usually happens when the cake balls are too cold compared to the melted chocolate, so let them sit for a minute or two before dipping.
Can I make these ahead of a party?
Absolutely, you can prepare and decorate them up to two days in advance and store them in the fridge until serving time.
What can I use instead of candy melts for the eye details?
Gel icing works just as well as candy melts for the smaller details like the iris, pupil, and veins, and it’s often easier to control for fine lines.
If you want another dessert on the table that leans sweet rather than spooky, a batch of warm cherry pie poppers makes a nice contrast next to these eerie little eyeballs.

Spooky Eyeball Cake Pops Recipe
Ingredients
Method
- Bake your cake mix according to the package instructions in a 9×13-inch pan, then let it cool completely on a wire rack. I always cover mine with a towel while it cools so it doesn’t dry out on top. A fully cooled cake crumbles much more evenly than a warm one.
- Break the cooled cake into large chunks, then crumble it by hand into a big bowl until you have very fine, even crumbs. Add the frosting and work it in with a spatula or your hands until the frosting disappears completely into the mixture.
- Use a small cookie scoop to portion the mixture, then roll each portion between your palms into a smooth, round ball. I like to keep them close to 1.5 inches so they look proportional once coated. Set each one on your parchment-lined tray as you go.
- Place the tray of cake balls in the freezer, uncovered, for at least an hour. This step is what keeps them from falling apart the moment they hit the melted chocolate, so don’t rush past it even if you’re in a hurry.
- Melt your white chocolate wafers slowly over a double boiler or in short microwave bursts, stirring often. Insert a lollipop stick into each frozen cake ball, then dip it fully into the melted chocolate and gently tap off the excess before setting it upright to dry.
- Once your white coating has set, use melted green candy or gel icing to make a small circle in the center for the iris. Add a tiny black dot in the middle for the pupil, then finish with fine red gel lines radiating outward to look like veins.
Notes
- I always freeze my cake balls longer than I think I need to, since a soft center makes the chocolate coating crack apart.
- I melt my chocolate in short bursts and stir constantly, because scorched white chocolate turns grainy and won’t coat smoothly.
- I keep a cup of hot water nearby to dip my toothpick in between drawing veins, which keeps the red lines thin and crisp.
- I like working in small batches of four or five at a time so the chocolate doesn’t harden before I’ve dipped them all.
- I always make a couple of extra cake balls, because at least one or two crack during dipping no matter how careful I am.