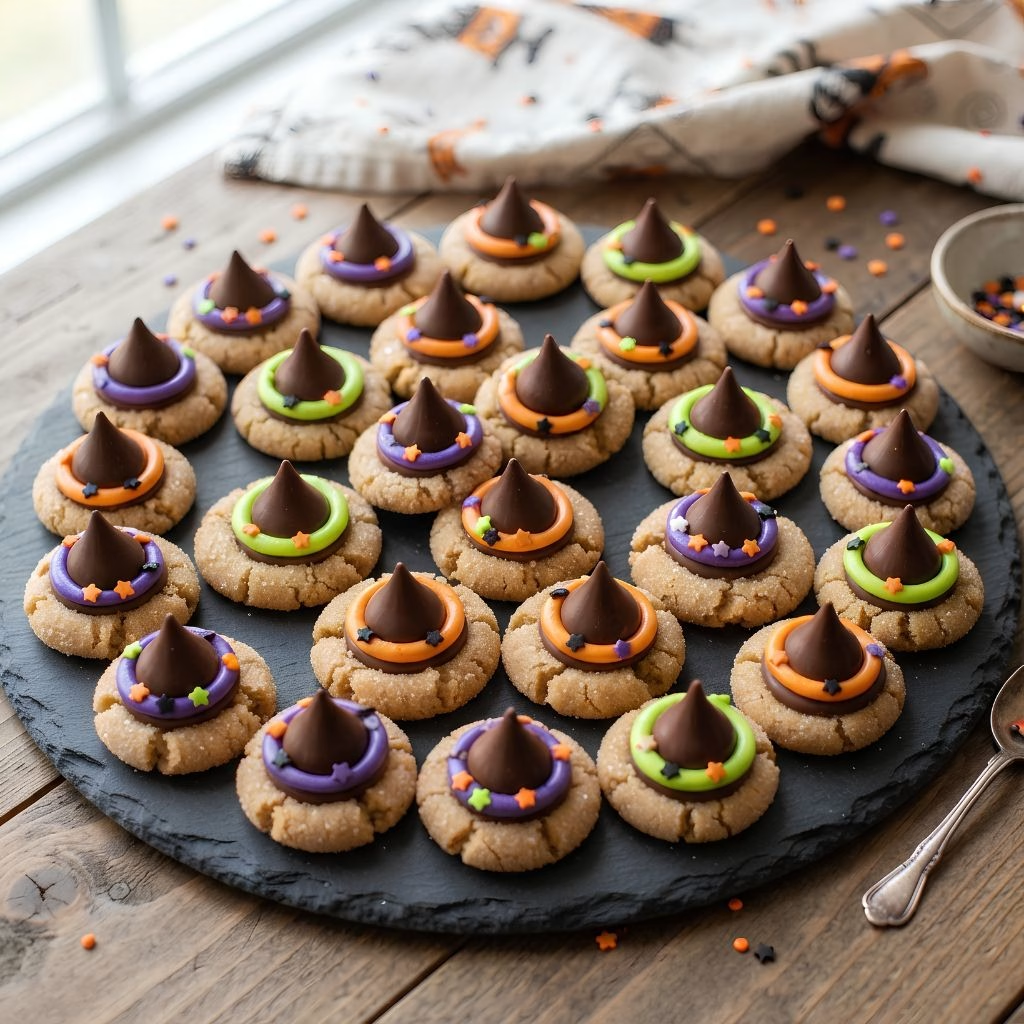
I make a batch of this Witch Hat Cookies Recipe every single October, and by now my kids expect them before we even carve a single pumpkin. I love a Halloween treat that’s more cute than creepy, and these peanut butter witch hat cookies hit that mark every time.
Between the soft cookie base, the melted chocolate brim, and that little candy kiss on top, they always disappear fast at parties. If you’ve been hunting for easy witch hat cookies that don’t require fancy piping skills, I promise this one is as forgiving as it is fun.

Cooking Time
- Prep Time: 15 minutes
- Cooking Time: 10 minutes
- Total Time: 55 minutes (includes cooling)
Ingredients
Cookies
- 1 ¾ cups all-purpose flour — gives the cookies their sturdy, chewy base without being cakey
- 1 teaspoon baking soda — helps the cookies puff slightly while staying soft in the center
- ¼ teaspoon salt — balances the sweetness and makes the peanut butter flavor stand out
- ½ cup granulated sugar, plus more for rolling — creates that classic crackly, sugar-coated cookie top
- ½ cup light brown sugar — adds moisture and a deeper caramel-like flavor
- ½ cup no-stir creamy peanut butter — pick a no-stir kind so the dough doesn’t spread too much in the oven
- ½ cup unsalted butter, room temperature — softened butter blends smoothly for an even dough texture
- 1 large egg, room temperature — binds the dough together and adds richness
- 1 teaspoon pure vanilla extract — rounds out the peanut butter flavor with warmth
- 30 chocolate melting wafers — these melt fast and evenly to form the brim of each witch hat
Frosting
- ½ cup unsalted butter, room temperature — the base for a smooth, pipeable buttercream
- 1 ¼ cups confectioners’ sugar, sifted — sifting prevents lumps so your frosting pipes cleanly
- 1 teaspoon pure vanilla extract — adds flavor without overpowering the peanut butter cookie underneath
- A pinch of salt — keeps the frosting from tasting flat or overly sweet
- 1 to 2 tablespoons heavy cream or whole milk — thins the frosting to the right piping consistency
- Gel food coloring in orange, purple, and green — gel colors won’t water down your frosting like liquid dye can
Decoration
- 30 chocolate kisses, unwrapped — these form the pointed tip of each witch hat
- Sprinkles — a festive finishing touch pressed around the hat band
Note: this recipe serves several, making about 30 cookies in total.
Equipment You Need
- Kitchen scale — helps you measure flour precisely for a consistent dough
- Stand mixer or hand mixer — makes creaming the butter, sugars, and peanut butter quick and smooth
- Medium cookie scoop — portions out evenly sized dough balls every time
- Baking sheet lined with parchment — prevents sticking and makes cleanup easy
- Piping bags or ziptop bags with the corner snipped — lets you control the frosting for a neat hat band
How to Make a Witch Hat Cookie Recipe?
This recipe comes together in two easy stages, first baking the cookies and then decorating them once they’ve cooled. Nothing here requires special skills, just a little patience while things cool down. Here’s exactly how I put mine together.
Mix the Dry Ingredients
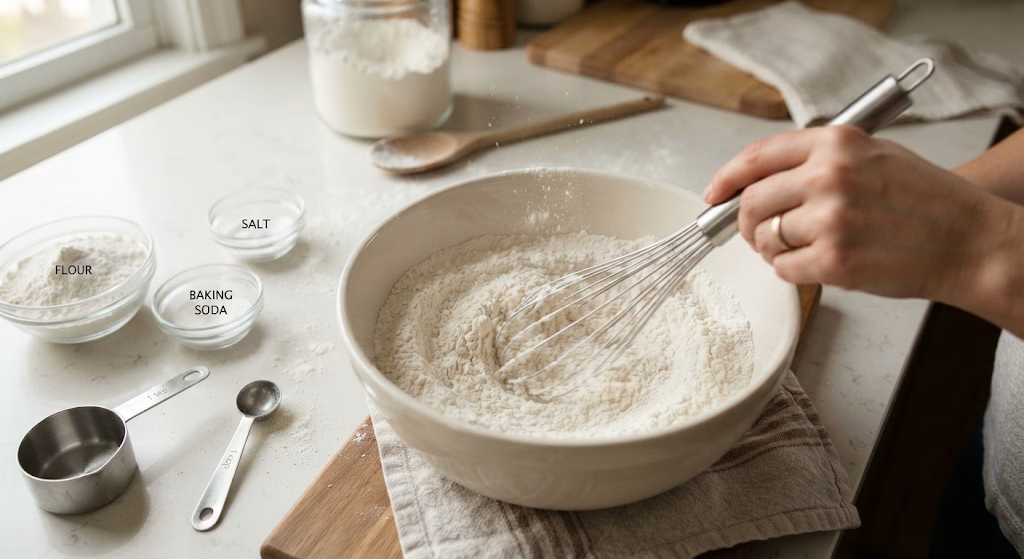
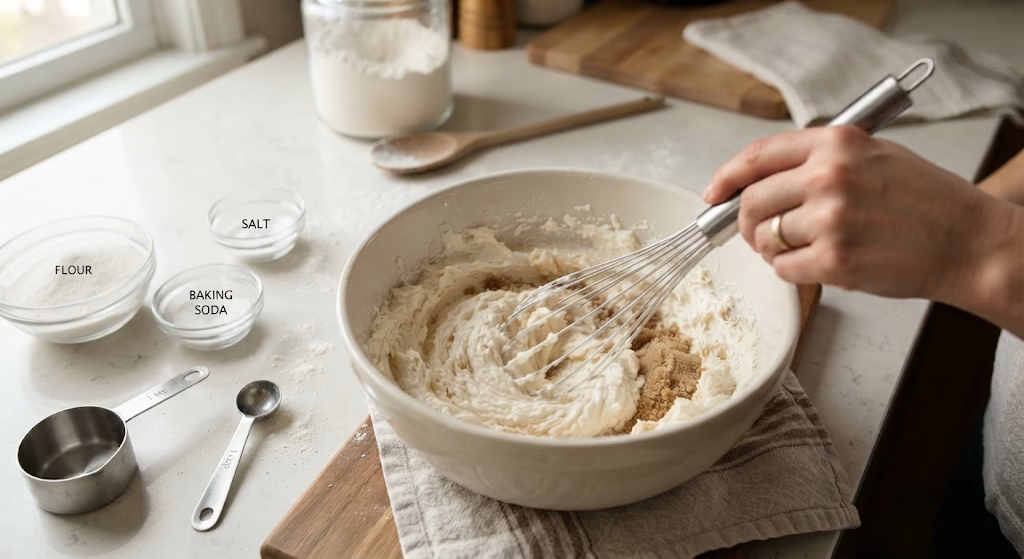
In a medium bowl, whisk together the flour, baking soda, and salt until fully combined. Setting this aside first means you won’t scramble to measure while your wet ingredients are already creamed. This simple step keeps the whole process organized.
Cream the Wet Ingredients
In your mixer bowl, combine the granulated sugar, brown sugar, butter, and peanut butter. Beat until light and fluffy, about two minutes, then mix in the egg and vanilla. This is where the base flavor of your witches cookies really comes together.
Combine Into Dough
With the mixer on low, slowly add the flour mixture into the wet ingredients. Mix just until everything is combined, since overmixing can make the cookies tough instead of tender. The dough should feel soft but not sticky at this stage.
Shape and Bake
Scoop tablespoon-sized portions of dough, roll into balls, then coat each one in the extra granulated sugar. Place them on your lined baking sheet and bake at 375°F for about 10 minutes, until lightly golden around the edges.
Add the Chocolate Brim
As soon as the cookies come out of the oven, press a chocolate melting wafer onto the center of each one. The residual heat will melt it slightly, so use the back of a spoon to spread it into a wide, even circle. Let the cookies cool completely before moving on.
Make and Pipe the Frosting
Beat the butter until creamy, then gradually mix in the confectioners’ sugar, vanilla, cream, and a pinch of salt. Divide the frosting into three bowls and tint each one with gel food coloring in your chosen witch hat colors.
Assemble the Hats
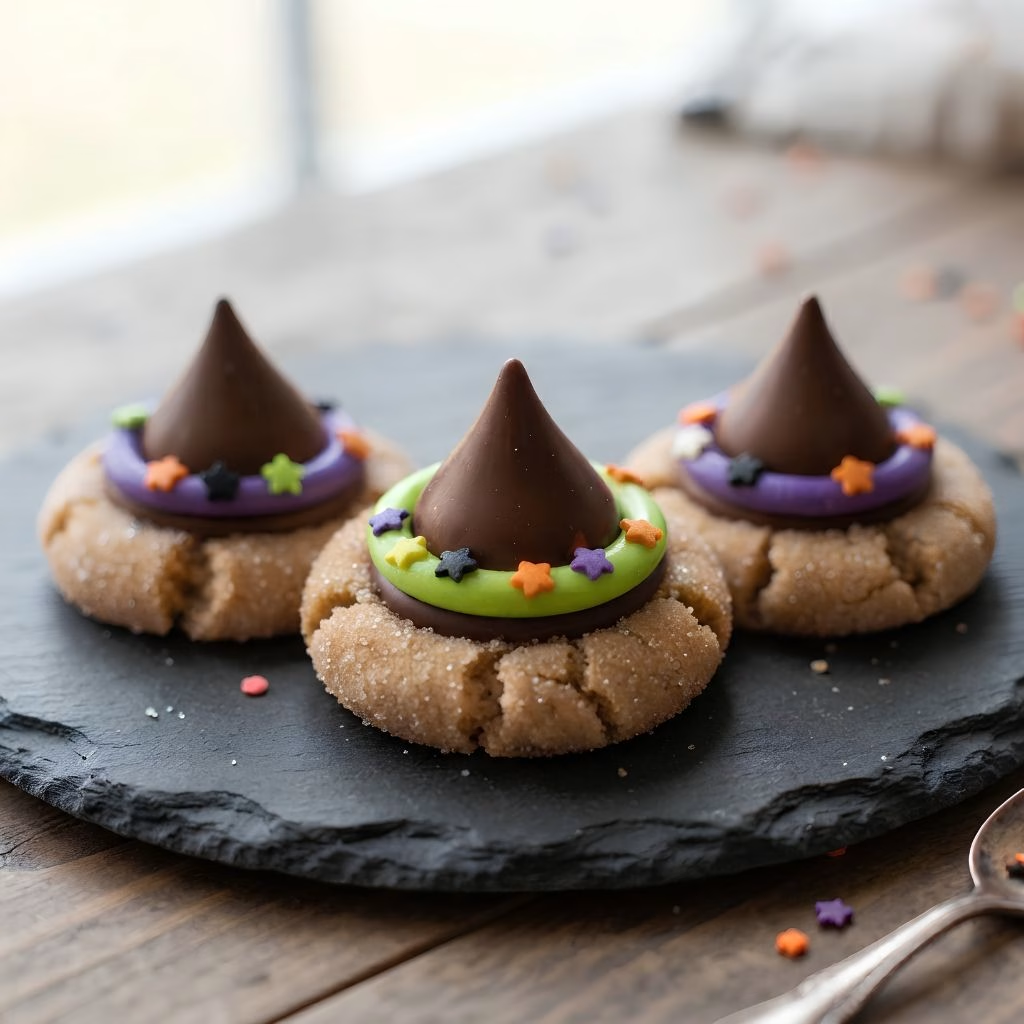
Pipe a small amount of frosting onto the flat side of a chocolate kiss, then press it into the center of the cooled chocolate circle. The extra frosting should peek out slightly to form the hat band, and you can finish with a scattering of sprinkles.
Additional Tips for Making This Recipe Better
I’ve made more batches of these than I can count, and here’s what genuinely makes a difference for me.
- I always use no-stir peanut butter, since the separated kind makes my dough spread too thin in the oven.
- I weigh my flour with a kitchen scale instead of scooping, because it keeps every batch consistent.
- I let my butter and egg come fully to room temperature first, which gives the dough a much smoother texture.
- I never skip letting the cookies cool completely before assembling, or my chocolate and frosting slide right off.
- I set up my frosting bags and chocolate kisses before I even start baking, so decorating goes much faster once the cookies are ready.
Common Mistakes to Avoid
- I once used peanut butter with oil pooled on top, and my cookies spread into flat puddles instead of holding their shape.
- I tried assembling the hats while the cookies were still slightly warm, and the chocolate and frosting just slid right off.
- I overmixed my dough one time trying to get it perfectly smooth, and the cookies baked up dense instead of soft.
- I used liquid food coloring instead of gel, and it thinned my frosting out until it wouldn’t hold its shape when piped.
- I skipped chilling my dough balls before baking on a warm day, and the cookies spread more than I wanted.
How to Serve Witch Hat Cookies?
I love arranging these on a black or dark orange platter so the colorful hats really pop against the background. Grouping different frosting colors together, orange, purple, and green, makes the whole tray look like a proper witch hat atelier of tiny, edible creations.
They’re perfect for a Halloween dessert table, a classroom party, or packed individually in cellophane bags as party favors. For a bigger spread of halloween cookie recipes easy enough for a crowd, I like setting these next to other bite-sized Halloween treats so guests can mix and match.
Variations
- Swap ½ cup of the flour for unsweetened cocoa powder to make chocolate witch hat cookies
- Use caramel or dark chocolate kisses instead of milk chocolate for a different flavor twist
- Dip mini pretzel cones or chocolate-dipped wafer cones in chocolate for a taller, more textured hat
- Use store-bought frosting and a betty crocker witch hat cookies style cake mix base if you’re short on time
- Try white chocolate melting wafers for a lighter-colored brim before adding colored frosting
- Add mini chocolate chips into the dough for extra bursts of chocolate in every bite
Nutritional Information
Here’s a rough breakdown per cookie, though exact numbers will vary depending on the brands you use.
- Calories: 202 kcal
- Protein: 3 g
- Carbohydrates: 24 g
- Fat: 11 g
Make Ahead and Storage
You can prepare the cookie dough up to 48 hours in advance and keep it covered tightly in the refrigerator until you’re ready to bake.
Store finished, decorated cookies in an airtight container at room temperature, where they’ll stay fresh and soft for up to one week.
For longer storage, freeze the unbaked dough for up to three months, or freeze fully baked cookies before decorating and thaw them in the fridge overnight.
Why You’ll Love This Recipe?
This has become one of my most requested Halloween bakes, and here’s why I think you’ll feel the same.
- It’s festive without being fussy: These hat cookies recipe steps are simple enough for a weeknight, yet they still look impressively decorated on a party table.
- The flavor combo never misses: Peanut butter and chocolate are a classic pairing that appeals to kids and adults alike, making these one of the better halloween cookie recipes for adults too.
- It’s easy to customize: From cocoa swaps to different colored frostings, you can make a whole rainbow of witch hats to match your party theme.
- It travels and stores well: These hold their shape nicely in lunchboxes, treat bags, or dessert platters without falling apart.
FAQs
Why did my witch hat cookies spread too much in the oven?
This usually happens when the butter or dough gets too warm, so try chilling your shaped dough balls in the fridge for 20 minutes before baking.
Can I make the cookie dough ahead of time?
Yes, the dough keeps well covered in the refrigerator for up to 48 hours, just let it soften slightly at room temperature before scooping.
What’s the best way to store leftover cookies?
Keep them in an airtight container at room temperature, where they’ll stay fresh for about a week.
Can I freeze the dough or the baked cookies?
Yes, both freeze well for up to three months, just thaw the dough in the refrigerator before scooping, shaping, and baking.
Do I have to use chocolate melting wafers for the hat brim?
They’re the easiest option since they melt evenly, but you can also melt regular chocolate chips and spoon a small circle onto each cooled cookie instead.
If you’re planning a whole dessert table for the holiday, these look great next to something like a slice of chocolate chip cake for guests who want more than just cookies. And for a smaller, poppable treat to round out the spread, a batch of cherry pie poppers works just as well alongside these witch hats.

Witch Hat Cookies Recipe
Ingredients
Method
- In a medium bowl, whisk together the flour, baking soda, and salt until fully combined. Setting this aside first means you won’t scramble to measure while your wet ingredients are already creamed. This simple step keeps the whole process organized.
- In your mixer bowl, combine the granulated sugar, brown sugar, butter, and peanut butter. Beat until light and fluffy, about two minutes, then mix in the egg and vanilla. This is where the base flavor of your witches cookies really comes together.
- With the mixer on low, slowly add the flour mixture into the wet ingredients. Mix just until everything is combined, since overmixing can make the cookies tough instead of tender. The dough should feel soft but not sticky at this stage.
- Scoop tablespoon-sized portions of dough, roll into balls, then coat each one in the extra granulated sugar. Place them on your lined baking sheet and bake at 375°F for about 10 minutes, until lightly golden around the edges.
- As soon as the cookies come out of the oven, press a chocolate melting wafer onto the center of each one. The residual heat will melt it slightly, so use the back of a spoon to spread it into a wide, even circle. Let the cookies cool completely before moving on.
- Beat the butter until creamy, then gradually mix in the confectioners’ sugar, vanilla, cream, and a pinch of salt. Divide the frosting into three bowls and tint each one with gel food coloring in your chosen witch hat colors.
- Pipe a small amount of frosting onto the flat side of a chocolate kiss, then press it into the center of the cooled chocolate circle. The extra frosting should peek out slightly to form the hat band, and you can finish with a scattering of sprinkles.
Notes
- I always use no-stir peanut butter, since the separated kind makes my dough spread too thin in the oven.
- I weigh my flour with a kitchen scale instead of scooping, because it keeps every batch consistent.
- I let my butter and egg come fully to room temperature first, which gives the dough a much smoother texture.
- I never skip letting the cookies cool completely before assembling, or my chocolate and frosting slide right off.
- I set up my frosting bags and chocolate kisses before I even start baking, so decorating goes much faster once the cookies are ready.