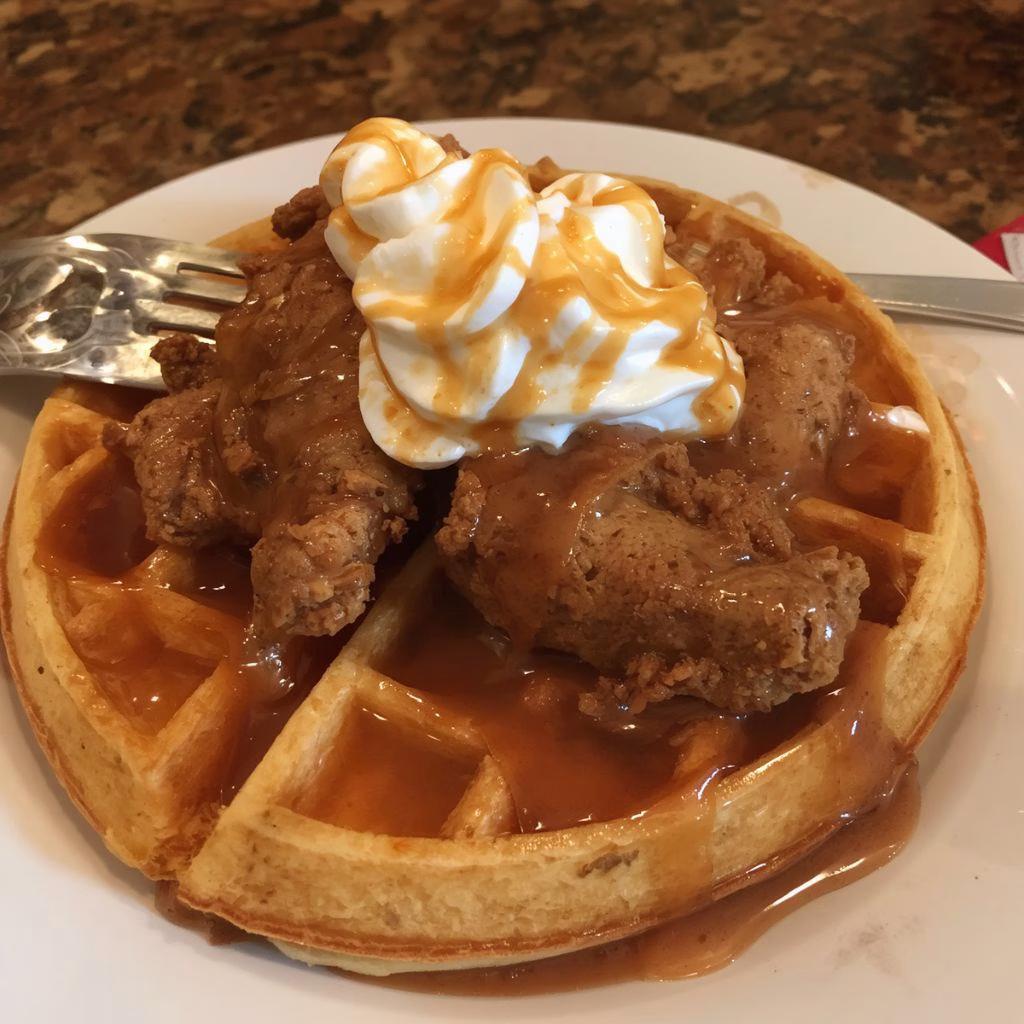
I still remember the first time I pulled a batch of golden fried chicken tenders straight from the oil and set them on top of warm, crispy waffles. I knew right then I’d never go back to store-bought waffles or bland chicken again.
This Chicken and Waffles Recipe has become my go-to for lazy weekend brunches and special occasions alike. I love how the sweet maple syrup mingles with the savory, spiced crust on the chicken. Once you try this combo at home, I promise you’ll understand exactly why it’s such a beloved Southern classic.
Ingredients
- Chicken tenderloins (1 lb, about 6-7 pieces) – tenderloins cook quickly and evenly, so they’re ideal for this recipe; if you only have breasts on hand, slice them into strips first.
- Whole buttermilk (1 cup) – the acidity in real buttermilk tenderizes the chicken and adds a subtle tang you just can’t get from regular milk.
- Kosher salt (2 teaspoons, divided) – kosher salt dissolves evenly and seasons the chicken all the way through without an overly salty bite.
- Garlic powder (2 teaspoons, divided) – adds a deep savory base note to both the brine and the flour coating.
- Onion powder (1 1/2 teaspoons, divided) – rounds out the flavor and works alongside the garlic powder for a well-balanced seasoning blend.
- Ground white pepper (1 1/2 teaspoons, divided) – I prefer white pepper here since it brings heat without leaving visible black flecks on the crust; black pepper works fine too.
- Smoked paprika (1 1/2 teaspoons, divided) – gives the chicken that gorgeous golden-red color along with a hint of smoky depth.
- Hot sauce (a few dashes, optional) – stirred into the buttermilk brine, this adds a little kick without overwhelming the other spices.
- All-purpose flour (1 cup) – creates that classic crispy, craggy coating; avoid over-mixing so the texture stays light.
- Vegetable oil (enough for frying) – choose a neutral oil with a high smoke point so it can handle the heat without burning or adding off-flavors.
- Prepared buttermilk waffles (from your favorite recipe) – homemade waffles hold up so much better under the chicken than frozen ones, staying crisp instead of turning soggy.
- Pure maple syrup and softened butter, for serving – skip the imitation syrup here; the real thing makes a noticeable difference in flavor.
Note: This recipe yields about 4 servings, so double or triple the ingredient amounts above if you’re feeding a larger crowd, and adjust your frying batches accordingly.
Variations
- Swap the buttermilk for a dairy-free alternative, such as unsweetened almond or oat milk mixed with a tablespoon of lemon juice, to keep things dairy-free.
- Use a 1:1 gluten-free flour blend in place of all-purpose flour for a gluten-free version that still fries up crispy.
- Add a pinch of cayenne pepper or extra hot sauce to the flour dredge for a spicier kick.
- Stir cinnamon and a splash of vanilla extract into your waffle batter for a warmer, dessert-like flavor.
- Drizzle the finished dish with hot honey instead of maple syrup for a sweet-and-spicy twist.
- Try boneless chicken thighs instead of tenderloins for a juicier, more flavorful bite, much like the texture in Creamy Pepperoncini Chicken Salad with Mashed Chickpeas Recipe
Cooking Time
- Prep Time: 30 minutes (plus at least 3 hours to overnight for the buttermilk soak)
- Cook Time: 30 minutes
- Total Time: About 1 hour of active time, not including marinating
Equipment You Need
- Large resealable bag or covered container – for marinating the chicken evenly in the buttermilk brine.
- Deep fry thermometer – helps you keep the oil at a precise, steady frying temperature.
- A heavy-bottomed pot or dutch oven – distributes heat evenly so the chicken fries consistently.
- Shallow pie plate or wide bowl – makes dredging the chicken in seasoned flour quick and mess-free.
- Wire rack set over a baking sheet – lets excess oil drip away so the chicken stays crispy instead of greasy.
- Kitchen spider or slotted spoon – makes it easy to lift the chicken safely out of the hot oil.
How to Make Chicken and Waffles Recipe?
Making this dish comes together in a few simple stages: marinating, dredging, frying, and serving. None of the steps are complicated, but a little patience during the brining stage really pays off. Here’s exactly how I do it every time.
Marinate the Chicken in Buttermilk
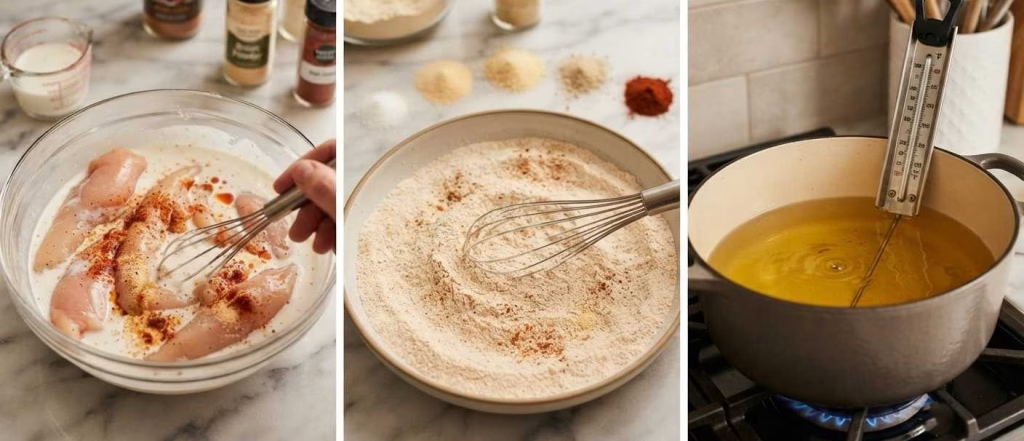
Pat the chicken tenders completely dry, then place them in a large resealable bag or container. Pour in the buttermilk along with half of the salt, garlic powder, onion powder, white pepper, and smoked paprika, plus a few dashes of hot sauce if you like heat. Seal the bag and refrigerate for at least 3 hours, though overnight gives the juiciest, most flavorful results.
Prepare the Seasoned Flour
While the chicken marinates, whisk together the flour with the remaining salt, garlic powder, onion powder, white pepper, and smoked paprika in a shallow dish. Mixing the seasoning directly into the flour ensures every bite of the crust is packed with flavor, not just the surface. Set this seasoned flour aside until you’re ready to fry.
Heat the Frying Oil
Pour vegetable oil into a heavy-bottomed pot or dutch oven, filling it about halfway up the sides. Clip on a deep fry thermometer and heat the oil over medium-high heat until it reaches 350°F. Keeping the temperature steady is key to getting a crisp crust without greasy or undercooked chicken.
Dredge the Chicken
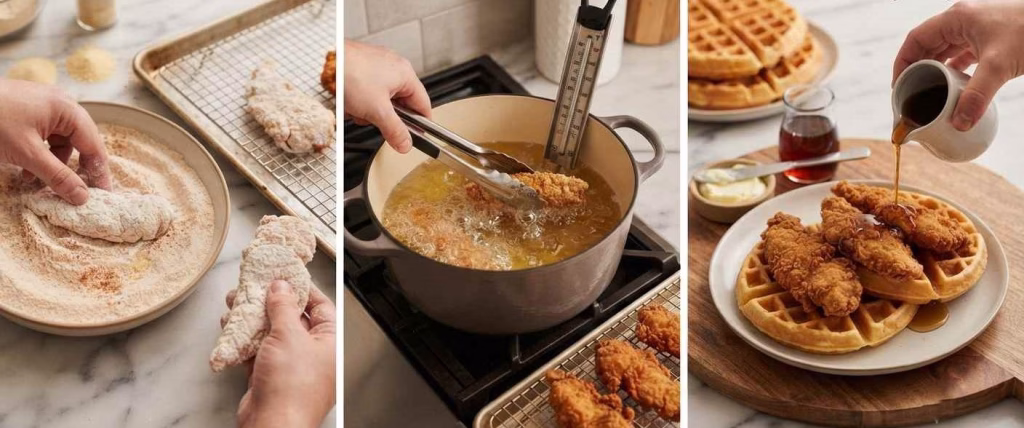
Remove each piece of chicken from the buttermilk, letting the excess drip off, then coat it thoroughly in the seasoned flour. Press the flour gently into every crevice for maximum crunch, then shake off any excess. Place the coated chicken on a baking sheet and repeat until all the pieces are ready to fry.
Fry the Chicken in Batches
Carefully lower 4 to 5 pieces of chicken into the hot oil at a time, avoiding overcrowding the pot. Fry for about 2 to 3 minutes per batch, until deeply golden and the internal temperature hits at least 165°F. Transfer the finished chicken to a wire rack so it stays crisp while you fry the remaining batches.
Warm the Waffles and Plate Everything
Reheat your prepared waffles in a low oven so they’re warm and ready right when the chicken finishes frying. Arrange the waffles on plates, then top each one with a few pieces of crispy fried chicken. Finish with a pat of softened butter and a generous pour of warm maple syrup before serving.
Additional Tips for Making this Recipe Better
I’ve made this dish more times than I can count, and these little tricks have made a real difference for me.
- I always let the chicken sit in the buttermilk overnight when I have the time; the extra hours make the meat noticeably more tender.
- I never stack my waffles right after cooking since the trapped steam makes them soggy fast; a wire rack keeps them crisp while they wait.
- I double-check my oil temperature between batches because it drops each time you add chicken, and cooler oil leads to a greasy coating.
- I like using a spare wooden spoon to test the oil if my thermometer isn’t handy; small bubbles forming around it means it’s ready.
- I rest the fried chicken for about 5 minutes before serving so the juices redistribute and the crust sets up perfectly.
How to Serve Chicken and Waffles Recipe?
I love serving this dish family-style on a big wooden board so everyone can build their own plate. Stack a waffle, add a couple of pieces of chicken, then finish with a drizzle of syrup right at the table for the best presentation. Fresh berries scattered around the plate add a pop of color and a nice burst of freshness against the rich chicken.
For an extra-special touch, I sometimes add a light dusting of powdered sugar or a small dollop of whipped butter on top. A side of hot sauce or a sweet chili glaze also makes a fun dipping option for guests who like a little extra kick, and Frito Taco Coleslaw Recipe makes a crunchy side for the meal.
Nutritional Information
Here’s a general idea of what one serving of this dish looks like nutritionally, though exact numbers will vary based on your specific ingredients and portion sizes.
- Calories: approximately 520 per serving
- Protein: approximately 32 grams
- Carbohydrates: approximately 48 grams
- Fat: approximately 22 grams
Make Ahead and Storage
You can prep the chicken up to the frying stage the night before by letting it marinate in the fridge, which actually improves the flavor and texture. The waffles can also be made a day in advance and stored separately so nothing gets soggy while waiting to be served.
Store any leftover fried chicken and waffles in separate airtight containers in the refrigerator for up to 3 days. Keeping them apart preserves the waffle’s texture and prevents the chicken’s crust from turning soft.
To freeze, wrap the cooled chicken and waffles individually in plastic wrap, then place them in freezer bags for up to 2 months. This keeps them from sticking together and makes it easy to reheat just what you need.
When you’re ready to reheat, warm the chicken in a 375°F oven or air fryer until the crust crisps back up and the inside is hot, about 10 to 15 minutes. Waffles reheat well in a toaster or oven at 350°F for a few minutes until warmed through and crisp again.
Why You’ll Love This Recipe?
This chicken and waffles combo checks every box for an easy, crowd-pleasing meal that never disappoints.
- It’s beginner-friendly: the steps are broken into simple stages, so even first-time fryers can follow along and get great results.
- It’s endlessly versatile: swap in gluten-free flour, dairy-free milk, or different spice levels to match your dietary needs or mood.
- It works for any meal: this dish feels just as at home on a Sunday brunch table as it does for a casual weeknight dinner.
- It’s a genuine crowd-pleaser: the sweet-and-savory combination appeals to picky eaters and food lovers alike.
- It reheats beautifully: leftovers stay delicious, making it a great option for meal prep or feeding a larger group over a couple of days.
Chicken and Waffles Recipe
Ingredients
Method
- Pat the chicken tenders completely dry, then place them in a large resealable bag or container. Pour in the buttermilk along with half of the salt, garlic powder, onion powder, white pepper, and smoked paprika, plus a few dashes of hot sauce if you like heat. Seal the bag and refrigerate for at least 3 hours, though overnight gives the juiciest, most flavorful results.
- While the chicken marinates, whisk together the flour with the remaining salt, garlic powder, onion powder, white pepper, and smoked paprika in a shallow dish. Mixing the seasoning directly into the flour ensures every bite of the crust is packed with flavor, not just the surface. Set this seasoned flour aside until you’re ready to fry.
- Pour vegetable oil into a heavy-bottomed pot or dutch oven, filling it about halfway up the sides. Clip on a deep fry thermometer and heat the oil over medium-high heat until it reaches 350°F. Keeping the temperature steady is key to getting a crisp crust without greasy or undercooked chicken.
- Remove each piece of chicken from the buttermilk, letting the excess drip off, then coat it thoroughly in the seasoned flour. Press the flour gently into every crevice for maximum crunch, then shake off any excess. Place the coated chicken on a baking sheet and repeat until all the pieces are ready to fry.
- Carefully lower 4 to 5 pieces of chicken into the hot oil at a time, avoiding overcrowding the pot. Fry for about 2 to 3 minutes per batch, until deeply golden and the internal temperature hits at least 165°F. Transfer the finished chicken to a wire rack so it stays crisp while you fry the remaining batches.
- Reheat your prepared waffles in a low oven so they’re warm and ready right when the chicken finishes frying. Arrange the waffles on plates, then top each one with a few pieces of crispy fried chicken. Finish with a pat of softened butter and a generous pour of warm maple syrup before serving.
Notes
- I always let the chicken sit in the buttermilk overnight when I have the time; the extra hours make the meat noticeably more tender.
- I never stack my waffles right after cooking since the trapped steam makes them soggy fast; a wire rack keeps them crisp while they wait.
- I double-check my oil temperature between batches because it drops each time you add chicken, and cooler oil leads to a greasy coating.
- I like using a spare wooden spoon to test the oil if my thermometer isn’t handy; small bubbles forming around it means it’s ready.
- I rest the fried chicken for about 5 minutes before serving so the juices redistribute and the crust sets up perfectly.