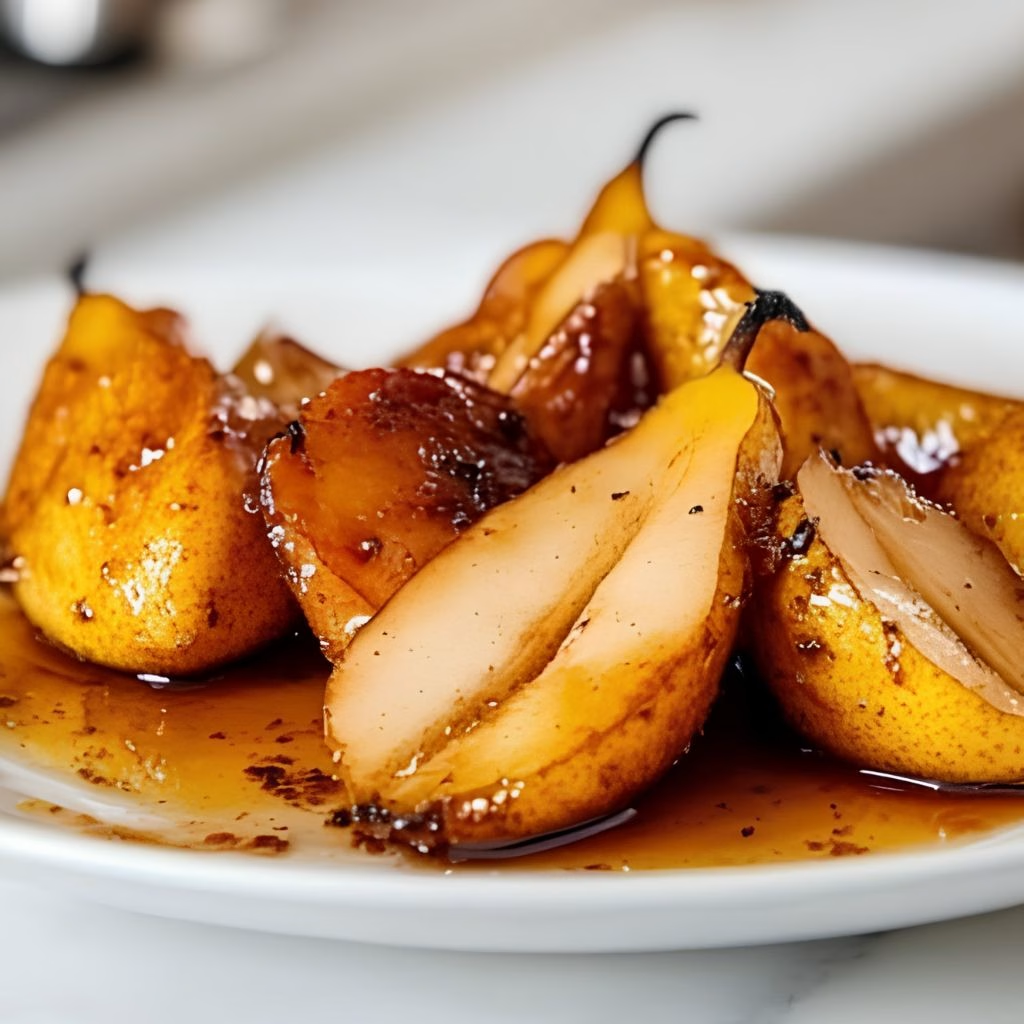
I still remember the first time I pulled a tray of Honey Roasted Pears Recipe out of the oven the whole kitchen smelled like caramel and cinnamon, and I honestly couldn’t wait for them to cool down before digging in. This recipe has become my go-to whenever I want something sweet but don’t feel like turning on the mixer or making a mess.
It’s just a handful of pantry staples, a baking sheet, and a little patience while the oven does all the work. Whether I’m making it for a quiet weeknight treat or dressing it up for guests, it never fails to impress. Once you try it, I promise it’ll become a fall staple in your kitchen too.

Cooking Time
- Prep Time: 10 minutes
- Cooking Time: 25-30 minutes
- Total Time: 35-40 minutes
Ingredients
- 4 ripe but firm pears (Bosc or Anjou work best) – they hold their shape in the oven without turning mushy
- 3 tablespoons honey – this is what gives the pears that glossy, caramelized finish
- 2 tablespoons unsalted butter, melted – adds richness and helps the honey coat evenly
- 1 teaspoon ground cinnamon – brings warmth and pairs beautifully with the natural sweetness of pears
- 1/4 teaspoon ground nutmeg – just a pinch adds a cozy, spiced depth
- 1 tablespoon fresh lemon juice – keeps the pears from browning and balances the sweetness
- A pinch of sea salt – rounds out the flavors so the dish doesn’t taste flat
- 1/4 cup chopped walnuts or pecans (optional) – for crunch and a nutty finish
- Vanilla ice cream or Greek yogurt, for serving (optional) – makes it feel extra indulgent
Note: This recipe serves 4 people generously as a dessert or light breakfast.
Equipment You Need
- Baking sheet or oven-safe skillet – to roast the pears evenly
- Parchment paper – prevents sticking and makes cleanup easy
- Small mixing bowl – for combining the honey butter glaze
- Pastry brush or spoon – to coat the pears with the glaze
- Melon baller or teaspoon – to hollow out the pear cores neatly
- Sharp knife – for slicing the pears in half cleanly

How to Make Honey Roasted Pears Recipe?
This recipe comes together in just a few simple steps, and most of the work happens hands-off in the oven. I like to prep everything first so the pears go in fresh and don’t have time to brown. Here’s exactly how I make mine every single time.
Step 1: Preheat and Prep the Pan
I start by preheating my oven to 400°F and lining a baking sheet with parchment paper. This step matters more than people think, since a properly heated oven is what gives the pears that gorgeous caramelized edge instead of a soggy, steamed texture.
Step 2: Prepare the Pears
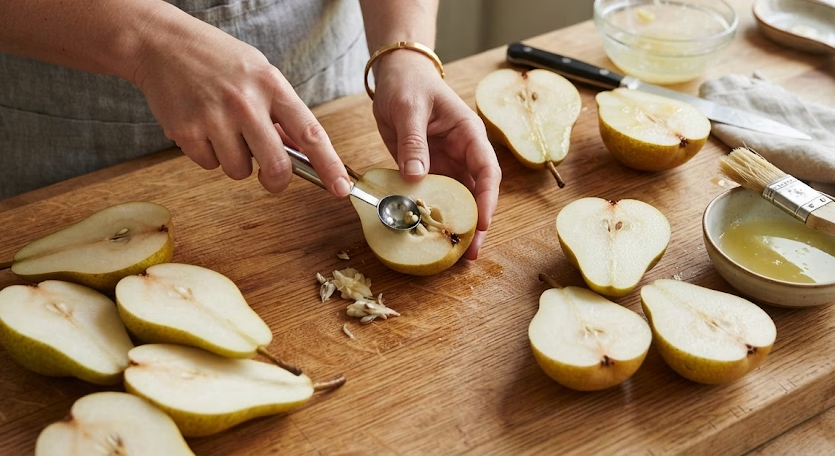
Next, I slice each pear in half lengthwise and use a melon baller to scoop out the seeds and tough core. I brush the cut sides with lemon juice right away so they don’t brown while I finish prepping the rest.
Step 3: Mix the Honey Glaze
In a small bowl, I whisk together the melted butter, honey, cinnamon, nutmeg, and a pinch of salt until it’s smooth and glossy. This glaze is really the heart of the recipe, so I always taste it before brushing it on.
Step 4: Coat and Arrange the Pears
I place the pear halves cut-side up on the baking sheet, spacing them a couple of inches apart so they roast instead of steam. Then I generously brush the honey mixture over each one, letting a little pool in the center.
Step 5: Roast Until Golden
I roast the pears for about 25 to 30 minutes, basting them once halfway through with the pan juices. They’re done when they’re fork-tender and the edges have turned a deep caramel color.
Step 6: Add the Finishing Touches
Once out of the oven, I sprinkle the warm pears with chopped walnuts and let them rest for a couple of minutes. This little pause lets the glaze thicken slightly before serving.
Additional Tips for Making This Recipe Better
I’ve made this recipe more times than I can count, and here’s what I’ve learned along the way:
- I always choose pears that are ripe but still firm to the touch, since overly soft ones turn to mush in the oven.
- I like to baste the pears at least once while roasting so the glaze doesn’t just sit on top and burn.
- I never skip the lemon juice step, because it keeps the pears looking fresh and appetizing.
- I sometimes swap in maple syrup for half the honey when I want a deeper, earthier flavor.
- I let the pears rest for a few minutes after roasting so the caramelized juices set slightly before serving.
Common Mistakes to Avoid
Over the years, I’ve made a few slip-ups with this recipe, so here’s what I now watch out for:
- I used to overcrowd the baking sheet, which made the pears steam instead of caramelize — now I always give them space.
- I once used overripe pears and ended up with a mushy, watery dish, so I stick to firm ones now.
- I forgot to baste halfway through once, and the tops dried out I never skip that step anymore.
- I used cold butter straight from the fridge once, and the glaze didn’t mix smoothly, so I always melt it first.
- I’ve learned not to rush the resting time, since cutting in too early means the juices run everywhere instead of staying glossy on the pear.
How to Serve Honey Roasted Pears?
I love serving these pears warm, straight from the oven, with a scoop of vanilla ice cream melting into the caramelized juices. For a lighter option, I’ll spoon them over a bowl of Greek yogurt with a drizzle of extra honey on top. When I’m hosting, I like to plate them on a rustic wooden board with a few extra walnuts scattered around and a light dusting of cinnamon for presentation.
A sprig of fresh mint or a few pomegranate seeds also adds a nice pop of color if you want to make the dish look a little more special. For a savory spread, you could also serve them alongside a simple Roasted Cauliflower Tahini Salad for a nice contrast of sweet and savory flavors.
Variations
- Dairy-free version: I swap the butter for coconut oil, and it still gives a rich, glossy finish.
- Sugar-free option: I use a sugar-free honey substitute or a light drizzle of maple syrup instead.
- Nutty twist: I sometimes add chopped almonds or pistachios instead of walnuts for a different crunch.
- Boozy upgrade: A splash of bourbon or dark rum in the glaze adds a warm, adult twist for dinner parties.
- Extra spice: I add a pinch of ground ginger or cardamom when I want a more festive, holiday-inspired flavor.
Nutritional Information
Here’s a rough breakdown per serving, based on a standard batch of four:
- Calories: 210 kcal
- Protein: 2g
- Carbohydrates: 34g
- Fat: 9g
Make Ahead and Storage
I usually prep the pears and glaze a few hours ahead, then roast them right before serving so they stay fresh and warm. If I have leftovers, I store them in an airtight container in the fridge, and they stay good for up to 3 days.
To reheat, I just pop them in a 350°F oven for about 10 minutes or microwave them for 30 seconds, though the oven keeps the texture much nicer. I don’t usually freeze this dish since the pears tend to get watery once thawed, but if needed, they’ll keep in the freezer for about a month in a sealed container.
Why You’ll Love This Recipe?
This dish has become one of my absolute favorites for so many reasons, and I think you’ll feel the same way once you try it.
- It’s incredibly easy to make – With just one baking sheet and under 40 minutes, this recipe never feels like a chore, even on busy weeknights.
- It’s naturally gluten-free – I can serve this to guests with dietary restrictions without having to change a single ingredient.
- It’s versatile for any meal – I’ve served it as a dessert, a breakfast side, and even alongside a cheese board for guests. For another breakfast idea, Breakfast Beans and Eggs can also fit nicely into a varied morning spread.
- It’s easy to customize – Whether I want it dairy-free, boozy, or extra spiced, this base recipe adapts to whatever mood I’m in.
- It looks impressive with minimal effort – The caramelized glaze makes it look like I spent hours on it, when really it’s mostly hands-off oven time.
FAQs
Can I use a different type of pear for this recipe?
Yes, I’ve used Bartlett and Comice pears before with good results, though Bosc and Anjou hold their shape the best when roasted.
Do I need to peel the pears before roasting?
No, I always leave the skin on since it helps the pears hold together and adds a nice texture once roasted.
Can I make baked pears with honey and cinnamon without nuts?
Absolutely, I skip the nuts often when serving to guests with allergies, and the pears are still just as delicious.
What’s the best way to reheat roasted pear slices?
I reheat mine in the oven at 350°F for about 10 minutes, which keeps them from getting soggy like the microwave sometimes does.
Is this recipe good for a simple baked pears recipe with kids?
Yes, I’ve made this with my niece before, and the steps are simple enough for kids to help with under supervision.
Can I turn this into roasted pears savory instead of sweet?
Yes, I sometimes reduce the honey and add crumbled goat cheese and thyme after roasting for a savory twist that works great as an appetizer.
How do I make the best roasted pears recipe extra crispy on the edges?
I broil mine for the last 2 minutes of cooking, which caramelizes the edges beautifully without drying out the center.

Honey Roasted Pears Recipe
Ingredients
Method
- I start by preheating my oven to 400°F and lining a baking sheet with parchment paper. This step matters more than people think, since a properly heated oven is what gives the pears that gorgeous caramelized edge instead of a soggy, steamed texture.
- Next, I slice each pear in half lengthwise and use a melon baller to scoop out the seeds and tough core. I brush the cut sides with lemon juice right away so they don’t brown while I finish prepping the rest.
- In a small bowl, I whisk together the melted butter, honey, cinnamon, nutmeg, and a pinch of salt until it’s smooth and glossy. This glaze is really the heart of the recipe, so I always taste it before brushing it on.
- I place the pear halves cut-side up on the baking sheet, spacing them a couple of inches apart so they roast instead of steam. Then I generously brush the honey mixture over each one, letting a little pool in the center.
- I roast the pears for about 25 to 30 minutes, basting them once halfway through with the pan juices. They’re done when they’re fork-tender and the edges have turned a deep caramel color.
- Once out of the oven, I sprinkle the warm pears with chopped walnuts and let them rest for a couple of minutes. This little pause lets the glaze thicken slightly before serving.
Notes
- I always choose pears that are ripe but still firm to the touch, since overly soft ones turn to mush in the oven.
- I like to baste the pears at least once while roasting so the glaze doesn’t just sit on top and burn.
- I never skip the lemon juice step, because it keeps the pears looking fresh and appetizing.
- I sometimes swap in maple syrup for half the honey when I want a deeper, earthier flavor.
- I let the pears rest for a few minutes after roasting so the caramelized juices set slightly before serving