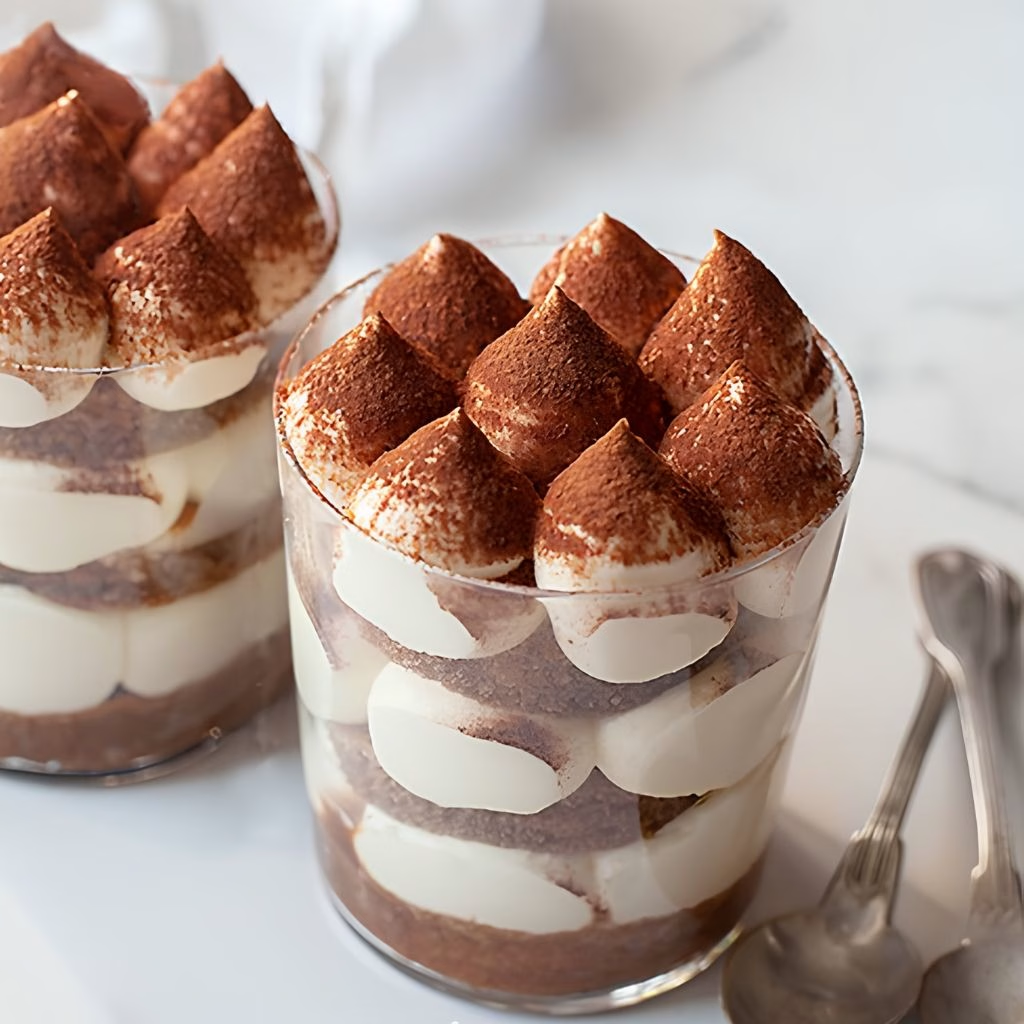
I made this Tiramisu Cups Recipe for a small dinner party last month, and honestly, I haven’t stopped making them since. I love that I can prep everything the night before and just pull them out of the fridge when my guests arrive. There’s no baking, no fussing with raw eggs, and no stress about getting the layers “just right” in one giant dish.
Every person gets their own perfect little cup, and I get to watch their faces light up with the first coffee-soaked bite. If you enjoy easy desserts with a fun twist, Air Fryer Churro Bites with Chocolate Dipping Sauce are another sweet option worth adding to your dessert rotation. If you want a dessert that looks fancy but takes almost no real effort, I promise this is the one.

Cooking Time
- Prep Time: 20 minutes
- Cooking Time: 0 minutes (no bake!)
- Chilling Time: 2 hours
- Total Time: 2 hours 20 minutes
Ingredients
- Strong brewed coffee (¾ cup) – I use espresso here since it gives the deepest flavor without watering down the cups.
- Sweet marsala wine (2 tablespoons) – this is what gives classic tiramisu its signature warmth, though it’s easy to skip if you want a kid-friendly version.
- Heavy whipping cream (1 cup) – grab cream with a high fat content and keep it cold; it whips up so much better that way.
- Instant espresso powder (1 teaspoon) – I mix a little into the cream itself for an extra coffee kick in every bite.
- Vanilla extract (1 teaspoon) – I always use real extract here, never imitation, since it makes a noticeable difference in flavor.
- Powdered sugar (½ cup) – it dissolves smoothly into the cream without any graininess.
- Mascarpone cheese (1 cup) – this soft Italian cheese is what makes the filling so silky, and I always let mine sit at room temperature for a few minutes before mixing.
- Savoiardi ladyfingers (12 cookies) – these Italian sponge biscuits soak up the coffee beautifully; I always check for a sturdy Italian-made brand.
- Cocoa powder (for dusting) – a light sieve of this on top right before serving finishes the look perfectly.
Note: This recipe makes 6 individual tiramisu cups.
Equipment You Need
- Electric hand mixer or stand mixer – for whipping the cream and mascarpone to the right texture.
- Six small dessert glasses or cups – I like ones that hold around 12oz so there’s room for two full layers.
- Shallow dish – for dipping the ladyfingers into the coffee mixture.
- Fine mesh sieve – for dusting the cocoa powder evenly on top.
- Plastic wrap – to cover the cups while they chill in the fridge.
How to Make Tiramisu Cups Recipe?
I promise this comes together faster than you’d think once everything is prepped. There are really just three parts: the coffee dip, the mascarpone cream, and the layering. Once you’ve got those down, the rest is just repeating the process in each cup.
Prepare the Coffee Dip
I start by brewing my coffee and letting it cool down completely, since warm coffee will melt the cream layers later. Once it’s cool, I pour it into a shallow dish and stir in the marsala wine. This mixture is what gives the ladyfingers their signature bold flavor.

Whip the Cream
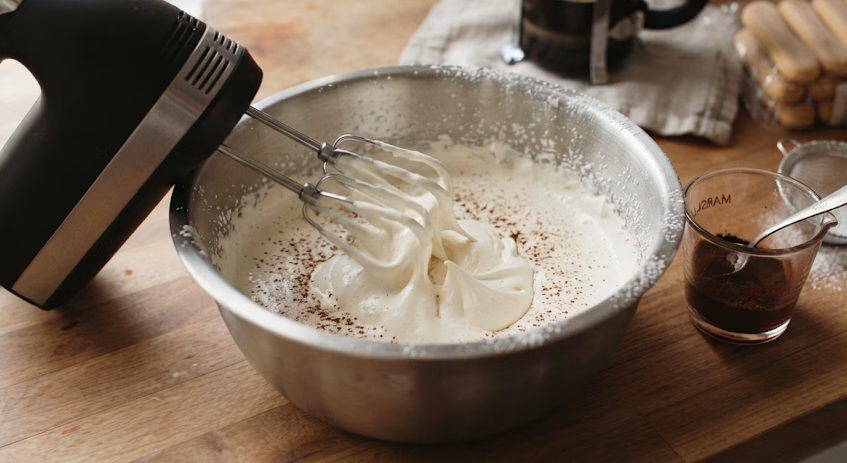
Using my hand mixer, I whip the cold heavy cream together with the powdered sugar and instant espresso powder. I only whip it until soft peaks form, since I know I’ll be mixing it again once the mascarpone goes in.
Mix the Mascarpone
In a separate bowl, I stir the mascarpone cheese with the vanilla extract until it’s smooth and a little looser. This little step makes it so much easier to fold into the whipped cream without lumps.
Combine the Cream and Mascarpone
I add the mascarpone mixture into the whipped cream and whisk just until it turns firm and holds its shape. I always watch closely here, because overmixing at this stage is the easiest way to ruin the texture.
Layer the Cups
I cut each ladyfinger in half and dip them briefly into the coffee mixture, then place two halves at the bottom of each glass. I spoon a generous layer of the mascarpone cream on top, then repeat with another layer of dipped ladyfingers and cream.
Chill and Set
Once all six cups are layered, I cover them with plastic wrap and pop them in the fridge for at least two hours. This chilling time lets the flavors meld together and helps the layers firm up nicely.
Dust and Serve
Right before serving, I sieve a light dusting of cocoa powder over the top of each cup. This final touch is what makes them look like they came straight from an Italian bakery. If you’re putting together a dessert spread, a Vanilla Bean Brown Butter Cheesecake Recipe can also bring another rich, creamy option to the table.
Additional Tips for Making This Recipe Better
I’ve made this recipe more times than I can count, so here’s what I’ve learned along the way:
- I always start with cream that’s very cold, since warm cream just won’t whip up properly.
- I never rush the dipping step for the ladyfingers. A quick dunk leaves them dry, so I let them soak up a bit more coffee than I initially think they need.
- I stop mixing the mascarpone cream the second it holds firm peaks, because a few extra seconds can cause it to curdle.
- I like to taste my coffee mixture before dipping, since bitterness varies a lot between coffee brands.
- I prep my glasses and ingredients ahead of time so the assembly step goes smoothly without any rushing.
Common Mistakes to Avoid
- I’ve overwhipped my mascarpone cream before, and it split into a grainy mess I now stop mixing the moment it looks thick and holds its shape.
- I once dipped my ladyfingers for way too long and ended up with soggy, mushy layers a quick dip is really all you need.
- I tried skipping the chilling time once because I was in a rush, and the layers just wouldn’t hold together when serving.
- I used cream that wasn’t cold enough one time, and it just wouldn’t whip up no matter how long I mixed it.
- I dusted the cocoa powder too early once, and it went soggy sitting in the fridge overnight, so I now always add it right before serving.
How to Serve Tiramisu Cups?
I love bringing these out on a wooden board or a simple tray so all the glasses are lined up together it makes such a pretty centerpiece for the table. A light dusting of cocoa powder right before serving is a must, and I sometimes add a few coffee beans or a small mint leaf on top for extra flair. If I’m hosting a bigger gathering, I like using clear glasses so guests can see the beautiful layers before they even take a bite.

Variations
- Alcohol-free version – skip the marsala wine entirely and use a little extra coffee instead, great for kids or anyone avoiding alcohol.
- Coffee liqueur twist – swap the marsala for Kahlúa or another coffee liqueur if you want a bolder, coffee-forward flavor.
- Decaf option – use decaf coffee and espresso powder if you’re serving guests sensitive to caffeine.
- Lemon version – skip the coffee altogether and dip the ladyfingers in limoncello mixed with sweetened lemon juice for a citrusy spin.
- Dairy swap – if mascarpone isn’t available, a smooth cream cheese or whipped ricotta can work in a pinch, though the flavor will be a bit different.
- Cake-based version – use slices of pandoro or panettone instead of ladyfingers for a heartier texture.
Nutritional Information
Here’s roughly what you can expect per serving of this recipe:
- Calories: 441 kcal
- Protein: 5g
- Carbohydrates: 30g
- Fat: 33g
Make Ahead and Storage
These tiramisu cups are actually best when made a day ahead, since it gives the coffee time to really soak into the ladyfingers and deepen the flavor. I usually make mine the night before any dinner or party so I’m not scrambling on the day.
They’ll stay fresh in the refrigerator for about 1-2 days at their best, though if your cream and mascarpone were very fresh to start, they can hold up well for up to 5 days. I don’t recommend freezing these, since the texture of the cream and ladyfingers doesn’t hold up well after thawing.
Why You’ll Love This Recipe?
There’s a reason this has become one of my go-to desserts for entertaining:
- No baking required – I can throw this together without ever turning on the oven, which is a huge win on a hot day or a busy week.
- Make-ahead friendly – I make these the day before any event, so I’m never stressed about dessert on the day itself.
- No raw eggs – unlike traditional tiramisu, this version skips the zabaglione, so I don’t have to worry about food safety concerns.
- Individually portioned – everyone gets their own cup, which feels a little more special and makes serving effortless.
- Easy to customize – I can make it alcohol-free, decaf, or even swap in a completely different flavor depending on who I’m serving.
FAQs
Is there an easy tiramisu cups recipe I can make quickly?
Yes, this recipe only takes about 20 minutes of hands-on prep before it goes into the fridge to chill, making it one of the simplest Italian desserts I make.
Can I make tiramisu cups with lids for taking to a party or storing?
Absolutely, I often use small mason jars or cups with lids so I can transport them easily or stack them neatly in the fridge without covering each one in plastic wrap.
Can I make a tiramisu cups recipe with no eggs?
Yes, this recipe is completely eggless since it uses whipped cream and mascarpone instead of a traditional egg-based zabaglione, so it’s safer and simpler to make.
Is there a tiramisu cups recipe with no alcohol?
Definitely, I just skip the marsala wine and use a bit more coffee in the dip instead. It’s a great option for kids or anyone who prefers to avoid alcohol.
What’s a good way to make tiramisu cups for a party?
I always make a big batch ahead of time since they hold up well in the fridge for a day or two, and I love that each guest gets their own individual cup with no serving hassle.

Tiramisu Cups Recipe
Ingredients
Method
- I start by brewing my coffee and letting it cool down completely, since warm coffee will melt the cream layers later. Once it’s cool, I pour it into a shallow dish and stir in the marsala wine. This mixture is what gives the ladyfingers their signature bold flavor.
- Using my hand mixer, I whip the cold heavy cream together with the powdered sugar and instant espresso powder. I only whip it until soft peaks form, since I know I’ll be mixing it again once the mascarpone goes in.
- In a separate bowl, I stir the mascarpone cheese with the vanilla extract until it’s smooth and a little looser. This little step makes it so much easier to fold into the whipped cream without lumps.
- I add the mascarpone mixture into the whipped cream and whisk just until it turns firm and holds its shape. I always watch closely here, because overmixing at this stage is the easiest way to ruin the texture.
- I cut each ladyfinger in half and dip them briefly into the coffee mixture, then place two halves at the bottom of each glass. I spoon a generous layer of the mascarpone cream on top, then repeat with another layer of dipped ladyfingers and cream.
- Once all six cups are layered, I cover them with plastic wrap and pop them in the fridge for at least two hours. This chilling time lets the flavors meld together and helps the layers firm up nicely.
- Right before serving, I sieve a light dusting of cocoa powder over the top of each cup. This final touch is what makes them look like they came straight from an Italian bakery.
Notes
- I always start with cream that’s very cold, since warm cream just won’t whip up properly.
- I never rush the dipping step for the ladyfingers. A quick dunk leaves them dry, so I let them soak up a bit more coffee than I initially think they need.
- I stop mixing the mascarpone cream the second it holds firm peaks, because a few extra seconds can cause it to curdle.
- I like to taste my coffee mixture before dipping, since bitterness varies a lot between coffee brands.
- I prep my glasses and ingredients ahead of time so the assembly step goes smoothly without any rushing.