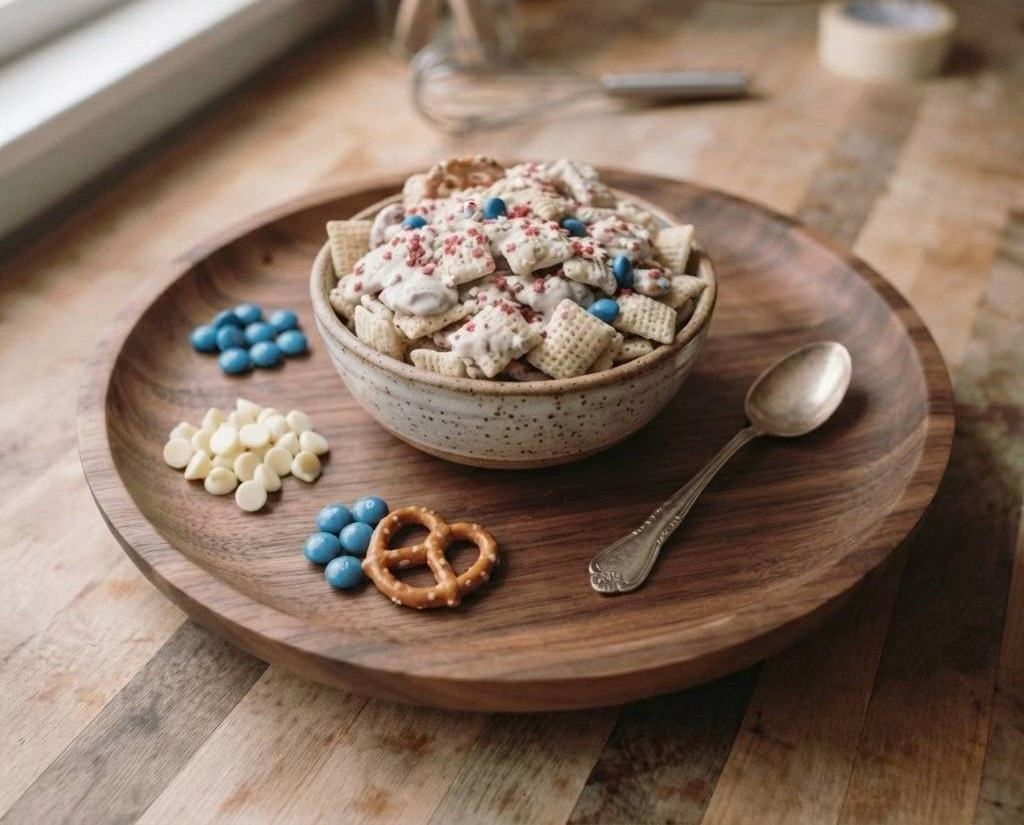
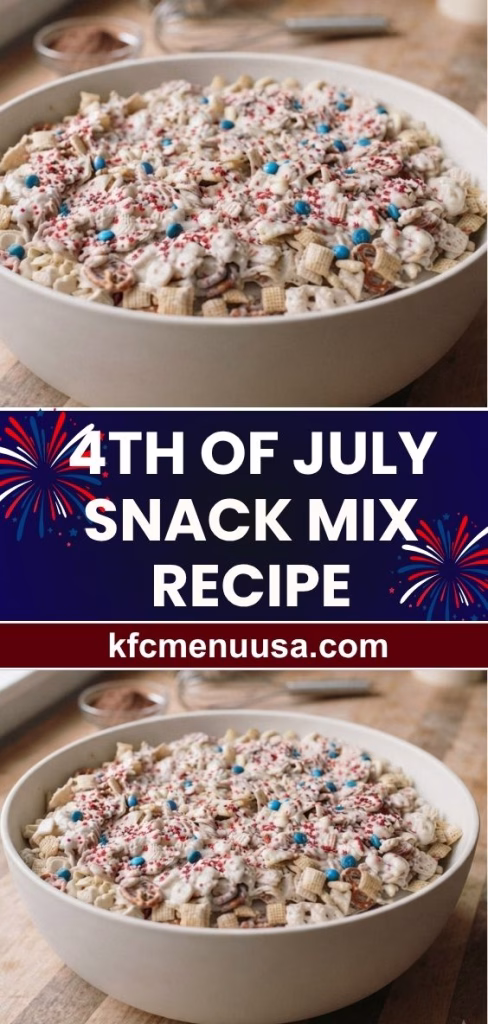
I’ve been making this 4th of July Snack Mix for every backyard cookout I host, and it never lasts more than an hour on the table. I love that it needs zero baking and comes together while I’m juggling burgers on the grill. It’s the kind of treat that looks like way more effort than it actually takes.
Kids grab it by the handful, and adults keep sneaking back for “just one more piece.” Once you try it, I promise it’ll become your go-to patriotic snack too. It also pairs perfectly with a slice of Oreo Cheesecake Recipe for an even more indulgent dessert spread.
Ingredients
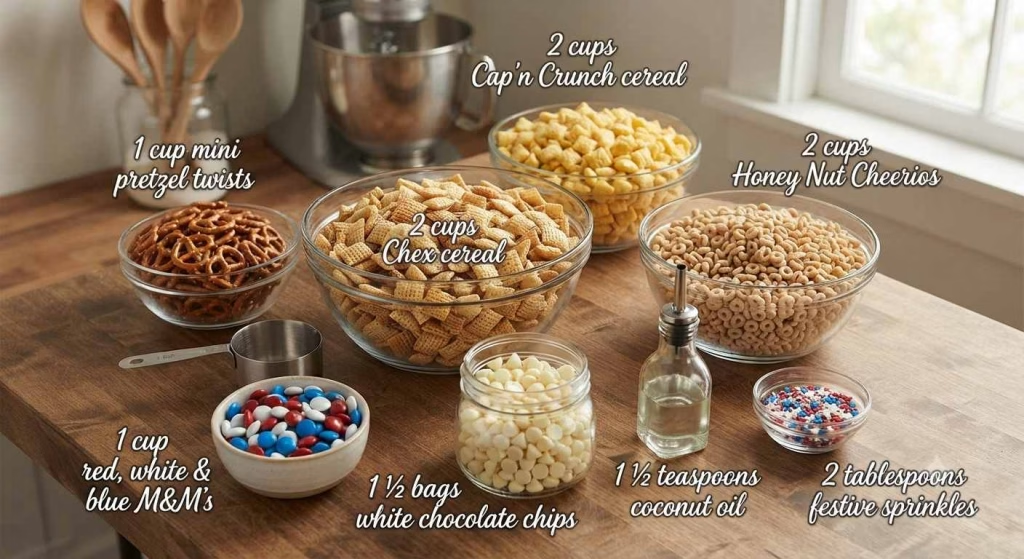
- 2 cups Chex cereal (corn or rice both work well)
- 1 cup mini pretzel twists (or mini pretzel rods, broken in half)
- 2 cups Cap’n Crunch cereal (grab the plain kind, not the berry version)
- 2 cups Honey Nut Cheerios cereal
- 1 cup red, white, and blue M&M’s (or regular M&M’s), plus a few extra for topping
- 1 ½ bags (about 16 ounces total, roughly 2¾ cups) white chocolate chips
- 1 ½ teaspoons coconut oil or vegetable oil
- 2 tablespoons festive sprinkles (optional, but they make it pop)
Note: These quantities make about 10 servings, roughly ½ cup per person, so it’s perfect for a mid-sized party crowd or a big family gathering.
Pro tip: Skip anything stale from the back of your pantry — fresh cereal keeps its crunch and holds the chocolate coating much better than boxes that have been open for weeks. And when it comes to the white chocolate, don’t rush it. Melting it slowly and stirring often keeps it smooth instead of clumpy or seized, which makes it so much easier to coat the mix evenly.
Variations
- Dairy-free swap: Use a dairy-free white chocolate or candy melt alternative so everyone at the party can enjoy a piece.
- Lower-sugar option: Cut back on the M&M’s and sprinkles, and use a sugar-free white chocolate baking bar instead of traditional chips.
- Extra crunch: Toss in some peanuts, mini marshmallows, or popcorn for added texture.
- Different holiday colors: Swap the red, white, and blue candies for other holiday shades to turn this into a Halloween, Christmas, or birthday party mix.
- Chocolate drizzle: Melt a little milk or dark chocolate and drizzle it over the top after the white chocolate sets for a marbled look.
- Gluten-free version: Choose gluten-free pretzels and double-check your cereal labels, since some cereals contain gluten additives.
Cooking Time
- Prep Time: 15 minutes
- Chilling Time: 20 minutes
- Total Time: 35 minutes
Equipment You Need
- Large sheet pan (about 15″ x 21″) – gives you plenty of room to spread the mix into an even layer
- Parchment paper – keeps the chocolate-coated mix from sticking to the pan
- Large mixing bowl – needed to toss all the dry ingredients together without spilling
- Medium microwave-safe bowl – for melting the white chocolate smoothly
- Rubber spatula – helps you fold the melted chocolate through the mix quickly and evenly
How to Make a 4th of July Snack Mix?
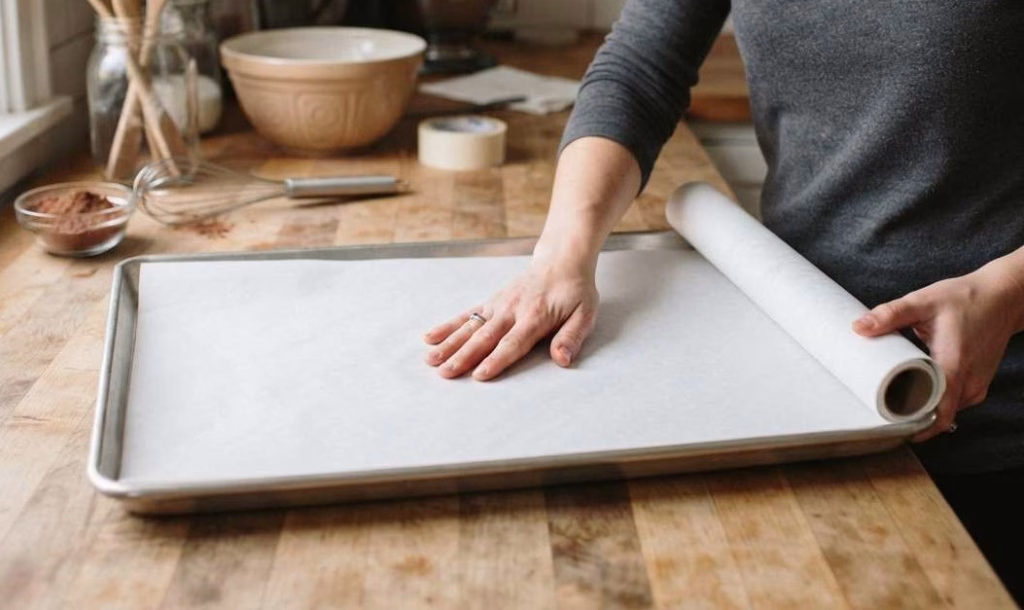
Step 1: Prep Your Pan
Start by lining a large sheet pan with parchment paper. This keeps the sticky, chocolate-covered mix from fusing to the pan once it hardens. Set the pan aside so it’s ready the moment your mix is coated.
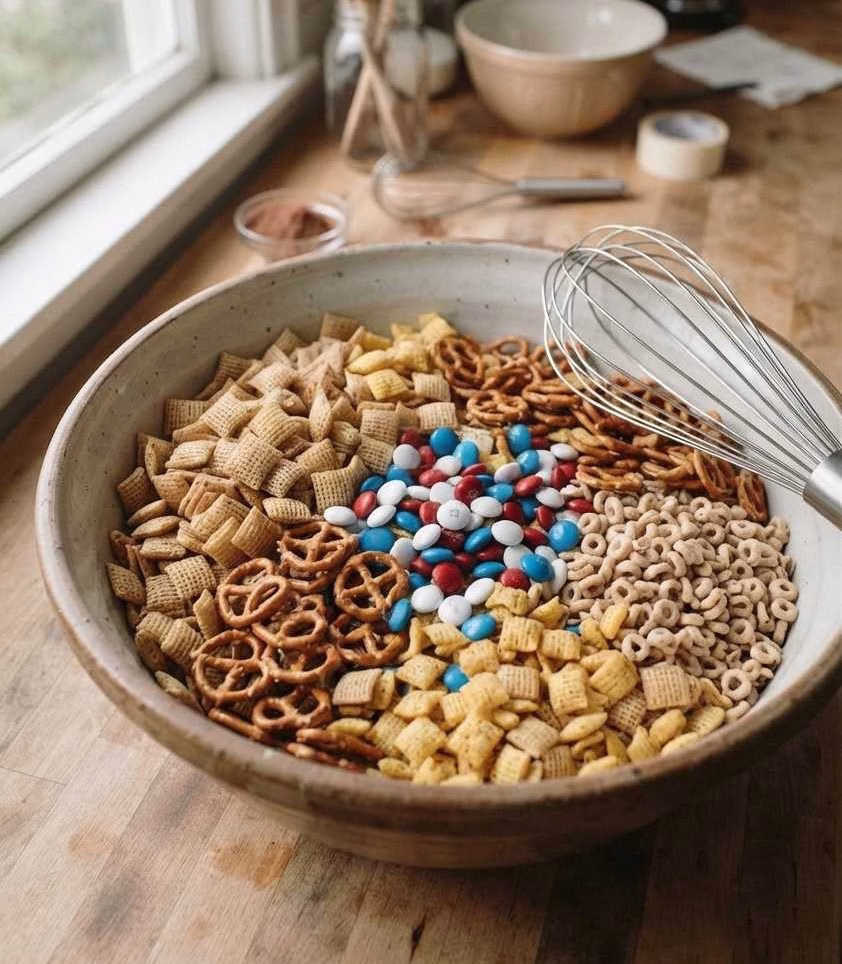
Step 2: Combine the Dry Ingredients
In a very large bowl, add the Chex, pretzels, Cap’n Crunch, Cheerios, and M&M’s. Gently toss everything together so the textures and colors are evenly distributed. Try not to crush the cereal pieces while mixing.
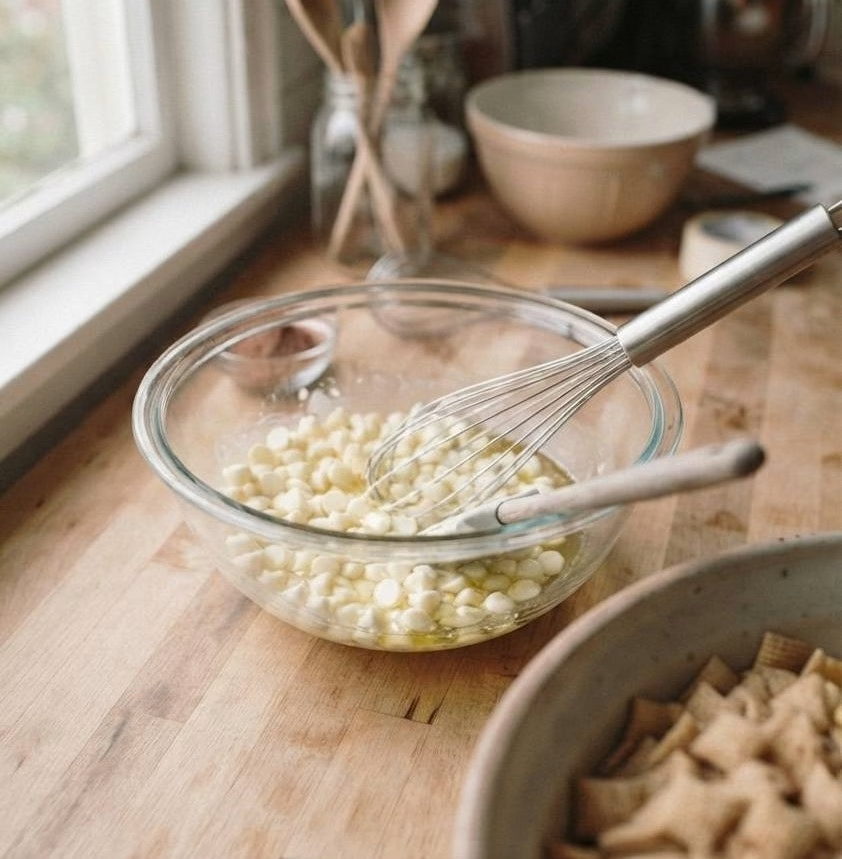
Step 3: Melt the White Chocolate
In a microwave-safe bowl, combine the white chocolate chips with the oil. Microwave in short 25-30 second bursts, stirring well between each one, until it’s completely smooth. Going slowly here prevents the chocolate from scorching or turning grainy.
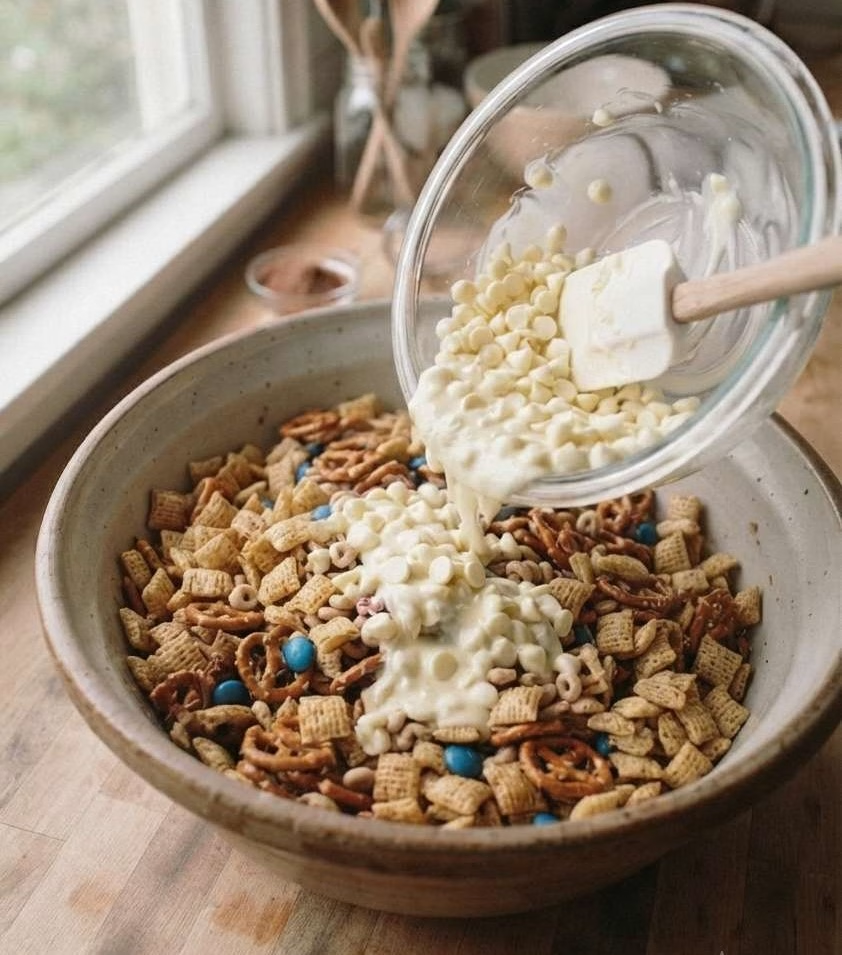
Step 4: Coat the Mix
Pour the melted white chocolate over your cereal mixture, scraping the bowl clean with a spatula. Working quickly, gently fold everything together until each piece is lightly coated. Speed matters here since white chocolate firms up fast.
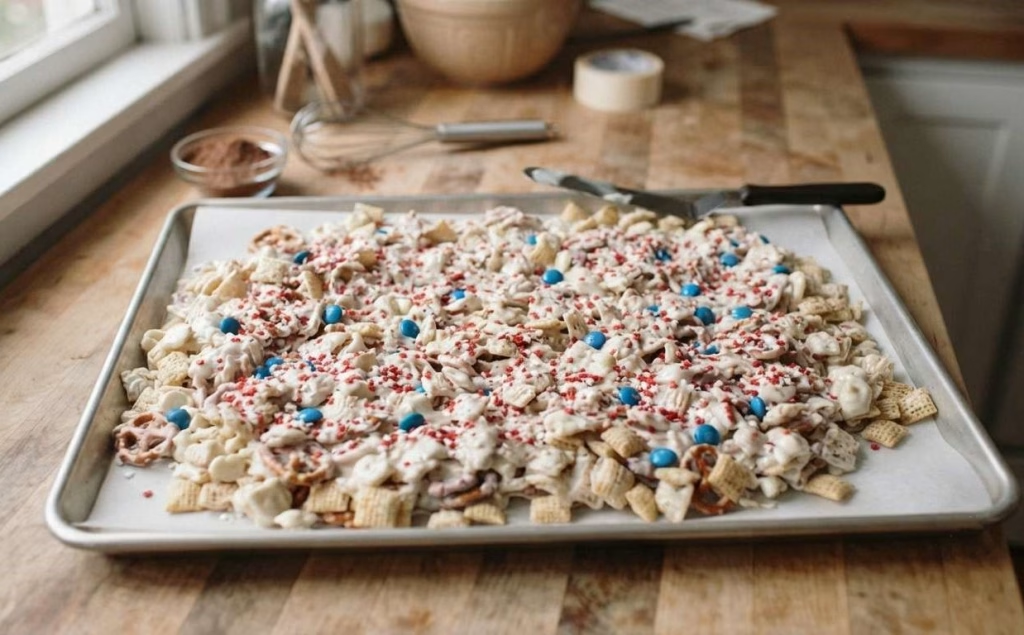
Step 5: Spread and Decorate
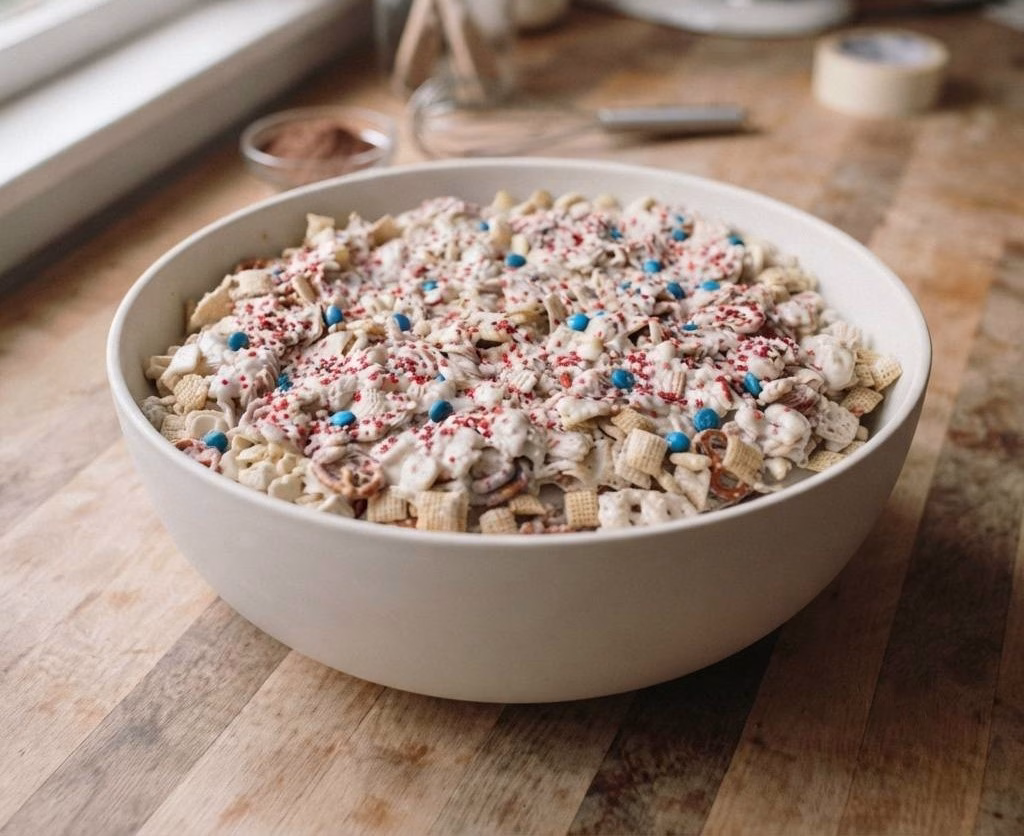
Transfer the coated mix onto your prepared sheet pan and spread it into an even layer. Immediately press a few extra M&M’s on top and scatter your sprinkles over everything. Do this fast, before the chocolate sets and stops being sticky.
Step 6: Let It Harden
Let the pan sit at room temperature to set, or pop it in the fridge to speed things up, about 10 to 20 minutes. Once firm, break the slab into bite-sized clusters and it’s ready to serve.
Additional Tips for Making This Recipe Better
- I always give the mix plenty of time to fully harden before breaking it apart — rushing this step leaves you with a gooey mess instead of clean clusters.
- I stick to a trusted white chocolate brand since cheaper chips can melt unevenly and taste waxy instead of creamy.
- I never walk away while melting the chocolate. Short bursts with constant stirring keep it silky instead of burnt.
- I set out everything I need before I start folding the chocolate in, because once it’s melted, I have to move fast.
- I like doubling the batch when I’m hosting a bigger crowd — it disappears fast, so I’d rather make extra than run out.
How to Serve 4th of July Snack Mix?
I love piling this mix into a big glass bowl or a red, white, and blue striped serving tray so the colors really stand out. For parties, I’ll portion it into small paper cups or mason jars so guests can grab their own handful without digging through a shared bowl.
It also makes a fun addition to a dessert table next to cupcakes or a fruit platter, and serving it alongside Strawberry Muffins Recipe creates a colorful treat selection for holiday gatherings. A few extra sprinkles scattered on top right before serving keep it looking fresh and festive.
Nutritional Information
Here’s a general idea of what’s in each serving (about ½ cup) of this snack mix:
- Calories: approximately 452 kcal
- Protein: approximately 5.7 grams
- Carbohydrates: approximately 62 grams
- Fat: approximately 21 grams
Make Ahead and Storage
Make Ahead: You can prepare this snack mix a day or two before your party. Once it’s fully hardened and broken into pieces, just keep it covered until you’re ready to serve so it stays fresh and crunchy.
Storage: Keep leftovers in an airtight container at room temperature for up to a week, though it truly tastes best within the first 3 to 4 days while everything is at peak crunch.
Freezing: This mix freezes surprisingly well. Place it in an airtight container or freezer bag for up to 3 months, then simply thaw it at room temperature whenever a craving hits.
Why You’ll Love This Recipe?
This snack mix checks every box for an easy, crowd-pleasing party treat, and here’s why it keeps landing on my table every summer:
- No baking required: Everything comes together on the stovetop and microwave, so you don’t need to turn on the oven during a hot summer day.
- Ready in 35 minutes: Between prep and chilling, this whole recipe is done faster than most desserts, which is perfect for last-minute get-togethers.
- Endlessly customizable: Swap the candy colors, mix-ins, or chocolate type to fit dairy-free, gluten-free, or lower-sugar needs.
- Great for a crowd: One batch makes about 10 servings, and it’s easy to double if you’re feeding a big group.
- Kid-friendly and festive: The bright colors and sweet-salty combo make it a hit with both kids and adults at any patriotic celebration.
4th of July Snack Mix Recipe
Ingredients
Method
- Start by lining a large sheet pan with parchment paper. This keeps the sticky, chocolate-covered mix from fusing to the pan once it hardens. Set the pan aside so it’s ready the moment your mix is coated.
- In a very large bowl, add the Chex, pretzels, Cap’n Crunch, Cheerios, and M&M’s. Gently toss everything together so the textures and colors are evenly distributed. Try not to crush the cereal pieces while mixing.
- In a microwave-safe bowl, combine the white chocolate chips with the oil. Microwave in short 25-30 second bursts, stirring well between each one, until it’s completely smooth. Going slowly here prevents the chocolate from scorching or turning grainy.
- Pour the melted white chocolate over your cereal mixture, scraping the bowl clean with a spatula. Working quickly, gently fold everything together until each piece is lightly coated. Speed matters here since white chocolate firms up fast.
- Transfer the coated mix onto your prepared sheet pan and spread it into an even layer. Immediately press a few extra M&M’s on top and scatter your sprinkles over everything. Do this fast, before the chocolate sets and stops being sticky.
- Let the pan sit at room temperature to set, or pop it in the fridge to speed things up, about 10 to 20 minutes. Once firm, break the slab into bite-sized clusters and it’s ready to serve.
Notes
- I always give the mix plenty of time to fully harden before breaking it apart — rushing this step leaves you with a gooey mess instead of clean clusters.
- I stick to a trusted white chocolate brand since cheaper chips can melt unevenly and taste waxy instead of creamy.
- I never walk away while melting the chocolate. Short bursts with constant stirring keep it silky instead of burnt.
- I set out everything I need before I start folding the chocolate in, because once it’s melted, I have to move fast.
- I like doubling the batch when I’m hosting a bigger crowd — it disappears fast, so I’d rather make extra than run out.