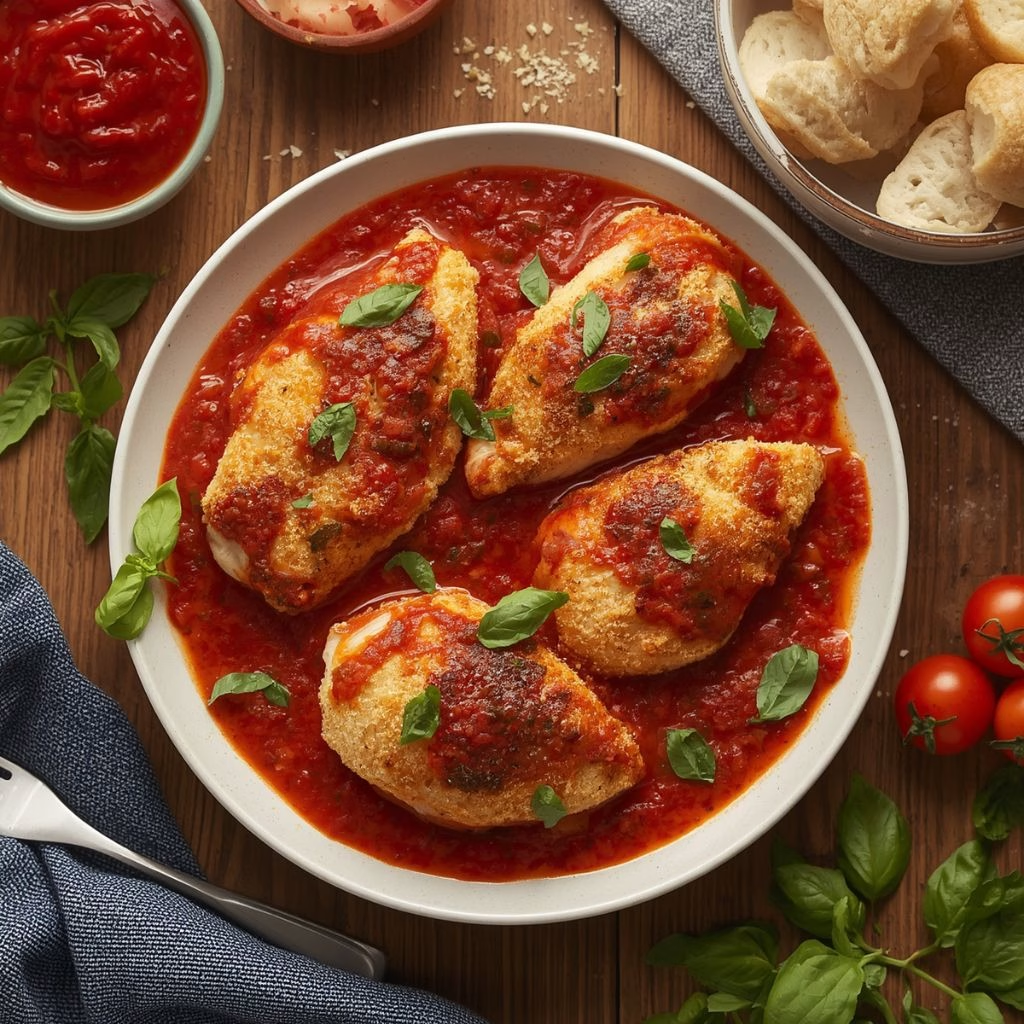
I first tried the Costco Copycat Chicken Parmesan Recipe on a night I truly did not feel like cooking, and I was surprised at how much I liked it. That got me curious about recreating the same flavors at home with a bit more control over the breading and cheese.
After a few test runs in my own kitchen, I landed on a version that tastes just as comforting but comes together with simple pantry staples. I’m walking you through every step here, from breading the chicken to building the cheesy layers on top. This is the recipe I now make on repeat whenever I want that deli-style chicken parmesan without leaving the house.
Cooking Time
- Prep Time: 20 minutes
- Cooking Time: 25 minutes
- Total Time: 45 minutes
Ingredients
- 4 boneless, skinless chicken breasts, pounded to even thickness so every piece cooks at the same rate
- 1 cup all-purpose flour, for the first dredging layer that helps the egg wash stick
- 2 large eggs, beaten, to bind the breadcrumbs to the chicken
- 1 ½ cups panko breadcrumbs, my pick for that light, crispy deli-style crunch
- ½ cup freshly grated parmesan cheese, mixed into the breadcrumbs for extra savory flavor
- 1 teaspoon garlic powder, for a quick flavor boost without chopping fresh garlic
- 1 teaspoon Italian seasoning, to bring in that classic herby note
- Salt and black pepper, to taste, seasoned into every layer, not just the surface
- 3 tablespoons olive oil, for pan-searing the cutlets to a golden crust
- 2 cups jarred marinara sauce, a good-quality jar like Rao’s saves time without losing flavor
- 1 ½ cups shredded part-skim mozzarella cheese, grated fresh rather than pre-shredded for better melting
- ¼ cup grated parmesan cheese, for the final layer of sharpness on top
- 8 ounces spaghetti or penne pasta, to serve underneath or alongside the chicken
- Fresh basil leaves, torn, for garnish and a pop of freshness at the end
Note: serves 4 people generously, with leftovers for lunch the next day.
Equipment You Need
- Meat mallet, to pound the chicken breasts to an even thickness
- Three shallow dishes, for setting up the flour, egg, and breadcrumb dredging station
- Large oven-safe skillet, to sear the chicken and finish it under the broiler in one pan
- Tongs, for flipping the cutlets without knocking off the breading
- Meat thermometer, to confirm the chicken hits a safe internal temperature
- Large pot, for boiling the pasta if you’re serving it underneath
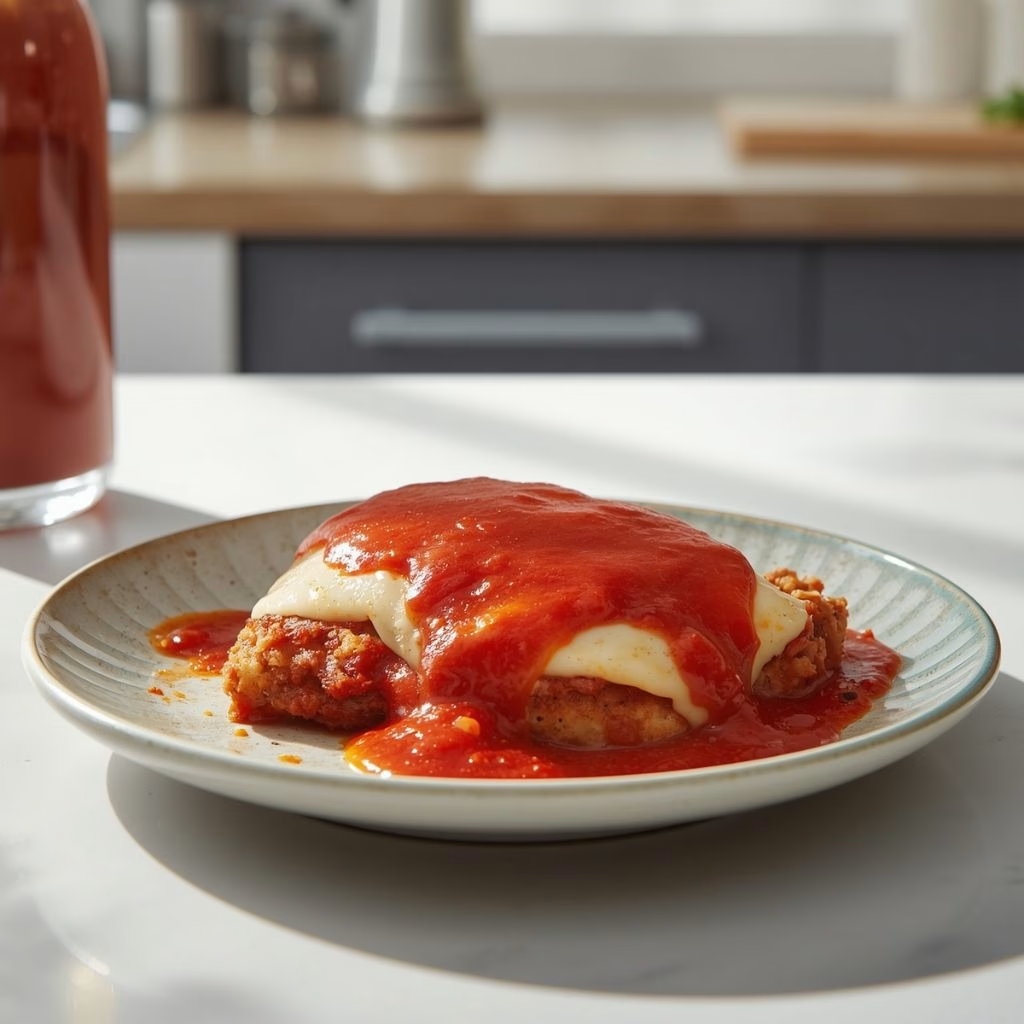
How to Make a Homemade Chicken Parmesan Recipe?
This part is really just three stages: bread the chicken, sear it, then top it with sauce and cheese before it goes under the broiler. I like to get my pasta water going first so everything finishes around the same time. None of these steps are difficult, they just need to happen in order.
Prepare the Chicken
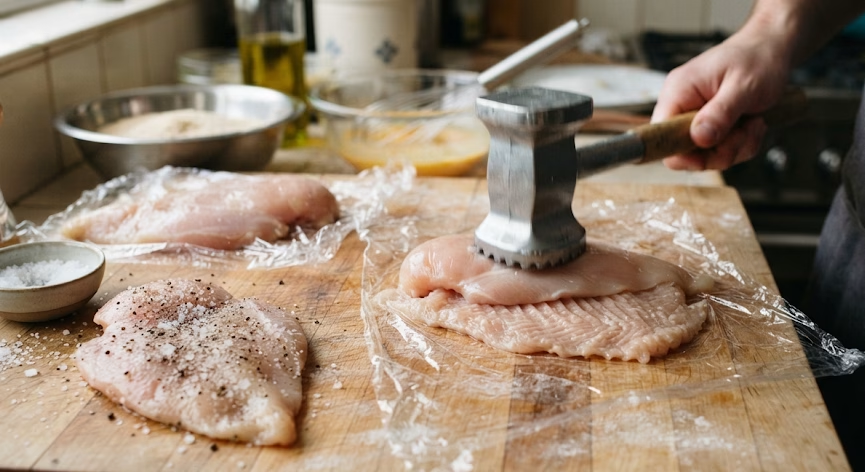
Place each chicken breast between two sheets of plastic wrap and pound it to about half an inch thick. This keeps the chicken from drying out and helps it cook evenly all the way through. Season both sides generously with salt and pepper before you start breading.
Set Up the Breading Station
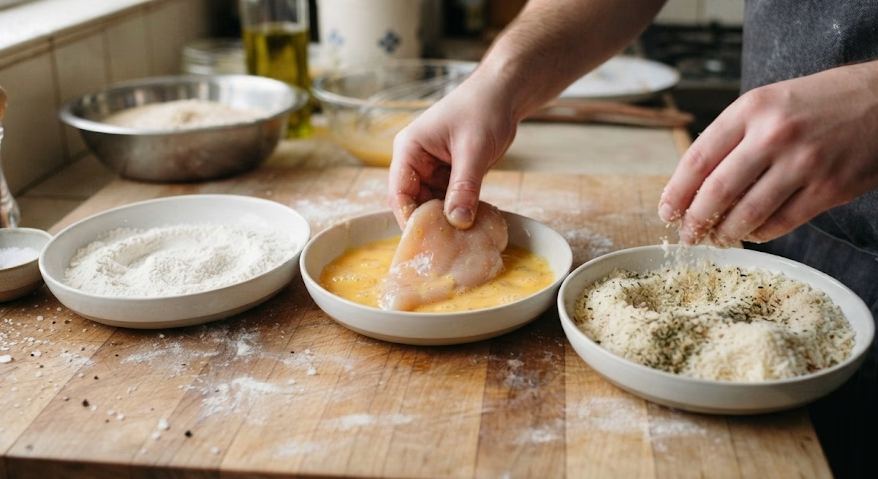
Put the flour in one shallow dish, the beaten eggs in a second, and the panko mixed with parmesan, garlic powder, and Italian seasoning in a third. Keep one hand dry and one hand wet as you work so the breading doesn’t clump on your fingers. This little trick makes the whole process much less messy.
Bread and Sear the Cutlets
Dredge each chicken breast in flour, then egg, then press firmly into the breadcrumb mixture so it sticks well. Heat the olive oil in your oven-safe skillet over medium-high heat and sear the cutlets for about three minutes per side until golden. You’re not cooking them through yet, just building that crispy crust.
Build the Parmesan Layers
Spoon a few tablespoons of marinara over each seared cutlet, then top with a generous layer of mozzarella and a sprinkle of parmesan. I like to leave a little bit of the crispy edge uncovered so it stays crunchy after baking. This is the step that really makes it feel like the deli version.
Broil to Finish
Slide the skillet under a preheated broiler for three to five minutes, watching closely until the cheese is melted and bubbling with light golden spots. Use your meat thermometer to confirm the chicken has reached 165°F in the thickest part. Pull it out the moment the cheese looks right, since broilers work fast.
Toss the Pasta and Serve
While the chicken broils, cook your pasta according to the package directions and toss it with a bit of the remaining marinara sauce. Plate the pasta first, then set a cheesy chicken cutlet right on top. Finish with torn basil leaves for a fresh, restaurant-style presentation.
Additional Tips for Making This Recipe Better
I’ve made this recipe enough times to pick up a few tricks that make a real difference.
- I always grate my own mozzarella instead of buying pre-shredded, since it melts so much smoother.
- I pound my chicken to an even thickness every time, because uneven cutlets mean some parts overcook while others stay underdone.
- I let the seared chicken rest for a minute before adding sauce so the crust doesn’t turn soggy right away.
- I keep my broiler door cracked open slightly so I can watch the cheese without walking away.
- I season my flour and breadcrumbs, not just the chicken itself, so every bite has flavor.
Common Mistakes to Avoid
I’ve made most of these mistakes myself before I figured out what was going wrong.
- I used to skip pounding the chicken, and the thicker end always came out undercooked while the thin end dried out.
- I once used cold eggs straight from the fridge, and the coating didn’t stick nearly as well as when I let them come closer to room temperature.
- I’ve overloaded the pan with sauce before, which made the crispy bread go soft and soggy.
- I’ve left the skillet under the broiler too long while multitasking, and the cheese went from golden to burnt in under a minute.
- I forgot to season the breadcrumb layer once, and the dish tasted flat even with a good sauce on top.
How to Serve Homemade Chicken Parmesan?
I like to serve this straight from the skillet, family-style, so everyone can see the melted cheese bubbling on top. A shallow bowl of pasta topped with the cutlet, a drizzle of extra marinara, and torn basil leaves makes for a really inviting plate.
A simple side salad with a light vinaigrette balances out the richness nicely, and warm garlic bread on the side never hurts. For a lighter presentation, I sometimes skip the pasta entirely and serve the chicken over sautéed greens instead. You can also enjoy similar seafood flavors with Thai Lime Garlic Steamed Fish with Coconut Lemongrass Sauce when you want something lighter.
Variations
- Swap the mozzarella and parmesan for dairy-free shreds and nutritional yeast if you want a dairy-free version.
- Use a low-sugar marinara or make a quick homemade sauce if you’re watching added sugar.
- Add a pinch of red pepper flakes to the breadcrumb mix for a subtle spicy kick.
- Swap the panko for crushed pork rinds or almond flour breading for a lower-carb take.
- Use gluten-free breadcrumbs and a gluten-free flour blend to make the whole dish gluten-free.
- Try provolone or fontina in place of mozzarella for a slightly sharper, nuttier flavor.
- For another crispy seafood option with a different flavor profile, Coconut Crusted Fish Recipe with Tropical Flavors is another enjoyable choice.
Nutritional Information
Here’s a rough estimate per serving, based on one chicken cutlet with sauce and cheese, not including pasta.
- Calories: approximately 420
- Protein: approximately 38 grams
- Carbohydrates: approximately 22 grams
- Fat: approximately 20 grams
Make Ahead and Storage
You can bread the chicken cutlets up to a day ahead and keep them covered in the fridge until you’re ready to sear them. This saves time on a busy evening since the messiest part is already done.
Store leftover chicken parmesan in an airtight container in the refrigerator for up to three days. Reheat it in the oven at 350°F for about ten minutes so the bread stays crisp instead of going soggy in the microwave.
To freeze, wrap the cooked and cooled cutlets individually before placing them in a freezer bag, where they’ll keep well for up to two months. Thaw overnight in the fridge and reheat in the oven until warmed through and the cheese is melted again.
Why You’ll Love This Recipe
This dish has earned a permanent spot in my dinner rotation for a few solid reasons.
- It’s genuinely easy to make: the breading and searing steps come together quickly, and the broiler does the final work for you.
- It’s versatile: I’ve served it over pasta, alongside a salad, and even tucked into a sandwich roll for leftovers.
- It fits different diets with small swaps: dairy-free, low-carb, and gluten-free versions all work with the same basic method.
- The flavor is easy to customize: a pinch of chili flakes, a different cheese blend, or extra herbs all change the dish without extra effort.
- It reheats well, which makes it a solid option for meal prep during a busy week.
FAQs
What is in the Costco chicken parmesan recipe?
Costco’s deli version, made by Ventera, typically includes breaded chicken breast, marinara sauce, a blend of Italian cheeses, and pasta in the same tray. My homemade version uses the same basic components but lets you control the breading and cheese yourself.
What is Ventera chicken parmesan from Costco?
Ventera chicken parmesan is a ready-to-heat deli tray sold at Costco, featuring breaded chicken cutlets, marinara sauce, melted cheese, and pasta. It’s meant to go from fridge to oven with very little prep needed.
What are the Ventera chicken parmesan Costco reviews like?
Most shoppers describe it as a convenient, satisfying weeknight option with generous portions and solid flavor. A common note is that it’s a great convenience meal, though it doesn’t fully replace a homemade version.
What are the cooking instructions for Ventera chicken parmesan?
The Costco tray generally bakes in a preheated oven until heated through, usually around 30 to 40 minutes depending on the package. Always check the specific instructions printed on your tray, since they can vary slightly by batch.
Can I make an easy chicken parmesan recipe in the oven with sauce?
Yes, you can bread the chicken, sear it briefly, then bake it topped with sauce and cheese at 400°F until the cheese melts and the chicken reaches 165°F internally. This oven method works well if you’d rather skip the broiler step.
Is Tyson panko chicken from Costco similar to this recipe?
Tyson panko chicken from Costco is a similar breaded chicken product, though it doesn’t usually come pre-topped with sauce and cheese like the Ventera tray. You can use it as a shortcut base and add your own marinara and cheese on top.
How much does the Ventera chicken parmesan 32 oz tray serve?
The 32 oz Ventera tray typically serves around four to six people, depending on portion size. Many shoppers split the chicken breasts in half to stretch it further across a family meal.
Can I use frozen chicken parmesan instead of making it fresh?
Frozen chicken parmesan works as a convenient backup, though it won’t have the same fresh-breaded crunch as this homemade version. Baking it according to package directions and adding fresh cheese on top can help close that gap.

Costco Copycat Chicken Parmesan Recipe
Ingredients
Method
- Place each chicken breast between two sheets of plastic wrap and pound it to about half an inch thick. This keeps the chicken from drying out and helps it cook evenly all the way through. Season both sides generously with salt and pepper before you start breading.
- Put the flour in one shallow dish, the beaten eggs in a second, and the panko mixed with parmesan, garlic powder, and Italian seasoning in a third. Keep one hand dry and one hand wet as you work so the breading doesn’t clump on your fingers. This little trick makes the whole process much less messy.
- Dredge each chicken breast in flour, then egg, then press firmly into the breadcrumb mixture so it sticks well. Heat the olive oil in your oven-safe skillet over medium-high heat and sear the cutlets for about three minutes per side until golden. You’re not cooking them through yet, just building that crispy crust.
- Spoon a few tablespoons of marinara over each seared cutlet, then top with a generous layer of mozzarella and a sprinkle of parmesan.
- Slide the skillet under a preheated broiler for three to five minutes, watching closely until the cheese is melted and bubbling with light golden spots. Use your meat thermometer to confirm the chicken has reached 165°F in the thickest part. Pull it out the moment the cheese looks right, since broilers work fast.
- While the chicken broils, cook your pasta according to the package directions and toss it with a bit of the remaining marinara sauce. Plate the pasta first, then set a cheesy chicken cutlet right on top. Finish with torn basil leaves for a fresh, restaurant-style presentation.
Notes
- I always grate my own mozzarella instead of buying pre-shredded, since it melts so much smoother.
- I pound my chicken to an even thickness every time, because uneven cutlets mean some parts overcook while others stay underdone.
- I let the seared chicken rest for a minute before adding sauce so the crust doesn’t turn soggy right away.
- I keep my broiler door cracked open slightly so I can watch the cheese without walking away.
- I season my flour and breadcrumbs, not just the chicken itself, so every bite has flavor.